As part of our continuing For Example series – which look at how key visual effects artists work with their tools of choice – we talk to lead texture artist and vfx supervisor Scott Metzger about The Foundry’s Mari and what aspects of the software he used, for example, in his work. We highlight recent projects Metzger has worked on including Dashing’s Hyundai spots, COPA’s Nicki Minaj ‘Turn on Me’ video and a Robot project created for The VFX Tour.
fxg: Tell me about your setup.
Scott Metzger: I have multiple systems of course, running Mari 1.4, but I may have a beta. The majority of the time I am either on a dual 6 core machine with 24 gigs of RAM or if I am working from home I am on a Mac Pro – mod-ed with two GTX580s but one 580 works pretty well and then at work I have a Quadro 4000 card. You definitely want to have a minimum of 1.5 gigs of RAM for Mari.
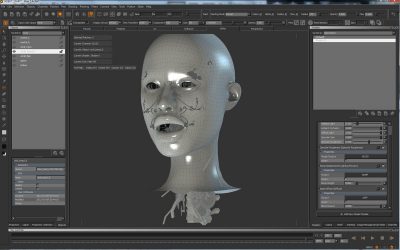
fxg: Mari is capable of very big files, much bigger than 2K or 4K – what is the sort of large files you are working with?
Metzger: I would say the largest file size I worked with is a 32K texture map written out as a tiled OpenEXR file. But with the Ptex stuff I have been doing, I created a demo piece with a full HDR environment of my apartment downtown, and that was about 10 gigs of data, and everything was loaded inside Mari on the fly. So when you zoomed in, Mari does a great job of loading and unloading that information into the graphics card, and it was one of the biggest things that The Foundry had ever seen at that time pushed through Mari.
fxg: You mentioned Ptex there – Mari did not ship initially with Ptex – how significant is Ptex to you?
Scott Metzger: When you are doing painting and especially in a projection paint system you have to have UVs for texturing and to get the baking correct to the UV set. You can do it with multiple UV sets, but then you have to have multiple UV sets. One of the great things about Mari is that you do not have to use UVs at all. There is a whole step just thrown out. What I would come across on some commercial productions is modelers who really don’t like to UV so they would use automatically mapped UVs – which is an auto function in most 3D software packages – which is OK – but when you are limited to say an 8K ZBrush or Mudbox image – using an automatically mapped UV image or UV set does not give you much resolution. So when you are required to use that workflow it is nice to go past that.
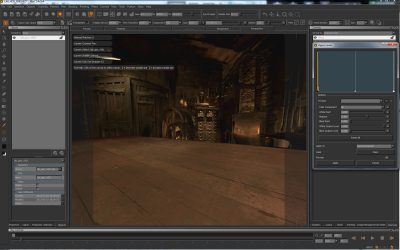
Using Ptex there is no UVs and you can set a default resolution based on the size of your object. There is a world scale starting point: you could say for example, ‘every centimeter is a pixel of resolution’ or say ‘every centimeter could be 10 pixels,’ and that would be your resolution. But if you later need more you can pick faces on the object, and up-res just those faces independently of the whole object. Being able to do that allows you to paint incredible detail and that just would not be possible without Ptex.
fxg: Did you use Mari before Ptex?
Metzger: Yes I did – I have no patience for UV mapping and obviously neither did the other modelers either. Let me give you an example – so being able to paint a 16K instead of say an 8K map made a huge difference. Mari was at the time of the change-over the only program that could do this well. Another example is if you are painting a huge sphere, you could export that as a tiled OpenEXR and it would automatically be saved out so that if you were only seeing the front of the sphere – then it is only going to load the front of the sphere and not the back of the sphere you can’t see. It will only use the tiles it needs.
The second part of this is the use of mipmaps. You can run a command line tool – for example RenderMan comes with txmake – V-Ray also has a texture convertor – and what these can do is create mipmaps. A mipmap will creature a texture at multiple resolutions from the top resolution of in this case 16K all the way down to 64 x 64 pixel resolution. The render will then decide which texture resolution it will need based on the distance the object is from the camera. It is actually really cool!
If I had the time to UV or even learn how to UV I could I guess [laughs] but I wear a bunch of different hats. I spend time on lighting, rendering issues, why things aren’t happening, so I don’t really have time – you can be so much faster with PTex.
– Above: Metzger outlines his tutorials on Ptex in Mari 1.3.
fxg: How did you get into texturing and using Mari?
Metzger: It’s funny, I fell into texturing by mistake, I was never really a texture artist whatsoever. I did, however, used to do things in Photoshop and yet when you are at a Linux shop/facility you can’t really run Photoshop under Linux. Or if you do you are using an emulator that tends to have a limit on memory you can access. Being able to use Nuke and Mari together pretty much removed any need for Photoshop at all.
fxg: Which is interesting as Mari v1.4 has quite a few tools for bouncing back and forth to Photoshop – but it sounds like you are not doing this because of operating systems?

Metzger: Yeah that is correct. Sort of related – one of the cool new features in v1.4 is the new OpenColorIO. Sometimes, for example, if you are on a job you will go to cgtextures.com and you will get a bunch of textures you want, and normally I would get those textures and before I started I would need to take them into Nuke and convert them from sRGB colorspace to RGB linear and then re-write out those new versions. But in the new version one of the cool new features is that you can load up all those JPEGs, and anything else you have, select them in Mari and then just hit sRGBtoLinear and away it’ll go and convert all your images. You can then just delete the original sRGB files.
fxg: It is nice to have proper color handling tools – Photoshop won’t even let you load an industry standard LUT so I imagine this sort of control is important?
Metzger: Yes it is a really good point. To be honest without The Foundry with Nuke, Mari and OpenColorIO, I just don’t know how people would correctly judge color. I can’t tell you how many times I would be working on a project and we’d get beauty plates, for example. I’d ask for 16-bit linear and I’d get OpenEXR files. But I’d go check them and they would have baked in sRGB gamma into them or even clammed them at 8-bit. And it is just so funny now because with the Alexa and the RED you can now just ask to get a copy of some original files maybe on set just so, for example, you can get a head start on something. But the point is nowadays – later when you get a set of poorly converted files – it is so easy to tell (as you have a copy of some of the originals yourself). I really just don’t think that many people knew how many bad file (transfers) we were getting in the past – you just could not tell. Some people will soon find out that times are changing.
fxg: Do you use the triplanar shader? Are you excited about it?
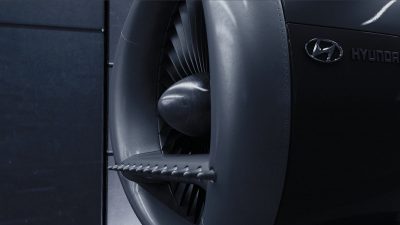
Metzger: Yeah, I am working with Dashing in Toronto and we had to texture these huge five different environments for five different Hyundai spots, but everything had to be modular. I was looking at these huge pillars and I was thinking, ‘Man oh man how am I going to do this without having to UV everything perfectly?’ The next day I woke up and I sat down at my computer and I had this little email or notice saying there is a new Mari alpha or beta and here it is for download. And so I look at the features and it has listed ‘triplanar shader’ and I wonder to myself if it is like Maya’s tri-planar shader? So I start up Mari and the whole goal for the day was to create these displaced pillars, that you just can’t get away with as just a bump map.
So I am trying out the triplanar shader and it was AWESOME. You can just drag any image into it, adjust it, scale it, flip it around – you can create perfect seamless textures over an entire surface. Before Mari you would have to set your resolution for your screen buffer, and then paint little patches of 4K here or 2K here and then move to a different area on your object, but with the triplanar you could just throw in your three images and then just bake out that shader to either an 8K, 16k or 32K file and then continue with that. One problem that I did run into was that the pillars were slightly curved so when you have a triplanar shader there would be blending issues, so I would get ghosting of the fine edges that were going to be displaced and if you displaced it you would really see these lines that should not be there.
I wrote back to The Foundry to say, “Guys is there anyway you can add some kind of blending control? Something that perhaps could go from the incidence angle of the top to the front for example?’ Within three days they had added it. Working on a commercial it is very rare you would try new software, and also you have very short turnaround, so I was blown away -it was the best.
Each of the walls in this job was about 15 million polygons and one of the things I was concerned abut was having it displaced. We were using the triplanar but the clients wanted these precise corners, and the triplanar was able to make these really precise and accurate edges, and it worked out perfectly. But then I wanted to render it out, so I tried doing instances of the walls and doing V-Ray displacement but there was a problem with the way V-Ray was tessellating the walls – it wasn’t looking to see if it was an instance so every single instance of that wall was being tessellated at render time. So you run out of RAM. So I took the Mari texture, took it into Mudbox. I tried using ZBrush but I couldn’t figure that thing out. My hat is off to anyone who can figure out that program. But anyway the cool thing about Mudbox is that there is a tool that matches the UV and you can displace the geometry based on an 8 bit image. So we took the Mari texture, 15 million polygon object, export it as an OBJ then using V-Ray I would use a command line VR-mash converter that would convert it to V-Ray proxy geometry and then if you do an instance in Maya twice, I could take one of them, swap out the original proxy geo with the low resolution with the super high density geo. We did that for most pieces of the set. It became quicker to render out the geometry than the bump maps for the objects.
fxg: Let me ask you about something that has been a pain in Mari – the filter speed? Has that gotten faster? Let’s be frank, a lot of people have bumped things to Photoshop to do filtering and then bumped it back just to avoid Mari’s filters.
Metzger: In the first version it was ridiculously slow. If you ever ran any type of filter – well you just wouldn’t. It would crash Mari, or it would just go away for 20 minutes, but it has definitely improved. Under Windows I have no problems whatsoever. I will run full channel operations in Mari and it works out great. I have had no problems. I have not popped open Photoshop in say eight months. It is a nice feeling.
fxg: One of the earliest demo features The Foundry showed was texturing on posed animated figures, literally with a looping animation. I have been dying to ask a hard core texture artist – is that a gimmick or do you ever use that?
Metzger: Well I don’t really do character work. I have done one, but I don’t normally use that, but I can see how that could be very helpful and to have that flexibility and one of the reasons Mari is so promising.
fxg: Well, let me try another then. With objects – moving away from characters perhaps – a good approach is to use an environment shader, but you can now use an environment shader with a mask environment or painted matte, do you use that?
Metzger: Yes when I am painting metals, like working on cars, it is sometimes easier to visualize some sort of reflection – even an environment look-up – but one of the new things that they did add was Fresnel – so you can blend and adjust the angle of reflectivity on the surface, which is a pretty cool new function that has been added on top of the initial environment maps deployment. At v1.3 they added the environment mapping and at v1.4 they added the blend option with the triplanar shader option.
Watch the final Robot spot from The VFX Tour.fxg: Are there any features of the program that you just really love that maybe are not so common?
Metzger: The triplanar! I don’t know how many people are using it right now, but I will be talking and giving a demo at NAB (Foundry Booth South Hall in Vegas) and I hope to be showing that thing off like crazy ’cause it is so powerful and saves so much time. You can just texture so much, and as a starting point for texturing I think every channel should be started off with the triplanar shader because it just saves so much time in building a base texture.
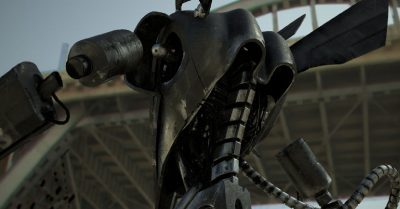
I use Mari for texuring but I also use it for lighting which is not something most people think of. It is great to be able to pull in a tracked camera and that is lined up to geomtery and just start painting HDR data. For a shot in the Robot project for The VFX Tour we had a tunnel – the LA Sixth Street Bridge. They have used that location a lot for films like Transformers, but the whole idea was to just show the workflow that would take the HDR Mari Ptex to a new level. So we shot a full range of 20 stops of light information that ranged from outside to a completely pitch black tunnel. To be able to capture all that and then paint it in Mari was really cool and I think that helped push some of the tools – such as OpenColorIO.
Watch Metzger’s paint tutorial for the Robot project.For example, there is an exposure tool and I ran into an issue with and while I was painting the pitch black area of the HDR I couldn’t bring up the exposure to see what I was painting so the team added an exposure function that will let you see the whole range but without having to tone map the image or texture to see it. You are painting the baked light information from on set and yet you are using Ptex so you have these great huge files and you don’t have to worry about UV – and that speeds things up dramatically.
Actually if you think about physically based rendering and location surveying, Lidar is becoming much cheaper (and thus it is making things much easier to fit things in budgets) so it is interesting to think about where the industry is going – how to create CG and and integrate CG and a workflow that supports it.
fxg: Thanks so much – see you in Vegas for NAB.
More…
Scott was on set as a cg sup on COPA’s Nicki Manaj video ‘Turn Me On’, the subject of fxguidetv #139. Click here to see that interview with COPA co-founder Alex Frisch.
Mari 1.4v3 has just been released. This is the version that Scott was using but in beta. Here is the release video showing the newest features of Mari. This includes the new Tint and Stencil options in Mari Paint.
Note: Scott Metzger will be presenting Mari at The Foundry booth in the South Hall at NAB in Las Vegas.
This will also be a part of our fxguide LIVE coverage at NAB. That’s right, fxguide is now broadcasting live from The Foundry booth all day on the Tuesday of NAB. The LIVE page will be here on fxguide.com closer to the date. Thanks to everyone who contributed to allow this to happen.
