Wolverine is the 4th of the X-Men films or the first of the spin off Origins series, depending on your point of view. We have a look behind the scenes of this film, talking to artists from Rising Sun Pictures, Luma Pictures and Hatch Productions as well as exclusive crew shots from on-set.
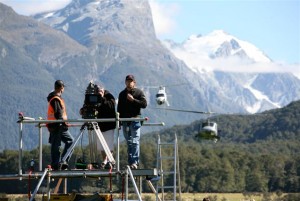
The much anticipated X-Men Origins: Wolverine (May 2009), starring Hugh Jackman, has opened to amazing box office success.. In this prequel to the “X-Men” trilogy, based on the popular Marvel Comics characters, Wolverine’s past is explored as he comes to terms with his powers and meets up with many of the other legends of the X-Men universe to fight back against a military out to eliminate them.
Shot primarily in Australia and New Zealand, it was filmed on the Arriflex 435, with Primo and Angenieux Lenses and on the Panavision Panaflex Millennium XL, Primo and Angenieux Lenses. The project used Kodak Super 35mm Vision2 200T 5217, and Vision3 500T 5219 stocks. The DOP was Australian DOP Oscar nominated Don McAlpine (Clear and Present Danger, Moulin Rouge!, Time Machine)
The Digital Intermediate was done at Efilm at 2K. The cinema release was film format 35 mm in an 2.35: 1 Anamorphic aspect ratio.
The film’s post production at 20th Century Fox studios was under the management of Ted Gagliano and Chris Dowell . Along with supervisor Wil Fluckey, Dowell decided at the start of production that Wolverine would utilize the Assimilate Scratch system in the post-production VFX data pipeline. According to Fluckey, Scratch was used by the studio’s VFX supervisors, Pat McClung and Greg Baxter, and their teams to handle and manage all the 2K visual effects files that were submitted by numerous visual effects houses around the globe.
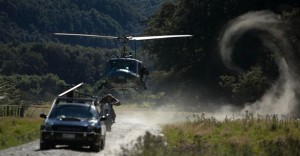
The 2K files were loaded onto a server and then ingested by a Scratch mobile system that was calibrated with the vendor-supplied 3D LUT. The artists then used the mobile Scratch wherever needed within the studio, for example, the cutting room or VFX session, etc, for evaluation, creating sequences, and playback from 2K DPX files. A permanent second Scratch system resides in a Fox Studio screening room, where the same files are used for the real-time 2K reviews by the studio team.
Wil Fluckey, 20th Century Fox Studios: “Working with digital files is better than working with film because the project moves much faster through post production, we’re able to skip the traditional time-consuming film out/print process, and we still get quality results instantly. In heavily intensive VFX films, time is of the essence so Scratch is a very useful tool for us. I can’t imagine doing another big VFX film without Scratch.”
The film’s previz was done by Vital Distraction and Frantic Films.
The action sequences were designed with 87Eleven (300, Bourne Trilogy, Watchmen). 87Eleven is an action design company, located in Inglewood, CA in a converted warehouse near the Los Angeles airport. 87Eleven specializies in stunt performance, stunt co-ordination and 2nd unit direction with martial arts choreography, wire work and cast/talent training. Their founders include former Navy SEALs and they are well known for action star “actor training” with their Epoch Training programs.
The primary visual effects companies were Hydraulx, Soho VFX, Rising Sun Pictures, Cinesite and Luma Pictures, with additional matte paintings by Matte World Digital and Hatch Productions. Ian Failes spoke to some of the vfx companies involved below.
Hydraulx
VFX SUPERVISOR: Erik Liles
Soho VFX
VFX SUPERVISOR: Allan Magled
Rising Sun Pictures
VFX SUPERVISOR: Tom Proctor
Luma Pictures
VFX SUPERVISOR: Vince Cirelli
Cinesite
CG SUPERVISOR: Jon Neill
Soho VFX
VFX SUPERVISOR: Allan Magled
Matte World Digital
SUPERVISOR: Craig Barron
Hatch FX:
SUPERVISOR: Deak Ferrand
Rising Sun Pictures
fxg: Can you give me an overview of RSP’s work for the film?
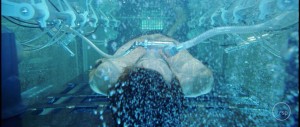
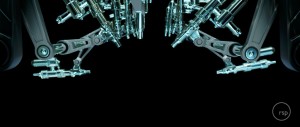
RSP initially provided pre-visualisation services for the film, as well as some onset supervision at Fox Studios. For the visual effects sequences, RSP created:
* the juvenile CG ‘Bone Claws’ for young Logan as they first emerge from his hands
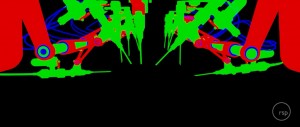
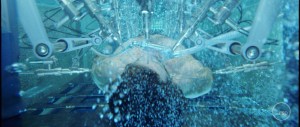
* the adamantium injection sequence involving the CG injection machine, gun and needles, CG bubbles and CG adamantium claws. As part of that sequence we also created a full CG door that is cut through with Wolverine’s shiny new adamantium claws (the ‘X’ as seen in the trailer)
* additional photoreal matte paintings for the secret military base and the carnival.
fxg: What was your brief for the look and feel of the effects?
Tom Proctor initially took a brief for the VFX in LA from the VFX Supervisor Pat McClung and Director Gavin Hood. It was great to be able to talk with them to get an idea of where they were heading. Whilst the previous X-Men films and the comics gave a good reference for the style, the sequences that Rising Sun worked on had to sit with the onset props.
For both the bone claws and the adamantium claws, we referenced footage with the claw prosthetics, to show how they would interact within the environment. This gave a good starting point. For some of the shots, we had to remove the practical claws before adding the redesigned CG claws. For the adamantium injection sequence, the machine was mostly complete onset, and the prop of the gun with needle was sent to us to use as a reference to build our CG version.
fxg: What kind of reference or previz did you look to for your shots? Did you have to embark on any concept work or R&D?
In addition to reference that was shot with practical props with the live action plate, production also provided us with concepts, reference and previz. Renders from other vendors were provided for contextual accuracy. The bone claws went through many rounds of development before the final look was achieved, as did the adamantium claws and the injection machine. Most of these had to be approached on a case-by-case basis, to build on the RSP pipeline already in place from previous shows.
fxg: How did you approach your shots technically? What techniques did you end up using? Can you talk about 1 or 2 of your main shots or sequences in particular and how they were accomplished?
For young James Logan’s bone claws, the intention was originally to keep the practical prosthetic as seen in the original plates and reference. Unfortunately they didn’t hold up in close ups. More specifically, the design of the bone claws was changed throughout, and there eventually became continuity issues that needed to be resolved through the use of CG.
On the back of James’ hand, we applied a warping effect where the skin on the back of his hand is rising and moving. It was a prolonged creepy moment as the claws grew under the skin and eventually emerged out the knuckles. We rendered some 3d passes to apply the warp in 2d. That went through a few different iterations with different levels of detail – our brief was that it needed to be creepy, but not gruesome – the PG-13 rating drove that look, so there couldn’t be anything overly-gory. We tried some extreme stretching of the skin in some early versions, but it was too much for the censors and had to be dialed back. Although the bone claw breaks through the skin between his knuckles, we never see any blood. They travel under the skin then slowly flay out.
For the design of the bone claws, we went through a few different styles before arriving at the final look. As far as modeling, we had a practical bone claw sent to us which we used as reference, in addition to reference shot on set of the child model. This was developed as the look and texture progressed. At first there was a smooth, waxy translucent look, then we progressed on to something which looked very much like bone. Some of the early developments involved looking at the way that bones calcify as they develop.
There was a gag we were trying to do with the translucency of the bone – to progress from a finger-nail type vein bone which transitioned to a mature calcified look as it emerged from his knuckle. The timing of the shots meant this gag could not be played out – so the bones ended up coming out with the ‘mature’ calcified look, and you can see some of the veins beneath the surface – we really tried to get some of the translucency of real bones in to the final design.
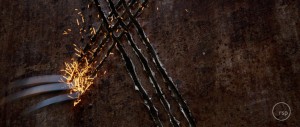
For the fully CG shot of him tearing his way out of a metal door with his new adamantium claws, we needed to create an entirely CG shot. We start by seeing the exterior of a rusty metal door, and the claws punch through the door then tear out an X in the door. It was originally intended to be shot practically but the design of the door was changed significantly. We went through revisions to get the look of the door just right for the fully CG shot, and that was transposed in to the subsequent live action plate where the practical door was fully replaced.
For the fully cg shot – the first thing we aimed to do was to get some camera and animation that the client was happy with. The shot has a very hand-held feel, a bit of wobble, as there’s a slight pull out on the camera – the claws penetrate and follows a slash down, before pulling out to reval the ‘X’. This was a big story point so it was important that we got it right. Once that was locked, we had to create a door rig which would in effect ‘unzip’ between being a completely healed clean door and a door with a very pronounced slash and metal ripped.
We modeled up a slashed door, with a really pronounced edge door. In 3d we rigged together a door that would unzip in time with the claw animation and do a reveal. That was then rendered out as a series of passes which were all bolted together in the comp. There’s a different material inside the slash, for the door surface, and displacement work to embellish the edges as the claws rip through the door. It was topped off with sparks to sell the moment. It was pretty involved across the board to make it feel like it was a big cast iron or steel door that he has slashed – there was a fine line between it looking like aluminum foil or butter that we need to tread in order to get it looking right.
fxg: What kind of interaction did you have with the overall visual effects supervisor? How did you communicate with the production?
After the initial brief in LA, the team in Sydney communicated with production via regular cineSync sessions. The ability to use cineSync was vital to be able to review work-in-progress quicktimes, turntables and development and to get succinct feedback. All high speed transfers were completed using Aspera, which allowed us to send HD Quicktimes as well as DPX frames for review when required.
fxg: Finally, this seems like a great visual effects project – a comic book film entrenched in reality. How did that influence your approach to the effects work?
Being fans of the comic book, it was certainly a great film to work on. The two main sequences we delivered were defining moments in the story, and it’s great to see them supporting the marketing of the film all around the world. We had to ensure that the work we provided would support the narrative and really deliver some memorable effects that would resonate with the fans worldwide, and provide a believable origin for Wolverine.
Luma Pictures
Much of Luma Pictures work was shot on Cockatoo Island, Sydney Harbour, Sydney, which doubled as Stryker’s Facility. Unfortunately for the filmmakers, Sydney does not have a disused Nuclear power plant in the middle of Sydney Harbor.
The film’s climax, of course, is a visual effects tour de force, and much of the juice is supplied courtesy of Luma Pictures. The Venice, Calif. visual effects studio created 125 visual effects shots for the film, the lion’s share of which appear in the concluding “Aftermath” sequence. Luma created the CG environment where the scene takes place at the destroyed nuclear reactor, as well as the huge assortment of dust, debris and other atmospherics which accompany the mayhem. Most significantly, its team of animators produced photo-real CG doubles for several of the film’s mutant cast, including Victor Creed (Sabretooth), as well as Wolverine’s adamantium claws. In a testament to its own skills, Luma completed all this work in just seven weeks.
In creating the 3D environment representing the smashed nuclear facility, Luma went to great lengths to make the scene look real. “We flew a crew to Sacramento to photograph decommissioned cooling towers and industrial complexes as reference for our 3D replicas,” recalls Luma VFX supervisor Vince Cirelli. “We also analyzed reference material of large structures that had been demolished to better understand how certain building materials fracture under stress. Those elements helped us to create a believable, post-apocalyptic environment that provides the stage for the final minutes of the film.”

Luma Pictures has a strong reputation for CG characters and doubles, through its work on such films as Underworld: Evolution, City of Ember and Primeval, but the short deadline for Wolverine posed a unique challenge. While Luma usually produces CG characters in a modular manner to provide maximum flexibility for lighting and environmental conditions, that simply wasn’t possible in this case.
“As we had just five weeks to finalize photo-real humans, we decided to build the characters for the shots,” explains Cirelli. “The lighting was developed for the shots and texture artists worked inside of the lighter’s scene files to tweak shaders and balance textures so that they could be exported as the hero asset and rendered. This method allowed us to render photo-real humanoids that held up close to camera in just a few weeks.”
For the Aftermath sequence, actors were shot on greenscreen and were then integrated into multiple 3D environments. Luma artists had to make subtle adjustments to the lighting, shading and color tones of the real actors to ensure they reflected the light from the digital environments.
“It required articulate rotoscoping and various keying techniques to skew the tonal range, a delicate balance that, if not handled correctly, could have made the actors look processed or compy,” Cirelli notes. “As a further complication, the 3D environment into which the actors were being comped was going through continual refinement through to the very end.”
The complexity of the shots, with their multitude of live and digital elements, made it difficult to maintain visual continuity. Luma produced a number of “tent-pole” composites to provide a reference for color, lighting and shading values, but as the sequence was constantly evolving, there was a repeated need to refine the look. “We were frequently required to apply significant changes across the entire sequence of 100-plus shots for the purpose of studio screenings,” observes digital effects supervisor Justin Johnson.
“We met the challenge by relying heavily on Assimilate’s Scratch playback and color grading system for real time adjustments during client review sessions,” adds VFX producer Steve Griffith.
While the deadline pressure was daunting, Luma has developed its pipeline (which employs a mix of off-the-shelf and proprietary technology) to process extremely complex work with great efficiency. Additionally, the studio’s staff was turned on by the opportunity to contribute to a critical sequence in a film that is sure to command a huge, worldwide audience. “Our entire staff rallied together,” says senior VFX producer Steven Swanson. “Their grace under pressure—and the quality of the resulting work—is a testament to the incredible talent and work ethic of our artists and managers.”
Luma was accorded high marks by the production team for its ability to deliver under pressure. “It was a great experience for me working with the crew at Luma,” said Craig Lyn, an additional visual effects supervisor on the film. “They’re a talented and professional group who always strove to deliver what was asked…then busted their asses to do more.”
Luma Pictures executive VFX supervisor Payam Shohadai was pleased by the effort put in by his team. “We garnered a lot of compliments for our workflow and for the work itself,” Shohadai recalls. “The studio’s appreciation of our flexibility and responsiveness has led to an award of additional complex creature work for an upcoming Fox film.” Luma is currently working on three more film projects, including the new Coen Brothers film A Serious Man.
Hatch
Hatch co-founder and artist Deak Ferrand talks about his studio’s matte painting effects for Wolverine to Ian Failes.
fxg:What did your work for Wolverine involve?
We came in late on the project, although we had met with production before they started shooting. This included Greg Baxter, the VFX producer, with whom we had worked on The Rundown and Blade III a few years back and Pat McCLung, the VFX supervisor. They came back to us right before they were to re-shoot in January a whole new sequence for the movie. We also provided a matte for the end of the movie.
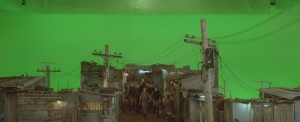
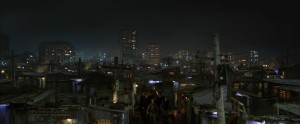
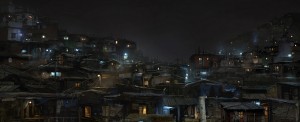
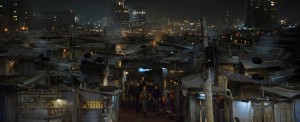
We took care of the design and matte paintings for that sequence, a total of five shots, the largest of which was a crane down over a shanty town, a few cuts within the sequence and the last painting as Wolverine drives towards Las Vegas.
fxg:What was your brief for the look and feel of the effects? What kind of reference or previz did you look to for the shots?
The director provided some tear sheets of favelas and we were on our way to conceptualising. The effects needed to be realistic. I gathered many more references of favelas and various slums as well as some African cities in the 70’s.


fxg:How did you approach your shots technically? What kind of matte painting techniques did you use?
After the 3D tracking and roto was complete, the matte painting was projected in XSI and composited in After Effects. We also had fun building some miniature pieces for this shot. Both the crane down of the shanty town and boom up on the road leading towards Las Vegas required projection matte painting.
This was a fun project, the creatives were very happy from the get go and made things move along smoothly throughout the duration of the project. The turn-around had to be fairly quick as our part had to be completed by early March.
