Swedish studio Lost Liner recently created an all-CG spot for biscuit brand Ballerina. The commercial, featuring a group of dancing cookies, utilized a mix of animation, fluid sims and new rendering solutions to tell its story. Lost Liner VFX supervisor Ulf Lundgren walks us through the making of the TVC in ten steps from concept to final product.
Step 1 – Concept

Lundgren says the advertising agency, åkestam.holst, were guided by these key words from the client, Göteborg Kex (Gothenburg’s Crackers): ‘Novelty – filled to the rim with chocolate – Ballerina Cookies – filled with Ballerina filling and stuffed with chocolate bits – more chocolate in one cookie than you ever thought possible!’
The target audience was envisioned as “the chocolate-loving family who loves their coffee breaks, and everyone else who is enamored with chocolate and still in possession of their childlike mind,” adds Lundgren. To that end, Lost Liner and the agency conceived of a spot that was playful, spontaneous, pacey and ‘chocolatey’. “Since the colors of the product are red and yellow,” notes Lundgren, “it is desirable that they are featured prominently in the film’s color scale.”
Step 2 – Mood boards
After meeting the agency and client, Lost Liner (Lost Liner is not a large studio, with six creatives and two producers, but usually expands with freelancers as larger projects require) produced mood boards, aimed at creating a feeling for how the TVC will be experienced. “It’s about trying to figure out color scales, character styles and set and prop designs,” says Lundgren. “Moodboards are a quick first step to create an understanding how the final product will be perceived.”

Step 3 – Storyboard
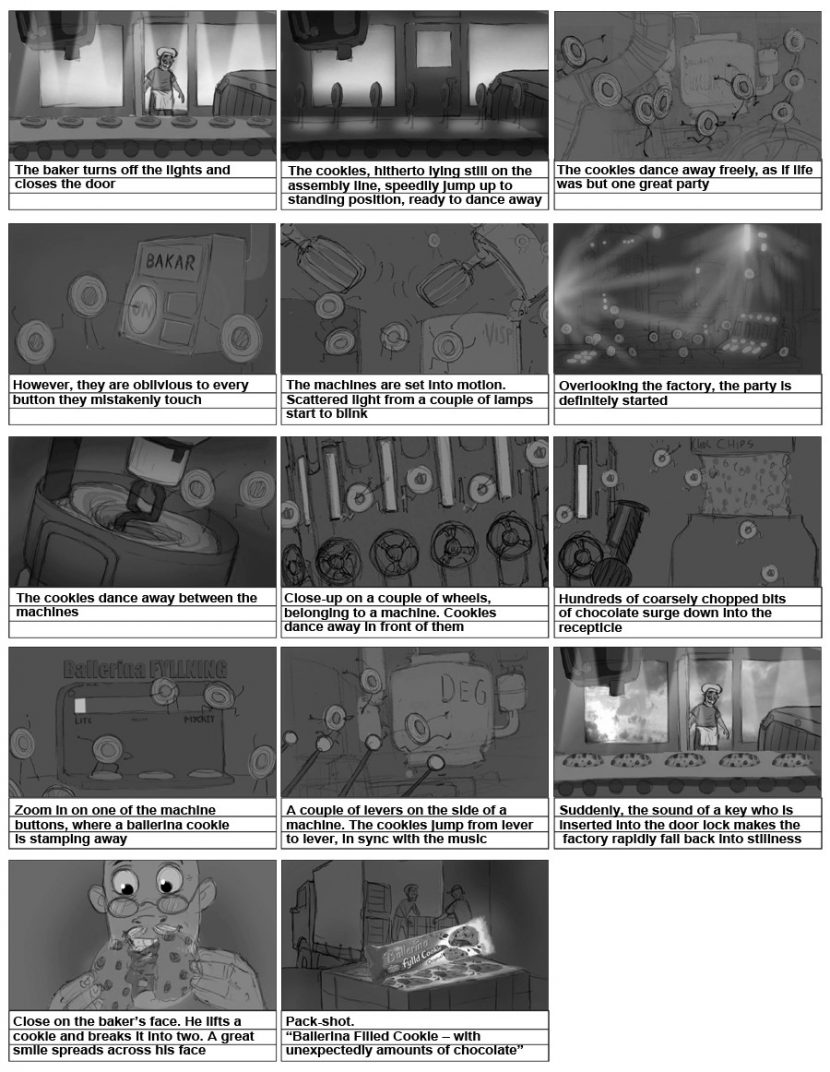
Once the script was approved, Lost Liner created a storyboard of the key events in the spot. “These images are mounted in sequential order as in a comic book,” explains Lundgren, “which, even at this early stage, gives us a feeling of how the finished film will look like. Later, we may very effectively try out alternate edits or ways to tell the story by adding, subtracting or juxtaposing images.”

Indeed, this initial storyboard featured images and characters not seen in the final commercial. “For instance,” says Lundgren, “the baker was removed, as were some of the disco images. This is a natural progression in the creative process and is best done at this early stage, when the actual production of the film has not begun. Hence, no work needs be redone or discarded, which will be the case if changes and supplements arrive later in the process.”
Step 4 – Boardmatic
An extension of the storyboard work was Lost Liner’s boardmatic, in which images are placed in the correct order and shown for the anticipated length of time. Says Lundgren: “The result is a film with exactly the same length as the finished film, giving us an understanding of how long each shot is and how the images and scenes relate to each other temporally.”
“One of the main discussions during the early boardmatic-phase was if the baker should be present or not,” continues Lundgren. “After a longer discussion, we concluded that we did not want the cookies to compete with another character. After several updates to the boardmatic, we started to feel satisfied. We employed six weeks of pre-production to polish the structure of the film, enabling us to enter the production phase fully prepared.”
Step 5 – Design and modeling
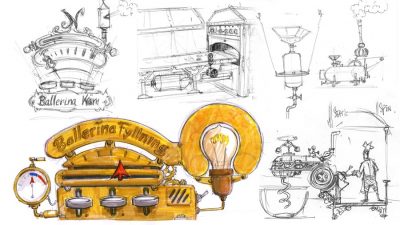
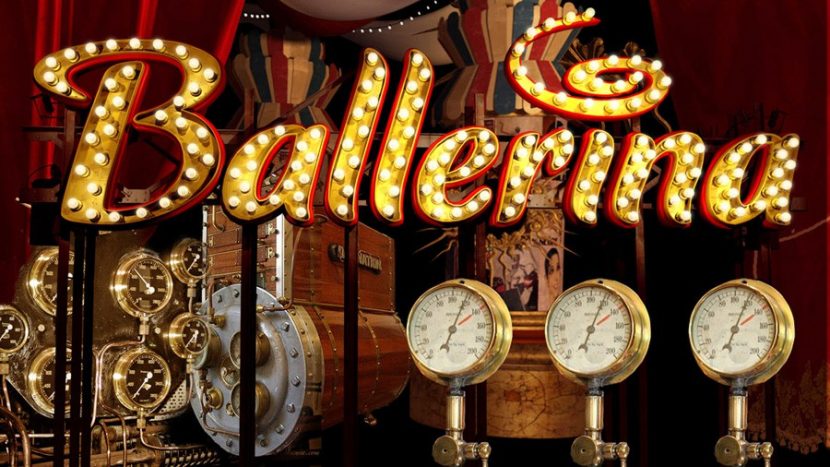
The spots designs for the bakery were influenced heavily by steampunk – and this helped Lost Liner populate the sets and machines. “Even if they are just visible for a very short time, they are essential in giving the film the playful feeling we were looking for,” says Lundgren. “Scratches and wear and tear were hand-painted on each detail to create the right kind of patina, making it all feel credible.”
Cookie Animation Test.For the original Ballerina cookies – the TVC’s lead characters, Lost Liner went through a number of design variations. “In one test,” recalls Lundgren, “the cookies are given small Ballerina shoes. To test the cookie design, short animated scenes were created, enabling us to try out possible personalities for the cookies.”
“We scouted through several cartons of cookies from Göteborgs Kex, selecting only the very best of each kind,” adds Lundgren. “We utilized photogrammetry software such as Autodesk PhotoFly and Photomodeler that uses photographic analysis to create a accurate and precise 3d model. For this we shot a larger number of evenly lit photographs of the cookies from every angle. To achieve this quickly we built an highly improvised turntable rig that consisted of nothing but a white cardboard sheet place on top of a coffee cup standing on a saucer. And we then simply rotated the coffee cup around its axis on the saucer by slightly moving the ear of the coffee cup a few degrees between each photograph. It was a very inexpensive yet highly accessible and accurate solution to the problem.”
Cookies turntable.Artists at Lost Liner then used the photographs to extract the cookie from the backdrop and generate a matte. “We then used software that aligns and correlates where all the photographs were taken in relationship to the model,” says Lundgren. “This way we get a 3D point cloud of the cookie and very accurate 3D placement for the camera positions. After this we used software that was capable of extracting a very high resolution 3d mesh with texture from this large data set. This was also later cleaned up and polished in Mudbox before we extracted a low resolution proxy that were used for animation and placement in the film. This way the product in the film was guaranteed to be identical with those found in the stores by the consumers.”
Step 6 – Animatic
The first major blocking of the CG assets was then created in an animatic with only simple placeholders for the characters. “We build the sets and shoot the scenes with virtual cameras and pace the editing according to the boardmatic,” says Lundgren, “recreating both the character and camera movements in a 3D-environment.”
Animatic.Step 7 – Animation
Once the animatic was approved, animators added the final animation. “The animations of the Ballerina cookies were evidently paramount,” notes Lundgren. “But what was extra satisfying to us was that we could fill out the background with cookies that the viewer, at first sight, will not have time to take in, but which, on subsequent viewings, add depth and surprise.”
Animation.Step 8 – Simulation
For the fluid sims on the chocolate the team used Softimage 2012’s built-in fluid solver called “Lagoa”. Softimage 2012 was used for most of the modeling with the detailing done with displacement and texture maps that where made in Mudbox 2012.
One of the major shots in the TVC required liquid cookie stuffing to fill a glass receptacle. There was also a shot of chocolate chips falling in slow motion. Lost Liner simulated these behaviors. “For the falling chocolate chips, we use a method based on classic Newton physics,” says Lundgren. “Every little adjustment of the material properties, the total amount and the speed heavily affect how the chocolate chips fall. Before reaching the final result, we made a great number of variations, wherein the result was polished closer to perfection every time around.”
Chocolate bits simulation.Then for the cookie filling in the glass receptacle, Lost Liner relied on sims based on the equations of Navier-Stokes. “The textures of the filling, the movements, as well as other properties, were adjusted all along the process to achieve the result we were aiming for,” says Lundgren.
Liquid simulation.The dough required a slightly different approach, since it was only seen briefly in one shot. “We decided to go for a more effective and controllable solution than simulation,” comments Lundgren, “simply sculpting the dough to its final shape, with lumps, creases and everything, and then adding distortion. We achieved this through employing Mudbox, a software product that offers digital equivalents to mud.”
Dough simulation.Step 9 – Lighting and rendering
The ‘mood’ of the TVC was achieved at the lighting stage. According to Lundgren, Lost Liner’s guiding principles here were “after closing hours”, “cozy” and “everything looking tasty”. The overall lighting was based on a blue key light. This created ” trong silhouettes and an evening feel,” says Lundgren. “Closer to the cookies, we complemented with smaller and warmer yellow lamps to give the sense of a theatrical stage. It also made the cookies look savory. We used as much incumbent lighting as possible, such as street lamps, the pulsating light from the warm oven, or small spotlights placed on the same height as a desk lamp would be.”
Lighting.Some shots took only a few minutes per frame to render, where as others took an hour. The longest frames took 2.5 hours, but it was dependent on the complexities of the scenes as well as the amount of refractions,
depth of field and motion blur used. The team did render the full film at low quality first, and that took only a few minutes per frame even for the slowest frames that when, re-rendered – at full quality took over two hours.
The benefit Lost Liner found in rendering everything in one pass with motion blur, DOF and atmospherics was that it allowed the artists to directly see the end result when working and designing the shots.
To make the food ‘shaders’ look so edible, the team used a combination of subsurface scattering and old school backside shading in the shader but “the most important thing is to get some good lighting,” says Lundgren. “For this we used soft lights (big lights) and a few well placed hard lights (small lights) for ‘kicks’, just like one does in real life. If all things else fails a lot of depth of fields always makes food look more delicious.”
Step 10 – Grading and online
The final fine-tuning of colors and color temperature occurred in the grading stage. “Some shots may need to be a bit bluer and colder,” says Lundgren. “Or the cookies may need a slightly warmer hue to look more appetizing. To enhance the viewer’s focus on the course of events, some shots may need a subtle vignetting, making the edges darker. This allows for the eyes to focus more easily on the desired part of the image.”
Grading.