In examining the concept art for Remember Me, it is easy to see that the team at Dontnod had to produce wet complex urban environments, often in the rain. The team set to work to produce the most realistic and yet flexible environment to allow the game level designs the maximum impact, flexibility and rendered quality.
Here is the detailed account of the effects animation work to produce rain. This is part 2 of our three part series on game environments. Read the first part on rendering Remember Me here.
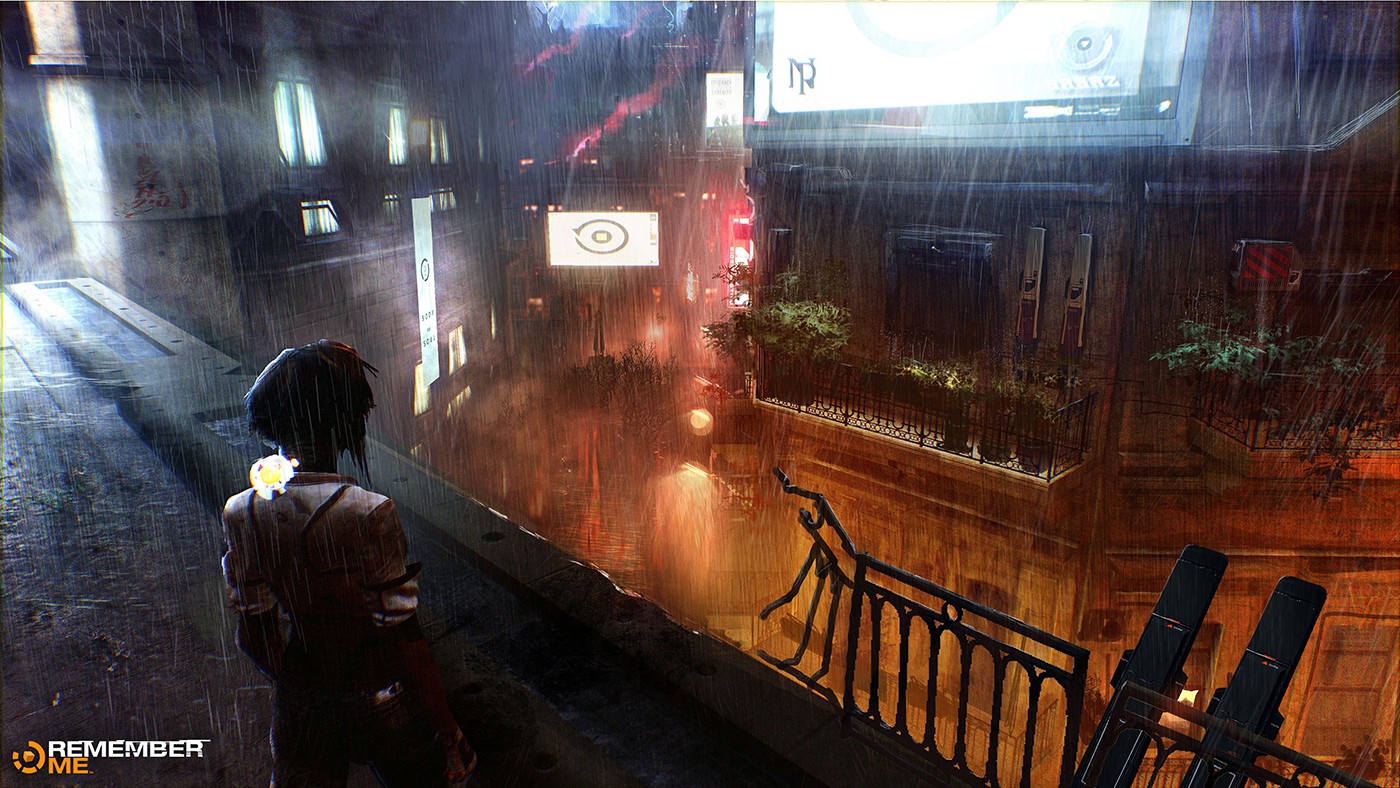
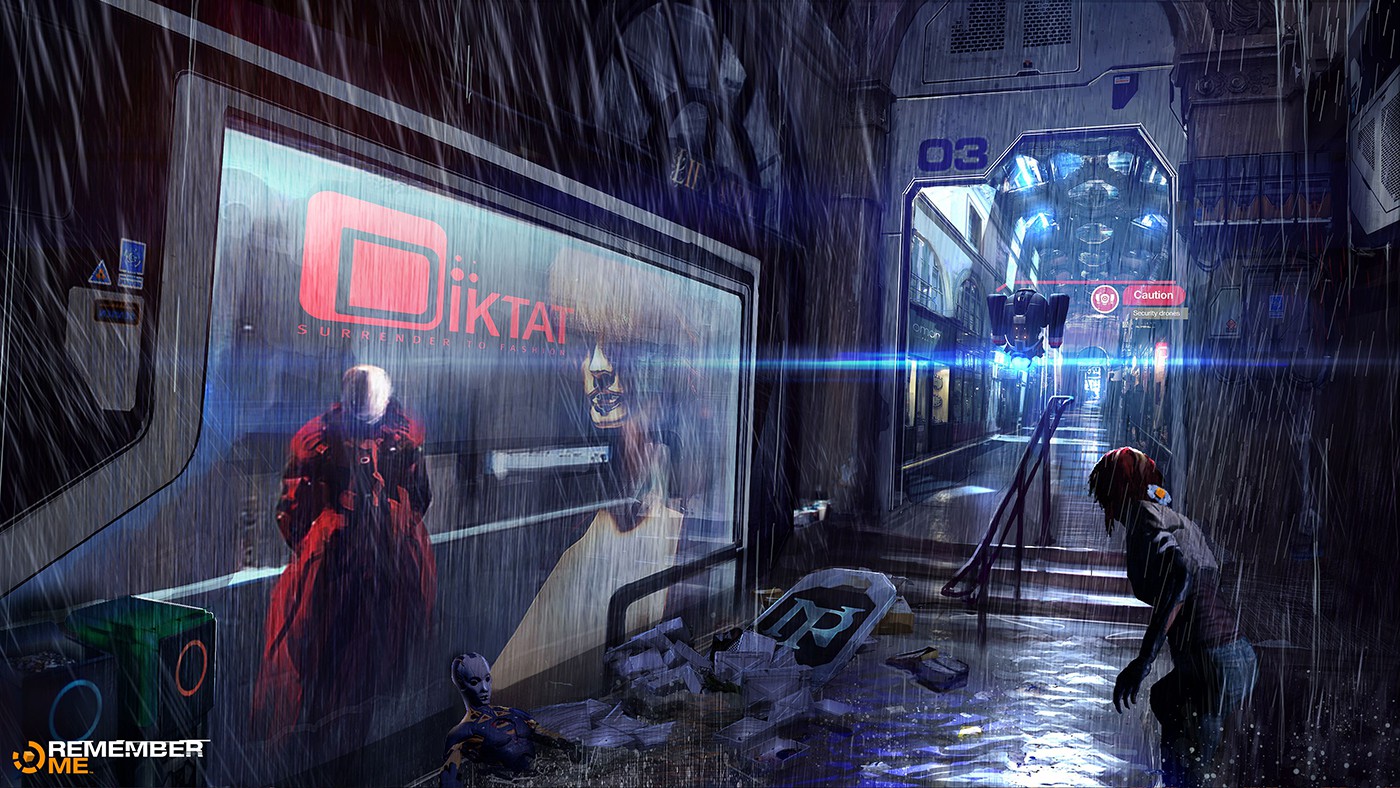
As you can see above the concept art shows various strong rain scenes and ideas.

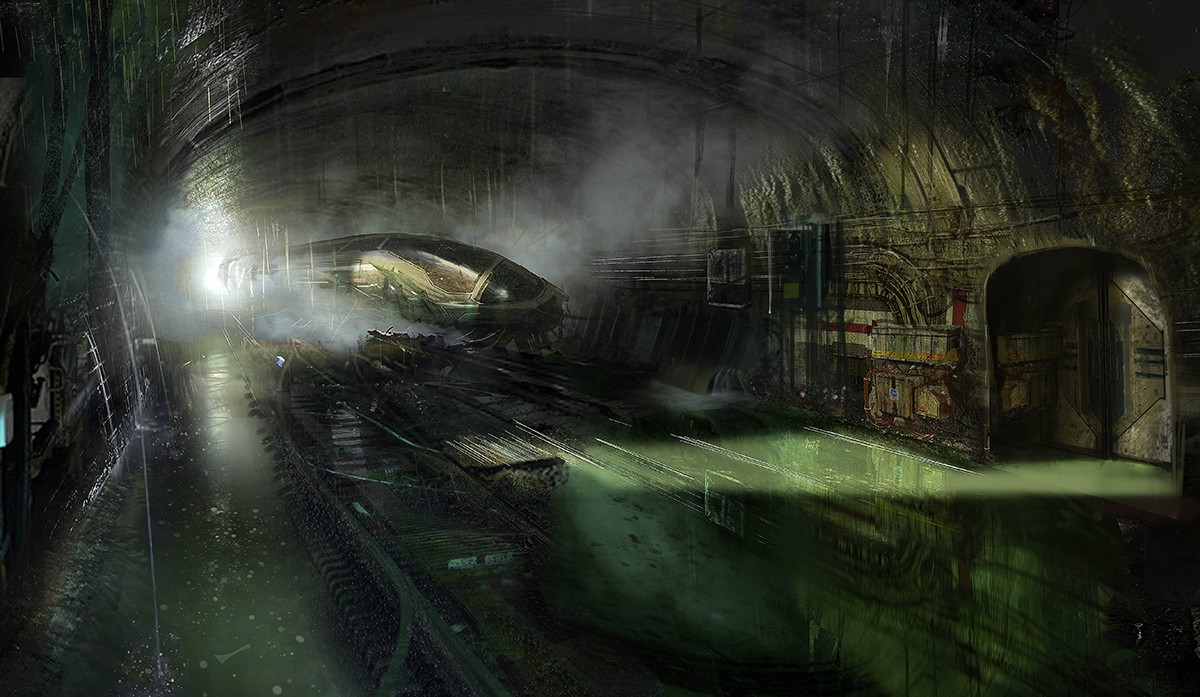
With various wet interior and exterior scenes.
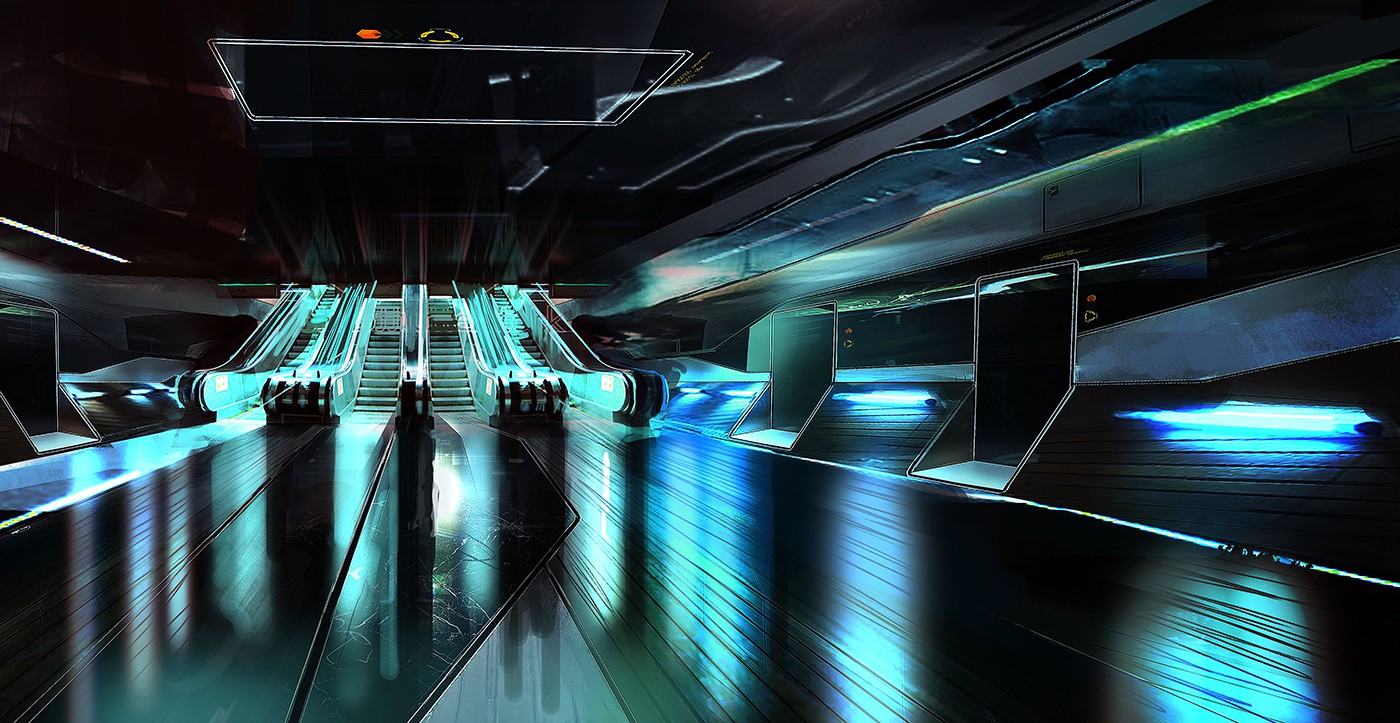
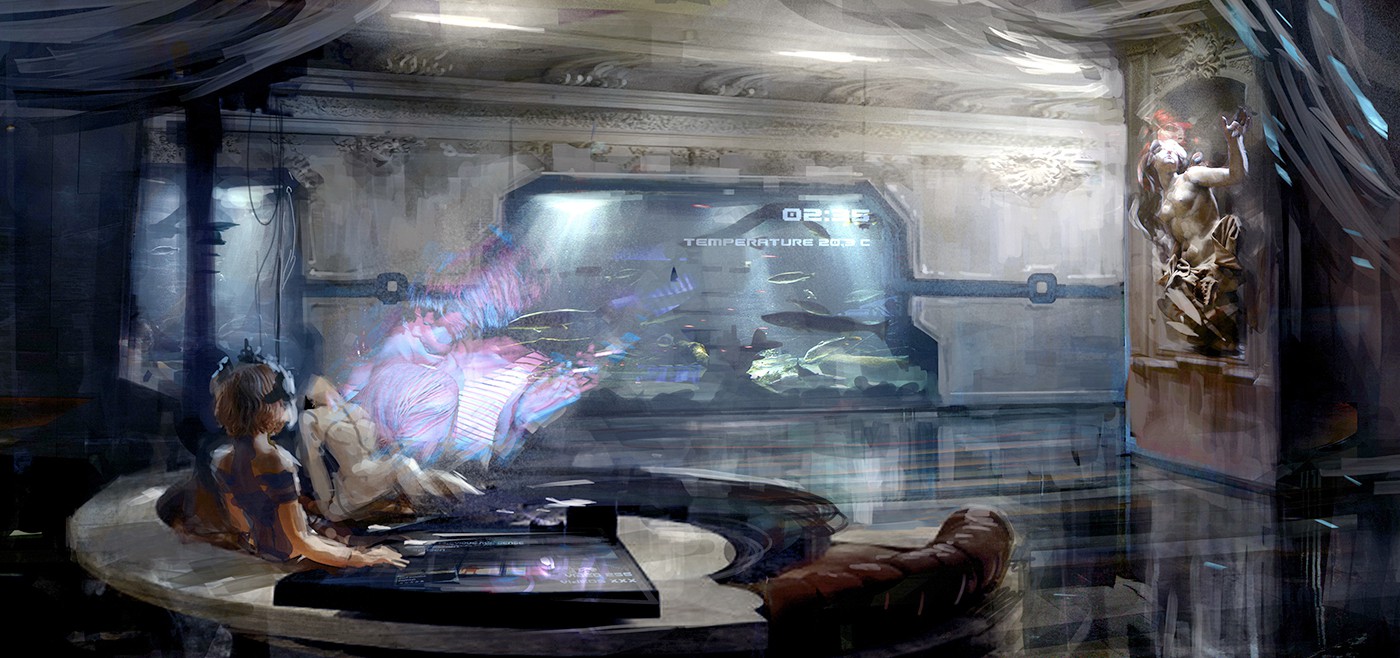
As well as many challenging environments with complex lighting involving similar concepts.
EXCLUSIVE Download – six ultra high res concept art frames 3000 ~ 4500 pixel wide images (8M zip file).
The results are stunning but to really appreciate what the team had to do, we wanted to drill down on just what it takes to produce such high end A title game graphics. Articles often focus on the game play or the cinematics, but we were interested in what it takes to produce high end urban real time environments, ones that push the limits of console technology, while building on the published research of feature film physically correct lighting and other game based innovative memory and texture size workarounds.
Real world water attributes
In several games today there are dynamic weather effects. The most popular weather effect is rain. Sadly, rain has often no effect on the actual gameplay but it can have a great effect on the mood and nature of the visuals. Rain in the real world has a lot of impact on the appearance of the environment. The goal of this article is to describe the technique, both technical and artistic, to be able to render a world with a rainy mood. By wet world, we mean not only a world which is experiencing rain, but also that world wet after it has stopped raining.
The aim here is to help in the understanding of physical processes involved in rendering wet surfaces. Wet surfaces are really complex to get right and the complexity involved is particularly difficult to master in the context of game development (dual layering, porosity, subsurface interaction, etc…). It is impossible to explain or highlight everything but this should give an insight to the complexity of game environment development. As the context is high end gaming, the solution will lie not in forcing new complex lighting models but rather tweaking BRDF parameters from dry material to achieve some active realism while remaining inside a render budget. However this can be done with the benefit of using physically based lighting models with physically based values. From the correct physical parameters one can identify the nature of surfaces. Building out from this the approach can also provide useful information when dealing with procedurally based aging and weathering, and many other similar gaming environment problems.
Section 1: Reference
How does it rain? Reference from real life
For this study it was decided to focus on wet urban environments rather than natural or landscape scenes.
Lighting in the rain
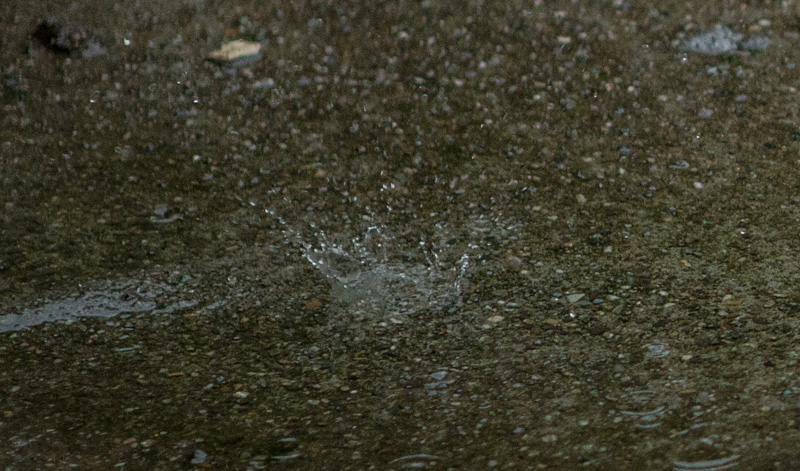
Lighting has a lot of influence on the rain, particularly during the night. As most live action DOPs know, it is hard to film rain or record it on set, as rain drops are often difficult to see, but they do become highly visible when reflecting or catching the light. When looking at filmed rain, the rain drops are perceived as streak particles but in fact the long streak is caused by motion blurring of the camera shutter time. The drop itself has not changed its spherical shape. Many rain drops or rain showers are not perpendicular to the ground because of wind. This can add to realism in a game environment.
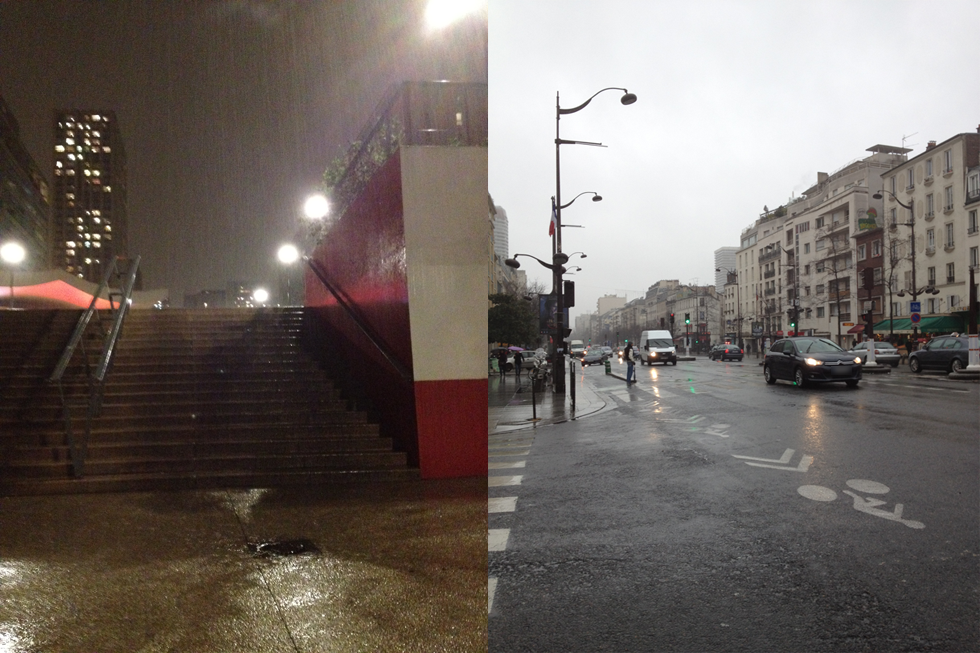 Also often in rain footage one can see a halation.
Under strong rain, there is atmospheric scattering modification (fog) and light through rain produce a misty glow effect as seen left.
Section 2: Rain effects in games
From section 1 above, it is clear that rain and wet urban environments are much more complex and numerous than one might first imagine. To immerse a player in a rainy world, and really add realism, a game developer needs to support a lot of interactions and lighting properties.
One of the historical key real time programming references for rain city environment rendering was the “Toy Shop” demo from ATI (2005) which has been widely covered and referenced at many graphics conferences.
This demo dates from eight years ago, and yet it is still difficult to fit all the demonstrated effects into a modern PS3/XBOX360 playable game environment. In this second section the article we will reference research done for the game Remember Me. This post is the result of that research. For this section, Sébastien Lagarde was joined by contributions from co-workers Antoine Zanuttini, Laury Michel and Orson Favrel.
2A: Splashes
In the real world, when a falling drop hits a surface, a splash is generated. Rain splashes can be simulated easily in a game by spawning a water splash particle when the stretched particle representing the raindrop collides with the scene. Tracking every particle colliding with a scene can however be costly. The solution is found in noting that with so many raindrops creating so many water splashes, it is hard to distinguish which rain drop is causing a specific individual rain splash. Based on this observation, it is simpler to have two independent systems to manage raindrops and rain splashes.
Most games collide a bunch of random rays starting from the top of the world and moving downward colliding with a simple geometric representation of the scene. This collision detection then generates water splashes particles. As a further optimization, the water splashes are only generated close to the screen.
When the surface is not a simple flat ground plane but a more complex shape such as a car, another optimization is used to avoid complex collision detection computation. In this second optimization, emitters of water splash particles follow just the geometry boundaries of the complex shape. The pattern will not be as random as other water splashes but the look can be effective.
The Remember Me team tried a different approach. Instead of trying to collide a set of rays with the simplified world model, they rendered a depth map view from the top – in the direction of the rain. The depth map gives all the information one requires to emit a water splash particle at a random position in the world respecting the scene geometry. The steps of the approach are simple:
- Render a depth map from above looking down
- Transfer depth map from GPU to CPU memory
- Use the depth map to generate random positions following the world geometry
- Emit the water splash at the generated positions

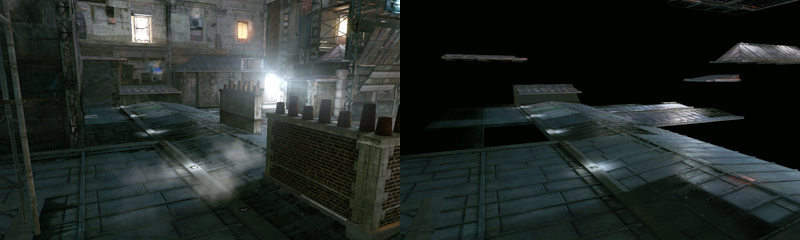
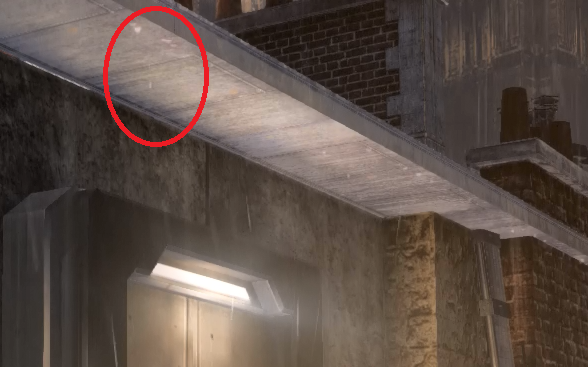
Imagine a scene on a roof top as above, note the hero roof section is surrounded by other taller buildings.
Rain will need to ’emit’ splashes from the visible roof tops, but complex fire escapes etc can be simplified.
To render the depth map, they linked a dummy location in front of the current camera but at a little higher, then rendered the world geometry from this point of view. As not all parts of the world need to generate rain splashes, they added an extra mesh tagging method for the artists to specify if a mesh needs to be rendered in the depth map. The team also allowed for a mesh to be only rendered in the depth map and not in the normal scene. This is useful when one has translucent objects like glass which should stop rain but can’t render in opaque depth map or to approximate a complex shape with a series of less complex meshes such as say tree branches and leaves.
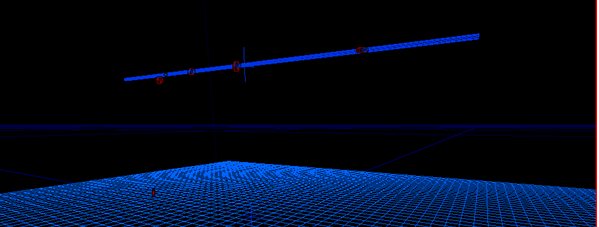
To ease the debugging for the artists they also added a special visualization tool in the editor to only see objects relevant to the rain splash.
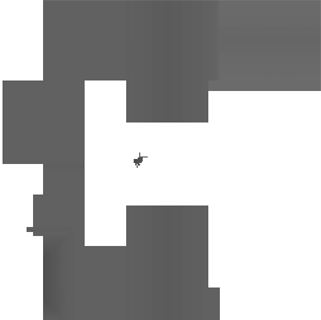
The precision of world generated positions from this depth map depends on the resolution and the size of the frustum of the depth map. With a 256×256 depth map and a 20m x 20m orthogonal frustum the team could get world cells of 7.8cm² at the height taken from the depth map. The rasterizer will rule the height store in the depth map. This means that if you get an object in a cell of 7.8cm² with large height disparities, chances are the water splash will be spawned at a wrong height. This is a tradeoff between memory and performance.
For consistency with various platforms the depth value is stored in normalized coordinate device. In case of a perspective projection, a reversed floating depth value is used to increase precision.
When a falling drop hits a surface, it is subjected to a sudden impact force. Splashes can occur in two possible ways: corona splash, where a thin crow-shaped water sheet rises vertically above the surface before breaking into smaller droplets; and prompt splash where droplets are emitted directly from the base of the drop without the formation of a crown.
Typically, a corona splash requires a thin layer of water on a flat surface and stays alive for 10-20ms. The dynamics of the splash depends on many factors and is divided in two categories:
- the material properties of the surface (roughness, et ) and
- the falling drop properties (size, velocity).
Rough materials tend to have important influence on the impact result. The radius and height of the crown can be related to the drop properties, the number of splash droplets is also related to the velocity of the drop. The distribution of the splash droplets can be described by a stochastic model.
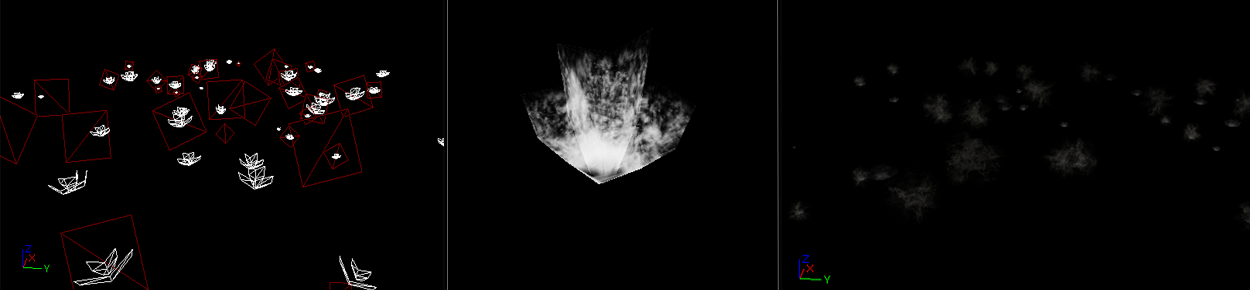
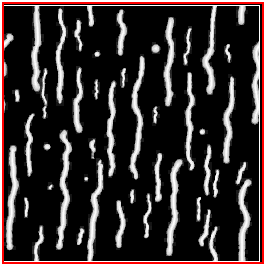
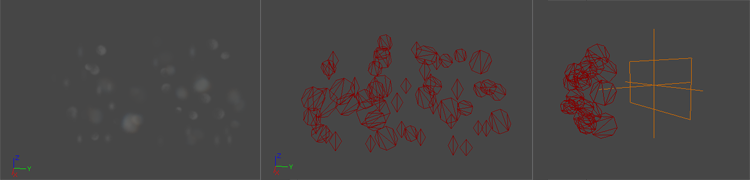
For a game, of course, it is difficult to go too far in the fine detail of each splash. For example, the original Toy Shop demo (above) uses a single quad textured animation captured from a high-speed video of a splashing milk drop. The quad is scaled to produce variety. A good compromise between this and render times seems to stay with the two main characteristics of the impact: a generic crown shape scale by height and radius and some secondary droplets. However, as this specific part of the effect is often in the hands of the actual FX artists, they tend to do whatever they feel creatively looks good (regardless of the physics). The team used an artistic route in the game and came up with a mesh they liked to represent the crown shape and a sprite to simulate the splash droplets. The picture below shows a wireframe of the effect with the crown mesh in white and the splash droplets in red (left). The crown mesh and the splash droplets are mapped with an animated material. The crown mesh (middle) is scaled during the effect. Result (right).
Lastly, a word on the splash distribution. The number of splashes depends on the number of raindrops, to keep it simple, and the team linked the number of rain splashes to a rain intensity value.
Here is an R&D clip of the shot, note this is not directly from the game – and it also shows the drops isolated.
Timings:
On PS3, a 256×256 depth map rendering mainly dominated by character takes around 0.32ms. The rain splashes under heavy rain take around 0.33ms.
On XBox 360, the depth map takes around 0.20ms. The rain splashes under heavy rain take around 0.25ms.
As stated at the start of this section, if characters are too costly to render, you can spawn random splashes on their head and shoulders. The difficulty here is to try to get the same splash distribution as the surrounding ground.
2B: Rain/Raindrops
Now the team has drops and splashes happening in the shot, attention turns to the effect the droplets have on light, and making them ‘read’ correctly in a scene.
The rain itself is the most complicated, and studied, of the rain/wet effects – and is costly to get right.
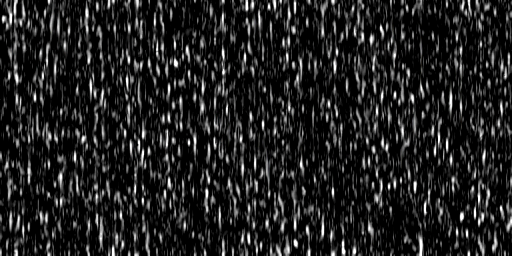
The observation section above showed that it is often difficult to perceive the rain. The best way to see the components of rain is with a bright light or when it is raining very strong. In all cases what we see is long streaks but in reality the rain is composed of individual raindrops. If the team had wanted to render real world raindrops, at a normal low resolution, the raindrops would be just a few pixels wide. Moreover, as raindrops are very faint in bright regions and tend to appear much stronger in dark areas, matching reality in a game was not thought to be a good target. That being said, before simulating game rain it is worth noting what would be reality.
 A detailed description of the physical properties of rain drops include:
- Raindrops are transparent objects of normally 0.5 to 10mm in size. Smaller raindrops are spherical in shape but larger are oblate spheroid
- A drop tends to be much brighter than its background or the portion of the scene it occludes. This is because raindrops refract light from a large solid angle (165°). Showing the environment including the sky – towards the camera. The incident light that is refracted is only attenuated by 6%. Specular and internal reflections further add to the brightness of the drop.
- In spite of being transparent, the average brightness within a stationary drop (without motion-blur) does not depend strongly on its background. This is because the solid angle of the background occluded by a drop is far less than the total field of view of the drop itself.
- The brightness of a raindrop is not affected by other raindrops. This is because for any given raindrop the total solid angle subtended by other raindrops (raindrops are small and are far apart) is insignificant to that subtended by the environment. (Att: Garg, Krishnan, K. Nayar , “Vision and Rain”, 2006)

As observed in the picture above, the world is refracted through raindrops. Correctly rendering a raindrop would require ray trace rendering a spherical shape with reflection, refraction and internal reflection.
Interestingly, as they fall, raindrops undergo rapid shape distortions (oscillations). A rain drop attains a constant velocity between 3 m/s for smaller rain drop (1mm) to 9 m/s for larger (> 4mm). Their motions produce randomly varying spatial and temporal intensities in image. This is perceived as streaks due to long time exposure of a camera and are motion-blurred in a real camera at 24fps.
As stated above there has been a huge amount of SIGGRAPH and general rain rendering research done, and most is available online:
Simple photometric models can only be used when the rendered rain is at a great distance from the camera, in which case, all the streaks are thin enough to make the details of their brightness patterns irrelevant. In close-up shots of rain, however, each raindrop projects to a large image streak, revealing the intensity pattern within it. This pattern is highly complex because of shape distortions that the raindrop undergoes as it falls. These shape distortions are due to oscillations induced by aerodynamic forces and surface tension. The interaction of the shape distortions with light result in speckles, multiple smeared highlights and curved brightness contours within the rain streak.
– Photorealistic Rendering of Rain Streaks, Kshitiz Garg Shree K. Nayar. Columbia University
A large database of rendered streaks under different lighting, viewing and oscillations condition is publicly available. Even an old nVIDIA SDK included a sample using a part of this database, however using a database like this is hard on current console generations and game designers are not looking for perfectly matching reality at any render price.
There are two methods to implement raindrops in game environments. Either with a particle system or with large textures.
Particle solution
The particle systems method often consists of representing the streaks with simple shapes such as a rectangle. Particle systems often produce realistic movement, they can be wind-driven and efficiently simulate on the GPU. For performance, the particle system is linked to the camera to minimize the number of particles to manage. For example in the game Space Marine, it uses a view frustum restricted particle generator.
The main downside of the particles approach is the lack of scalability. Stronger precipitation requires increasing the number of particles and at some point this would mean lowering the gaming framerate.
Texture solution
The large textures method use animated textures (either procedural or hand authored) representing several streaks. The large textures method has the same performance overhead for heavy precipitation as light precipitation unlike particle systems. But they lack the realism of raindrops depth and movement. The Toy Shop demo (above) used screen quad mapped textures (commonly named a postprocess). The demo tries to emulate multiple layers of raindrops moving with different speeds and at varied depths within a single rendering screen quad. The weakness of this approach appears quickly when the camera is moving around. The rain effect looks like a postprocess, and looking downward makes the raindrops fall visually parallel to the ground.
The game Flight Simulator 2004 addressed the issue by mapping four animated textures onto a double cone.
By using a cone mesh and by tilting it to adjust for camera movement, they allow precipitation to fall toward the camera. They scale down each of the four successive textures and scroll it more slowly, creating drops that are smaller and move slower to simulate depth with parallax.
To support dynamic rain with varying intensities at reasonable performance, the team on Remember Me developed an approach similar to Flight Simulator 2004.
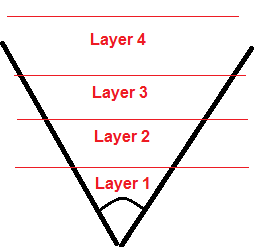
Team member Antoine Zanuttini explains, “We define four layers of rain each representing an area in front of the camera. Each layer uses the same pre-motion blurred raindrops texture”. This four layer approach is key, it allows some techniques to be used on closer rain (layers 1 and 2) and different approaches on layers further away ie. layers 3 and 4.
The team mapped the texture on a mi-cylinder mi-cone mesh linked to the camera and positioned at the camera origin. They then rendered from inside the cylinder. “We could smoothly fade the raindrops at the top and bottom when looking up or down if the artists wanted to,” he adds.
They translate and non-uniformly scaled the cylinder’s texture coordinate for each layer at different speeds and sizes.
Translation simulates the raindrops motion, further away layers use bigger scale factors to increase the number of raindrops with distance.
To simulate the feeling of wind they applied an additional cyclic rotation. NB: In practice, this was just artistically set and not defined from a real wind value.
To get depth and parallax feeling within the raindrops effects, the team decided to use the depth buffer to occlude the raindrops. For this to work, each raindrop requires a “virtual” position. “We had already defined that each layer represent an area in front of the camera. Within each layer, we used a heightmap texture scale, and biased each layer’s attributes to give each raindrop a depth inside the area. We used the direction from the view to the cylinder pixel position and this depth to retrieve the virtual world position of the raindrops. Generating heightmap texture is not an easy task, and it is best to generate it procedurally,” explains Zanuttini.
As for particles, a soft depth test can be performed to progressively decrease the opacity of raindrops. This depth occlusion increase the realism of rain, particularly in urban environment with a lot of occluders in front of the camera.
In a third person game like Remember Me, you can see some raindrops falling between the player and the camera. A good side effect of this test is that the raindrops disappear when looking at the ground because the depth of the raindrops are behind the depth of the ground. Another occlusion to take into account is the one from the sky. When a player is under cover, they don’t expect to see raindrops(!) This could be easily achieved by reusing the depth map generated for the rain splashes. Just like with a shadow map, one can project the virtual position of the raindrops and do a depth comparison to know if the raindrops are expect to reach the player’s virtual position or if it should be stopped.
Performance and tweaks
In practice, the group performed several simplifications for performance, some to the closer layers 1 and 2 and different randomizing approaches to the further layers 3 and 4. “We chose to perform the raindrops occlusion tests only on the first two layers and at a lower resolution. Our depth map generated for rain splashes has a limited range, so we setup the distance of the first two layers in order to be covered by the depth map (remember that’s the depth map is shifted toward the camera). We also decided to not project the virtual position for distance occlusion but simply do a depth test difference in view space,” he explains.
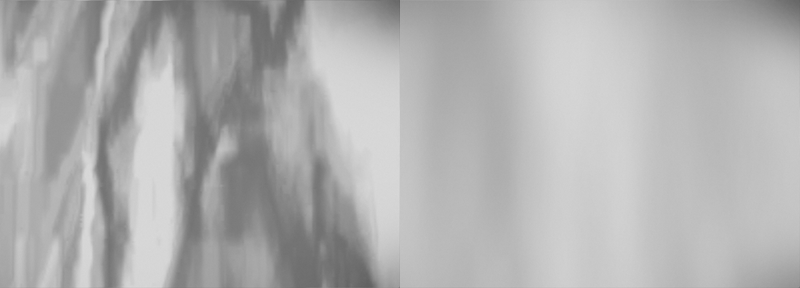
To take into account raindrops occlusion for the other far layers (layers 3 and 4) they smoothly mask-in each layer based on the layer distance and depth buffer at full resolution.

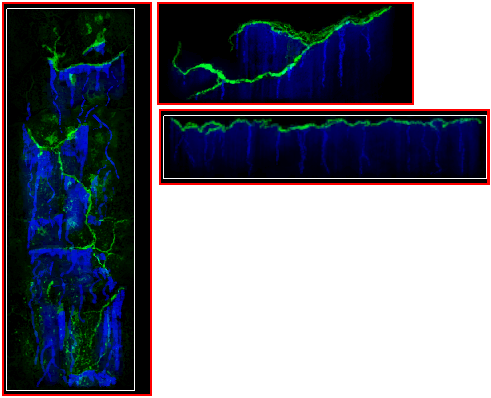
The shot above shows the mask result for the first three layers.
For the two far layers (layers 3 and 4), they also added a feature to increase raindrops variety. They generate two smoothly changing pattern textures to use as blend masks to stop the raindrops from looking like a repeating pattern.
Putting the drops together with the falling rain:
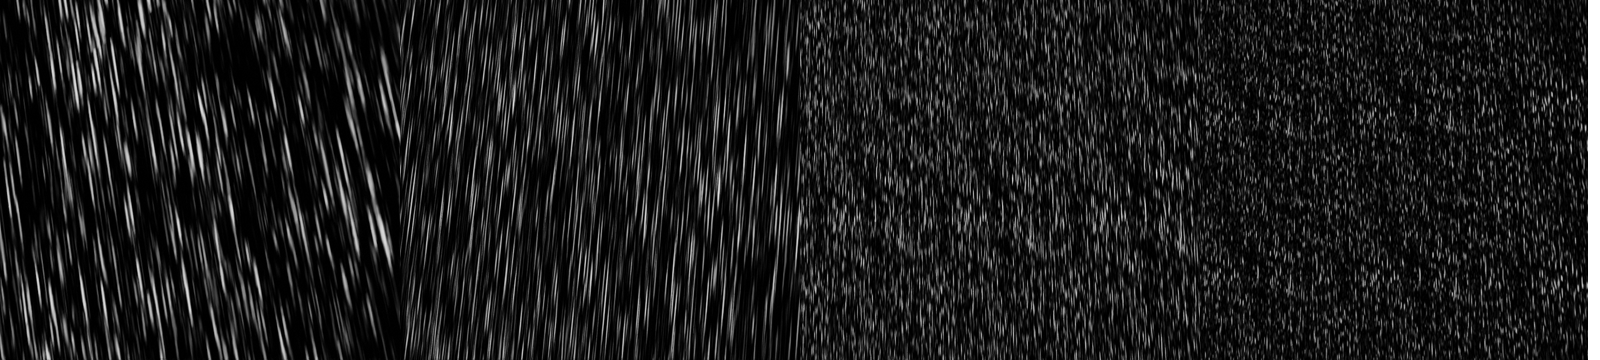
This R&D video shows the behavior of the different layers by enabling/disabling them, the “rain intensity” influence, the “layer distance”, and the occlusion tests.
The 3 stills below show respectively:
- no rain
- the rain effect enabled (similar to game play level)
- an exaggerated version to better highlight the layers and occlusions

Timings:
On PS3 the low resolution pass take around 0.40ms and the full resolution (the additional cost of the rain effect in the post process pass): 1.29ms for a total of 1.69ms.
On XBox 360 the low resolution pass take around 0.34ms and the full resolution: 1.38ms for a total of 1.72ms.
Timings are the same whatever the strength of the rain.
2C: Droplets on walls
As seen in the observation post, rain is not about just splashes, raindrops and puddles. Many objects interact with the accumulated water based on their curvature and environment. Adding all these elements increases the rainy mood. But compared to the other effects, they are generally less scalable and less controllable due to production time constraint. They are best suited for a known rain condition in an area. One can build them into dynamic rain models by blending in and out the effects, but they will not really be adapted to all weather condition. In other words it is better to know the rain level before adding water drips and interactions.
Most such interactions are usually created by FX artists in creative ways (and not always realistically and placed by hand in the scene). For example in the game Bioshock, dripping water is created with a cylinder mesh. Cascading water that interacts with objects is done with the help of 1D shadowmaps.
Here are some examples of how such things as water running down walls and glass was addressed by the team.
For example, to do droplets running down glass, the team used a sliding texture. The texture are sampled twice with two different translations and scales. The result is also used to enable a distortion effect. To get some view dependent lighting information they sample a low res environment cubemap and add it to the actual color.
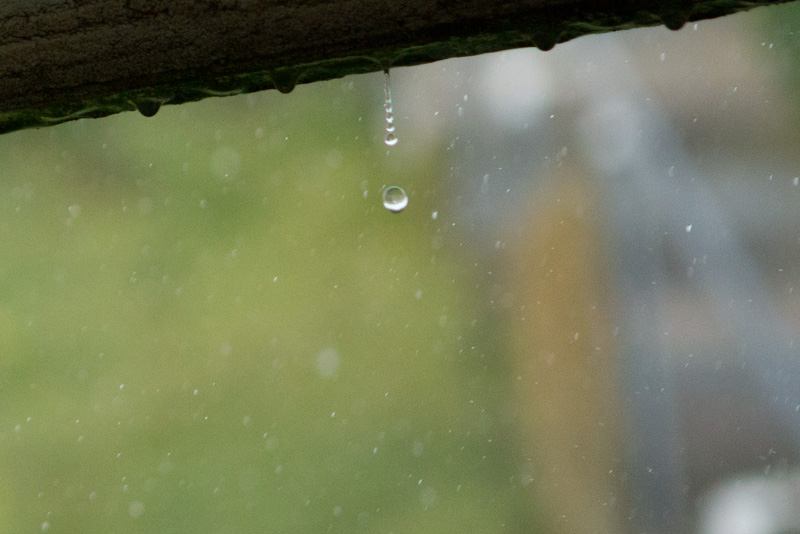
To achieve falling droplets was slightly harder.
 In the video above the falling drops are caused by water accumulated on an edge of a roof, but the solution was generic enough to be reused. A random location is taken on a thin cylinder. Sizes of the cylinder, size of the drops, the spawn rate are all configurable to adapt to different edge size and fixed weather condition.
As for droplets on glasses, the team used a low resolution environment cubemap for the lighting integration with a tint value. Below is a wireframe of the effect with the cylinder in blue and droplets in red:
This effect is similar to droplets on glass.
But in the texture:
• the blue channel is use for the water glide, and
• the green channels allow controlling the crack shape.
Camera droplets
“An important clue to immersion in a rainy scene is the presence of rain drops on the camera lens when the camera is facing upward,” explains team member, Laury Michel. “This kind of effect is always implemented in an artistic way in games. In order to achieve this effect, we first attempted to use a fullscreen postprocess blending a distortion texture when the camera looked upward, and then fading out the effect when it no longer did.”
This effect worked quite well except for two problems:
- it wasn’t that dynamic (apart form the fading in and out)
- It was quite costly
The second attempt was directed toward implementing some screen space effect using particles. This has the advantage of reducing the fill-rate needed and allows for more dynamic effects using the particle system framework (in the case of Remember Me that is Unreal Engine 3’s Cascade).
Drawing the particles directly in screen space is not easily done within the particle system framework. An easier approach is to draw the particles as if they were in view space (on the near plane in front of the camera) and link their transformation to the one of the camera. It has some disadvantages as well: changing the FOV affects the way those particles look for example as does changing the screen ratio. But these problems were negligible.
The effect can be seen in action at the beginning of the raindrops clip.
Timings:
The effect cost around 0.32ms on PS3 and 0.54ms on XBox360.

Part 3 of our special feature will be on the materials in these wet environments.
Parts of this article in a different form, were published on Lagarde’s blog. Mike Seymour worked with Sébastien to publish this edited version for fxguide.
(The longer version includes pseudo-code and can be found at http://seblagarde.wordpress.com)
I just wish the game developers would actually focus on making rain effects look great in all of the games. For now, we have studios like Bethesda who tell us it’s impossible to have rain collision in Skyrim due to engine limitations – and then some modder makes it happen?
The main problem is, “…it is still difficult to fit all the demonstrated effects into a modern PS3/XBOX360 playable game environment.” If studios would stop developing for consoles first instead of an actual computer, PC gamers would be able to have such effects. The studios could focus on making a game look even better than what we are used to, and then they could port it to console and downgrade the stuff consoles can’t support.
Instead, PC gamers get jipped because studios only care about the consoles. You hear it everyday, that is were they are focused. Even with the new next-gen consoles like the PS4 and Xbox One, PC’s will outshine both of them in a year.