Visual effects supervisor Bill Westenhofer, from Rhythm & Hues, recalls when Life of Pi director Ang Lee visited his office in August 2009 and asked whether a digital character looked better or worse in stereo. “We all kind of said, ‘We don’t know so why don’t we give it a shot?'”
That request set the wheels in motion to re-create the events of the novel by Yann Martel, in which an Indian boy Pi becomes stuck on a life raft in the middle of the Pacific ocean with a tiger, hyena, zebra and orangutan after the tragic sinking of their ship. Several visual effects companies brought to life the digital oceans, environments and animals required to tell this incredible story. In this article we delve into the work by Rhythm & Hues and MPC for the film.
– Above, watch a breakdown of some of the key visual effects shots in the film by Rhythm & Hues, in cooperation with our media partners at The Daily.
The ocean as a character
“The challenge for us was how to portray an ocean that’s as much a character as possible,” says Westenhofer. “This is the first film in a while that’s right there in the ocean non-stop for over 3/5th of the running time, so we had to find a why to deal with the ocean and the animals.” Along with Rhythm & Hues, MPC contributed key water simulation shots, including dramatic sequences of the ship sinking and for a sequence dubbed ‘The Storm of God’.
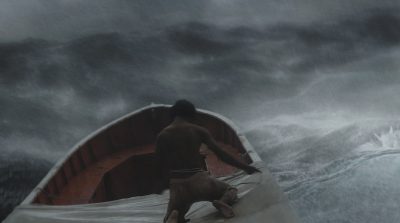
In order to establish just what role the ocean would play and how that would look, a great deal of research was undertaken. “We went out on a Coast Guard cutter off Taiwan to fairly rough seas,” says Westenhofer. “That was really great reference. We found that you could get swells that were 14 second periods and you could have long wave lengths but with huge volumes of water that will raise six or seven feet at a time.”
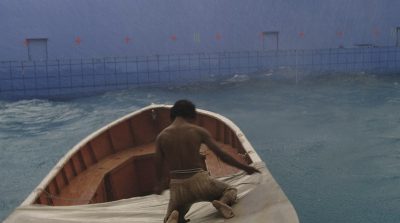
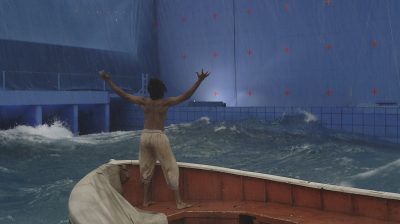
The research informed a bluescreen-surrounded tank setup in Taiwan that was 75 by 30 meters and three meters deep. To aid tracking, a painted grid half a meter in size was painted on a splashguard surrounding the tank. “We also placed a wave break at one end with tetrapod constructs piled up that helped kill the waves bouncing back,” explains Westenhofer. “We had a theme park company build a series of 12 caissons – large pistons that could suck water in and pump it out at varying rates, with varying wave patterns. The best we got was a four foot swell on 12 second periods.”
Click here to jump down to an in-depth interview with MPC visual effects supervisor Guillaume Rocheron on the remarkable Tsimtsum Sinking and Storm of God sequences in the film.
Solving for stereo
One of Rhythm & Hues’ biggest challenges was the fact that Life of Pi was shot on water AND in stereo (on the Fusion 3D rigs from the Cameron | Pace Group with ARRI Alexas). “Those two features don’t really play nicely together,” admits digital effects supervisor Jason Bayever. “The way they shoot the stereo is with two cameras – one goes through glass and the other one bounces off as a reflection. Because water is almost fully reflective, depending on your angle you get variations between the eyes. Another big challenge from that was, because it was shot on Technocrane, a lot of times there were no reference points to track to – we have a moving boat on moving water and you’re shooting looking down on it, it’s very difficult to track that boat and get characters to sit and get motions to appear.”
The solution was to set up two witness cameras at different angles on set which gave an overview of what was going on while shooting. Bill Westenhofer had all the cameras time-code sync’d. R&H artists then tracked the boat in the witness cameras first – not the main camera. “We got the placement of the boat in the world correct and the motion of the boats,” says Bayever. “We got that as close to perfect as we possibly could so when we looked through the camera, we were able to solve the camera because we had solved the boat.”
To match the left and right eyes, proprietary tools that pre-processed disparity maps, and manual checking, were employed via a stereo quality control department. “A lot studios will track both eyes independent of each other and fix it in the comp,” notes Bayever. “What we did – something we started developing on Yogi Bear – was that we would fix the plates ahead of time. That way as they go through the pipeline you have a near perfect stereo match between the eyes. When it gets to tracking the plates are clean, matching, have distortion pulled out of them. All tracking really has to do is take the on-set camera data and then solve for both eyes.”
Matching waves
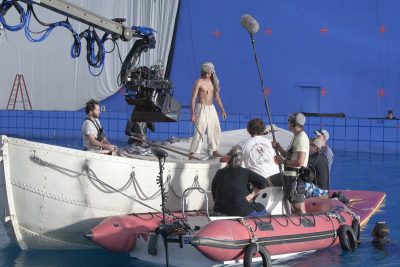
So much of the ocean surface featured in Life of Pi was digitally created. But of course many shots of the life raft were shot in a tank with a wave machine providing a lot of movement. That meant R&H had to match the look of the ‘practical waves’. “One of the first things we did was Bill shot the turbines running at different intervals and different settings,” explains Bayever. “So we had a bunch of footage with a locked off camera and we brought it back to R&H. We had our ocean layout guys match the waves with some procedural tools, match the frequency and get a CG version of what they shot on set.”
“Our procedural tools used a series of octaves of simulated wave patterns,” adds Westenhofer. “We could eventually get the patten of the tank waves to flow into our virtual water extensions because physics works as one expects. And then we had to develop systems for the white caps as well. For that we used something called the blotcher – it allowed you to selectively place different wave patterns and paint them in at various locations to add more realism to the backgrounds of shots.”
Watch how R&H modeled a digital orangutan.R&H also solved the rolling tank waves by overtaking the camera where necessary, since the tank was only three meters deep. “We made it look like Pi was on much larger waves and was actually in the ocean,” says Bayever. “The tank could only give you certain height of the waves. We overtook the camera and separated the raft from the boat sometimes just so we could have a large swell come in, lift the boat up, lower it back down and then come back through and lift Pi up and down – which was completely different than what they shot.”
Adapting their current Houdini and proprietary water sim setup was crucial to enable R&H to complete the film. “The way we’d done it in the past was stacking displacement maps on top of each other until we got a nice looking ocean,” notes Bayever. “In this case because we were matching a real plate, we came up with a more procedural in-shader way of doing it. We could get the water moving in different directions and interacting with itself all through this procedural shader, whereas before we had to stack displacement maps.”
R&H’s water tools are crafted in Houdini with a custom proprietary shader and a stereo visualizer added on top. Water and effects were rendered in Mantra. Since the creature work was created in their custom Voodoo toolset and rendered in a proprietary renderer called Wren, the pipeline had to join the systems to allow for say interaction and reflections on the ocean surface.
Skies above
The skies were also an important part of R&H’s water-based shot solutions. “Naively,” admits Westenhofer, “when we started the project I thought we’ll just go grab a bunch of HDRI skies off the web. To my dismay there were barely any and those that did exist weren’t of great quality. So someone’s job had to be – go take our HDRI rig modified to shoot eight different directions with six exposure settings which combined into a 15K HDR skydome that we used as our backgrounds. Someone went to Florida, sat on a beach and waited for nice skies to come along and take pictures. If you can get a gig like that in the visual effects world, all the power to you!”
Listen to Bill Westenhofer talk to Mike Seymour in our fxpodcast.
Animating a tiger
For animation director Erik de Boer, Life of Pi was the culmination of years of animation work at the studio. “The only conclusion I could make was that this was a project we had been rehearsing for since the Babe movies, really,” he says. “I realized we had so much experience built up in the animation team that this would be so fun to do.”
R&H reference multiple sources for tiger motion and lookdev. The live action / on set tigers were provided by French animal trainer David Faivre, so a team flew to Paris over two years about to spend time with the tigers and collect video footage. “For each shot I would try to compile clips and selects from that reference footage, and then use that in the kick-offs with the animators to inspire them,” says de Boer. “We also had a lot of clips that dealt with generic tiger motion, such as swinging tails or leaping up or down, even just clips that dealt with testicles and they wiggle underneath the tail!”
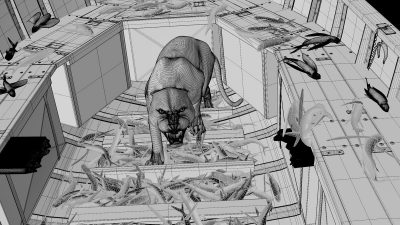
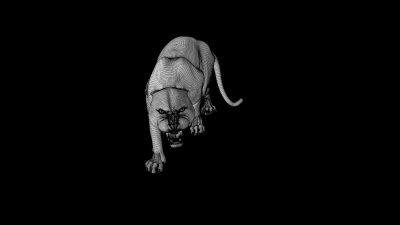
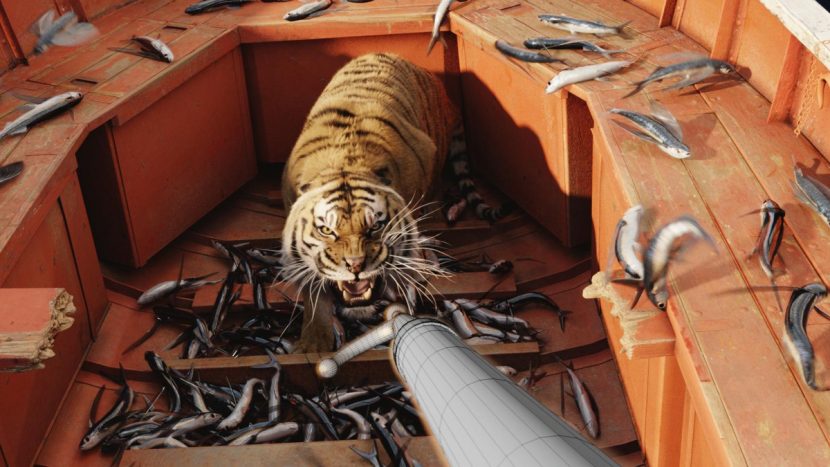
A crucial aspect of the reference footage, which also came from the tigers when on-set, and from various documentaries, was the fine detail for specific actions. “We got some incredible shots of rolling paws, yawns, eye twitches, lower-jar stuff – all the close-in detail,” says de Boer. “On the tiger, the paws were incredibly expressive. The way the nails protracted and darker fur would come out with those nails – the pink of the nail. Now when we collide with the ground we can see the shape change, the anger and aggression.”
On set, de Boer also helped with interaction by standing in the boat with Pi actor Suraj Sharma. “There’s a sequence where Pi is fighting Richard Parker over a tuna which lands in the boat and Pi uses a boat hook which he sticks down Richard Parker’s throat. I was on the boat pulling and pushing with the boat hook trying to make sure it looked believable. What is interesting, I would hear over the radio, ‘Harder, harder’ more often and we were literally pulling and yanking as hard as we could. Some of the stunt guys were helping me too, but when you look at the monitor it just felt soft and sloppy. So that was a fun realization that you just can’t push it enough.”
“And then I spent some lovely hours on my hands and knees in a half-soaked boat with real flying fish in 90 degree heat,” adds de Boer. “To be able to have that physicality and experience – normally we just hold a mouse or a laser pointer – so that was pretty special. Some of that hard work and motivation on the set was great to carry back to the team.”
Tiger animation pipeline
Voodoo, R&H’s proprietary VFX toolset, was used for animation. Richard Parker’s face was one of the key aspects concentrated on, according to de Boer. “The facial rigging on him was a combination of a more muscle-driven underlayer with more blend shapes on top of it, and those blend shapes were partially created again in a procedural way. We would have the modeler sculpt those blend shapes for aggressive snarls. The little tabs these tigers have on their lower jaws that get pulled in on snarls – we had great reference of all of that and then we would let a modeler run with those and would art direct them until we were happy. On top we had a procedural way to make sure the distribution of polygons was true and naturalistic.”
See how R&H created the attack on the hyena.Another important aspect was Richard Parker’s interaction with the environment. “I was always encouraging the animators to collide the side of the tail with the boat or to have the tail flip over the side of the boat, or to use the oars and animate them and let the paw balance on them,” says de Boer.
“Tigers are very much a sinewy body surrounded by a loose bag of skin,” outlines Westenhofer, referring to the muscle and skin setup for Richard Parker. “There’s a muscles system and a two pass skin solve – one that gets tugged by the muscles and moves around and then a dynamic sim that would hang off that and allow the skin to slide over the surface to wriggle up with various folds.”
Rendering fur
R&H added to their workflow the ability to sub-surface scatter through fur for Life of Pi (the studio’s proprietary renderer Wren was used to render Richard Parker). “The sub-surface looked so great, because it just softened out the fur a little bit and gave us the ability to have the light penetrate deeper into the tiger and his fur,” says Bayever.
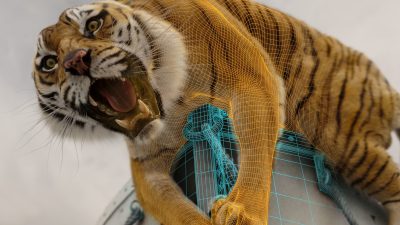
Richard Parker was mostly raytraced and fully ‘diffuse reflected’ his environment. The studio also implemented area lights for all the furred characters on the show. “As he got closer to the tarp, for instance, you got a bright bounce off the tarp bouncing to his chin,” adds Bayever. “As he moved closer to the orange seats, you got an orange bounce off that.”
We used as much HDRI as possible. Because it was shot on a fully bluescreen set, the HDRI was useful in terms of what the boat was lit with, but we couldn’t actually use them because we’d have blue spill on the tiger. So we actually painted and created HDRI on the show. We worked out a procedure to get a higher dynamic range into and out of Photoshop so that we could then light using these painted environments.”
Mixing sims – how to create a wet tiger
One sequence featured Richard Parker half submerged in the bottom of the life raft, which called on R&H to integrate water and fur sims. “The challenge was that the water simulations are run in Houdini but the fur, muscle and tiger are all proprietary,” explains Bayever. “In order to get a tiger that is in water and the hair being swished around just like the water is moving it around and the sim at the same time over the tiger – do you start with animation or simulation? In most cases we started with a very quick pass of the water simulation in the boat. We then passed that simulation off into animation.”
“They then animated the tiger in the simulation, and that would get passed back to effects so they could re-run the simulation and get all the water interaction and the waves over and sliding over the back of the tiger. Effects would provide velocity fields to our tech anim department and run the fur through that. We would actually have the ability to get the fur that’s outside the water stick to the top of the tiger like heavy fur would and the fur that’s under the surface would move around like it’s underwater, slowly like fur would.”
A zebra, a hyena and an orangutan
Richard Parker is of course the starring animal of the film, but R&H also created many others, including the key characters of the zebra, hyena and an orangutan on the boat. The zebra, seen also in the ship sinking sequence as an MPC asset, is dispatched early on on the life raft by the hyena. “We did have an animatronic prop built by Legacy Effects and shot that in the boat,” says Westenhofer. “We ended up replacing it in many of the shots for added interaction.”
For the orangutan (OJ), reference came again from real life. “She’s a metaphor for Pi’s mum and we had to add that to a few places,” explains Westenhofer, “right before she gets dispatched by the hyena she gives a look and that was the one time we let a little bit of anthropomorphism kick in as representative of the last look Pi gets of his Mum as she gets killed.”
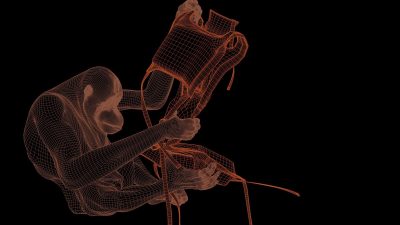
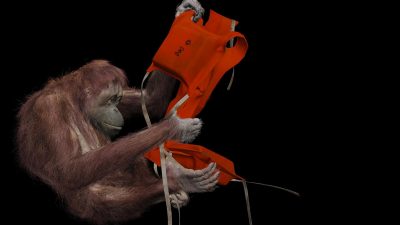
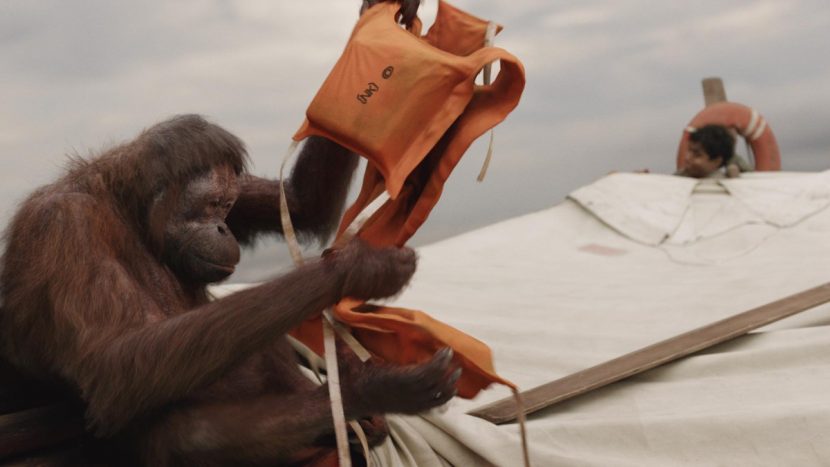
The hyena, modeled as well on real reference, had to perform quite exaggerated moves for one scene in which gets overly excited running back and forth on the boat. “We had a real hyena named Vlad,” says Westenhofer, “and if you tickled her she would laugh and she would expose her teeth but it looked like the most ferocious thing – she’d make a squealing sound and she was actually happy.”
Making fish fly
In the flying fish sequence, there are tens of thousands of fish flying and slamming into the boat and hitting Pi and Richard Parker and landing inside the boat. Because of the sheer number of fish in the scene, it became one of R&H’s most complicated Massive set-ups they had ever tackled. “They had to run the Massive sim at 120 frames per second,” says Bayever. “Because the fish travel such a long distance over a frame, then if at the beginning of the frame it was outside the boat, and then at the end of the frame it was on the other side, it wouldn’t hit the boat and bounce off and land into the water. So they had to run it at 120 fps so they could get samples throughout the frame, so if it hit the boat it would bounce off and land in the water.”
Watch the flying fish sequence.Tweaking was also necessary to make sure the fish could interact with the rolling waves and go on top and underneath the water. “Massive can only take in a single frame piece of geometry to interact with, well, it can take in multiple frames but the waves and the oceans were so huge it was difficult for Massive to deal with,” says Bayever. “We had waves going over, and the fish would have to ride up and down on the waves – they couldn’t just fly through a wave.”
Whale of a time
In one spectacular shot, a whale breaches the surface and jumps over the boat, illuminated via a bioluminescent ocean surface. “The whale breach has a slightly overcranked feel, a slightly slow motion feel, and to get that weight into that animal is tricky,” says de Boer. “To push the drama and make it spectacular we just pushed the height of the jump. And the whale comes out of the water completely and it looks cool.”

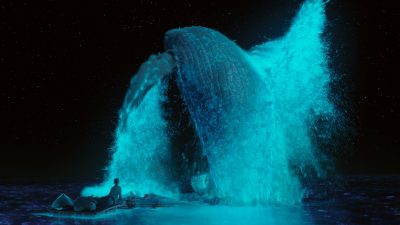
“The bioluminescence itself had to illuminate everything in the scene,” adds Bayever. “We weren’t using the lights necessarily, but for the most part the whale and inside the whale’s mouth had to be lit by the same bioluminescent volumes that were in the scene. As we moved through it we could see the lights lighting the whale.”
Island challenges
Pi eventually reaches an island inhabited by thousands of meerkats. “The challenge here was geometry,” notes Bayever. “It was a big intertwined island of roots and trees, and thousands of meerkats and water simulations. You can’t have roots that are low-res or cheat, because of the stereo. We had to create an instancing property for geometry to let us put in hundreds of trees and roots.”

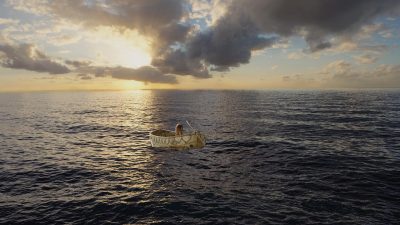
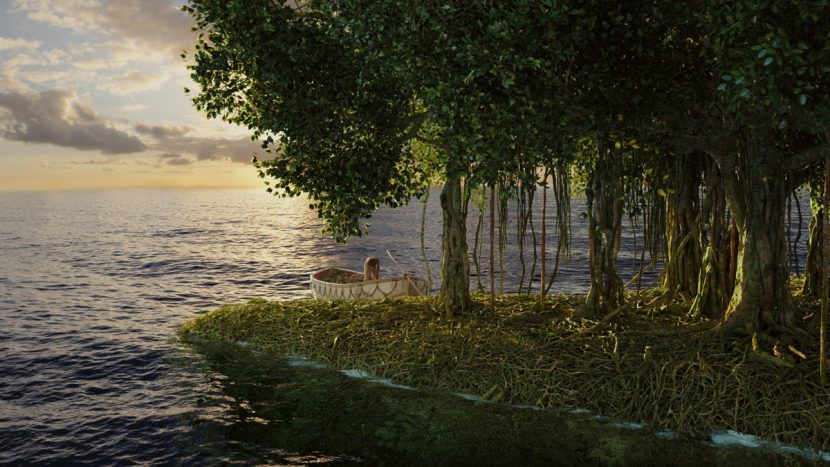
The meerkats were created via a mixture of Massive and keyframed creatures. “I think I’ve seen every episode of Meerkat Manor at this point as reference,” jokes Westenhofer. “But the sequence was a lot of fun.”
The meerkats also had a particularly emotional impact on de Boer’s contribution to the film. “Two years ago I pitched an idea to Ang which was a meerkat sitting on a branch and instead of him sitting on Pi and waking Pi up he loses his balance. We had seen this looking at the reference where they fall asleep sitting up, and they almost lose their balance, catch themselves. I saw the shot finally rendered and I just realized what an incredible trip this has been.”
A breakdown of the meerkats sequence.How MPC served up some storms
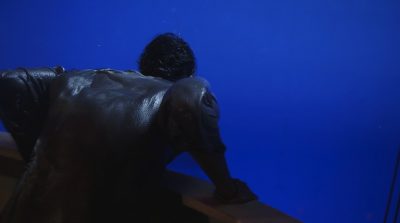
MPC visual effects supervisor Guillaume Rocheron breaks down the water sim work for the Tsimtsum Sinking and Storm of God sequences in the film.
fxg: What kind of previs and concept art did you receive from the production for the storm sequences?
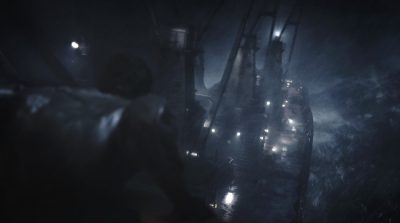
Rocheron: The Tsimtsum Sinking and Storm of God sequences were fully prevised by Halon. Ang spent roughly a year on the previs for the ocean sequences in the film. When Pi is in the ocean, everything is shot in a wave tank surrounded by blue screens, so previs was key to block continuity, lighting direction et cetera.
There are very little references of ships in hurricane-like storms, so we did spend a lot of time internally finding out what oceans look like in different conditions using similar methods to how we would research character studies. Using the ocean footage we found, and all of the documentation available on ocean conditions, we sat with Bill Westenhofer, the overall visual effects supervisor, to break down the sequences and identify the ocean characteristics that would allow us to tell Ang’s story.
fxg: Tell me about the lifeboat dropping shot. How was the shot planned and what was filmed as live action?
Rocheron: Right from the start of the project, we knew we would have to make a very good digital double of Pi for shots like this and shots that would feature the size of the waves clearly, which made them impossible to reproduce in the wave tank. In that dropping shot, Pi falls 40ft or 50ft in a couple of seconds and there was clearly no way to shoot that. The first part was shot on a blue screen with the camera pulling back away from the lifeboat and Pi falling down. We then transition to our CG lifeboat and Pi as just you start seeing them moving down to get a correct sense of acceleration which required some careful keyframing, but also to marry with the original footage. The Tsimtsum and the ocean are of course CG.
fxg: How did you approach modeling CG versions of the Tsimtsum, lifeboat and CG Pi?
Rocheron: The Tsimtsum was built from very detailed production art department blueprints. Because the ship would be featured close up when Pi is still on the deck and when the Tsimtsum starts to sink and the sequences following, we had to make very detailed builds of most sections, both inside and out. Our texture team shot thousands of tankers pictures in the Vancouver bay for reference. The lifeboat was originally built by R&H, so we shared this asset with them and conformed it to our pipeline. Pi was built from cyberscans and cross polarized texture shoots. We also did FACS session with 3 cameras to have good references of his face.
fxg: Can you talk about how you managed the wave simulations for the storm sequence – how did you art direct some of the waves while maintaining the efficiency of sims?
Rocheron: The art direction and the scale of the sims were our 2 main challenges when we started the project.
The first thing was that Ang really treated the ocean as a character. As all characters, we needed to have flexibility to make it perform as the story required. Fluid simulation based shots are traditionally a very counter-intuitive process to go through for a director due to the fact simulations can change from one iteration to the other, which can become a real problem if it starts changing timings or events that you wanted to keep. Because our shots were mostly sitting on the CG ocean, it was key to be able to lock our wave layout and composition while providing Ang with a way to design and choreograph the shots, especially knowing how precisely storytelling events would have to be timed.
From the previs, we knew we would have to deliver almost 12 minutes of digital storm in native 3D, with waves that were 45ft high, 820ft long, with a lot of sprays, mist and white water everywhere. Those 12 minutes were spread amongst only around 100 shots, which shows how long most of the shots were because Ang really wanted to immerse the audience into the 3D footage. That proved to be a great challenge in terms of how far we had to push the amount of details since there is a lot of time to stare at everything.
Such a grand scale of wave size wasn’t achievable in the wave tank used for principal photography, and even though it provided us with invaluable references and details, we had to replace the real water with our CG ocean in all of the storm shots. After the camera and the lifeboat were tracked, we’ve had to retarget the motion of both so they would float on the much larger waves.
Our FX and R&D team worked with Scanline on a new water surface simulation method we called “Refined Sheet”. Using a heightfield or geometry representing the main ocean shapes, we were able to emit a thin sheet of voxels to simulate the water flow and the various interactions. The major advantages for us were that the water solve would be based on a pre-existing layout, which would allow us to lock the shots pre-simulation but also to concentrate our computing power only on a few feet of water depth instead of the full ocean from top to bottom which gave us the room to increase dramatically the level of details.

Our R&D team put together a layout toolset based on Tessendorf deformers and Gestner waves to allow our artists to create a non simulated, geometric representation of the ocean, with a lot of controls to tweak every single component individually. We would start with a pre-established ocean template, with realistic properties in terms of wave size and timing but we were able to add, remove, shape or keyframe individual waves. We really ended up treating the ocean like a character, having layout artists and animators keyframing the base layer of waves that would then drive our final simulation. We were able to animate that base layer, review it with Ang and Bill and lock the shot design and layout before we started the simulation work, which was a real game changer for us. We would then sim the water surface using our Refined Sheet technique and then simulate what we are calling elements: based on the now simulated water surface, we would emit spray, that would become bubbles when colliding back with the surface or mist if caught by wind. Bubbles would then become foam when rising up to the surface. The amount of wind in hurricane like conditions, got us to simulate a wind field above the ocean surface, to fill the atmosphere with mist picked up from the ocean spray and rain. We ended up spending a lot of time simulating all these since these were the key to the visual complexity of a storm.
Even though this work was a huge technical undertaking, it was always about telling the story and Ang was always here to remind us what was important to him and direct us to make this film as visually stunning as it is!
fxg: What other kinds of modifications to Flowline and MPC’s fluid sims tools were necessary?
Rocheron: We wrote a completely new adaptive meshing system for the water surface so we could render the very large water surfaces with a maximum of details, but also add displacement maps on top of them additional details. Rendering the huge quantity of elements proved to be a challenge and we wrote custom renderscripts to parse to data as efficiently as possible to the renderer. We simulated and rendered up to 1.5 billion water particles in a single shot.
The implementation of a full deep compositing workflow also allowed us to split renders for efficiency reason and re-assemble everything correctly down in Nuke. There were so many transparent layers of spray, rain, mist that it proved to be extremely useful to accurately assemble everything in 3D.
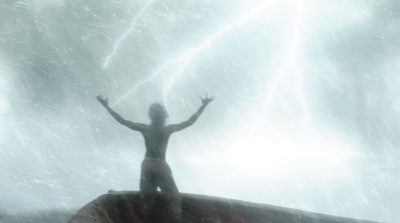
fxg: How did you approach underwater shots, in terms of the shooting the scenes and the look and feel of the environment? Can you talk about any assets shared here with R&H?
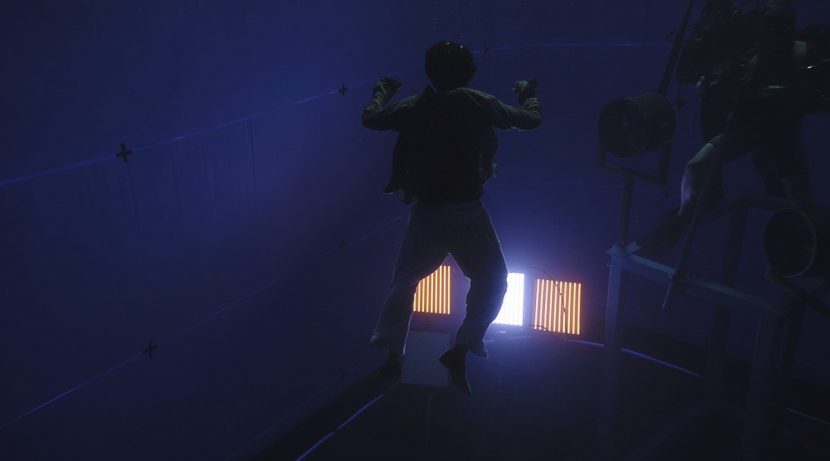
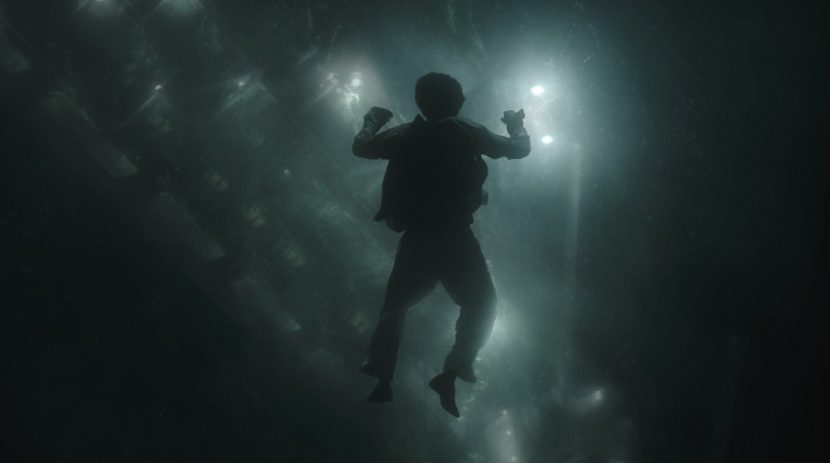
Rocheron: There was a special deep tank built to film underwater shots. For the shot where Pi stares at the Tsimtsum plunging into the deeps, he was filmed against bluescreens in the deep tank, with light sources at the bottom to emulate lights from the sinking ship. We then re-animated the camera, to increase the depth Pi swims to and the amplitude of the move and transition to a CG Pi at the end of the shot to bring him back to the surface that was now meters away. The ocean surface was simulated as per shot above water and thanks to the way elements were simulated we actually rendered the bubbles and the foam sitting on the surface. A special simulation was done for the crashing wave from that angle, which was that rolling wall of bubbles. To help sit Pi in 3D, we simulated underwater murk and plankton. It took a lot of lighting and compositing care to balance the visibility of the Tsimtsum, how they would illuminate Pi, the surface and the plankton.
We shared a few assets with R&H. We were in charge of building the digital Pi and the raft and they provided us with the zebra and the lifeboat. Some of these assets being very hero, it has been a tight collaboration to ensure consistency of the look between our sequences as generally fur and muscles and shaders are things that have to be re-done because being proprietary to each studio.
The art of visual effects
Along with Rhythm & Hues and MPC, other vendors on the show included:
– Buf, responsible for the tiger vision sequence where Richard Parker peers down and sees a squid and whale attack that then becomes a stylistic move through various fish, plankton and even a ‘galactic’ view of Pi’s mother.
– Crazy Horse Effects, which handled matte painting and period work.
– Look Effects, completing composites especially in the ship’s cargo hold.
– Christov Effects, which worked on a comic book inspired shot.
– Lola VFX, using its expertise in body manipulation to emaciate Pi for scenes in which the end looks nigh for him and Richard Parker.
– yU+co, who created several stereo montages and dissolve elements.
– An in-house compositor, and additional stereo work by Reliance Mediaworks and Stereo D.
The visual effects crew on the show all collaborated to bring the most important thing to the screen – an interesting story. “In one of first meetings at Rhythm & Hues with Ang,” recalls Bill Westenhofer, he said ‘I look forward to making art with you.’ This was really for me one of the most rewarding things I’ve worked on and the first chance to really combine art with VFX. Every shot was artistic exploration, to make the ocean a character and make it interesting we had to strive to make it as visually stunning as possible.”
All images and clips copyright © 2012 20th Century Fox.

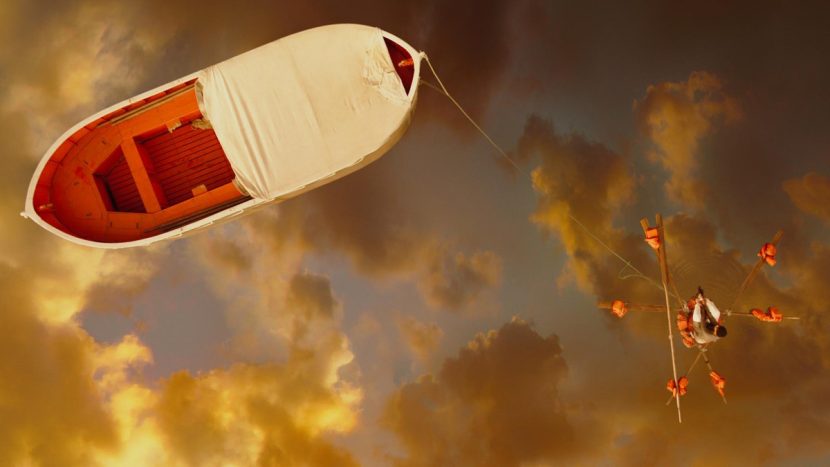
“So someone’s job had to be – go take our HDRI rig modified to shoot eight different directions with six exposure settings which combined into a 15K HDR skydome that we used as our backgrounds. Someone went to Florida, sat on a beach and waited for nice skies to come along and take pictures. If you can get a gig like that in the visual effects world, all the power to you!”
I did 8k HDRs for Pi in Hawaii, and it was quite the experience. I got R&H equipment for my vacation, and Rhythm got copies of the HDR skies. The tripod, auto-panohead and camera weighed the backpack down quite a bit as I hiked around the islands, and many times I was also carrying my laptop. I still intend to write about the experience, but have yet to find the time… It turned me on to 360×180 photography however, and now I have my own pano head and do it for fun. Most of my skies I donated to R&H for Pi ended up being cut from the movie though- oh well!
http://www.360cities.net/image/waikiki-waves-hawaii
http://www.360cities.net/image/waikiki-beach-at-sunset-honolulu-oahu-hawaii
http://www.360cities.net/image/pu-uhonua-o-honaunau-national-park-lava-delta
http://www.360cities.net/image/south-point-sunset-hawaii (One of my first attempts at stitching- still has wacky colorspace issues)
http://www.360cities.net/image/south-point-field-hawaii (colorspace issues again)
Find more there:…
[…] What host are you the use of? Can I am getting your associate link on your host? I desire my website loaded up as fast as yours lol[…]…
[…] can be seen in just about every major blockbuster today. A great example of this is in the movie Life of Pi, where just about the entire movie took place on a CG ocean. Significant time and attention to […]
[…] Oscar-winning cinematography was actually shots of flat blue walls that were replaced with completely original renders from the Rhythm & Hues […]
[…] http://www.fxguide.com/featured/life-of-pi/ […]
[…] It is testament to ‘Rhythm & Hues’ VFX studio that the special effects also offer unforgettable characterisation that is both realistic and somehow larger-than-life, a poignant part of our story given their concurrent upset and bankruptcy (see: Life After Pi). ‘Richard Parker’ is so spine-tinglingly real it is hard to spot the differences between the very high-tech CGI and the few authentic shots. The tiger, never anthropomorphised, demonstrates fear, threat, hunger, languor and suffering, its muscles and movements painstakingly constructed with immense attention to detail. Amazingly the ocean becomes a character as well, and what a visually staggering character and set piece it is, dominating 3/5th of running time and ranging from beautifully serene calm to terrifyingly fury, always indomitable. For further astounding special effects details click here. […]
[…] Guide has an extensive write up, featuring several exclusive videos, on the stunning visual effects work that went into creating the oceanic world of The Life of Pi. The article is pretty long, covering […]
[…] http://www.fxguide.com/featured/life-of-pi/ […]
[…] dilakukan di kolam tersebut dengan menggunakan krane yang menggoyangkan dek kapal. Berkunjunglah ke artikel ini untuk melihat bagaimana Rhythm & Hues, yang dipimpin Bill Westenhofer, membentuk semua visual […]
Thank you for a truly in-depth article on this amazing movie and the unbelievably talented people that created it. I’m only an old audio editor, but CGI amazes the bejeezuz out of me. I bought the movie as “pre-viewed” from the Dollar Store, so I didn’t get the 3D bang, but still, I would have sworn to any God available that the tiger was real. Obviously not in shots with Pi in them, that would be dangerous, but I would have sworn it was all intercut with a real tiger. And when I found out the orangutan was never real at all, I had to watch those scenes again. Would never have believed it it they hadn’t said it in the Special Features interviews on the DVD. So sorry the company went chapter 11, they are truly artists. Thanks again for your article, several years after the fact.