fxguide delves into the virtual production behind Jack the Giant Slayer, Bryan Singer’s re-telling of the classic fairytale in which farmboy Jack (Nicholas Hoult) finds himself in a very different world and charged with recusing princess Isabelle (Eleanor Tomlinson) of the Kingdom of Cloister. Digital giants, CG beanstalks and entire new worlds were overseen by visual effects supervisor Hoyt Yeatman, with several houses including Digital Domain, Giant Studios, The Third Floor, MPC, Soho VFX, Rodeo FX and Hatch Productions contributing.
Giants front and center
The story called for around 100 giants, eight with full speaking parts. A performance capture pipeline was chosen to bring the giants to life, and for that Digital Domain worked closely with Giant Studios and The Third Floor to rely on virtual production techniques that would fit into a live action film.
“We managed to combine all of our expertise and really launch into full, unadulterated performance capture where we were doing body and facial simultaneously so the actors were free to move about in any sized volume,” says Digital Domain visual effects supervisor Stephen Rosenbaum. “Then we even went as far as employing Simulcam techniques on the live action sets – taking the pre-recorded performance capture onto a live action environment to interact with live action characters.”
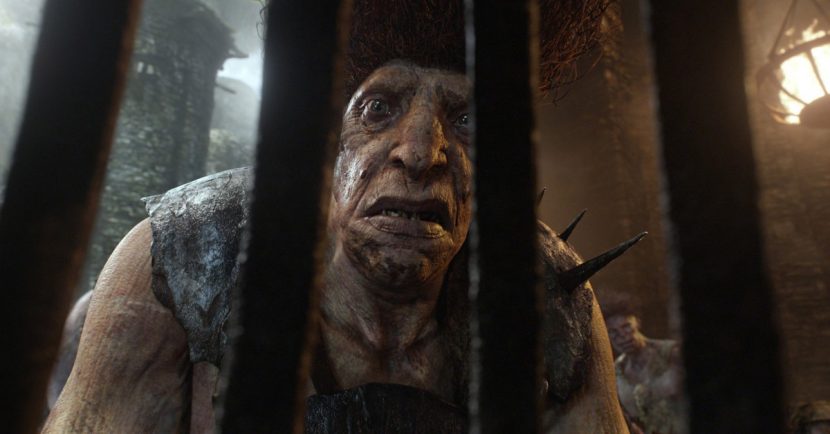
So how did they do it? The process essentially involved four main steps.
1. Pre-capture – a performance capture shoot with the actors playing giants took place in London where Giant Studios, Digital Domain’s Virtual Production Unit and The Third Floor worked together to do body capture, facial capture and render a virtual environment in real-time for Singer to compose shots.
2. Live action shooting – live action principal photography took place and made use of Simulcam tech and the earlier pre-capture to help the human characters interact ‘virtually’ with the giants.
3. Post-capture – a further performance capture session informed by the live action shoot made use of background plates to continue to acquire giant performances.
4. Giant building and world building – Digital Domain took the performance capture and turned it into living, breathing giants to inhabit the giant’s world of Gantua (and later Earth).
Step 1: Pre-capture
The pre-capture process produced shots in which giants would be ‘leading’ the scene, or where the shot was to be realized as completely CG.
The mocap volume
A mocap volume was spec’d by DD and Giant Studios and then built in London from scratch. Two inches of plywood was placed on the floor for actor comfort and for drilling in set pieces to be locked down, on top of which good quality carpet was placed. A set of trusses held the mocap cameras, and lighting was generally made to be diffuse with dimmers (since the performances would also be captured by witness cameras). Giant Studios also established a smaller accompanying mocap stage used to calibrate the performance capture actors.
The mocap volume was linked to editorial and to DD, Giant Studios and Third Floor systems – naming conventions and time code were vital. “All devices on set are fed the same master time code feed with individual timecode processors to delay or advance that timecode depending on the device,” says Digital Domain Virtual Production Supervisor Gary Roberts. “For example, most video cameras require a one or two frame delay to the time code to bring their timecode burn in/metadata in line with what the camera sees as timecode through the lens when looking at a smart slate. The same is true for all devices on set. Lots of synch checking during prep allowed us to figure out these delays.”
Digital environment and performer setup
Prior to the performance capture, DD provided The Third Floor with a detailed survey of a live action environment. The Third Floor then constructed a virtual version of that to go to Giant Studios who would use the CG sets for precise layout during capture, acting as a Virtual Asset Department. “From our experience on Avatar, we knew the job of creating previs assets was probably 90% there as being your realtime asset for the performance capture,” notes Third Floor previs supervisor Eric Carney. “A lot of tech for building a previs asset is the same for building a realtime asset on stage for mocap.”
DD scanned and acquired reference material of the actors who would be portraying the giants, creating CG real-time motion capture puppets of the giants based on the actors playing them. “From those sessions, we got a handle on their physicality,” says Roberts. “We’d get 3D prints of their heads and pull vacuform masks which we then use to figure out our makeup strategy for facial markers for the performance capture.”
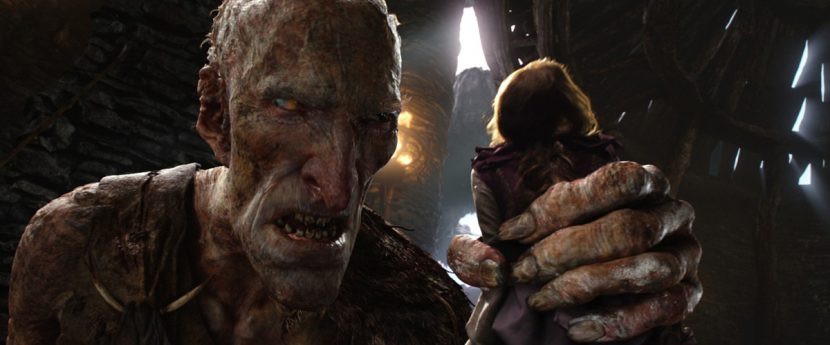
224 tracking feature markers were placed on the actor’s faces, then transposed to a mask so that every day of shooting the same-positioned markers could be applied through holes. 3D busts helped with creating form fitting helmets for the face mounted cameras, and custom suits were also built.
In addition, eight witness video cameras were set up and positioned around the actors for angles that would match coverage like a live-action shoot. “You’d use a virtual camera to compose your master or wide shot, and then use the HD cams to setup some coverage angles,” says Rosenbaum, “like an over the shoulder on one character and then the reverse angle on another character or a two-shot and so forth. That worked not only as reference for us downstream as we were processing all the mocap data but also again for editorial purposes helping them assemble the scene quickly using the HD reference.”
On-set virtualization
Taking in The Third Floor’s digital assets and DD’s digital giant puppets, Giant Studios’ on-set real-time vizualization system then came into play. Giant calibrated a statistical kinematic model for each actor that enabled their system to accurately track and solve a virtual version of each actor’s skeleton in real time – which was then re-targeted to the appropriate digital giant mocap puppet.
The animation of each giant, and captured props and the virtual camera movements, were streamed to Motion Builder, which was used to visualize the giants in CG backgrounds in real time. This feed was striped with time code matched to witness cameras, sound, mocap and facial cameras. It was recorded via video assist for playback purposes.
Watch a clip from the film.Facial capture
While Giant Studios was capturing the gross body movements, Digital Domain’s Virtual Production Unit handled the facial capture via stereo face cameras. “They were offset from the face at a 45 degree angle and that gave us true 3D information on the face,” says Rosenbaum. “It also gave us a good view around the side of the jawlines and the lips from a profile position, so you could see how the characters expressed and hit certain types of dialogue moments. A simple example would be if you said the word ‘moo’ – if you hold that ‘ooo’ out your lips curl and it’s really tricky to see what the lips are doing unless you have a view from the side. This gave us really nice precise information about how the actors were performing and delivering the dialogue.”
DD later created ‘Kabuki’ faces, static face meshes with the video output from the facial cams projected onto the mesh. These were provided to Giant Studios for the real-time version of the performance captured scenes. The video projections meant the actor’s performances could be seen by the director and other filmmakers, allowing them to view subtle movements such as eye blinks, and would also would help editorial craft shots.
Scaled performances
A major issue to overcome, of course, was the need to transfer the movement and actions of human actors to giants who would, in some cases, be up to 24 feet tall. DD and Giant Studios carried out a number of tests in the motion capture volume aimed at creating scaled environments, like a forest or kitchen, and props for the actors to hold, even ones representing humans being eaten by the giants. They also had to provide ways in which the actors could slow down their performances (such as through weight belts).
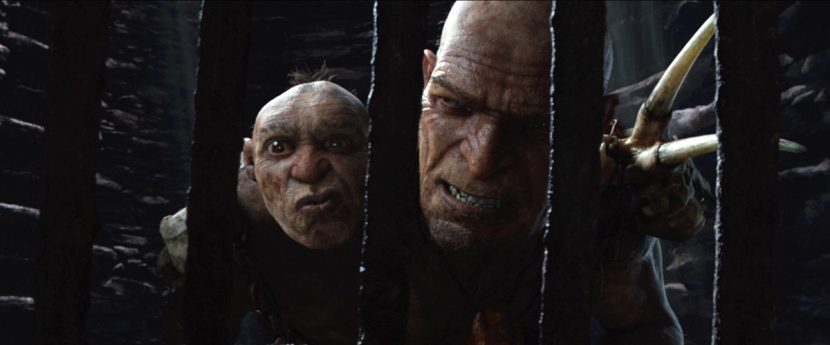
“We ended up with props on set for the virtual production that were the right size, weight and texture and also offered the right resistance to a human actor when playing a giant,” explains Roberts. “All of this included slow-down of actors’ performances to make the giants look right in frame. Seeing Cornell for the first time as Fee bend down and pick up a sheep and then a human-sized prop was a sight to behold! And it really did bring a level of believability to the performance and helped the actors understand the sense of size and majesty that the giants have.”
Performance assembly
Editorial would ingest the witness camera footage from the mocap volume. They also recorded the realtime render from Motion Builder of the giants in the virtual environment. This would then be turned over to Digital Domain and Giant Studios in the form of EDLs and QuickTimes. Then Giant Studios would produce the 3D motion of the actors re-targeted to the character. Digital Domain produced the kabuki faces, which were married with the other mocap altogether by Giant and given back to editorial. The result was a realtime 3D file which represents the form of assembly selected by editorial and can be used on set for realtime renders with Motion Builder and a live composite from the film camera.
Step 2: Live action photography
Shooting took place in various countryside locations in Britain and in sound studios. The film was shot in native stereo on RED EPICs with the 3Ality 3D rig. As it had done on Real Steel, Giant Studios employed its Simulcam system for live action sets – meaning that the filmmakers could see a real-time composite camera output on the monitor and compose shots accordingly. This was used on several shots, although some areas of filming were unable to be fitted with the optical-based system due to historical or physical sensitivities. “For these occasions,” says Rosenbaum, “they developed a small piece of hardware with a collection of inertial and gyro sensors that could attach and interface with an encoded crane. This resulted in a much smaller on-set footprint and allowed us to simultaneously shoot live action plates of giant performances in environments where little more than a camera was allowed.”
See how performance capture and on-set performance came together in this clip.How Simulcam worked
First, the giants’ performance had already been captured and cleaned up by Giant Studios. “These performances were selected by editorial as part of the performance assembly process from the pre capture sessions,” explains Roberts. “Digital Domain’s Virtual Production Unit created the kabuki masks and helped integrate this with Giant Studios into the real-time 3D scenes that were brought to set for principal photography. For the key shots that required Simulcam, Giant Studios and Digital Domain spent a lot of prep time with the principal cameras and encoded camera heads. A model of the prime lens kit was needed to understand the camera, along with knowledge of principal point and camera intrinsics. These were then modeled and matched in Maya and Motion Builder so we had a 3D version of the film camera with matching lens kit.”
“Once this is achieved in real time through Motion Builder we are able to match the real camera with a digital virtual version,” continues Roberts. “Now all we needed to do was to capture the position and orientation of the real camera and track that for the digital version. This was achieved in one of two ways depending on the shot paradigm and methodology used. For some shots we utilized Giant Studios’ optical motion capture system to track the camera. This was achieved by a proprietary system which involves LED’s placed on the camera itself that were tracked by small machine vision cameras alongside and a custom gyro unit.

“The combination of the two technologies enables a reasonable camera track to be achieved in real time which is fed into motion builder to drive the digital camera. Some shots used a more traditional encoded camera head and crane to track the principal camera and feed the tracking info as metadata into Motion Builder. Some of the technology battles that were fought with both techniques using Simulcam were nearly always environment based. Wind and rain did not real help the situation, but we managed to work our way around them!”
The Cathedral was one such place that the normal mocap cameras could not be rigged. “So what Giant developed was an IMU – an inertia monitoring unit – that attached an encoded head on the Luma crane, and subsequently the footprint doing Simulcam became limited just the camera crane itself,” explains Rosenbaum. “You could take a shot where you were tracking at floor level for 10 meters or so along the ground and then booms up four or five meters in the air at the precise time that Fallon turns into the lens. We’d run the camera, then run the playback of the the pre-captured motion of Fallon, and you could see the two on the monitor through the eyepiece happening as a composite simultaneously as if it was happening on the day together.”
On-set interaction
To help connect eye-lines between humans and giants, full-scale foam core giant head and body parts were laid out on set. “We also created a 20-foot-tall lightweight yet rigid portable eye-line pole that a stuntman could easily carry using a backpack rig,” adds Rosenbaum. “This allowed him to move quickly across terrains and simulate giant head positions and their long leg strides. When humans were held by giants, there were attempts to use motion control harness rigs, but we found the movements to be unnatural and forced the giant performances into restricted animations, so we had to create digital doubles for several of the hero giant performance shots.”
Survey and data collection
The common HDRIs and photo texture reference pipeline was employed on the production, with DD employing a system to track and place IBL’s into various environments. In addition, photo turntables and 3D scans of actors helped create digi-doubles, while LIDAR scans assisted with tracking and extending real environments.
See more of the attack in this clip.Step 3: Post-capture
The process for pre-capture was applied here, but at this point the production often already had plate assemblies from editorial since principal photography had occurred. “We were able to use Motion Builder to composite the live action plates in conjunction with the real-time giants to enable everyone to assess the actors’ performances and allow them to adjust the giants’ performances to fit the plates in terms of shot composition and required performances,” says Roberts. “For some shots, rough comp and roto work was done for on set visualization. Digital Domain and Giant Studios also worked together to light the giants in the real time visualization to match the plates as well as possible.”
Step 4: Giant-building and world-building
DD now launched into shot production, a feat requiring both animation and rendering of the giants and the world in which they inhabit. This included wide shots of Gantua as well as fully digital sets, such as the kitchen in which the cook giant prepares humans for consumption.
Animation supervisor Phil Cramer led the effort to establish the movement of the giants and take the performance capture to an on-screen level. For the general look and feel of the giants, Cramer says Bryan Singer wanted “an agile and powerful giant, rather than the lumbering kind we see in many films.” To get that kind of movement, the team experimented with simply slowing down the mocap (between 15 to 30 per cent) as well as capitalizing on weight belts around actors’ waists, legs and arms.
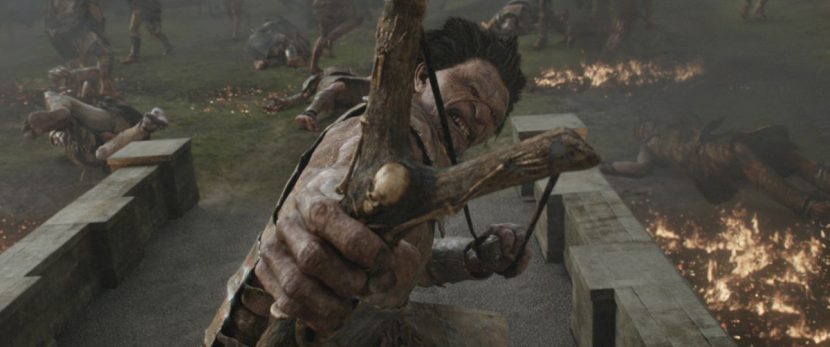
The mocap volume became a place also for direct experimentation with the actors, including Bill Nighy and Jon Kassir who together play the two-headed giant Fallon. “Going into it we had some complex ideas like tying them together with bungie cords or having styrofoam in between them,” recalls Cramer. “We tried all that and I must say it ended up not working as well as the most simple version with them just acting like in a play by standing side by side and each acting the head.”
In terms of facial animation, DD stepped up its face rig to increase the number of blend shapes – more than 2,000 per character (although animators drove around 100). Multiple giant shots relied on tiled action from mocap data rather than a specific crowd tool. And in addition to the hero giant animation, artists also had to create digi-doubles and animals such as horses, pigs, sheep and birds.
“It was the wide-ranging motions and variety of physical conditions that really stressed our character FX pipeline,” adds Rosenbaum. “The giants ran, jumped, climbed, swam, and fought, and they had to be in dry, damp, and underwater conditions. All 100 giants had two sets of wardrobe that were seen far away and close up. To create natural secondary and tertiary body movements, we had to account for multiple dependent layers of simulations. Aside from having their individual internal motion, the muscles, skin, hair, clothing, and miscellaneous wardrobe accessories also had to affect one another. We combined a complex deformation system with good old post-simulation sculpting to successfully achieve effects that are never visually appreciated unless done badly or not at all.”
Skin, hair and clothing
DD built a render pipeline to account for true global illumination. “We used Arnold because it gave us the benefits of a GI ray tracer with decent ‘deforming’ motion blur and offered an excellent shading API,” says Rosenbaum. “Regardless of whether a scene was interior or exterior, wide with a hundred giants or close-up on a hero giant, the artists only had to worry about the fidelity of the HDR and how to add per-shot stylistic lighting to the giants.”
To deal with the increased surface area of the giants, DD also developed a more accurate shading approach to multi-layered translucent materials – such as skin and eyes – that accounted for realistic light diffusion. Close-ups of the giants’ eyes would often require texture maps to be 16 to 32K. Says Rosenbaum: “Building technically precise shading models and exploiting the powers of a comparatively fast ray tracer that offered a true physically based rendering solution meant that artist intervention and management of the process was reduced to a minimum effort.”
The giants prepare for attack in this clip.In the exterior Cloister courtyard battle, and for shots of the giants entering the courtyard, DD used the fire point clouds to illuminate the giants. We had an accurate sun HDR that had a full value range to light outdoor shots easily with the correct sharpness and contrast,” notes CG supervisor Hanzhi Tang. “Our HDR light kits, with lights extracted from the HDRs and positioned into the correct place, were important for the indoor shots.”
Katana was employed for lighting because of its strength, says Tang, in handling large scene graphs and ease of swapping components in and out without affecting established lighting setups. “We used both a full ray-traced multi layered proprietary subsurface shader and a faster approximated subsurface depending on distance and scale. This helped enormously for crowd scenes.”
Effects
Fire, water, explosions, waterfalls, mist, clouds and rain were all part of the effects required on Jack the Giant Slayer, mostly using Houdini and Naiad. In one shot, the giant Fee emerges from the woods with Jack hiding underwater in a pond. The camera tracks Fee pursuing a sheep and goes below the water to see both Jack holding his breath and Fee’s hand. “We shot a plate of Jack lying down on a dry pond bed with hair slicked back flat against his head,” explains Rosenbaum. “Fee, the sheep and the water are all CG. We had to add water turbulence around Fee’s hand as it plunged through the water grabbing the sheep. We also had to simulate CG hair for Jack to look like it was floating underwater as well as add subtleties of a churn and displacement current from Fee’s hand action and various bits of debris and particulate to the water.”
Compositing
DD composited shots in Nuke, with digital effects supervisor Paul Lambert highlighting the watering hole and the shot of giants leaping onto the beanstalks on their way to Cloister as two of the most challenging comp-wise. “The beanstalk shots were challenging as they blended shared assets – beanstalks created by MPC and giants from DD. In those shots both of those elements deform each other. We used Nuke’s Deep Compositing and MPC used Deep Shadow to integrate the shared assets.”
Building a beanstalk
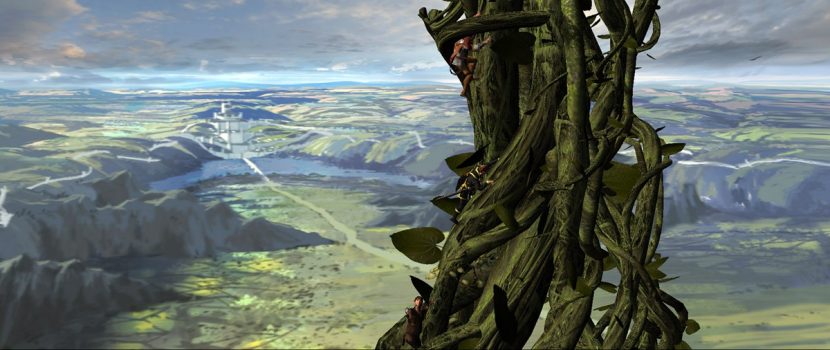
Of course, a Jack and the Beanstalk story would not be complete without the beanstalk component. Beanstalk visual effects were created by MPC, who also completed various views of the Gantua environments. There were two main requirements for the beanstalk – set extensions for shots of the actors climbing the massive plant, which had been shot on set often against bluescreen; and completely CG views of the beanstalk growing and existing in the world of earth and Gantua.
Previs’ing the beanstalk
The Third Floor became involved early on in production to produce a pitch trailer – partly to tell the story of the film and also help define the virtual production and performance capture concepts (which ultimately resulted in its Virtual Asset Department role – see above). A large previs effort became the beanstalk shots. For example, when the beanstalk first grows, The Third Floor helped determine the beats of the story, from the manner in which Jack would be carried out of the house, to moving the entire building. “We’d start with simple storyboards,” says previs supervisor Eric Carney, “and from there we would go into the previs and do a mocap session or multiple sessions with our own system. Then we would layer that together into shots.”
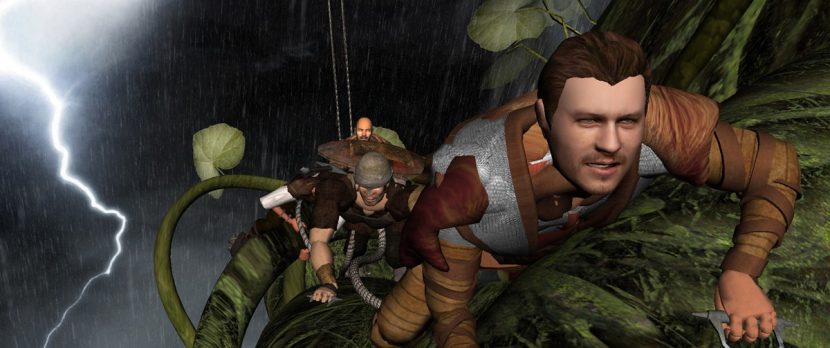
Using Maya for animation, The Third Floor came up with a few tricks to realize the huge stalk. “You’d build say 50 feet but then hide it below the ground and translate it up so that it looked huge,” says Carney, “and then add moving textures and some animated vines.” The studio also produced several other key previs and postvis sequences, including for the watering hole, traveling through Gantua and many action scenes.
Crafting a beanstalk
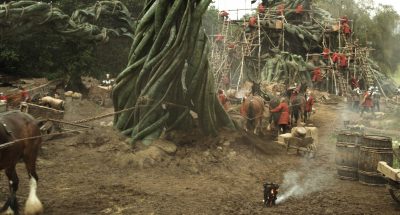
“We created a construction toolkit of a potentially infinite beanstalk,” says MPC visual effects supervisor Greg Butler. “We broke down the design into a generic section that could be a tiled approach, with one section connecting to another section, with variation, so that it really was only limited by a rigging curve based tool to say this curve goes this many units in the scene, now fill that curve with beanstalk sections. Added complexity was that it was multiple snakes of stalk intertwining to give a very loose braided rope look. That was to accommodate the fact that the beanstalk had to go five miles high.”
This was a procedural approach in terms of modeling, but it was animated via keyframing. “We started with a traditional model and animation structure, and then we built more of system approach to accommodate any shot where you had to go on a mile level,” says Butler. “Then when we got to the point of the connected box carts of beanstalk we then leveraged that to go further to have procedural leaf movement and culling. So that if you had a mile’s worth of beanstalk heading out into frame, by the time you’re sufficiently away from camera you’re dropping resolution and no longer doing full cloth sims and the render is able to start throwing out memory and only rendering what’s in a given bucket. Without that procedural approach it wouldn’t have made it into rendering at all.”
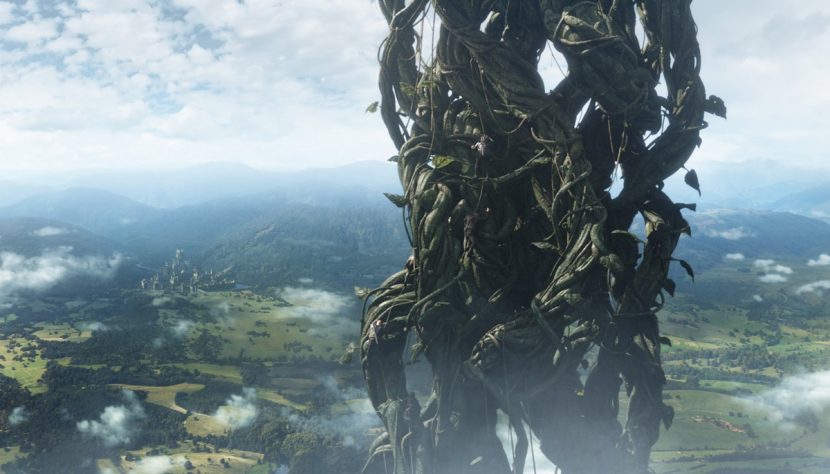
A growing beanstalk
While most of MPC’s shots were of the fully grown beanstalk, a few depicted its initial sprouting and rapid growth. “There are moments when it bursts through the house and carries Jack out of the house, which were done with some fairly basic blendshapes to grow in the shot,” says Butler. “Animation would keep adding tendrils and slap them onto the bigger part in the middle. It gave it this sense that the smaller sections were going for the middle to support the main structure. Later there’s a scene in Gantua were five main beanstalks burst out of the ground – a centre column comes out of the ground followed by lots of secondary sprouts that start to grab on and get that twisted rope look. Then they bend towards earth when the giants jump on.”
Rendering
MPC skinned the beanstalks on the fly, with final renders done in RenderMan. “That allowed us to avoid having to cache any geometry out,” explains Butler. “The render would then pick it up and we would handle it in chunks. It was proprietary – a developer put together a custom version of that targeted for this task. He added some procedural movement for leaves and some hooks for technical animation to make on the fly changes for faster/slower more/less leaves.”
In the clouds
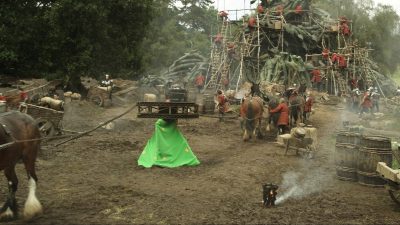
With the beanstalk extending into the heavens, clouds were an important consideration. MPC came up with a true volumetric solution. Artists laid out geo in Maya as large spheres, with smaller spheres depicting bits of broken off clouds. “The toolset was heavily based on taking an object, usually a sphere and putting a bunch of layered procedural noise onto the geometry to give a look that is typical for a cloud,” says Butler. “We had one guy who happened to have spent some time in the New Zealand airforce and had some level of meteorological training.”
Sharing shots
As noted above, some shots required digital giants from DD and beanstalk effects from MPC. In one particular scene of the giants jumping onto the beanstalks, the two studios worked out what caches to exchange in order to complete the shots. “We did a low-res version of our beanstalk skeleton rig, and DD did the same for their giants,” says Butler. “They would give us the blocking of giants as geo caches and we did the same for the beanstalk, plus a step further – knowing that it was a chicken and egg where the beanstalk would have to be affected by the giants leaping on it. So we gave DD geometry and a low res rig to drive the geometry so they could tug the beanstalk over and we’d bring that back in and plug that into our blocking.”
In those shots too, MPC had to deal with the giants running into the vines and leaves of the beanstalk. “We used the giant geometry to automatically cull any leaves the giants would have run into,” says Butler. “We had enough leaves that, rather than try and work around the giants, we could put in too many leaves and delete all the ones they would run into, and then finally the biggest thing that made the end of the line back and forth was the use of deep data and deep compositing in Nuke, so we didn’t have to worry about each other’s render layers.”
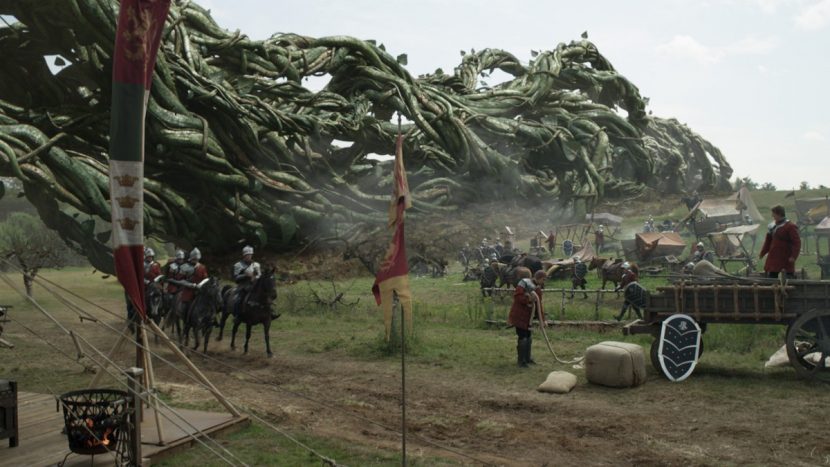
Later, a beanstalk takes down the castle from the inside, a sequence requiring shared shots between MPC and Soho. Here, MPC used its Kali finite element analysis tool for destruction effects. “We added a brickify component this time around,” notes Butler. “You take a texture map of large stone bricks and then it breaks up the model based on that texture map and then assigns each of those blocks parameters to act as if they are blocks connected by something like mortar. We supplemented it with fluid sims for dust, and particle sims for small objects and debris.”
Crafting the castle
A key location in the story is the castle, center of the Kingdom of Cloister and home to princess Isabelle. Soho VFX was responsible for creating the castle asset – oftentimes shared with other vendors – and many other surrounding environments.
Soho referenced principal photography from Hampton Court Palace and Bodiam Castle in Britain, LIDAR’ing these areas and taking photo textures. “Hampton Court Palace was made up of lots of red brick and flagstones,” says Soho visual effects supervisor Berj Bannayan. “In one courtyard in the Palace we maybe did 7 or 10 different scans from different positions – then we could mesh it altogether into one solid piece of geometry to represent the entire courtyard. The modelers wouldn’t build each individual brick and piece of stone. They would build the walls as they are as a flat surface. In the scan you’d see the high res detail of the all the mortar. They would build a low-res version of that with as much detail as necessary. Then from the LIDAR we could turn that into displacement maps, and the texturers would paint displacement maps for the bricks and floor.”
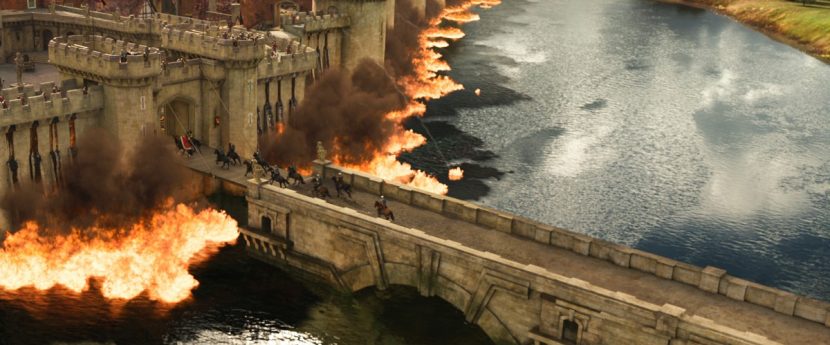
Modeling was done in Maya, with GeoMagic used to convert the LIDAR scans. 3D painting relied on ZBrush and BodyPaint, and rendering occurred in 3Delight. In addition, Soho created fully textured gardens, stables, crowd sims and surrounding environments. For the film’s end battle sequence – which takes place inside the castle courtyard and outside – Soho delivered shots of flaming trees, the flaming moat and digital soldiers. The trees, in particular, were realized with SpeedTree Cinema 3D tools. Soho also crafted rigid body sims for walls and battlements being destroyed.
Rounding out the effects
Rodeo FX contributed two sequences to Jack the Giant Slayer – a scene of the treasure room and a final pullout from London, overseen by Rodeo visual effects supervisor Sébastien Moreau.
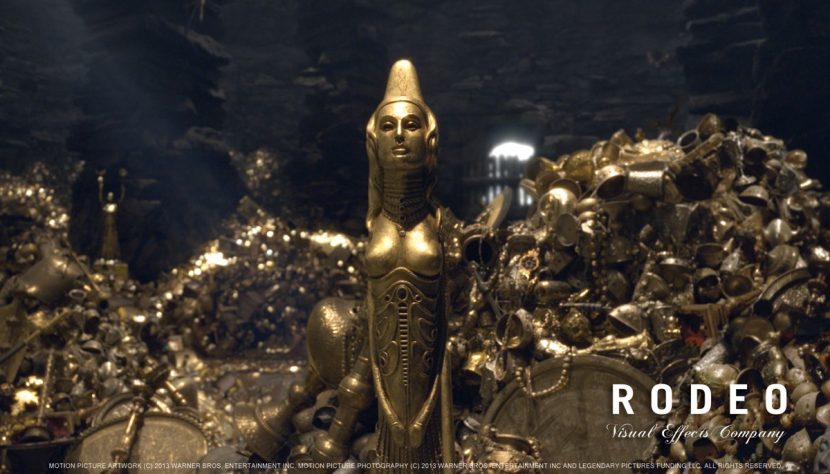
The treasure room environment included a singing harp and literally stacks of gold. “It was quite challenging,” notes Rodeo CG supervisor Mikael Damant-Sirois, “because they wanted to add a lot of treasure so we used rigid body simulations to do a few generic stacks. We then had hero treasure stacks with RBD sims inside ICE in Softimage to populate the foreground elements. We used the equivalent of RIBS, which is called ASS in Arnold – a baking of the geometry. It simplified the scene quite a lot and we could render millions of treasure objects.”
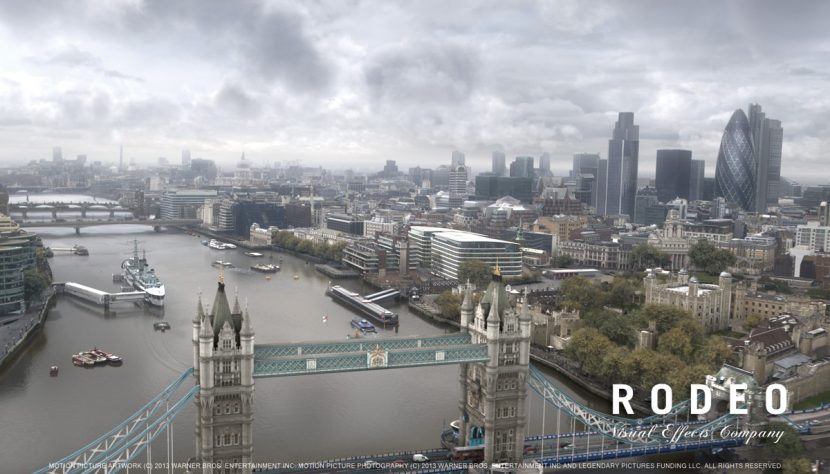
The London pull-out was a virtual environment from the Tower of London to a wide view of the city and ends in the sky. Rodeo conducted a photo survey of London and then used photogrammetry to reconstruct the city, with 3DEqualizer used to realize basic 3D reconstructions of the buildings. A volumetric cloud system in ICE was then used, and water and boat movements, along with cars and crowds was also added.
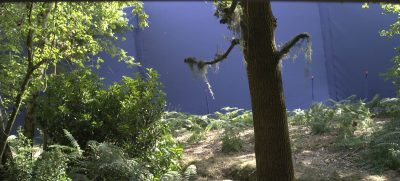
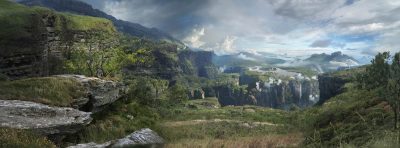
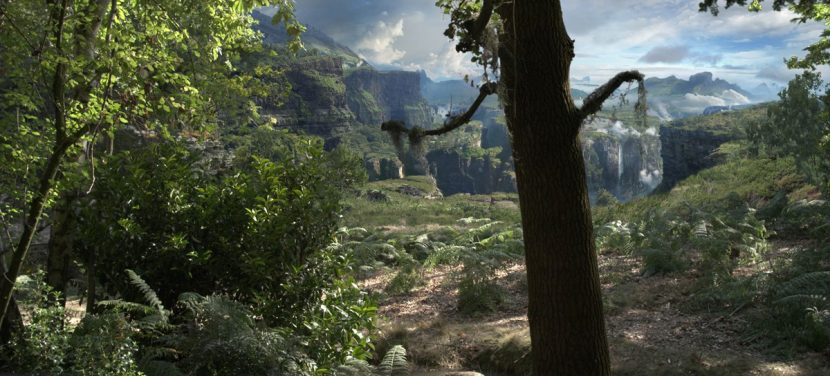
Hatch visual effects supervisor Deak Ferrand was called upon by Hoyt Yeatman for Gantua concept work and final matte paintings, including bridging the gap between the giant world and that of Earth. Some of the challenges Ferrand face were to consider where things like waterfalls and edges of Gantua would begin and end, which was ultimately completed to make it look like it was floating. One shot featured a character paying respect to a falling comrade, for which Ferrand completed a matte painting and then supervised the stereo compositing of the final frames.
All images and clips Copyright: © 2013 Warner Bros Entertainment Inc. and Legendary Pictures Funding, LLC.

too much CG kill the CG… Giants feels so much 3d! 🙁
Agreed. Time to look backwards in certain areas.
[…] ¿cómo se crea un monstruo en el cine? En FXGuide podemos encontrar un magnífico […]
[…] ¿cómo se crea un monstruo en el cine? En FXGuide podemos encontrar un magnífico […]
[…] ¿cómo se desarrolla un monstruo en el cine? En FXGuide logramos hallar un magnífico […]
[…] ¿cómo se crea un monstruo en el cine? En FXGuide podemos encontrar un magnífico […]
[…] ¿cómo se crea un monstruo en el cine? En FXGuide podemos localizar un magnífico […]
[…] ¿cómo se crea un monstruo en el cine? En FXGuide logramos hallar un magnífico […]
[…] ¿cómo se crea un monstruo en el cine? En FXGuide podemos encontrar un magnífico […]
[…] ¿cómo se crea un monstruo en el cine? En FXGuide podemos encontrar un magnífico […]
[…] ¿cómo se desarrolla un monstruo en el cine? En FXGuide logramos hallar un magnífico […]
[…] ¿cómo se crea un monstruo en el cine? En FXGuide podemos encontrar un magnífico […]
[…] ¿cómo se crea un monstruo en el cine? En FXGuide podemos encontrar un magnífico […]
[…] ¿cómo se crea un monstruo en el cine? En FXGuide podemos encontrar un magnífico […]
[…] ¿cómo se crea un monstruo en el cine? En FXGuide podemos encontrar un magnífico […]
[…] ¿cómo se crea un monstruo en el cine? En FXGuide podemos encontrar un magnífico […]
[…] ¿cómo se crea un monstruo en el cine? En FXGuide podemos encontrar un magnífico […]