In the history of modern visual effects films there is a small handful of universes worthy of religious veneration: the bed chamber in 2001, the hover cars of Blade Runner, the initial flyover from Star Wars and of course, the fallen broken ship of Ridley Scott’s Alien. This last hallowed and sacred site is known to all serious visual effects artists, but for a select few artists at companies like MPC, Weta Digital and Fuel, they got to rebuild and reimagine these ‘consecrated’ assets – the map room, the ship and of course the pilot’s chair from Alien. The film has erupted a blogosphere of arguments over the meaning or symbolism these objects have in a creationist tale of mankind, but virtually without question even the harshest critics of the film have applauded the stunning visual effects of Prometheus.
Here then is fxguide’s in-depth coverage of a few select sequences in the film, looking at the work of the Prometheus artists who, under overall visual effects supervisor Richard Stammers, recreated the world of Alien so vividly and magnificently.
Watch the full fxguidetv episode here, which features interviews with overall visual effects supervisor Richard Stammers, plus the VFX supes and breakdowns from the film’s principal vendors MPC, Fuel and Weta Digital.
Skin deep
Weta Digital produced a range of shots for Prometheus, from alien attacks to disturbing med-pod sequences, from Engineer ritualistic suicide to shot-for-shot digital doubles. A theme for many of these sequences was realistic skin. To produce such believable close-up character work, Weta had to build on its effects in Avatar and go even further into sub-surface scattering (SSS) algorithms than ever before. Weta used a global illumination tool starting on Avatar, and every project they have done since has advanced it incrementally.

Download a hi-res version of the disintegrating Engineer here.
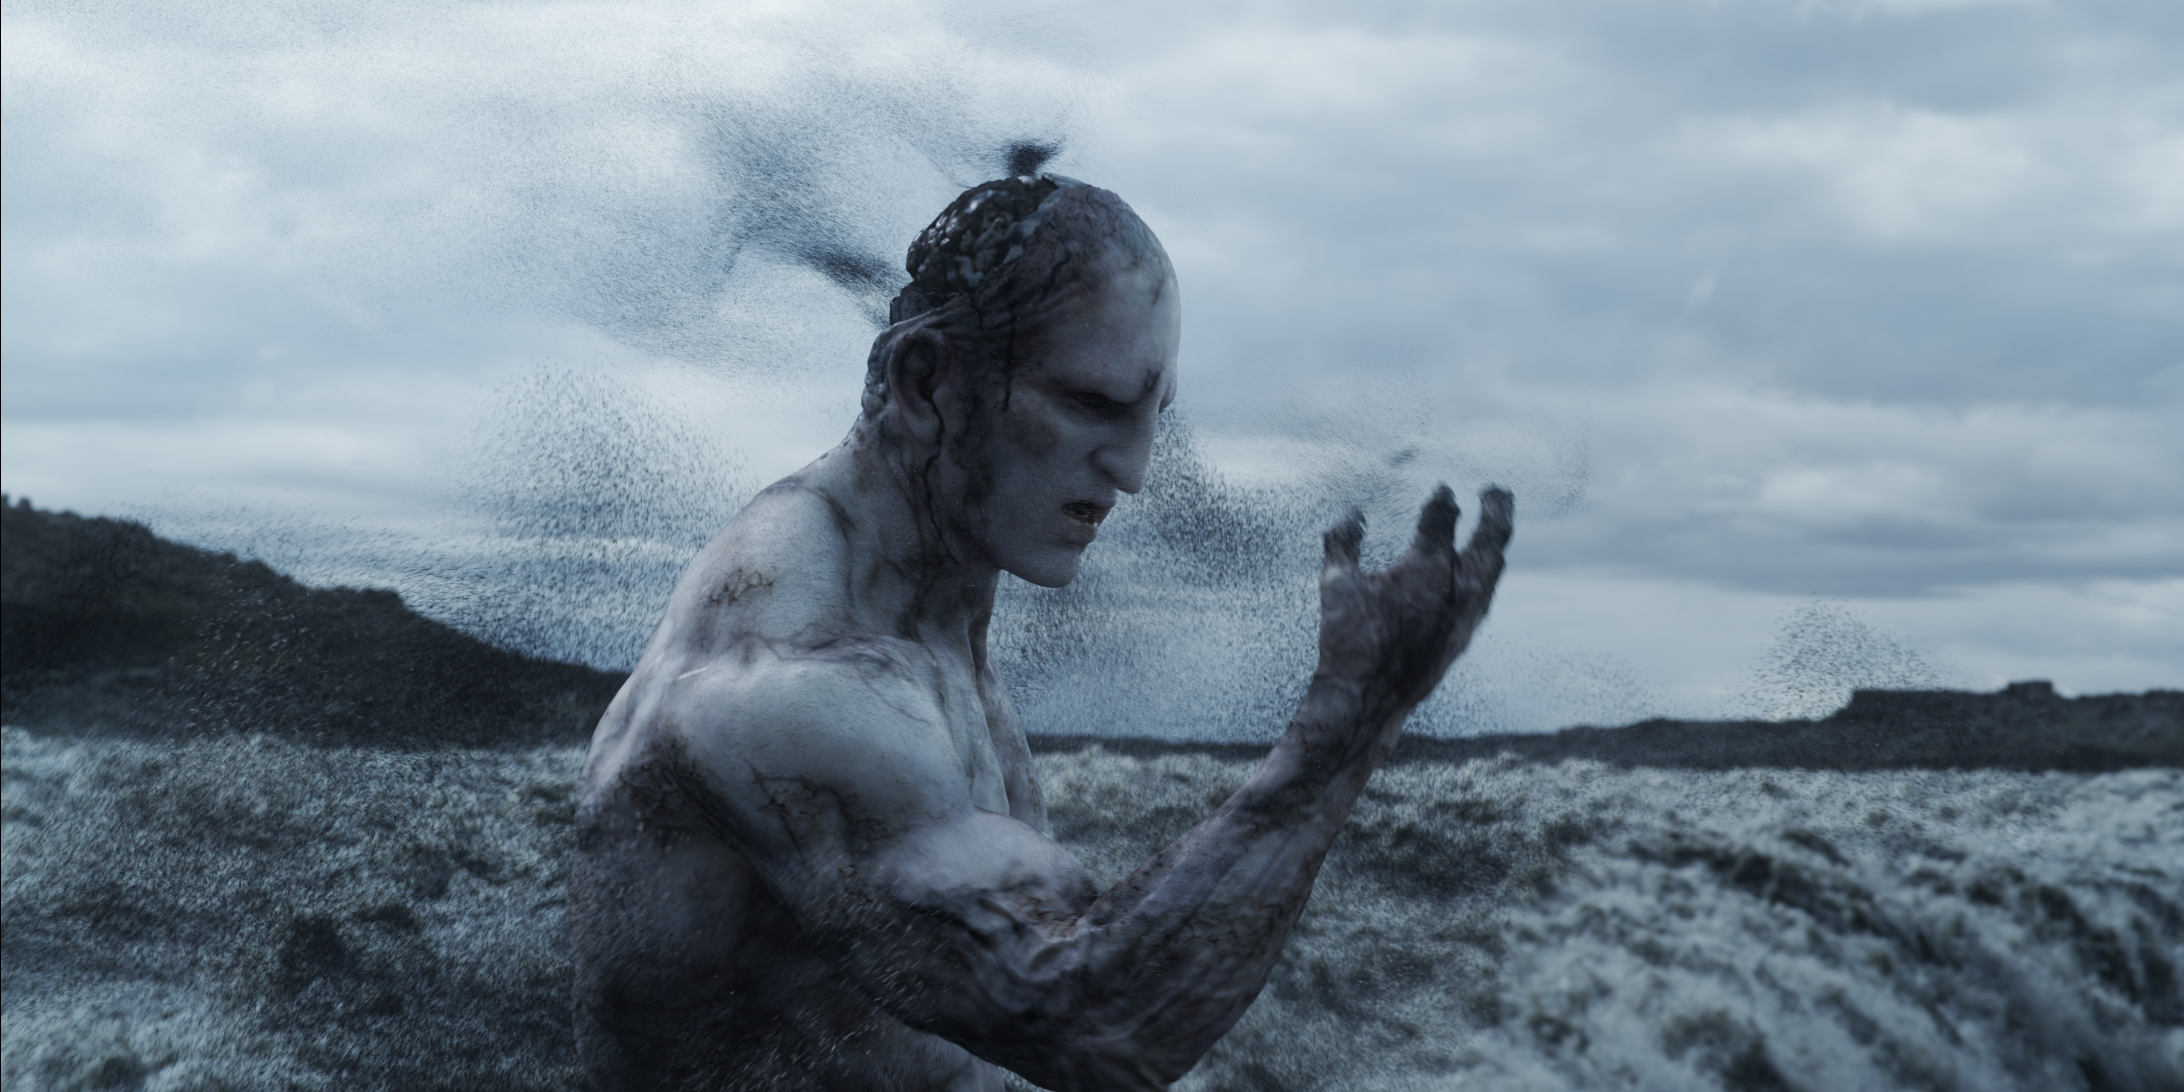
In many respects, Weta Digital’s work on Lord of the Rings validated a strong SSS approach to all character work decades before, but in Avatar the studio approached the limit of current SSS technology. For Prometheus a whole new SSS system was used.

During Avatar, Weta’s SSS approach was based on a Bidirectional Scattering Surface Reflectance Distribution Function (BSSRDF), that used a dipole (two) diffusion approximation allowing for efficient simulation of highly scattering materials such as skin, milk, or wax. A BSSRDF captures the behavior of light entering a material such as alien or human skin and scattering multiple times before exiting. Monte Carlo path tracing techniques can be employed with high accuracy to simulate the scattering of light inside a translucent object, but at the cost of long render times.

Specular reflection is a part of what makes skin look real, giving fine details of the structure of the skin. Skin – like most SSS target materials – looks the way it does due to a combination of absorption and scattering. SSS is an approximation of the full maths of the exact solution to one that is really a statistical model expressed and solved in Linear Transport Theory (a simpler but still complex problem). A scattering and absorbing medium is characterized by its refractive index together with the distribution and properties of absorbing and scattering particles, noting that light different wavelengths diffuse differently.
For this article the problem is all about a solution to the diffusion that happens as light enters a material, (or Diffusion theory). SSS is needed for photo real characters and Weta’s ‘approximations’ evaluate in seconds compared to test images done with full mathematically correct Monte Carlo rendering – which take hours for the same simple test image, so there is a huge need to find a good solution to this problem.
Until recently, most SSS algorithms used a dipole model. “For Avatar, Weta were using a dipole model,” says Martin Hill, Weta’s visual effects supervisor for Prometheus.

The dipole method approximates a BSSRDF by combining an exact solution for a single scattering with a dipole point source diffusion approximation, that simulates the real world multiple scattering. For some time, from the world of medical physics, it was known that this ‘dipole’ (dual light) method could represent incident source distribution on the surface of say human skin. A single dipole method was thought to be, until recently, accurate enough. As the name implies the dipole method consists of placing two point sources near the surface – one light source beneath the surface and the other located above the surface (based on a approximate version of the ‘Method of Images’ Algorithm). Any incoming ray is then transformed into a dipole source for the diffusion approximation, then combined for the final approximate scattering (exitance), although the mathematical details rarely figure to any lighting artist in production. What matters is that in a move to gain rendering speed, with the dipole approach, accuracy was scarified. Eugene d’Eon at Weta thought it might be possible to be more accurate without blowing Weta’s render time budget.
After Avatar using Dipole, for Rise of the Planet of the Apes, Weta moved to a translucency quantized-diffusion (QD) model which Eugene d’Eon primarily authored. His work built on previous research and “it puts a lot more detail on the surface than dipole does,” points out Hill. “You still get the spread and diffusion of light through transmissive skin, but it keeps the sharp and gives pore-level details a lot more clarity than we were able to do previously.”
What this means to an artist…
The specular reflection on the skin provides an immediate surface property. It gives one the details of the skin, diffused light is inherently less ‘detailed’ as the light has been scattered under the skin. In reality skin is a complex combination of scattered and surface properties. “Traditionally what we would do back at King Kong era is we would have a sub-surface model and then we’d add some sort of general Lambertian back in to maintain that detail,” explains Hill. It’s something we’ve always tried to fake until now, but the new model allows us not to have to do that, in a far superior way. It contains the detail right at the surface without us having to de-convolve our texture maps to accommodate it.”

A great example of this is human lips. In earlier models lips would appear waxy and not realistic, as the lips have very different skin thicknesses and properties compared to the skin just next to the mouth. Fat content and blood vessels are different as lips respond differently to emotion stimuli than cheeks or someone’s chin just below the lips. Also lips typically have a high contrast edge (sharp shadow edges) which can be lost in the dipole method.
Hill points out that if one takes images for textures of an actor’s skin, then, “the fact that you’re photographing skin – it already has the sub-surface properties baked in. If you’re re-using a sub-surface algorithm on top of that, in effect you’re doubling up on the diffusion.”
The new model helps keep the detail of the moles and the pores and the fine detail of the skin, which contribute a large fraction of the sub-surface, “but also helps with the long range subsurface – a centimeter deep – that’s still really soft but it has all these different ranges in between,” adds Hill. “It’s a continuum – you have a certain amount of very tight detail and then less amount of detail as you get further away from the incident point of the light.”
Of course, what works well for human skin also can work well for alien skin …
For the Engineers, there was a need for a much bigger application as, in terms of the practical on set appliances, there was a thick silicon skin on top of the actor. Hill explains: “We got a sample of the silicon that was used. We shined a laser into it and it just scatters for six, seven, eight centimeters – huge distances. If we just dial up the amount of translucency to get that kind of transmission, what happens is that a lot of our large features are literally – to the width of his fingers or the bridge of his nose or the brows or lips – a lot of the light just goes straight through them and they tend to look waxy.”
We got slabs of silicon and carved vein patterns into them and pumped through oils and inks with a heartbeat motion through the silicon
Thus, one of the extensions Weta put in the model used for the film was internal blockers to make sure that they could use the skeleton models that they had for their muscle and tissue rigs to be able to block the light transport and be able to keep the translucency distance deep but not fully bleed through solid internal structures.
To create a lot of the motion of the actual veins Weta filmed elements. “We got slabs of silicon and carved vein patterns into them and pumped through oils and inks with a heartbeat motion through the silicon,” notes Hill. “We backlit it and filmed it, and we used that as a driving element for a lot of the effects we had. One of the things we were noticing was that a vein under the surface has very different characteristics to one that is bulging on top of the surface. And how do you deal with different depths of these materials – a vein that’s 2 centimeters below the surface as opposed to 1 centimeter.”


The new QD approach was optimized for production and so while more expensive and complex it only increased render times in this area by a factor or 50% compared to what Weta had before. The Weta team implemented their QD BSSRDF using Pixar’s RenderMan (PRMan) extending the hierarchical irradiance point cloud algorithm. It also allowed for the use of real material’s scattering properties to be measured and used, generating even more accurate profiles and faster results, while keeping subtle detail that is often lost or needed to be faked under the previous dipole approach.
The Engineer


The Engineer is introduced as a creature in the opening sequence. He’s an idealized human in a number of ways with alabaster skin and perfect physique. “He has come to what we discover is Earth to effectively seed Earth with life,” outlines Hill, “he drinks this black organic goo which effectively destroys him from within.”
From that opening shot, as the scene progresses, the audience sees right down to a molecular level and see his DNA being torn apart by this transforming substance. “We see this DNA reform and become Earth DNA, if you like, effectively creating life on Earth,” he says.
CG Supervisor Thelvin Cabezas re-created a digital version of the Engineer with material skin qualities and replicated the lighting from the Dettifoss waterfall in Iceland. Weta used their facial FACS system, so the animation team led by Michael Cozens could articulate the face and bring The Engineer to life, “and really demonstrate we could pull off a photoreal digital humanoid very close to camera in the style Ridley had already lit it,” says Hill.
Scott wanted to shoot on location in Iceland with an actor in full prosthetic suit – in the final film it’s only the one Engineer, but there were other Engineers in this sequence originally. “The plan had been that the digital takeover would happen several shots into this sequence,” notes Hill. “Because of the quality of his skin and the lighting on the day, and the fact that there wasn’t much detail on him, combined with the fact the whole film was shot in stereo, we found it incredibly difficult to match move him accurately enough to be able to place on him the effects that were required for the early stages of the disintegration. We talked it through with Richard Stammers (overall VFX supe) to bring forward the transfer into a fully digital Engineer – their response was ‘Can you match it?’ So we worked really hard to get a perfect match in terms of material quality and lighting and also performance to the actor in the suit.”
As a starting point Weta needed to be able to digitally match the prosthetics perfectly. “With our muscle and skin rigs,” explains Hill, “usually when we create a full humanoid we’d have a full muscle rig controlling his abominable muscles, tendons and fat layer and all the normal things. Because we needed to match the practical which was an actor in very heavy prosthetics, we actually needed to tone down and augment how we’d normally do the muscles, but also add some more life than the prosthetic would normally get. We wanted to create a fully believable character but also not tip over the balance where you’d see muscles firing where you couldn’t previously see those in a silicon enhanced actor.”


The live action Engineer has a very thick layer of silicon material on the actor which makes him quite featureless. “We didn’t have tracking markers because Ridley wanted to be able to use as much as the footage as possible, so we had a very hard time trying to track and match move to the character. It’s made of silicon and deforms differently than our muscle systems would,” says Hill.
Self-surgery
In one eye-covering scene, Elizabeth Shaw enters a med-pod to perform a C-section after learning an alien has been growing inside her. “When the previs came in for this,” recalls Hill, “our jaws hit the floor and we couldn’t believe they wanted to go for something this graphic. When we got on the call afterwards, ‘Really? Do you want it to be opened up this much?’ The whole sequence is very analogous to the chest-busting sequence.”

Interestingly for Weta, actress Noomi Rapace (Shaw) had trained as a bellydancer for a previous film. “She was on the bed doing all sort of contortions, so it already had quite an interesting set of motions,” says Hill. “We covered her belly with tracking markers as we had to matchmove as closely as possible to make the effect work in physical space. We couldn’t warp in 2D afterwards without breaking the stereo.. We had to matchmove the organic belly as much as possible, in full stereo as well, with no 2d warping at the end to fit it back on.”
When the previs came in, our jaws hit the floor and we couldn’t believe they wanted to go for something this graphic
Scott wanted a clinical and mechanical look to the med-pod tools. “They had an almost a spidery motion to them,” notes Hill. “We looked at industrial machinery, car manufacturing robots and took a lot of their motion and tried to make them more spidery and sinister. We’d already been doing distortion for the body, but when the incision happens we had to do a fully digital wound and all the steam and blood that comes with it. We were using as much live action as possible – a lot of it was live action re-projected onto geometry. We were using live action plates but augmenting it quite severely.”
Neal Scanlan’s studio put together an animatronic version of the baby trilobite. The articulation on set was “fantastic and it could really move in incredible ways,” says Hill. For some of the shots Weta used the live action ‘baby’ and for others it completely replaced it, but there was always something in the scene on set for Rapace to perform and react with. “We would add more organic motion in places,” adds Hill. “While it’s in the placenta sack, that’s fully digital. There was a model made of the placenta with the baby inside but the internals weren’t articulated and we wanted it to convulse as it was being pulled out, which meant we had to go into a lot of scattering work with the rendering to make sure all the volumetrics worked – the blood and goo inside the placenta sack.”
While the exterior of Rapace’s stomach was often projected, the interior and the exterior when the wound was being rapid closed were all digital. “We really wanted to get a sense of these staples being forced in there, being quite visceral and violent,” says Hill. “We changed the design of the stapler a little bit and incorporated a pneumatic drill into it, so that the whole body of it is jumping up and down and forcing and pressing into her body, then it takes a little while for the staples to settle.”
For more on Weta’s work including the pilot’s chair and its elephantine armor listen to this week’s fxpodcast.
To the Stars

David, a Weyland Corporation android on board the Prometheus, undertakes his own detective work into the Engineers and uncovers a three-dimensional star map inside the Orrery – actually the Engineers’ spacecraft control room. Fuel VFX in Sydney created the star map – often relying on deep compositing techniques – as well as scenes of the Holotable on the Prometheus bridge and holographic video recordings of the Engineers inside the dome, the Orrery’s control desk effects, the laser scanning probes or ‘pups’, holographic screens in Vickers’ suite and set extensions.
The Orrery star map, in particular, drew upon art department designs and extensive Fuel concepts. “The original logic of how it’s laid out was a big bang,” explains Fuel visual effects supervisor Paul Butterworth. “We used a fluid simulation to figure out and map out the threaded fluid that’s exploded out to the volume. Then we used that logic to place each of the nebulas and star cluster. The logic was that you could pick any star system and blow it up into a section that you could study. Every nebula in there is a frozen moment of a fluid sim that’s been run over its course and found that right moment.”
Production filmed David (Michael Fassbender) on set in the cavernous 007 stage at Pinewood interacting with some occasional props and interactive lighting. The set was Lidar’d to enable set extensions, further shots involving the holographic Engineer projections and also the emergence of the ‘space jockey’ chair which Weta handled.
Watch a breakdown from the Orrery scene.Fuel used Nuke’s deep compositing tools into its pipeline for the complicated Orrery shots
Fuel incorporated Nuke’s deep compositing tools into its pipeline for the complicated Orrery shots, and for others, often enabling fast turnaround times for revisions since the planet, star animations and gas cloud sims would not have to all be re-rendered. “We also wrote a bunch of tools that can reference the shot you’re working on in Nuke and bring in only the stuff you need right now, or bring in the assets for that shot,” says Fuel compositing supervisor Sam Cole.
A significant amount of work was required in preparing the plates for the star map effects, by removing the distortion from the plates and also solving for stereo. “Say your camera’s a totally non-VA (vertically-aligned),” explains Cole, “then you’re getting parallax between these very fine star fields and your pixel you can touch on the screen is the sum of all the pixels behind it – and you have a vertical alignment matte you can rubber sheet that around. You can push that one pixel around but you’ve got baked parallax.”
Watch a further breakdown from the Orrery sequence.“We had mattes sent to us from production which would bend us a perfect left eye, where all the features are horizontal,” adds Cole. “But now that left eye relates to a camera that no longer exists. So you really need to solve a camera against the ones that exist – if you want to do science on the cameras you have to do it on the non-bent images, and take that faked out left eye as best as you can do it. Luckily for a lot of those shots we had there was stuff in the air.”

Earlier shots of the ‘pups’ with red scanning lasers being released into the dome were also handled by Fuel. “Originally the probes were objects rolling on the ground,” notes Butterworth. “They didn’t have lasers firing out all over the place. Over time we played with interactive light and laser scanning. The hardest thing for us was tracking the shots and accurately getting the camera to line up perfectly, and placing that within the surface geometry.”
The laser shots made use of Lidar scans of the dome tunnels and sets, but were particularly challenging both in terms of achieving them in stereo and sometimes through on-set smoke. “Having real flares down the lens causes problems in the alignment process making sure all the pixels are horizontally aligned,” admits Cole. “We had the rule that we would find the most far forward the flare could be – and built a simple rig that would slide cards around between the light source and the viewer and that’s been the most comfortable thing to do. It may occur behind your head in stereo – it looks really cardy and flat if you pop it on the screen plane but it was fun to pop it into the 3d space.”
For the smoke integration, Fuel artists would combine smoke elements from the studio’s library with the on-set plate and use noise textures to massage the shots. “When you make a noise texture,” says Cole, “you can make it in 3D quite simply and then you can slice right through it – do a left and right eye slice and whack it in by cards or if the camera was locked off we’d put it in by hand.”

On board the Prometheus, the pups reveal the inside of the dome (originally a pyramid) on a Holotable, another Fuel creation. “They had an initial drawing that was a red structure on a smaller table,” recalls Butterwoth. “We had to do a conceptual test – we did a full test shot with a proxy of what we thought the pyramid was going to be and its structure and how these probes would fly down and reveal sections as it was going. Ridley liked it so much that he wanted to make it more of a feature, so he cut the table and had it scaled up and it became a centerpoint in the sequence. He also used our test and projected it up onto actors for interactive lighting.”
“The idea with the Engineers was that they were security recordings”
The Prometheus crew encounter Engineer video holograms while inside the dome, essentially old recordings played back in a point-cloud-like re-projection. For these shots, Fuel had motion capture data of the Engineer performers and experimented with the ultimate final look. “The idea with the Engineers was that they were security recordings,” says Butterworth. “If you’re able to record all the actions of all the Engineers going about your business – in a volume as a 3D object – over thousands of years they become degraded and broken up. Half of the pixels aren’t working within the volume anymore. We looked at old TVs and other reference – taking a perfect recording of an Engineer and deteriorating it.”

Using the tunnel Lidars, Fuel executed one scene of the Engineers running past and through David. “Ridley drew these pictures where as the Engineer wrapped around him some of his texture wraps around his surface,” comments Butterworth. It was roto-matted – light passes to re-light David for that pass.”
Inside the Orrery, where David sees a holographic projection of the Engineers operating the control desk, and later the Engineer operates the ‘space jockey’ chair, Fuel created both graphics for the desk and the star map, sharing shots with Weta Digital. “We had to replace the desk,” says Butterwoth. “We had a beauty run of the desk, in some cases painting out an Engineer shot in stereo and then painted out the backplate. The scene was originally going to be shot with motion control – but it was long and laborious to set up and the shots can feel very mechanical. So at some point they shot with normal live action using crane moves, Steadicam and dolly moves. They did poor man’s motion control where they got your actor, he’d then pull out the Engineer and play to the space where he was. And sometimes they’d shoot a clean plate. There’d be some cases where the Engineer would be in shot, and because the eyeline’s better you inevitably have to paint it out and remake a backplate.”

Fuel had the benefit of The Foundry’s head of research Jonathan Starck visiting the studio to help with R&D and getting on an alpha version of Ocula (now a released product). Another helpful tool was Peregrine Labs’ defocus tool Bokeh, produced by Colin Doncaster. “In all of our renders that were coming out deep,” says Cole, “they were coming out sharp so we were able to match the focus later in comp with Bokeh. Inside the Orrery we wanted to have full control over the exact shape of the bokeh and the slight chromatic searing that you would get on those discs. And that allowed us to do it in deep. We’d plug in the cameras, plug in the T-stop from the on-set sheet and that’s where we start. It was fantastic for that. A lot of the iterations – we would have been really stuck without being able to iterate with that, especially for the Engineers where all the points are coming off the ground in the storm that are coming off them.”
Prometheus has landed

The titular spaceship, the Prometheus, was a visual effect by MPC, which also delivered the vast majority of shots in the film covering the outerspace environments, the planet atmosphere, the planet surface, the Engineer’s ship known as the Juggernaut, the Hammerpede creature, an eye-worm effect and digital make-up effects.
Watch Prometheus land in this clipThe landing Prometheus spacecraft follows shots from outer space through the planet’s harsh atmosphere and onto the surface. For the outer space shots, Ridley had found a small moon outside of Saturn which had a very interesting texture. “That was used for the background gas giant and the moon of it was our planet,” explains MPC visual effects supervisor Charley Henley. “We shot stills of swirls of ink, and studied high res photos of Earth and combined that into a massive matte painting. Ridley had also talked to some NASA scientists about the likely weather you’d find. He was keen to have cyclones and stormy weather.”


The atmopsheric environments were then realized from aerial shoots done in Iceland (shot with a stereo rig through a cloud basin) and then combined with DMP cloud backgrounds. The landing site, a rocky alienesque valley made up of ‘straight lines’ and the mysterious domes, came from another Ridley sketch of a real environment. “The location was a desert in Jordan called Wadi Rum,” says Henley. “The basis of that was desert sand but that wasn’t the terrain he needed so for that we went to a volcanic landscape in Iceland for all the ground-level terrain shoot.”
“We analyzed the area using Google Maps and DEM satellite maps which give you displacements,” adds Henley. “We put that into Maya and combined all that information and built up a rough 20 mile landscape. Then Ridley came into MPC and we did this interactive session on this model we created to work out what shots he wanted to create flying through the valleys and what angles he liked.”


For textures, the visual effects team camped out in the valleys of Wadi Rum, plotting GPS co-ordinates and marking rocks in the ground of locations that were considered appropriate places for Prometheus to land. “We picked four key areas and revisited those over 3 days,” says Henley, “photographing very hi-res 360 HDRIs in different lighting. We weren’t willing to model the mountains in enough detail to use a CG lighting approach so we took these photos to cover every lighting situation. The pinnacles on the ground where taken from real rock in Iceland. We scanned and texture shot about nine and from that created CG variations. We used a program to randomly scatter them across the landscape based on manually painted intensity maps.”
The Prometheus was modeled based on art department designs and built up in Maya, and had a take-off and flying set-up that allowed for interesting animation, according to Henley. “It had four giant thrusters that could pivot on two arms. In space flight they’re swung back to use ion thrusters. Down on the planet they could be more of a Harrier jump jet style. Coming into land they could swing forwards to give them a braking action.”


Production built a cockpit section and just one of the 16 landing feet of the Prometheus practically, along with part of the garage/airlock. “That was used as the basis for texturing Prometheus,” notes Henley. “We scanned it, photo modeled and photo projected the textures and used this as a guide for the rest of the ships detail and texture quality.”
In Iceland, production tended to shoot with as many mountains and backgrounds behind the characters as possible, says Henley, “to at least have gray behind them rather than sky, which is most problematic – the bright light eats through the edges and then when you key it back it doesn’t look right and you have to build it back again.” MPC also had to deal with helmet reflections, sometimes removing crew while other times adding 3D helmets. “The helmets would flex a bit more than they should so you would have to roto-anim them to line up exactly,” notes Henley. “We had to have a very accurate 3D roto of the head – that is much harder in stereo.”

“We used Flowline for the volumetrics to generate natural pluming dust, then our own volumetric tool for visualizing and rendering”
At one point, the characters are forced back from the dome to the Prometheus when a huge sandstorm approaches. “We used Flowline to simulate natural looking pluming dust, then our own volumetric tool for visualizing and Renderman rendering,” says Henley. “We started with about 20 separate caches and blended them into a nice shape, but kept increasing the number to get more scale – we ended up with 120 separate caches and tiny rolling detail.”
In a dark comedy scene, two of the characters encounter a strange alien creature, dubbed the Hammerpede, inside the dome. Looking cute initially, the creature attacks, breaking the arm of one character before wrapping itself around and inside his throat, and causing spurting alien blood to burn another. A practical Hammerpede was filmed on set. “It had translucent skin,” says Henley. “They had built an inside muscle layer and a second silicon layer to get a translucent look. We scanned bothlayers and generated a displacement map for the muscle texture. We re-built it CG with the two layer system and had all the light scattering based on the prosthetic and looking at how that was working.”

MPC also worked on shots showing a worm-like infection invading the face of Holloway (Logan Marshall-Green). Says Henley: “We wrote a system in Nuke we called ‘Wormulator’ that let you animate curves to taste – you could fatten it up or put a highlight on. That whole shot was done in compositing including the reflections in the eye.” Later on, Holloway becomes even more infected and his face almost mummified. Three practical make-ups were applied and shot separately and MPC would add to or animate between them for the desired look.
Watch this clip of Shaw on the planet surface before the Juggernaut takes off.In the film’s climatic moments, an Engineer attacks many of the Prometheus crew and then launches the Juggernaut on the way to destroy Earth. It emerges out of the planet surface through sliding silo openings, another effect created by MPC from previs and plates shot at both Pinewood and in Iceland. “We marked out the circumference for the silo a kilometer wide,” says Henley. “We put tracking markers out for the camera to line up to and helicopters to line up to. A 40 foot by 40 foot section of the silo was built practically on Pinewood’s back lot, we extended this for some shots and used it as a basis of the CG build.”

FXFACTOID:
“We actually cheated the scale a bit,.. something Ridley taught us. We would show the technical layout to Ridley about how it should be. And Ridley would say, ‘Well the computer is not what looks right – what looks good for the shot is right.”
– Charley Henley, MPC
The Juggernaut takes off but not before the Prometheus uses its ion thrusters to crash into the ship, causing an explosion and multiple debris to rain down on Shaw and Vickers (Charlize Theron) who are now on the planet surface, and then who must avoid the rolling ship on the ground. MPC relied on its FEA tool Kali to orchestrate the destruction effects, also using particle instances and practical debris, with Nuke sprites filling out the scene. “Any part of the ship that had to be destroyed had to be modeled in a certain way,” says Henley. “So we had to plan out what part needed to be hit. We used the art department to work out the timing and step by step stages of the destruction. Then we Kali modeled specific areas of the ship.”
The explosions were Flowline simulations and the falling debris – complete with naturalistic missile-like trails – were made from CG particles and bits of models made of parts of the ship. On the set and in Iceland, Theron and Rapace dodged practical debris rigged by the SFX teams which was combined with digital MPC elements via extensive roto.


The Juggernaut itself originated from drawings based on the similar Alien derelict ship, then as a dense Zbrush model by Russian artist Alex Kozhanov. Production visual effects art director Steven Messing also used Cinema 4D to create detailed orthographics for the MPC modelers. “We thought we would model the details procedurally,” recalls Henley, “but it never looked right so we scrapped that and manually laid out all the pipes – it had so many organic flowlines to keep in sympathy with. To help the illusion of scale in compositing we played a lot with ways to haze out and lose detail in some parts of the ship this was used extensively for the crash sequence.”
Co-ordinating 1400 shots

Overall visual effects supervisor Richard Stammers and VFX producer Allen Maris oversaw the effort of at least ten vendors for Prometheus. Principal vendors MPC, Weta Digital and Fuel were joined by Halon (previs), Hammerhead, Rising Sun Pictures, Luma Pictures, Lola, Prologue, Territory Studio, and in-house work from Pixel Pirates and Invisible Effects. Reliance Mediaworks performed stereo ‘triage’ on the parallel-shot RED EPIC footage, with Identity FX also contributing stereo optimization work.
Halon Entertainment lent previs services in LA, and MPC assisted with pre- and postvis for shots when production moved to London. “Ridley really warmed to previs,” says Stammers. “He’d say in the past, ‘Why do I need previs? I can draw what I want’. But there were so many technical questions that we needed answered, so it was important we got the previs done for those.” For example, Stammers tested the landing of the Prometheus early on in previs. “Ridley had a feeling it had to move and bit quite agile and take off like a Black Hawk would – but it’s so massive so we really had to strike that balance between what it was and get a sense of motion and the dynamic frame that he wanted.”

Fluent Image assisted with shot delivery to the many vendors with a custom system. “The RED raw files were taken from cameras, sent to a workstation at the studio or on location,” explains Stammers. “This material was piped to a server and renderfarm to create all the dailies for the editorial teams and all files stored on server. A VFX editor could export shots from the Avid to a WebUI on the Fluent Image system, and the dailies sent. With each delivery, each file would get a log DPX sequence with a reference match clip with the grade applied to it to make it look like what the DOP had set on set. We also had a test chart frame which had the same setting applied to it so the vendors could then see they were getting a raw frame without any color applied to it. They had a reference of what the shot should look like and the grade applied to it and RAW with the grade applied to it. So if they needed to recreate that grade that had two points of reference.”
Watch some behind the scenes footage from Pinewood and shooting in Iceland.Vendors also received camera metadata, including ISO and color settings, plus lens and rig information. “Each shot had as much info as we could possibly give them,” says Stammers. “And each plate went to Reliance Mediaworks for plate triage and the corrected plates went back to the vendors, so they could start working on something straight away. Generally they’d only correct the left eye and the right eye would remain hero – the one that looks through the mirror was generally the one that had better optical quality.”
Stereo optimization

Completing over 49 minutes of non-VFX native stereo optimization in nine weeks was Identity FX. The studio predominantly used the Mistika for the work, led by Leo Vezzali, also relying on Nuke for special effects fixes such as flares, tracking marker removals, and then Ocula for more comprehensive shot reconstruction. Identity worked under the film’s stereo supervisor Sean Santiago to complete the optimization.
Vezzali identified early shots that contained some excessive noise, so he requested the original R3D files to test a Debayer pass in the Mistika. “I would have to say that the large amount of brightness/flare disparities were quite challenging to deal with as were all of the steadi-cam shots in general,” notes Vezzali. “Zoom and exposure mismatches are really the most prevalent challenges that I have encountered. In most cases, the difference in exposure leads to a soft focus issue in one eye which can cause eye fatigue over the course of a scene. We had to use extensive masks and power windows to mitigate the disparities.”
Both Mistika and Ocular were vital tools in the process. “Most of the time,” says Vezzali, “I would provide a color balanced version of the shot to our Nuke compers so that they could focus on the geometry alignment since the Mistika is able to process the color alignments in near real-time. For the more problematic geometric misalignments, we found that we could work iteratively, running multiple color or alignment passes helped to resolve inconsistencies in the depth/disparity map generation in both tools. In terms of the interplay between tools, I can honestly say that there were only a handful of shots that were completely handled by Nuke Ocula as the sole solution. In some cases, I even did some last tweaks on shots that returned from comp.”
On particularly challenging scene was Shaw’s C-section in the med-pod. “There were many long hallway shots in and out of the med-pod that had shaky camera movements and massive lighting shifts which required a ton of key frames on the Mistika and more of compositing approach that I hadn’t anticipated employing to correct the shots,” says Vezzali. “I basically had to roto isolated elements of the shots so that I could apply very specific parameters and composite them back together in the Mistika. The most difficult shot required 12 composite layers to correct in the Mistika. In spite of it not being designed for specifically for compositing, the tools are very fast and robust. The tracker is extremely solid and made my life a lot easier.”
Rounding out the VFX

Territory Studio came onto the production to create design and animation of the on-set screens, but then also delivered post screen graphics and creative development for titles. “Our graphics we’re physically on set,” says Territory founder/director David Sheldon-Hicks, “programmed sometimes to respond to the actors, and featured all over the Prometheus ship from social deck and medical to dozens of screens on the bridge. We worked for several months before shooting, developing the visual style for all the screens. When shooting commenced we had to be incredibly responsive, often being asked to create animations that would be shot the same day.” In post, Territory then worked on helmet cam HUD overlays, a cyro-pod HUD display, screens for the parasite extraction procedure and the DNA screens and tablet.

Luma Pictures contributed holographic effects to the film, including embedding graphics onto a handheld slate which had been shot on set with transparent plastic blocks, and scenes of Holloway passing through a hologram. “For scenes in which the actor was partially inside the volume of the hologram, we were faced with creating detailed holdout geometry and matchmoves of the actors, so they would integrate properly within the CG fluid,” says Luma visual effects supervisor Vincent Cirelli.
“To create the look of the distortion field for this hologram shot, we used FumeFX for Maya, which we recently worked with Sitni Sati to implement,” adds CG supervisor Richard Sutherland, CG Supervisor. “Prometheus was the perfect testbed for this new fluid-based tool.”
Hammerhead, under visual effects supervisor Jamie Dixon, also delivered holographic effects, this time for the presentation made by Weyland on board the Prometheus. Other shots featured the linguist training hologram David watches, a CG basketball and later shots of David’s head talking after being ripped off by the Engineer – achieved by combining a prosthetic neck piece with Michael Fassbender’s head.
In addition, Rising Sun Pictures assisted with comps for the Prometheus flightdeck, helmet reflections, wire removals and the storm sequence close to the ship. “Richard Stammers had two options to shooting the sequence,” says Rising Sun visual effects supervisor Tim Crosbie.


“One with some live-action particles on-set, and the other was clean. By shooting with particles, that allowed us to have a very strong foundation to allow us to add additional particles that were needed to bulk up the shot. This was a combination of CG particles, and multi-layered live action particles. This gave us the ability to control the stereo depth and carefully place them, where required, to give the desired result. In almost all shots, the characters were on rigs, so one of the bigger challenges was removing the rigs whilst retaining the existing particles.”


All images and clips © 2012 Twentieth Century Fox Film Corporation. All rights reserved.
You guys kick ass! This is a great article and big ups to the artists that worked on this – outstanding work.
Thanks – glad you liked the story. The team here worked hard to bring you this spot light on some of the best VFX we’ve seen this year
Great article, loved all the details. And let me say the obvious: the VFX in the movie was great. I’ve seen awesome VFX before in movies, but after Prometheus landed, I took out my phone, opened Facebook and posted: “Watching Prometheus. EPIC AND BEAUTIFUL VISUALS”, something which I never usually do. 😀
Just the scope of the visuals, be it the opening scenes of the camera going through the valleys and waterfalls and rivers, to Prometheus landing, or the gruesome surgery scene, everything was just big and wide and epic. Plus the 3D really helped this time, unlike other movies.
Damn, I wanna see this movie again for the VFX.. (goes and books tickets). Great work by everyone in the VFX teams.
P.S: I was thinking Industrial Light and Magic must have worked in this movie, turns out they didn’t 😀
I must say i’m impressed… impressed of such a long and completely not boring article 🙂
Regards from Poland and do more great articles 🙂
Pingback: ERIC ALBA | Prometheus: rebuilding hallowed vfx space by @fxguidenews
Pingback: The Unpopular Opinion: ‘Prometheus’ is One of the Boldest Science Fiction Movies in Recent Memory - Next Big Film
Pingback: The Unpopular Opinion: ‘Prometheus’ is One of the Boldest Science Fiction Movies in Recent Memory | Fishstream TV
Pingback: The Unpopular Opinion: ‘Prometheus’ is One of the Boldest Science Fiction Movies in Recent Memory | Cool Movie Info
Pingback: The Unpopular Opinion: ‘Prometheus’ is One of the Boldest Science Fiction Movies in Recent Memory | Cool Movies
Pingback: The Unpopular Opinion: ‘Prometheus’ is One of the Boldest Science Fiction Movies in Recent Memory | Great Movies Info
Pingback: Getting started – Vision Play
Pingback: From ‘Scanners’ to ‘Game of Thrones,’ Here Are the Best Exploding Heads in Film and TV – Searching latest NEWS