Rendering is always an exercise in managing how much computer power you are willing to devote to simulating reality – that cost is expressed in both dollars and time.
Once considered a commodity item in the whole CG / VFX world – rendering is now a hot topic. CG supervisor Scott Metzger jokes that one can’t talk about renderers without annoying someone. “Renderers are like religion (laughs). Rendering is a religion! Especially now in this era, which is really really exciting, there is so much going on and there are so many renderers, so much happening. To me it is the most exciting part of being in our industry right now.”
As Dana Batali, Vice President of RenderMan products at Pixar commented to fxguide at an earlier Siggraph, “Rendering drives the largest computational budget of getting the pixels to the screen.” He pointed out at that time ‘sims’ (physical sims like cloth etc) were only about 5% of most film’s computation budgets. Since rendering dominates render farms one cannot devote as much effort to perfect light simulations in a render as you can to a destruction simulation in just perhaps one shot.
Renderers are easy to write in the abstract, as perhaps a university project, but to work in production environments is extremely difficult. Arnold, by Solid Angle, is some 200,000 lines of highly optimized C++ code, and it is considered a very direct implementation without a lot of hacks or tricks. Production requirements in terms of rendertime and scene complexity are staggering. And the problem is not just contained to final render time, as Arnold founder Marcos Fajardo pointed out at Siggraph 2010 – final render CPU time might cost $0.10 per hour, but artist time is closer to $40 an hour, so interactivity is also vital.
This leads to the heart of rendering: picking the best approach that will get the results looking as good as possible, in the time you have, and more precisely picking which attributes of an image – be it complex shading, complex motion blur, sub-surface scattering or some other light effects should be your priority – which ones will play in your shot, and which attributes need to be more heavily compromised.
Rendering is an art of trying to cheat compromises.

Concepts
There are many choices and factors that influence the decision of a studio to pick one renderer or another, from price to their pipeline experiences, but for this article we focus on a comparison based on the needs of global illumination (GI) in an entertainment industry production environment. We have chosen to focus on major studios with the expectation that many smaller facilities are interested in the choices made by those larger companies with dedicated production and R&D personnel. This is not to lessen the importance of smaller facilities but rather to acknowledge the filter down nature of renderer choices.
Reflection and shading models
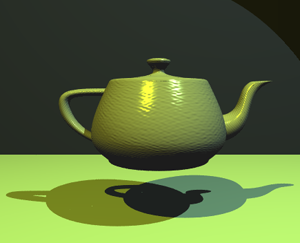
The goal of realistic rendering is to compute the amount of light reflected from visible scene surfaces that arrives to the virtual camera through image pixels. This light determines the color of image pixels. Key to that are the models of reflection/scattering and shadingthat are used to describe the appearance of a surface.
- Reflection/Scattering – How light interacts with the surface at a given point
- Shading – How material properties vary across the surface
A mathematical description of reflectance characteristics at a point is the BRDF – bidirectional reflectance distribution function.
BRDF
An object’s absorption, reflection or scattering is the relationship between incoming and outgoing illumination at a given point. This is at the heart of getting objects looking correct.
Descriptions of ‘scattering’ are usually given in terms of a bidirectional scattering distribution function or, as it is known, the object’s BSDF at that point.
Shading
Shading addresses how different types of scattering are distributed across the surface (i.e. which scattering function applies where). Descriptions of this kind are typically expressed with a program called a shader. A simple example of shading is texture mapping, which uses an image to specify the diffuse color at each point on a surface, giving it more apparent detail.
The modern chase for realism revolves around more accurate simulation of light and the approaches renderers have taken to provide the best lighting solution. Key to current lighting solutions is global illumination.
Global illumination
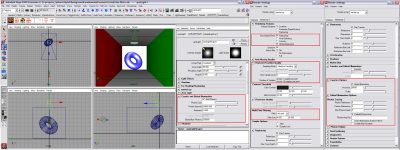
The defining aspect of the last few years of renderers has been global illumination (GI).
Jeremy Birn (lighting TD at Pixar and author of Digital Lighting and Rendering, 2006) succinctly defines GI as “any rendering algorithm that simulates the inter-reflection of light between two surfaces. When rendering with global illumination, you don’t need to add bounce lights to simulate indirect light, because the software calculates indirect light for you based on the direct illumination hitting surfaces in your scene”.


We want to get all the contribution from all the other surfaces so that it takes into account BRDF and radiance from each direction. GI makes CG lighting much more like real world lighting and accounts for radiosity or the color bleeding that happens when no reflective surfaces still provide bounce, and bounce tinted to their diffuse color.
Solutions:
- Radiosity
- Photon mapping (and with final gathering)
- Point clouds
- Brick maps
- Monte Carlo ray tracing
Conventional radiosity
Conventional radiosity is an approach to GI where indirect light is transmitted between surfaces by diffuse reflection of their surface color, and sorted in the vertices of the surface meshes. While this was one of the first types of GI to become available, the resolution of your geometry is linked to the resolution of your GI solution. To achieve more detail in the shadows, you need to increase the poly count, and if the objects are animated and moving it needs to be recomputed every frame. As such it was not popular in VFX.
In a simple ray tracer, the ray’s directions are determined regularly and normally in a simple grid. But there is a key alternative, Monte Carlo ray tracing, also known as stochastic ray tracing. In Monte Carlo ray tracing the ray’s origins, directions, and/or times are set by using random numbers. See below.
A ray tracer suffers in render time as the number of shiny surfaces and the number of lights and objects balloons – as it tends to on a major effects shot.
The key with a ray tracer is not its complexity but the complexity of its optimizations and implementation.
The key concepts are simple enough, but the demands on a production ray tracer to deliver inside a computational budget on exceedingly complex projects is no small demand. Until recently, full ray tracers were not used for animation. They were popular for still shots, or very small special cases, but most ray tracing commercially happened as part of a larger solution, as part of a hybrid solution.
Now that that is changing there is great demand for the amazing accuracy and subtlety of a ray tracing solution. But the key is to stay focused on producing good results not necessarily accurate results. In films and TV shows it is rare that accuracy is regarded as the absolute yardstick. Flexibility to solve directorial requirements need not also encompass physical accuracy, but the ability to create realistic imagery is pivotal.
Photon mapping
The photon mapping method is an extension of ray tracing. In 1989, Andrew Glassner wrote about ray tracing in An introduction to ray tracing:
“Today ray tracing is one of the most popular and powerful techniques in the image synthesis repertoire: it is simple, elegant, and easily implemented. [However] there are some aspects of the real world that ray tracing doesn’t handle very well (or at all!) as of this writing. Perhaps the most important omissions are diffuse inter-reflections (e.g. the ‘bleeding’ of colored light from a dull red file cabinet onto a white carpet, giving the carpet a pink tint) etc.”
The photon map algorithm was developed in 1993–1994 and the first papers on the method were published in 1995. It is a versatile algorithm capable of simulating global illumination including caustics and diffuse inter-reflections. And for many years it provided the same flexibility as the more general ray tracing methods using only a fraction of the computation time.
The key with photon mapping compared to early radiosity ray tracing that stored values at each vertex is that in the new approach the GI is sorted in a separate data type – the photon map. The resolution of a photon map is independent from the rest of the geometry.
The speed and accuracy of the photon map depends on the number of ‘photons’ used. They bounce around a scene and bounce off any surface which should be brightened by indirect light and are stored in a map – not unlike a ‘paint gun’ effect where the blotches reflect the photons. This means that you can get good results from just photon maps, but if the number of photons are not enough, the results will not be smooth.
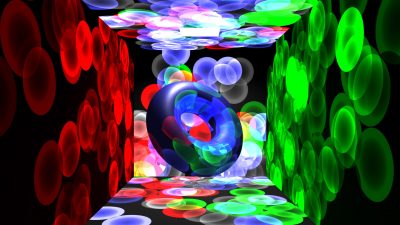
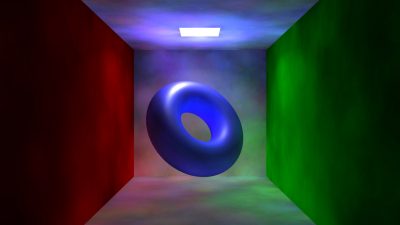
The solution to this problem is to use photon maps with final gathering, which in effect smooths out the photon map, providing much more continuous and smoother illumination. In addition to ‘filtering’ the photon map it provides what Birn describes as something that “functions as a global illumination solution unto itself, adding an extra bounce of indirect light.”
The photon map with final gathering for computation of global illumination is a three-pass method:
- First, photons are emitted from the light sources, traced through the scene, and stored in a photon map when they hit non-specular objects
- Then, the unorganized collection of stored photons is sorted into a tree
- Finally, the scene is rendered using final gathering (a single level of distribution ray tracing). The irradiance at final gather ray hit points is estimated from the density and power of the nearest photons. Irradiance interpolation is used to reduce the number of final gathers.
The photon map is still decoupled from the geometric representation of the scene. This is a key feature of the algorithm, making it capable of simulating global illumination in complex scenes containing millions of triangles, instanced geometry, and complex procedurally defined objects.
Combining global illumination with final gathering can achieve the most physically accurate illumination results required. And it is widely used for interior architectural shots that require the effect of the light contribution from exterior and interior light sources. To seamlessly turn final gather on and off with global illumination, a scene must be modeled in a physically plausible way for both of these lighting effects. For example, lights should have roughly identical values for color (direct light) and energy (photons) attributes. Materials are normally also designed to be physically plausible also. So in Softimage, for example, there is an Architectural Material (mia_material) shader that is designed to support most physical materials used by architectural and product design renderings. It supports most hard surface materials such as metal, wood, and glass. It is tuned especially for glossy reflections and refractions and high-quality glass.
Radiance or ‘color bleeding’ in RenderMan
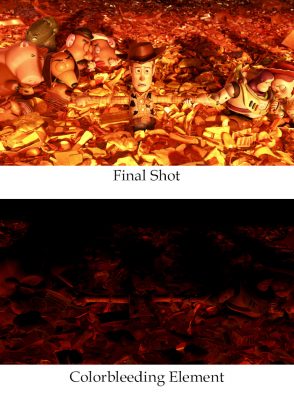
As time progressed companies aimed to add radiosity to images, even if they were not doing a full ray tracing solution. With release v11 of Pixar’s RenderMan, ray tracing was implemented as part of the shading language, to aid in rendering physically accurate interreflections, refractions, and ambient occlusion. In the case of RenderMan today, v16 offers several new features implemented specifically to enhance the performance of ray traced radiosity, including a radiosity cache, physically plausible shading, and a pure brute force ray tracing solution. The new Raytrace Hider in v16 lets renders bypass the REYES algorithm altogether. The Raytrace Hider is a new option that allows one to render images using pure ray tracing, bypassing the usual rasterization process that PRMan uses. Rays can now be shot from the camera with jittered time samples and lens positions to produce accurate motion blur and depth of field effects. With v16, ray traced GI has become a viable production tool. Prior to v16, RenderMan was still producing great GI solutions using multi-pass solutions.
Before the expense of ray traced radiosity became feasible for large productions, Pixar’s RenderMan tackled GI in two distinct ways, one using ray tracing to just add the indirect radiance after the direct illumination has been calculated, and the other using a version with no ray tracing at all. all. These techniques were first used in production on Pirates of Caribbean 2: Dead Man’s Chest, 2006. For production scenes with complex shaders and geometry, these techniques proved to be relatively fast, memory efficient, and artifact free, but because of their multipass nature, they required significant disk I/O, careful asset management, and were unsuitable for interactive re-lighting.
Pixar’s RenderMan provided two multipass solutions or options for natural color bleeding: brick maps (this is an approach similar to photon mapping) and point clouds. We spoke to Pixar’s Per H Christensen, about these two multi-pass approaches.
[fx_audio src=”/wp-content/uploads/2012/04/renderman_per.mp3″ link=”/wp-content/uploads/2012/04/renderman_per.mp3″]
Click to listen to Mike Seymour talk to Per Christensen who explains the differences between brick maps and point clouds. Per Christensen is a senior software developer in Pixar’s RenderMan group at Pixar in Seattle. His main research interest is efficient ray tracing and global illumination in very complex scenes. Before joining Pixar, he worked for Mental Images in Berlin and Square USA in Honolulu. He received a Master’s Degree in electrical engineering from the Technical University of Denmark and a Ph.D. in computer graphics from the University of Washington.
Option 1 Brick Maps: Ray traced solution/brick maps to solving indirect illumination or radiosity
The steps are :
– Render with direct illumination, and during this render the software writes out point cloud (with each point in the cloud having the direct illumination color on it), this is “baking the direct illumination”.
– Then the software converts this point cloud into a 3D brick map. This 3D map – very much like a texture map – is independent of the camera effectively.
– The final step is to render the final image and for each shading point where you want to know the indirect illumination or the radiance the software shoot rays back out into the 3D brick map and looks up the color at that point. Doing it this way gets expensive very quickly, but it is optimized in RenderMan to just look up in the brick map and to minimizes the number rays. As REYES divides the surface into micropolygons RenderMan does this well.
Option 2 Point Clouds: to solving indirect illumination or radiosity with point clouds (no ray tracing)
The steps are:
– Render with direct illumination as before, write out point cloud (each pt has the direct illumination color), but do not do the brick map
– Render the final image – for each shading point where before you would shoot rays into a brick map – you now look up in an octree. So points close by where we are in 3 space the software evaluates fully, but points a long way away are just clumped together for an aggregate solution. In a way at each shading point you want a fisheye view of the world, at that point, a rasterization of the world – but using the octree to speed everything up.
RenderMan doesn’t account from every point in the cloud and does not use ray tracing at all in this method.
To deal with these very big point clouds there is a cache system that reads the points as you need them. Similarly, for the ray tracing method, the software was optimized to allow for dynamically offloading of geometry when not needed to reduce memory use.
In the past, TDs picked one of these two methods for a show (film) to establish the approach that works for that film’s scenes. For example, Wall-E used the point cloud methods for ambient occlusion, as there was a lot of very dense garbage (in the start of the film) and for the ray tracing method they would need to access all of the geometry to determine ray intersections, making the point cloud method the one the Pixar team selected to use for that film.
Importantly, most of the discussion above is about diffuse transports. To cover a broader more general approach to GI it should be stated that only photon mapping and Monte Carlo ray tracing allows one to solve for the specular paths or even diffuse to specular lighting effects such as in caustics. Caustics remains a very complex and demanding issue. While solved many times in production it tends to rarely be solved directly and is more often solved as a special case.
The RenderMan team used to recommend using multipass methods such as baking the direct illumination or photon mapping. But with the multi-resolution radiosity cache introduced in PRMan v16 it is just as efficient, and much easier to use the new techniques.

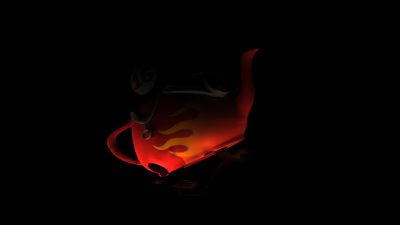
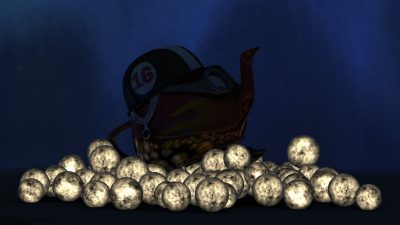

Christophe Hery, Senior Scientist at Pixar says, “Obviously I have been a big supporter of multipass approaches in the past, and in particular of point-based techniques. But through my more recent Physically Based and Energy Conservation work (primarily at ILM with my former colleague Simon Premoze – though I now reproduced and enhanced it at Pixar), I discovered that Multi Importance Sampling is a very practical solution for allowing a unification of illumination: for instance, it is because we sample the BRDFs that we can transparently swap a specular emitting light of a given shape and intensity, with a geometry of the same size and color, and in essence get the same reflection from it (obviously a crucial part to get that working is HDR textures). Interestingly, solving the visibility for specular (ray-tracing for MIS) will essentially give you for free the shadowing on your diffuse components. Associate to that the radiosity cache (from PRMan v16) and then you find yourself in a situation where the PBGI (Point Based Global Illumination) stuff or even spherical harmonics become obsolete (to justify these, you would need to have more or less a pure diffuse illumination, at least a low frequency light field).”
Christophe Hery joined Pixar in 2010 after spending 17 years at ILM. In 2010 he received a Technical Achievement Award for the development of point-based rendering for indirect illumination and ambient occlusion. He is recognized throughout the industry as one of the leading technical innovators and researchers in areas of lighting and rendering. As such, fxguide asked for his personal opinion as to whether this means he increasingly favors a full ray traced solution.
“Yes. I believe the whole industry is moving in that direction. Normalized BRDFs and area lights, in conjunction (through MIS), deliver a plausible image with minimum tweaking, empowering the artists to focus in beautifying the shots.”
In recent times at Siggraph and elsewhere there have been advances in lighting such as the use of spherical harmonics, but the use of these cutting edge approaches are somewhat mitigated by adopting a more complete ray tracing solution. Hery expands on the point above:
“SHs (Spherical Harmonics) as a full pre-canned illumination solution can ‘only’ reproduce low frequency luminaires or materials. As such, they are not a complete approach, and they always need to be supplemented by something else. Plus they come with serious issues related to precomputation and storage. If one is to use MIS to achieve specular, one might as well share the light sampling (and traced visibility) and essentially get diffuse for free.”
When the master GI solution is ray traced, the setups are also easy: there is no special extra data to manage. Hery, again:
“You can even make the whole thing incremental (in a progressive refinement manner), enabling fast interactions. With PRMan v16, I do not think we are at a time that it makes sense to trace the camera rays (better to rely on Reyes tessellation), but everything else can. On the other hand, Lumiere PRMan’s relighter, is starting to work great in pure ray-trace hider mode.”
Lumiere is a part of RenderMan RPS, and provides an API for developers to access. Lumiere is the REYES re-renderer, but there is also the RAYS re-rendering/relighter. Many studios have written their own interface into Lumiere, including from inside Nuke, inside Maya, or as a stand-alone facility application. Lumiere is actually a name given to two different types of re-rendering inside Pixar, both a relighting Katana-style tool and an interactive tool – the name is used on a several of Pixar’s internal tools.
Monte Carlo ray tracer
Arnold is an example of a Monte Carlo Ray tracer, it’s an unbiased, uni-directional stochastic ray tracer. Unlike RenderMan it uses ray tracing for direct and indirect lighting, but also unlike earlier ray tracers is not slow and difficult to use with animations and moving objects. Arnold is very much a production renderer designed precisely for VFX and animation production. (see below).
Arnold fully supports GI and provides incredibly high levels of realism and visual subtlety while also covering the flexibility needed for productions.
Arnold has no rasterization tricks, no irradiance caches or photon maps for light sources. According to Eric Haines (Ray Tracing News): “Motion blur and depth of field effects weakens rasterization’s appeal, since much sampling has to be done either way; these features are a natural part of stochastic ray tracing. Not being a hybrid system using some form of rasterization has a number of advantages. First, there’s only a single version of the model stored, not one for the rasterizer and another for the ray tracer. Reducing memory footprint is critical for rendering large scenes, so this helps considerably. Arnold also uses compression and quantization of data (lower precision) in order to reduce memory costs. Not using two methods of rendering avoids other headaches: maintaining two separate renderers, fixing mis-syncs between the two (e.g., one thinks a surface is in one location, the other has a different result), dealing with a large number of effects consistently in both, etc.”
Avoiding irradiance caches, as in the hybrid approaches above, means that there is minimal precomputation time for Arnold. This means rendering can happen immediately versus waiting for precomputations to be completed. Combined with progressive rendering (where an image is roughed out and improves over time), this is an advantage in a production environment, as artists and technical directors can then iterate more rapidly.
Image Based Lighting (IBL)
An important part of GI is image based lighting. IBL involves capturing an omni-directional representation of real-world light information as an image, typically in one of three ways:
Dreamworks (updated)
It would be wrong to imply all productions are moving away from PBGI and are focused just on ray tracing. While Dreamworks do not use RenderMan – they use their own renderer – they have been using point based solutions very successfully on their films for some time.Eric Tabellion from PDI/Dreamworks, R&D published the following as part of his 2011 EuroGraphics paper
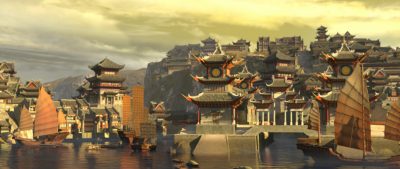
“Point-based global illumination (PBGI) is an efficient method for computing smooth interreflections which are vital for photo-realistic rendering. PBGI is an alternative to ray tracing based approaches, such as Monte Carlo path tracing or irradiance caching and has been utilized in several DreamWorks Animation feature films, including “Shrek Forever After”, “Megamind”, and many others.
In its most basic form, PBGI is a level-of-detail (LOD) algorithm for simplifying both geometry and shading. As a preprocess, the geometry is finely sampled using a large number of points, which are shaded using direct illumination and a view-independent diffuse shading model. This point- based representation is then aggregated into a hierarchy, usually an octree, where each coarser level accumulates the geometry and outgoing radiance from the finer levels.”
At Siggraph 2010 Tabellion summarized it as: “GI remains very valuable for animated film production lighting. We’ve analyzed both ray-tracing and point-based GI approaches … overall, ray-tracing is more appropriate for applications seeking higher accuracy or when scenes have large flat surfaces without too much high-frequency texture detail. Points offer a close approximation and are a very appealing alternative for film production. Both approaches produce images that are visually very similar, but point-based GI produces very stable images more efficiently while handling higher scene complexity.”
“When considering rendering performance and scene complexity handling, I’m still a big fan of PBGI,” Tabellion explained to fxguide this month, but he also pointed out that, “When considering ease of use and setup, interactivity (minimize the ‘time to first pixel’) and reliability / predictability, then I think rendering systems based on ray tracing are better.”
The Main Renderers
The market for renderers can be divided into three groups. Stand alone packages such as RenderMan, application specific packages such as Mantra (Houdini’s renderer) and GPU renderers that may or may not be bundled with an application such as Quicksilver which ships with 3ds Max. Of these the production gold standard for the past few decades has been RenderMan from Pixar’s RenderMan group.
RenderMan – Pixar
 Photorealistic RenderMan, PRMan, is Pixar’s primary renderer and one of the most influential and respected renderers in the world. Not only has every major Pixar film and thus many Academy Award winning animated feature films used it, is also the blue ribbon high end package that all other renderers must be compared to.
The first use of the word RenderMan was in the RenderMan Interface Specification, in 1988. Strictly speaking, PRMan is a RenderMan compliant renderer, and there are other RenderMan compliant renderers not made by Pixar.
PRMan uses the REYES (Renders Everything You Ever Saw) algorithm but it is also able to deploy ray tracing and global illumination algorithms making it a hybrid renderer. Loren Carpenter and Robert Cook developed the original REYES renderer when Pixar was part of Lucasfilm’s computer and graphics research unit in the early 1980s. It was first used commercially to render the incredibly impressive and landmark Genesis Sequence in Star Trek II Wrath of Khan (1982).
Since the beginning of the CGI / VFX industry, Pixar’s RenderMan has been playing a key role, rendering VFX for such classic films such as The Abyss, Terminator II, Jurassic Park, and fully animated features such as the Toy Story series, Wall-E, Cars and the rest of the great Pixar films. RenderMan was involved in 84 VFX films and 23 animated films in 2011 – worthy of note this is approximately ten times the volume of a decade ago.
Today, Pixar’s RenderMan has evolved to become the de-facto standard for much of the VFX industry, used everywhere by studios large and small to create outstanding graphics for feature films and broadcast television. Pixar’s RenderMan has been used on every Visual Effects Academy Award Winner of the past 16 years, and as of last year, 47 out of the last 50 nominees for Visual Effects have chosen Pixar’s RenderMan to render their effects. Since 1999, Pixar has been awarded some 5 technical Oscars, from the 2011 – Scientific & Engineering Award to David Laur (Senior RenderMan Developer) for his work with Pixar’s Alfred render queue management system, to the Academy honoring Pixar’s head Ed Catmull with the Gordon E. Sawyer Award for a lifetime of technical contributions and leadership in the field of computer graphics, including his work with Pixar’s RenderMan.
Today PRMan is used to render everything that comes out of Pixar and is commercially available to other studios as either part of the RenderMan Pro Server or directly for Maya. There is also renderfarm queue management software and special student and educational versions.

RenderMan History
The Early Days 1988 to 1995
- RenderMan renders curved surfaces by using micropolygons about the size of a pixel
- It did not originally use ray tracing, but now that has been added in 2002, making RenderMan a hybrid render
- It uses high level primitives. Geometry is tessellated in screen space, one can ask RenderMan to render a sphere, at this location, you don’t need to define the sphere
- From the outset it was very well designed for parallel processing a scene on a renderfarm. It was a tiled approach and thus only needed to use a fraction of the total geometry per tile, making it very efficient
- It used stochastic (randomizing) sampling – and very early on it had motion blur which allowed it to be used very effectively for effects work, integrating with live action more seamlessly
- And it was very well suited to displacement mapping
1995
Toy Story was introduced and by then RenderMan had 64 bit support, and was at RenderMan toolkit 3.5
2001
Monsters Inc was released and and the ricurve primitive, for rendering fur and hair, was added.
2002
Finding Nemo was released.
Ray tracing was introduced, in RenderMan Pro Server 11. This was a key release – it included not only ray tracing but also ambient occlusion and deep shadow maps.
2004
The first widespread use of ray tracing at Pixar was for ambient occlusion in the movie The Incredibles.
2005
Accelerated ray tracing was introduced for the film Cars. Cars used pure ray tracing without color-bleeding, radiance or radiosity effects. The ray tracing did provide accurate sharp reflections and shadows – notably ambient occlusion, to provide very realistic car paint textures.
2006 – 2007
Brick maps and point based color bleeding were introduced.
Ratatouille was released with dramatic sub surface scattering used on the elaborate food shots. But the film pre-dated the new brick map and point based color bleeding, using it only for some shiny pots and pan shots, but not widely throughout the film.
2008
Wall-E is released and extensively used brick maps.
2009
Pro Server v15 was released, including Ptex support for the first time.
2010 – 2012
PRMan today supports deep compositing, a new ray tracing hider, a radiosity cache, and physically plausible shading. It is still a hybrid renderer but with v16 it is possible to just ray trace and not use the REYES algorithm. This is not to imply that the REYES approach is being phased out. As Dylan Sisson, RenderMan Technical Marketing Specialist at Pixar, explains, “Today more complex scenes than ever before can be handled by pure ray tracing, but not all scenes. There is room for alternative techniques and tools which may be useful depending upon the unique demands of any given scene, so the RenderMan team sees its role as providing many varied approaches to a user – choice rather than just ‘one tool in the tool box.”
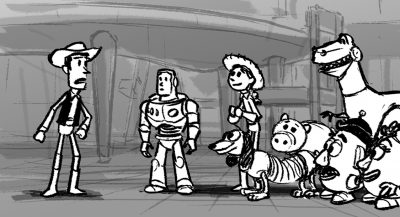
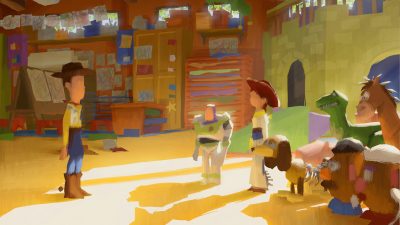
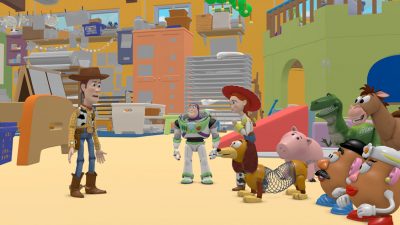
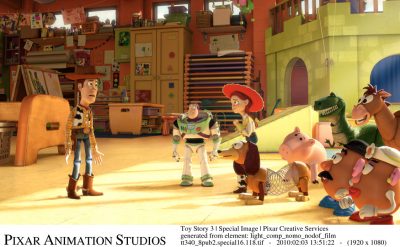
Pixar Toy Story 3 shot progression
Current developments
Today some companies like Weta Digital have scenes that are too complex for an ‘all-in-one’ ray tracing solutions. For some of their work, ray tracing just isn’t a solution. “If you look at companies like Weta who are putting out really really large data sets,” says Sisson, “the size of data sets they are generating is mind boggling. So for those top level studios there is going to be a place for point based solutions for scenes that can’t be rendered with ray tracing. But on the other hand, there are going to be more and more types of shots where ray traced GI will be perfectly reasonable.”
The use of ray tracing or not is a direct factor of image rendering time. Performance is therefore a big issue for the engineers in the RenderMan team. “If you look at the performance with the new radiosity cache, RPS 16 can be up to 40 times faster than RPS 15 on some of the scenes we have tested in production. So RPS 16 is just much faster,” notes Sisson.
Today RenderMan ships as RenderMan for Maya 4.0, RenderMan Studio 3.0 and RenderMan Pro Server 16.0.
RPS 16 is very much a landmark release for RenderMan. It is not only significant for what was added but it lays the ground work for several new chapters in the RenderMan story. RPS 17 is planned for release in 2012, and it will very much build on 16, especially in providing improvements in ray tracing as they relate for example to volumetrics, photon mapping and object instancing. “RPS 16 is a foundational release,” says Sisson, “We looked on the horizon and we see that more expensive effects like ray traced GI and ray traced subsurface scattering will become applicable to production VFX, even becoming the norm. We’ve gone to great lengths to make PRMan very savvy about how it calculates these effects, so we implemented the radiosity cache, the plausible shading, the ray tracing hider, creating a solid base for rendering ray traced radiosity, interactive re-rendering, etc. We’re buying into the idea that we want to provide people with a great tool box – so if you want to render everything in one pass – great – but if you want to break your scene up and render it in many passes, you can do that too.”
Although RPS16 is still based on the REYES algorithm, the team at Pixar have extended PRMan with various ray tracing tools while maintaining RenderMan’s reputation for handling the most complex production scenes. By the use of ray differentials and multi-resolution texture and tessellation caches, very complex scenes can be ray-traced and high levels of radiosity realism can be used in production.
Which begs the two questions – why go this way and where is this heading?
- Why add ray tracing? Certain desirable special effects, such as accurate environment reflection, inter-reflection, refraction, and colored shadows can be easily handled by a general tracing facility. Also, the same internal facilities are required for generating photon maps, which Pixar uses for global illumination. (In other words, RenderMan already has ray tracing and has for some time, this new work builds on it).
- So has PRMan been replaced by a ray tracing renderer? Pixar’s existing PhotoRealistic RenderMan product has been extended to add ray traced shading as an integrated set of new features. PRMan continues to be based on Pixar’s highly evolved version of the REYES algorithm, which has been so successful in handling large production shots. In fact, Pixar continues to add interesting new features and performance enhancements to the core renderer, independent of ray tracing, often in response to their own demanding feature film requirements. Ray tracing has been added to the shader writer’s toolkit, in an advanced form which builds on the tracing proposal that has been part of REYES all along. PRMan still efficiently sets up primitives for rendering as it always has, but now shaders that execute on those primitives have the ability to use several built-in ray tracing operators to probe other geometry in the scene. The techniques that long-time PRMan users have learned and refined will continue to be useful and effective, ray tracing just adds to the bag of tricks. Indeed, many scenes will not benefit from adding ray traced effects, but they can now be added when required in a fully integrated fashion.
An example of ray tracing being used prior to RPS 16 is in the films Cars and Cars 2. While the sharp car reflections in the cars were generated with ray tracing, an even better example of complex yet unusual use of the algorithms is in the background car crowd scenes.
To produce background large crowds, a huge number of cars were required. Pixar used Massive, Houdini, and Marionette – their own in-house animation system – to produce the car crowds in the stands. To render the cars a technique called ‘Shrink-wraps’ was developed. Pixar used displacements to ‘shrink-wrap’ a cube shape down to a car shape for the crowd cars in Cars and Cars 2. Essentially, the crowd cars collapsed the entire model hierarchy down to a box for the body, and four cylinders for the wheels, these base simple shapes were then displaced to the shape of ‘hero cars’ that were separately and previous traced. These ‘hero car’ models were placed in a sphere, that was traced and then the data applied to the very simple shapes to make them displace to look like very complex much more heavy geometry. These ‘crowd cars’ render extremely fast and the geometry is tiny by comparison.
“That is one of neat things you can do with RenderMan,” explains Sisson. “You can write arbitrary shaders that allow you to create interesting assets.” To create the Shrink-wraps for the cars the team “essentially placed a virtual sphere around the actual model of the car (hero car) and then used a shader to trace into that sphere along the normal until it hit the car, and then would report back the distance, to create a 32-bit float map for displacement. This is a great example of how flexible ray tracing is in RenderMan – it is not just casting a ray and retrieving a color – rays can generate arbitrary data like these shrink wraps.”
Cars were then randomized for color etc. The end effect is extremely effective dramatically lighter in memory requirements and faster to render. For example: 200 normal cars would render in 59:24 seconds (long distance – far away cars) vs 00:51 using the Shrink-wrap approach, and 3.8GB of PRMan memory becomes just 61MB with the Shrink-wrap ‘trick’.
The use of shrink-wraps was not ideal for models with concavities or transparency. Side mirrors of many cars were the main areas one can see a visible difference, but in a wide crowd shot this is an acceptable limitation. Heavy displacement can also create render-time artifacts from lighting and texture filtering, but for background characters Pixar found these minor points acceptable.
But the net result is extremely effective, and yet the technique dates back to 2006, and it goes to show the flexibility of ray tracing in RenderMan.
For the 2011 implementation of ray tracing inside RenderMan, the Pixar engineers use importance sampling or rather ‘multiple importance sampling’ (which samples from both surfaces and lights and combines the results in a smart way in the shader for the lowest noise, and less artifacts while still being very fast).
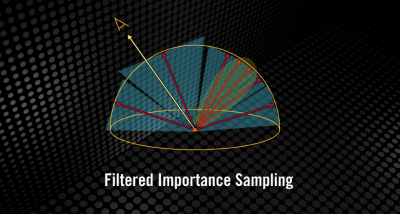
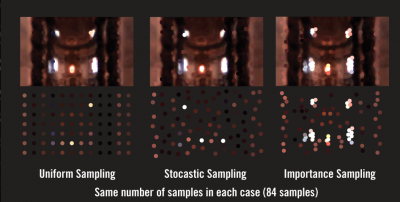
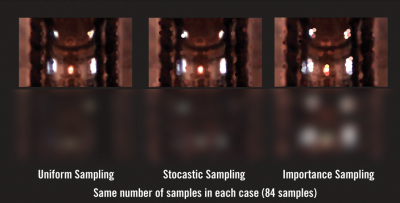
Importance sampling is part of the process that determines how many rays you cast into a scene and making sure you don’t cast more rays than you need to. This is important as ray tracing is expensive but too few rays will result in noise. The point of importance sampling is to therefore provide more rays but just where it matters. The problem is that normally using the necessary number of samples to reach the required result is too expensive and fewer samples are evaluated at the cost of visual noise within the image. Importance sampling reduces the brute force approach.
This all affects writing shaders, in addition to the other things mentioned, in RPS 16 RenderMan has new tools in the shading language to calculate global illumination effects. “For example”, says Sisson, “if you want to create an area light, we have surface shaders that can reduce that type of calculation into as few a steps possible. In the beginning, we had shaders with an ambient component, diffuse component, and a specular component – those were the building block of shaders. Over time more features were added. New functions allowed shaders to calculate new effects, like ambient occlusion, but they also added cost to the shader. With RPS 16 we asked if there was a better way to consolidate the calculations shaders make? We created new calls for direct lighting and specular lighting as well, so that view-independent lighting (diffuse) can be reused by the radiance cache, while view-dependent lighting (specular) can be recalculated. This is one of the things that makes ray traced GI in 16 so fast. Over the next 3 or 4 years people are going to become a lot more familiar with the new features of RPS 16.”
Looking forward to the rest of this year, Dylan Sisson points out that RPS 17 and RMS 4.0 will be released. The current RMS 3.0 has RPS 15’s internal ray tracer. “We are lining up the releases this time so RMS 4.0 will have the internal RPS 17 renderer with RMS 4.0 – so a complete upgrade. That release will have direct support for a lot of the features that are in v16 and v17, making these new features accessible to the average user.”
Longer term, RenderMan continues to grow and develop and Pixar, like many companies, is partly tied to the overall health of the general production community. Luckily, that is improving globally. Pixar has watched the market recover from the economic upset of the GFC a few years ago, and as Sisson comments, “We are seeing a lot more productions, a lot more growth. The pulse of the industry is a lot stronger than it was and we are seeing that reflected in (our) sales as well.”
Arnold – Solid Angle
One of the most interesting and successfully expanding renderers is Arnold. A fully ray tracing solution, it has gained tremendous credibility in the last few years at the high end especially in major vfx feature films and animated features. Sony Pictures Imageworks was the catalyst for the professional adoption of the product, but its use and reputation have blossomed to places such as Digital Domain, ILM, Luma Pictures, Framestore, Digic Pictures and others.
The product is ‘hot’ and yet remarkably unavailable. If you go to the Solid Angle web site you will be greeted with just a logo (and an equation if you can find it). No sales page, no specs, no PR, no user stories – nothing. Still the program is considered by many to be massively important, and its adoption is spreading just on word of mouth, amongst high end facilities.
Arnold was started by Spaniard Marcos Fajardo, but while he lived in the USA. Today Fajardo is still the chief architect of the “Arnold” at Solid Angle and the company is back based in Europe.
Arnold history
1997
Fajardo decided at age 24 in 1997 to write his own renderer. The skeleton of what was to become Arnold was started in 1997.
According to an interview with Fajardo by Eric Haines (Ray Tracing News), during Siggraph 1997 Marcos slept on the floor at the house of some of his friends. These friends introduced him to many of their own friends; one of them was Justin Leach, who was working as an animator at Blue Sky Studios. Justin knew Fajardo was into rendering and introduced him to Carl Ludwig, co-founder and one of the original developers of Blue Sky’s renderer. By all accounts, Ludwig was great, gave Fajardo a tour, and they spent some time chatting about ray tracing. Blue Sky Studios was the first studio to use (classical, later Monte Carlo to some extent) ray tracing for all rendering. Fajardo was blown away by their images, especially one rendered by John Cars, with illumination coming from the sky. He was inspired – these images convinced him that full stochastic ray tracing was the way to go. Blue Sky’s Bunny was done with stochastic ray tracing, though the bunny itself did not have indirect lighting (too expensive at that time). It was probably the first use of unbiased Monte Carlo radiosity in film, back in 1998.
1999
A renderer is not normally an end product like a paint program is, and thus in many respects it is an API that allows programs to access it for rendering models and animations created up stream in the process. Hence it was that Arnold was initially called RenderAPI. But in 1999 Fajardo was working with Station X Studios in LA. One night he went with two friends to an Arnold Schwarzenegger film, End of Days. Again according to Haines, Fajardo friends “imitated the Arnold accent from the rear of the theater, cracking up the audience.” Fajardo had never realized what a distinctive voice Schwarzenegger had, since he had only seen Schwarzenegger’s films in Spain, where they’re dubbed in Spanish. “They just impersonated him.. and one of them was a stand up comedian – and pretty good,” he laughingly recalls. Andy Lesniak, one of the friends at the theater, suggested “Arnold” as a joke, and Fajardo liked it. “So I thought – what the Hell – I will call it Arnold, but I did expect to change it but I never did.” The code name was picked up by people, so the name became permanent.
2001
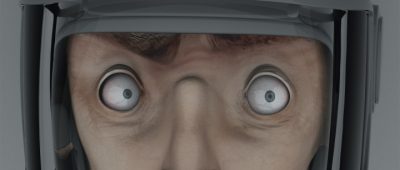
In 2001 the animated film 50 Percent Grey was nominated for an Oscar. This was a key moment for the product. “Yeah that was just one of my friends working by himself, Ruairi Robinson, on 3D Studio Max, back then we had a 3DMax plugin that another one of my friends had developed (Gonzalo Rueda).” Arnold was used exclusively for the rendering. It was a key illustration for the power and speed of Arnold: it showed that ray tracing could produce high quality images with a small CPU budget. It was just one guy – eventually he sent the sound to Cinesite and they did the sound professionally but basically it was just one person with one or two machines.
To render the whole film with global illumination, full ray traced on just a few a machines was remarkable – something not lost on the film’s director who actually invited Fajardo to attend the Oscars with him in 2001. “He wanted to thank me, so it was the first time – it was the only time – I was invited to the Oscars. So that was a lot of fun!,” Fajardo remembers.
At that time Fajardo was working for Paul Debevec at the ICT in Marina Del Ray. Fajardo worked on the Parthenon project with Paul Devevec, which was all rendered on Arnold.
2003 – 2004

In 2001 a key paper was published on sub-surface scattering. Fajardo recalls that the first paper he saw on this was one by Henrik Wann Jensen, in 2000, but it was a follow up paper in 2001 which “made it a lot more efficient by precomputing the illumination at the surface of the object and then doing the integration as a secondary process. “When I read that second paper., the first time I read it I did not understand it, which is what happens with these technical papers, they are really heavy on the maths. I said ok this is kind of cool but I don’t get it, but then I re-read it a few times, and once I got it – I was attending a conference at the time and listening to some other papers – but once I got it I was so excited that I had actually understood the technique that I thought this is very cool and this is very easy so I am going to program it right away. So I opened my laptop and just implemented it into Arnold in half an hour.” The first major Arnold film to use it was Cloudy with a Chance of Meatballs when Fajardo arrived at Sony Pictures Imageworks (SPI).
In 2004 Fajardo joined SPI at Century City – although his flat mate was Sebastain Sylwan – now Chief Technology Officer at Weta Digital, but then he worked also for ICT and Sylwan and Fajardo shared a flat opposite the old home of the ICT in Marina Del Ray. Fajardo’s time at Sony was critical and so influential that now Arnold is the only renderer that SPI uses. While there he continued to develop the software but just as he had negotiated with ICT – he owned the rights to Arnold outside of the company.
2012
Solid Angle is now sixteen people and half of those are working on the core renderer. “I just cant seem to stop hiring people,” says Fajardo. “Every time I do another deal with a major studio I seem to hire another engineer!”
Of the sixteen, twelve are in Madrid, while others are remote, in places like London (on site at Framestore), San Francisco and Utah. We asked why Utah? “Utah is one of the historical and classical centers for computer graphics, Ed Catmull started at Utah, there is a lot of history and a great university. And in fact Utah became a center for ray tracing research a few years ago. Nvidia acquired a small company Rayscale (2008). They were from University of Utah. There are a lot of really good students in ray tracing coming from University of Utah. There is one really good researcher Peter Shirley (Adjunct Professor, School of Computing, University of Utah). He is one of the researchers I have learnt the most from in my career. He is one of the Gods of sampling and computer graphics. This is the guy who lead that group.”
It may seem like a diverse group, but talent is hard to find, says Fajardo. “You just go where the best talent is. Writing an efficient Monte Carlo ray tracer is really hard. There are only a few people in the entire world who can be really good doing this. We have to find them wherever they are.”
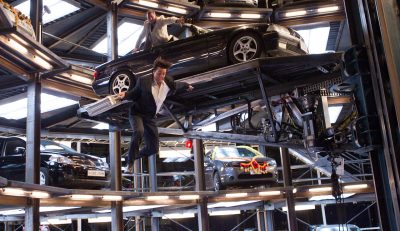 Arnold is now used at many companies around the world – Sony Pictures Imageworks, Framestore, Whiskytree, Luma Pictures, Digital Domain and ILM. The last one is interesting as ILM has a permanent site license of RenderMan, having been very involved from the earliest days and of course Pixar being a spin-off from Lucasfilm. ILM came to Arnold as they were exploring Katana from the Foundry, and as Katana works well with Arnold, John Knoll said he decided he wanted to try it. It was used in the car park sequence near the end of Mission Impossible 4: Ghost Protocol. “Pretty much every major studio you can think of is either using Arnold or is evaluating it,” points out Fajardo.
A few other films the renderer has been used on include Thor, Captain America, the upcoming Marvel film The Avengers, Alice In Wonderland (and almost all SPI pictures for several years), X-Men: First Class, Captain America, Red Tails, Underworld: Awakening and in commercials such as the award winning Bear spot by Mikros Image in France. (Nearly all of these we have reported on here at fxguide.com).
Arnold does have one major client not in films, but in the related area of gaming cinematics. Digic Pictures in Hungary is one of the top three cinematics companies in the world. The company’s first Arnold project was AC: Brotherhood, in mid 2010, and most recently Mass Effect 3. Everything in the cinematic was rendered with Arnold, except some FumeFX volume renders. At FMX they pointed out that the full HD frames character renders were around 45 min to 3 hours (face closeups) and backgrounds were 30 min – 2 hours.
“But keep in mind that lighting was very heavily based on indirect (big square area light behind the window, the rest is almost exclusively indirect illumination) so we needed more GI sampling than usual. And only the final renders (and a few tests were done in 1080p HD, before that the rendering and comp was in 720p).”
But with all their success, Solid Angle’s marketing program is almost non-existent. The company is working “from the top studios down” in a deliberate attempt to not grow too fast. The company likes to know all its customers and provide high level support. “It is much easier for me to sell a huge number of licenses to a large company and give them good quality support,” says Fajardo, “than it is to sell to thousands and thousands of individuals which would give me a lot more support work for me and my small company. Some day we may move from big customers to small studios but for now it is working well.”
What goes on in Arnold’s heart
At its core Arnold is a ray tracer that tries to solve as efficiently as possible ray tracing for film and media production, with as few tricks, hacks and workarounds from the end user as possible. “We are just trying to solve the radiance equation, on the fly without doing any type of per-computation, and pre passes,” explains Fajardo. “So we just trace a lot of rays around and hope to get an accurate answer. The challenge is to design a system that is optimized so that it traces a relatively small number of rays for a given quality and also the ray tracing needs to be very fast. That’s what we do everyday we try and optimize the renderer with both mathematical processes to optimize the Monte Carlo equations and also to make the code very fast – so those two things – the speed of the rays and the number of the rays – that is what we work on everyday.”
Arnold can optimize so well as it is focused on just one task: great images for movies. The Arnold team is not trying to produce a general purpose renderer that covers a wide range of uses and industrial applications, like RenderMan it is firmly developed with a very targeted user base in mind. There are other ray tracing products but they often seek to be used in automotive design, industrial and architectural design. Not so Arnold.
“Thanks to that efficient system you can actually use the system. For many years we have been led to believe that you would not be able to use ray tracing in production, and that is just a legacy, from when the software was not ready,” says Fajardo. Solid Angle have worked hard to make Arnold production ready so it can be used in production on a daily and exclusive basis. “It is paying off finally, it has been a lot of work but it is paying off.”
Interestingly, many of the earliest problems with ray tracing – sampling issues, mathematical approaches have been known for some time, and the basic equations were laid out by Pixar in the 80s in a seminal paper called Distributed Ray Tracing by Robert Cook, (Cook, Carpenter, Porter Siggraph 1984).
“Ray tracing is one of the most elegant techniques in computer graphics. Many phenomena that are difficult or impossible with other techniques are simple with ray tracing, including shadows, reflections, and refracted light. Ray directions, however, have been determined precisely, and this had limited the capabilities of ray tracing. By distributing the directions of the rays according to the analytic function they sample, ray tracing can incorporate fuzzy phenomena. This provies correct and easy solutions to some previously unsolved or partially solved problems, including motion blur, depth of field, penumbras, translucency, and fuzzy reflections.”
– Excerpt from the Abstract of Distributed Ray Tracing, 1984.
The initial equations published in this paper are indeed the starting point for Arnold, although, says Fajardo, “they were later refined by Jim Kajiya in 1986 and that’s the equation – that paper The Rendering Equation by Jim Kajiya that laid out the full set of equations today we call the radiance equation or for short the rendering equation. That is what we are trying to solve and that encompasses everything you see in our rendered image: anti-alising, soft shadows, global illumination, motion blur, glossy reflections – everything, all of that – it is all in that equation.”
The name of Fajardo’s company can even be found in this equation, if you look up the definition of the word radiance it is loosely described as the “amount of light that is emitted from a particular area, and falls within a given solid angle in a specified direction.”
The rendering equation itself is defined as an integral equation in which the radiance at a point is given as the sum of emitted plus reflected radiance under an optical approximation.
It was simultaneously introduced into computer graphics by David Immel et al.and James Kajiya in 1986.
If you click on the Solid Angle logo on their minimalist web site – this is the equation that appears.

But it is one thing to have an equation that has been freely published for twenty years and it is another to make a viable and growing product in the incredibly competitive world of visual effects.
Clearly Arnold is very good implementation of this equation.
We asked Fajardo about their implementation: “At the bottom of it (Arnold) is just a Monte Carlo integration, which is just that ‘we have a complex problem to solve – how do we do we solve it?’ The answer is we just throw a dice many times and by evaluating this function at all these random positions and average together all these evaluations we come up with an answer that converges to the right answer, with more and more samples. That is the basic process and that will give you better anti-aliasing, better soft shadows etc for everything. That is the basic way to describe it. It is more complicated that than in practice but that is how it works.”
As many computer graphics graduates know, it is not impossible to write one’s own ray tracer and many people at college do just that, but the difference with Arnold is that a basic ray tracer will be slow and unworkable. Arnold is not – it is fast and finely tuned for quality and speed simultaneously. “Writing a single path tracing renderer is not hard, but it is way different from writing a production renderer with thousands of features!,” jokes Fajardo.
Solid Angle does this by using not only their own team of in-house programmers but also the open source community when appropriate. An example is in texture anti-aliasing – a common problem for students writing their own ray tracer. A regular pattern of say one ray per pixel and point sampled will naturally produce aliasing and moire patterns. This is a problem Fajardo fixed very early in Arnold’s development. “When it comes down to texture filtering,” he says, “we can compute what we call a texture convolution and use a mipmap to pre-filter the texture so even one sample per pixel you would still get anti-aliasing texture maps. That is a very common practice – and everyone in the industry does that – and so do we, we use an open source library lead by Larry Gritz called OpenImageIO.”
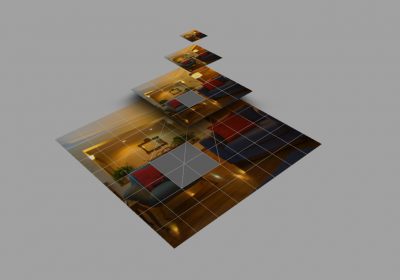
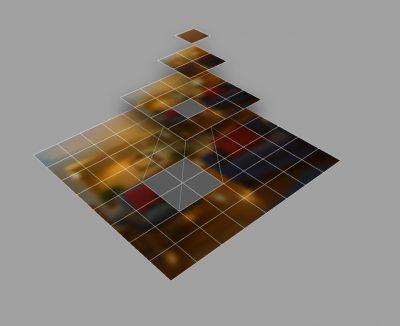
Project OpenImageIO started as ImageIO – an API that was part of Gelato, the renderer software developed by Nvidia. Work started in 2002, and in 2007, when project Gelato was stopped, the development of ImageIO also ceased. Following this Larry Gritz started OpenImageIO.
“We incorporated OpenImageIO into Arnold and we rely on it to compute these very accurate and beautiful texture filtering that are aliasing free,” says Fajardo. “Not only do you get anti-aliasing textures but you can get a lot of textures into memory. OpenImageIO has a texture cache – and with a cache you can allocate say a 100 megabytes of memory just for texture maps and as you load more and more textures. And so with a limited amount of memory you can render huge scenes with thousands and thousands of textures – gigabytes of textures – so with regards to textures we are very happy with how we implemented this solution.”
This was in 2009 in Los Angeles. “We did this integration while I was at Sony Imageworks and the first show we used the OpenImageIO filtering was Cloudy with a Chance of Meatballs (September 2009). OpenImageIO played an important role because it lead us to load a lot more textures than before.” Fajardo was at Sony Pictures Imageworks as an employee but one with very special arrangements. Most of the development of Arnold was done with Fajardo negoiating with companies that he work on projects but be allowed to develop Arnold and, critically, keep the rights to the source code.
Interestingly, not only is SPI a fully Arnold facility and has been now for some time, but they have a concurrent version of Arnold. Under the deal negotiated SPI branched the source code. SPI has a copy and continues development of their version of Arnold and Fajardo owns his version and continues to develop and sell the software. This may sound like a divorce but if it is, it certainly is one where the children are not suffering. So strong is the relationship between Solid Angle and SPI that ideas and new developments continue to be swapped between both camps. “So if I come out with something that makes Arnold ten times faster Sony can take that and use it,” says Fajardo, “and in fact they have done that with different techniques. And likewise if they come out with something new I can incorporate it into my branch. Rob Bredow, SPI CTO, negotiated this deal for SPI. “In fact it was his idea!” compliments Fajardo, who clearly respects Bredow. “I left Sony not a rich man but I left with my own technology, and with that technology I started my own company.”
The Solid Angle branch uses C++ shaders. “The C++ library is a solid tool used in production for many years, currently at version 4.0. The SPI branch used C shaders for years, then both C and OSL for a while, and after the current set of shows is finished they’ll be OSL only,” Fajardo recently said.
The bulk of development and support is carried out by dedicated engineers in the Solid Angle team. Having key customers also with access to the source code such as the MtoA and SItoA may seem risky to some, but not so says Fajardo. “Making some source available to customers, and accepting contributions, is not the same as letting them write the software for you.”
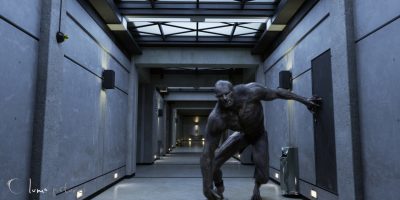
Arnold is not the only ray tracer on the market – RenderMan is a hybrid scanline and ray tracer and Maxwell is a pure ray tracer with very little in the way of optimizations and customizations. Fajardo believes that Arnold sits between these two other professional packages. “If you think about a line – then at one end you have RenderMan which I describe as being great at painting pixels and at the other end of the line you have something like Maxwell – which is a very pedantic physically based renderer that does not let you ‘paint with a brush’ – it just lets you simulate light. Arnold somehow sits somewhere in the middle – what we have is a system that is something that is pretty much physically based – it lets you simulate but it also allows a lot of artistic control to change things.” But perhaps the greatest difference to users is the speed of the ray tracing – there is no doubt that Arnold is fast. “You can fire a lot more rays for a given CPU budget – and for that reason you can use it for animation. My goal when designing Arnold was to make a renderer we could use for doing animation – physically based renderering for animation. That is not the goal of Maxwell, say. With Renderman of course you use it for animation but then it is not a physically based system – it is more like a paint brush.”
Looking to the future, Fajardo feels that while there has been a lot done, there is “still a lot of room for optimization. You can optimize for a single image or you can optimize for animation, such as motion blur, but to give you an example one of the only limitations of Arnold is that it does not really do caustics very well. “We haven’t bothered to spend our resources optimizing on caustics. The reason is that the effect is very difficult to render – you need a lot of time and many rays – but honestly for film and animation production nobody needs it. Well, I mean to say, in my 15 years in production there has not been a single film that has requested accurate caustics – actually I think I do remember one! On Watchmen we used Arnold to render the glass palace. They did investigate it, but it turned out that as it is glass over glass it was very complex. But in the end they did not use it, so that is one example of something other renderers have a good approximation for already, and that I would like to do more research on and explore one day. But other than things like that, it is mainly more optimization across the board.
Fajardo says this optimization will include for the areas of more efficient motion blur, more efficient storage of polygons and hair – so you can render twice the amount of hair or twice the amount of polygon, and more efficient instancing – so you can use millions and millions of replications of an object for populating an environment. “We are continuously looking for improvements,” he says. “It is never ending – there is always something the users want – it just never ends!”
Case Study: Framestore and Maya with Arnold
Today, Arnold is being used on productions around the world, one of the largest in production right now is Gravity. This is rumored to be the largest Arnold film outside Sony Pictures, but as it is not out for some time, it is too early too discuss. Framestore actually used RenderMan and Arnold on Wrath of the Titans.
Framestore had two major sequences for Wrath:
• The Cyclops – mainly rendered with a pre-release version of RenderMan 16
• The Labyrinth – mainly rendered with Arnold
“The initial intent was for Wrath to be an entirely PRman show,” commented Framestore’s Martin Preston. ” We already had a lot of experience in using PRman for creature work, and so even though Wrath were switching their shading and lighting approach over to a more physically plausible scheme, they felt that PRman would be the easiest fit.”
However as the scope and complexity of the Labyrinth work became clearier to the team, Framestore believed that PRman would struggle with the quantity of geometry that they needed for the environments, using the lighting methodology they had choosen for the film. “Fortunately we’d added support for Arnold to our pipeline, for another production, so Wrath were able to quickly evaluate how well that could cope with their work, and so rather than rejigging how they’d expected to build the labyrinth they could switch renderers comparatively painlessly. It was quite a late decision!” explained Preston.
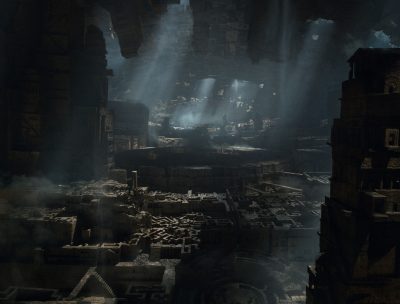
Framestore’s own press release on Wrath states that “Arnold chews through geometry.” We asked Preston if this was because of Arnold’s Object instancing? (in RenderMan 16 there is no ray tracing object instancing)
“Yes, that’s right,” he said. “The labyrinth, which is essentially a large quantity of instances of (comparatively) small amounts of unique geometry (all ray-traced with rather extreme atmospheric scattering) was a perfect fit for Arnold. That said in this show, and others, we are finding that Arnold is perfectly capable of ray-tracing against surprisingly large quantities of non-instanced geometry.”
Plausible lighting has become an important part of the Framestore pipeline. The company believes that from a technology point of view there are two ways a studio like Framestore can improve the efficiency of lighters. “Either by making their technology fast (through techniques such as progressive rendering) so that they can turn around lighting iterations more quickly, or secondly by making the lighting technology more intuitive. so they need fewer iterations,” explains Preston.
The switch to plausible lighting is the core of the second of these approaches. By having lighting and shading behave in a predictable way it is easier “for lighters to predict the results, they’re going to get and so avoid unexpected surprises!”
One area that is of real interest is the Maya to Arnold and Softimage to Arnold utilities. Solid Angle has been developing these but they are still in alpha and beta. The specific tools are known as MtoA and SItoA respectively. The community has known about their late stage development for some time and many people are keen to see them released. Framestore did not however go this route on Wrath of the Titans.
“When we adopted Arnold we wanted to make it relatively simple, from the point of view of our artists, to switch renderers. As such we’ve gone to some lengths to add Arnold support to our existing technology, rather than develop an entirely seperate Arnold-specific pipeline around a tool like MTOA. So while we looked at MTOA we didn’t want to integrate Arnold in this way,” said Preston.
Wrath is a good example of why Framestore did this, using the tools developed in house the film was able to switch a sequence to a new renderer without needing to change how their team or their pipeline worked. “Our lighting pipeline is built around our proprietary PRman lighting tool, fRibGen. That already allowed developers to supply plugins to the tool (for things like integrating procedural geometry, new types of passes and so on) so to adopt Arnold the first thing we needed to do was to add a plugin (fArnoldGen) which knew how to generate and control Arnold renders.”
fRibGen works by by allowing look-developers to build palettes, containing both shaders and the logic used to attach shaders to geometry, which can then be used during the export or rendering process to match whatever the current assets are to the ‘look’ defined by the palettes. “Our Maya scenes typically consists of lightweight proxies of assets, for things like geometry, fur, crowds, volumes, particles and in Wrath’s case instances. Then at rendertime procedurals will use the logic held in palettes to continue to perform shader or data assignment (which allows lighters of look-developers to influence the appearance of assets which aren’t present in their Maya scene).”
As a result Framestore also needed to write Arnold equivalents of all of their PRman procedurals. “The result of all this work is that lighters see a lightweight version of their shot, which they can choose to render in either PRman or Arnold using the same pipeline,” explains Preston.
MtoA, SItoA
Some companies however are using the alpha and beta tools. “The SItoA and MtoA plugins are still in private beta,” explains Solid Angle’s Fajardo, “but our betas are pretty solid. Writing solid plugins for complex 3D apps like Maya and Softimage is really, really hard and takes a long time. We are a bit obsessed with quality and won’t make an official release until the plugins are polished to perfection. SItoA has been in development for longer, currently at version 2.1.1, while MtoA is still at version 0.15.0. We follow a strict versioning procedure that lets our testers use the software in production with sufficient guarantees that new changes don’t break existing scenes, we issue frequent bugfix releases etc. So in practice, many of our testers have been using our plugins in production for a year or two.”
Luma Pictures used MtoA in X-Men: First Class, Captain America, Underworld: Awakening and others in production. ObliqueFX used SItoA in Source Code. And countless studios have used both SItoA and MtoA for commercials (such as Mikros Image, a Maya based studio in Paris and winners of the two VES commercials awards this year and one of them last year).
Case Study: Whiskytree & Softimage (SItoA)
One company using SItoA is Whiskytree on several small sequences on some very big budget projects. “Whiskytree has utilized SItoA on feature film projects including TRON: Legacy, Thor, Captain America: The First Avenger, The Hunger Games, and most recently on Marvel’s The Avengers,” comments Votch Levi, Computer Graphics Supervisor, Whiskytree.
“Thor was our first project to use SItoA and Arnold. We believed that the level of geometric density and shading requirements on Thor would be difficult to achieve using Softimage’s built in renderer. SItoA proved very successful through the project and we have started every subsequent project based on a SItoA render pipeline.”
Levi believes SitoA is currently very stable and dependable. “Arnold is able to handle very dense scenes well beyond what Softimage is able to represent in the viewport. We have built our asset publishing system, “Distill”, around the Arnold asset types. This allows us to abstract asset complexity from Softimage and layout/render very complex scenes. Our typical rendered scenes contain over 140 million triangles across thousands of objects though we have pushed over 1 billion polygons within 24 GB of ram. Previously we would break scenes up into layered passes to manage scene complexity but now with Arnold and Sitoa we render all passes at once.”
We asked Levi how he found developing shots for Arnold to render.
“Arnold and SitoA have completely changed the way we develop and light shots. For many years lighting was a very technical art requiring management of baked assets and multiple illumination models to achieve certain looks. Before Arnold it was very rare to use features like displacement, motionblur, IBL, glossy reflections, and multi-bounce diffuse samples on shots. Now when putting shots together we don’t have to consider if the render will fail because we’ve enabled Motion blur. It’s reasonable to use all these effects concurrently without repercussions. After years of battling motion blur and displacement issues it’s very liberating to turn these features on at the beginning of a project and not have to worry if it’s going to increase render times or cause frames to fail. However, working with Arnold is not all dandelions and pony rides, sample noise is a challenge and can require very long render times to remedy. Arnold is a brute force raytracer that lacks the ability to apply selective levels of sampling across specific shaders and all pixels are sampled uniformly based on the shading feature requirements. This is a good thing because it simplifies render settings but it also means some areas of the frame may be oversampled to reduce sample noise across the whole frame. It took us some time to adapt to the difference in Arnold’s philosophy from other raytracers but, once we got accustomed to its approach, render optimization was quick and easy to understand.”
Whiskytree is known for environment creation and matte paintings. Traditionally the matte painting workflow involved creating paintings in Photoshop and projecting the artwork onto cards or articulate geometry in a 3D environment to simulate parallax within a complex camera move. Because of the speed and efficiency of Arnold the company now tends to create more geometry in CG with physically accurate shading and rely less on paint and projections. “This gives us more freedom to create dynamic camera moves and quickly iterate through shot production,” says Levi. “SitoA and Arnold are an excellent complement to the matte painting toolkit.”
Individual sales
“Everyday,” says Fajardo, “we get individual artists across the world emailing us and saying ‘please can we test Arnold’ and it is tough, we’d love everyone to have access to the software, but at the same time it is hard for us to support crowds and hundreds or thousands of people. Until we grow the support structure in the company, we won’t have it online to download, but we are working on it, I am hoping this year we will have some good news on our web site.”
But Fajardo is at pains to point out that “if you are a studio you can just email the company and discuss company level licenses”.
Mental ray – NVIDIA
Mental ray is a production renderer developed by NVIDIA. As the name implies, it uses ray tracing to generate images. It is licensed to Autodesk and is therefore an option on programs such as Maya and 3ds Max. Autodesk is therefore NVIDIA’s biggest customer for mental ray, and mental ray is one of the most common renderers in the world. But NVIDIA also have other rendering solutions include GPU solutions – see below.
Barton Gawboy, ARC Training and Special Projects, NVIDIA says: “I like to think that the time has finally come in terms of the advancement of technology that we can take advantage of what we would call brute force approaches, light is a very simple thing, it travels in one direction and does not change unless it bumps off something, and it can bump off a lot of things. Now to make real light simulation you have to do a lot of work to model all these simple bounces. When rendering first started a lot of it was approximations, tricks, to simulate light and not do much indirect lighting, but as processes got faster and there is more memory we can get closer to the actual simulation of light, which is really just an unbounded infinite ray tracing thing going on all around us.”
A key feature of mental ray is the achievement of high performance through parallelism on both multiprocessor machines and across render farms. Central to using mental ray is to understand final gathering. Final Gather is a technique for estimating GI. Users can achieve GI in mental ray by using photon tracing or a combination of this and final gathering, but final gather is recommended by Autodesk as a simpler approach.
When Final Gather is enabled, objects effectively become a source of indirect light, mimicking the natural world in which objects influence the color of their surroundings. When one Final Gather ray strikes an object, a series of secondary rays are diverted at random angles around it to calculate the light energy contribution from the surrounding objects. The light energy is then evaluated during the ray tracing process to add the effect of the bounced light.
When rendering animated sequences, it becomes necessary to bake the Final Gather Map (FGM). When rendering a sequence, if rendering a unique FGM for each image is kept, the render output result will be calculated based on a different FGM for each frame. When playing the sequence, there will be a noise created by the per frame FGM fingerprint.
In versions prior to say Autodesk 3ds Max 2010 software, animation flickering was caused by two main factors:
- When the Final Gather points are not “locked” on the geometry, they “slide” along the surfaces as the camera moves.
- Moving objects create Final Gather points that are “floating” or “ghosting” in the 3D space, introducing rendering glitches.
After 2010, GI animation flickering is substantially eliminated by two main techniques:
- To handle camera movements, Final Gather points are shot from several locations along the camera path. Final Gather points become “locked” on the geometry, thus removing the “sliding” effect of those points across frames.
- To handle moving objects, one Final Gather file per frame is processed in a first pass. When the beauty pass is rendered, Final Gather points are interpolated across multiple frames to “smooth out” the solution.
V-Ray – Chaos Group
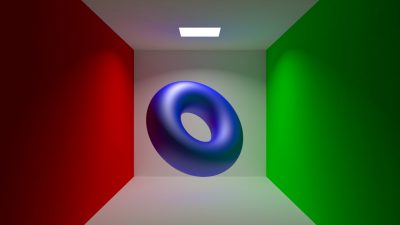
As Arnold is not available for general purchase, a hugely popular ray tracer, away from the very large studio environment, is V-Ray. The program has grown dramatically in recent times.
The core developers of V-Ray are Vladimir Koylazov (‘Vlado’) and Peter Mitev of Chaos Software production studio established in 1997, based in Sofia, Bulgaria. The company offers both a CPU and GPU version: V-Ray and V-Ray RT GPU
Different verisons of V-Ray support 3ds Max, Maya, Softimage, C4D, Rhino, amongst others.

Koylazov is very proactive, not waiting for OpenEXR to be released V-Ray already supports for example deep compositing via a plugin. This ‘can-do’ attittude is sited by users as a reason the company is popular. Last year it released version 2.0 of V-Ray. With this release V-Ray has moved from being focused on architectural work to more film and TV work. For example, V-Ray now has faster hair and fur rendering (with further optimizations to come, faster and more accurate subdivision surfaces and an excellent sub-surface scattering shader for skin). There is also a special car paint shading tool to speed up photo realistic cars. No longer do you need to build up layers of shaders, one shader provides a complete solution.
Other examples of V-Ray’s move further into the entertainment industry include:
Geometry instancing is a simple but very effective technique for rendering scenes that are rich in details, like forests, parks etc. With instancing, the actual geometry for the object is stored just once and then simply referenced at the various points in the scene where it is needed, which can save quite a bit of RAM. “However, instancing is different from a renderer’s ability to handle large geometry sets,” says Koylazov. “Every now and again you see people boasting that some renderer can process zillions of polygons and then it turns out that they are all instances. Still, it is a useful technique, which is supported by V-Ray as well.”

V-Ray has always been able to handle large data sets which is a key feature as to why it has found adoption in professional production environments. Most of the RAM used by a renderer goes for the description of the scene geometry and the material textures. “With geometry we are not talking about instances, but unique polygons,” notes Koylazov. “Scenes with many objects and especially with displaced or subdivided surfaces can come down to millions of triangles. And then there is hair and fur where often millions of hair strands are needed to achieve a realistic result. If there is enough RAM to hold the entire scene data, then all is well and good, but sometimes scenes are so complex that they don’t fit in the available RAM. So a renderer must implement some way to generate parts of the scene as needed. In V-Ray this is implemented as so called “dynamic geometry”, which means that it is generated on demand when it is needed, and can be removed when memory is low and the renderer needs it for something else. So for example if a heavily displaced object is not needed for the rendering of a particular camera view (and not visible in reflections, refraction etc) it will not be generated at all.”
Another technique that V-Ray employs for rendering large amounts of geometry is V-Ray proxy meshes, sometimes also called “tiled meshes”. The proxies involve preprocessing the geometry and creating a .vrmesh file on disk. The renderer can then load bits and pieces of the geometry as needed during the rendering, without the need to keep everything in RAM.

Large textures are usually handled by preprocessing them and creating so-called “tiled textures”. In V-Ray this is implemented though the OpenEXR file format, which supports them natively. A renderer can then load just bits and pieces of the texture as needed during the rendering. The tiled textures also store multiple resolutions for the same texture. So, for example, the renderer can pick up a lower resolution version of the texture if it is needed for an object that is far from the camera.
We asked Koylazov about speed optimizations for very complex and heavy geo or volumetric rendering.
“Unfortunately these things are slow by their nature, especially in a global illumination raytracer where potentially every object in the scene can influence any other object. For geometry specifically, speed could come from simplifying the geometry when the full detail is not needed (i.e. if an object is far from the camera). For example, view-dependent tessellation of subdivided and/or displaced surfaces ensures that objects far from the camera have less detail and so take less RAM and are easier to raytrace. For volumetric rendering, calculation of the volume lighting is the slowest part of it, so various caching schemes can be used to speed the process. For example, Phoenix FD, our fluid dynamics simulator, caches the volume lighting in the fluid grid itself, which speeds up volume rendering quite a bit. Some of the global illumination solutions provided by V-Ray (irradiance map, light cache) also support the caching of volumetric lighting to help speed up the process.”
Scott Metzger, CG Supervisor, uses V-Ray and feels strongly that for medium level companies to survive they need to be exploring V-Ray for their facility due to the combined image quality and speed of production, specifically the speed one can zero in on a production final high quality look. Metzger even told one medium size company he worked with recently that he believes moving forward, ‘you will either be using V-Ray, or you’ll be out of business.’
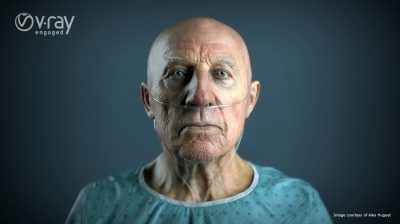
“What really makes V-Ray shine compared to other renderers is: pipeline. With V-Ray, artists can release great photoreal images without a a large team of TDs to support them. That one small fact is actually huge,” Metzger points out. “The costs for visual effects are lowering like crazy. It’s becoming extremely hard to compete when VFX studios are sending half of the production work overseas. Being on the studio side of things recently I have seen the numbers and bids for jobs. It’s actually really crazy to see who can do what at the lowest possible cost. Depending on the renderer used has a huge impact on this. Instead of having a huge TD
team adding features and customizing everything you now have software companies like Chaos Group who have 30+ programmers to assist around the clock. That saves a ton of development money and time, and maximizes efficiency.”
“V-Ray is sort of a hybrid – you get the best of both worlds – you have biased and you have unbiased brute force for all the GI. I start with Brute Force for primary and then you have your second rays which can be light cache photons. What I do with light cache is compute the GI for the scene for all frames from one single image. Then you have irradiance mapping which is another type of GI which is similar to GI baking – based on what is closest to camera in your field of view. Irradiance map is similar to a photon map in RenderMan. There is photon mapping through lights, but the irradiance works like a blend of photon mapping and final gathering. It is funny but all these renderers are similar but all a bit different. The irradiance map is scene dependent but not vertex dependent.”
Of course V-Ray offers a range of render outputs and image qualities. “You can turn off GI and just fake a lot of GI by just using a light dome (IBL),” admits Metzger. “With dome lights you can save a lot of time, you can get away with a lot with your indirect lighting, your lighting will look a lot like GI when using dome lighting.”

Importance sampling is an essential part of V-Ray as it is any raytracer. As Koylazov explains, “it makes sure that the calculations that are spent on the various raytracing effects are in proportion to the contribution of those effects to the final image (at least as far as the raytracer can guess). To achieve this, they usually exploit some ‘a priory’ knowledge about the scene. For example, we know in advance that light comes from the scene light sources, and that bright light sources contribute more to the scene than dim light sources, so a raytracer knows that it needs to spend more calculations to refine the contribution of bright lights. This is different from adaptive sampling, which figures out the important calculations during the rendering process itself. There are various ways to implement importance sampling – some are straightforward (f.e. making sure that shadow rays go towards lights), some – not quite (f.e. importance sampling of a HDR dome light source).”
As with RenderMan, V-Ray deploys multiple importance sampling where several different importance sampling techniques for the same effect to be combined in order to produce an optimal result. “In a raytracer,” says Koylazov, “multiple importance sampling is typically used to calculate the contribution of area light sources. V-Ray implements multiple importance sampling for area and dome lights, and for many other things as well. It should be noted that there is a certain amount of guesswork involved in importance sampling. Going to the example that bright lights need more samples, this won’t be true if we have a scene where the bright lights are in a different room, or their contribution is blocked by some object.”

“But what is interesting about V-Ray is its sampling,” says Metzger. V-Ray has Adaptive DMC. This sampler makes a variable number of samples per pixel based on the difference in intensity between the pixel and its neighbors. In V-Ray this is the preferred sampler for images with lots of small details like fur for example and/or blurry effects (DOF, motion blur, glossy reflections etc). It is an option in VRay. “In most renderers,” explains Metzger, “you have to adjust sampling so much – in every shader, adjust sampling in the lights, adjust the aliasing. The nice thing about Adaptive DMC is that it controls all that for you. It is almost if you just have a noise control. You have almost a noise threshold that controls noise over all, it controls how the scene is resampled for higher quality. So the cool thing is that even though your render is Linear, you can indicate what the final viewing gamma will be, say 2.2. Knowing that the software can direct its sampling efforts to where it will make the most difference, even in the Linear render – knowing it will be viewed in gamma 2.2. It will not waste time sampling where the highlights are going to be or the brighter areas. It is going to focus a lot of the render time into the shadows and mid tones – because that is where all the noise would be seen.”
3Delight – DNA Research
3Delight is a proprietary RenderMan-compliant renderer. It was used extensively on Happy Feet 2 at Dr. D Studios in Sydney. It grew in popularity a few years ago, and while a very good renderer it was primarily labelled as a ‘poor man’s RenderMan’ since the product was much cheaper than RenderMan and thus allowed many smaller facilities to get high end professional results. But Dr. D did not select it just on the basis of price, although that was a factor when at the start of production the pipeline was being established (especially as RenderMan’s price drop or adjustment was yet to happened). Brett Feeney, Head of Production at Dr. D Studios, says price was only half of the equation. “It was about 50:50, there were some architectural things about it that took our fancy. They (DNA) would bend within the RenderMan standard to get you out of a problem. It was performance wise at the time a shade faster for large soft furry creatures, as well as sub-surface scattering, and those were things we were focused on. And at the time they had the edge.”

During production, after Dr. D had decided to adopt a 3Delight pipeline, Pixar lowered their pricing on RenderMan and as such the gap and the ‘need’ to use a non RenderMan compliant renderer was greatly reduced. Still, Feeney says as recently as last week he was discussing a new project that he might use 3Delight on.
Dr. D Studios used it as the primary renderer on Happy Feet 2 along with Mantra from Houdini (Side Effects Software). The production pipeline on the film was animation in Maya and then everything was passed to Houdini. Some elements, especially volumetric components, were then rendered in Mantra while the majority was rendered in 3Delight. As there was no existing workflow for this, all three companies, Side Effects Software, DNA research and Dr. D worked together to build specialist tools.
It was DNA’s willingness to work with the startup studio that really impressed Feeney. Interestingly, the team flew to Sydney to meet Dr. D. Initially the DNA software team encouraged Dr. D to go down a ray tracing path inside 3Delight, given the refraction and ice etc in the film. At that first meeting Feeney recounts the conversation: “‘We believe ray tracing is back,'” they told Feeney, ‘we think you should be using ray tracing, you should have a look at it'” – to which Feeney agreed to think about. But at the time, at that initial meeting, he did point out the scale and size of the scenes in Happy Feet 2 may not make that viable. Sure enough, “by the time they had spent a week here researching exactly what we had to do and how we wanted it to look, they were like, ‘Right we are going back to put a lot more work into our point based system!'” – which Feeney admired – and appreciated. “That willingness to work with us, was one of the bigger reasons we went with them,” he says.

For renderfarm control on the scale Dr. D needed, they turned to an open source solution, written in part by one of the new team they hired for Happy Feet 2. Originally developed by Blur Studio, the program Arsenal was designed as a replacement for 3ds Max’s BackBurner. It is now a robust open source render management platform supporting many packages, including 3ds Max, Maya, Houdini, 3delight, XSI, Nuke, Fusion, Shake and After Effects. The core is written in C++ using Qt, and PyQt is used to extend Python interfaces. Dr D developed further tools to manage and extend the queue management for their 3Delight render farm.
DNA Research released the latest version of 3Delight Studio Pro 10, last year. This major release introduced important technological advances in ray-tracing performance and global illumination. Pro 10 introduced a new point-based occlusion and global illumination algorithm. This new algorithm approach introduced support for translucent surfaces, a first for this class of algorithms. 3Delight Studio Pro – formerly named 3Delight – now also includes a 3Delight for Softimage plug-in. The 3Delight Studio Pro all-inclusive package enables users and studios to use 3Delight standalone in their rendering pipeline along with 3Delight for Maya -or 3Delight for Softimage – or both.

3Delight Studio Pro’s features include ray tracing, global illumination (including photon mapping, final gathering and high dynamic range lighting and rendering), realistic motion blur, depth of field, complete geometry support (including highly efficient rendering of hair and fur), programmable shaders and antialiased shadow maps. It is available for Windows, Linux and Mac OS X.
While it is still used in many medium to small facilities it is not widely used by large studios, but was used extensively on many films such as District 9 and Harry Potter and the Deathly Hallows. Interestingly, based on the purchasing patterns seen by Lollipop Shaders, who make RenderMan shaders, 3Delight is more popular outside the USA than it is proportionally within the States. In places like Australia, Russia and other secondary markets 3Delight has a strong brand.
Maxwell: Next Limit
Maxwell is used in the architectural visualization field, design and animation often in conjunction with 3ds max and 3ds viz. It is also used with Maya and more recently Softimage. While used in animation, it has a wide application and success in areas other than film and TV, in fact it only recently supported rendering in Rec.709 as an option.
Maxwell Render is a software package that aids in the production of photorealistic images – it produces very accurate images. It was introduced as an early alpha on December 2004 (after two years of internal development) and it utilized a global illumination algorithm based on a metropolis light transport variation.
Maxwell Render was among the first widely available implementations of unbiased rendering and its GI algorithm was linked directly to a physical style camera to provide a simplified rendering experience. One of the great advantages of Maxwell is that the user is not required to adjust arbitrary illumination parameter settings, as was typical of scanline renderers and ray tracers. “Instead of having to tweak things, Maxwell behaves like the real world,” explains Dario Lanza, Maxwell Render Technical Consultant, Next Limit. “It also makes Maxwell really easy to use, you don’t get loads of panels with things to adjust. You have the same parameters to control in Maxwell that you do in the real world, you have really very few parameters to tweak and you get photorealistic images from the very beginning.”
As one might expect, Maxwell Renderer is compatible ‘out of the box’ with Next Limit’s RealFlow fluid sims software. This allows users to render their RealFlow particles simulations directly with Maxwell Render, meshing the point cloud at render time. The current version is 2.6.10. This version once again builds on improved speed especially in sub-surface scattering and motion blur (especially with volumetrics). New since version 2.6 has been the ability to create ‘plug-ins’, or extensions, for Maxwell. These can aid in many areas of the render process. This is part of an overall move by Next Limit to have Maxwell ‘play better with others’. Recently the team introduced a new procedural primitive extension for rendering hair/fur/fibers – compatible with the most popular hair systems. The fibers can be created by a number of supported hair editing tools, such as:
 Shave&Haircut for Maya
- Maya Fur from Maya
- Ornatrix for 3DSMax
- Hairtrix for 3DSMax
- Hair and Fur from 3DSMax
- Cinema Hair from Cinema4D
The fibers are created at render time which means the rendering is much more efficient without needing to convert anything to polygons. Each fiber is not just a flat ribbon but has a real volume. Similarly, it is now possible for Maxwell to render particles using the procedural primitive for particles. This is compatible with the most popular particle systems (RealFlow particles, Maya particles, 3ds Max particles, for example).
Like Arnold, it has geometry instancing, as well as object referencing, and procedural geometry. Maxwell is different from Arnold, though, as it is a directed path tracing system, which provides as a result excellent caustics. “A regular ray tracer would take forever to solve caustics in a nice way, but the directed path approach gives you scattering in a very optimized solution, it provides real nice caustics very fast,” says Lanza. This is something Arnold for example does not do.
Maxwell is not focused on the entertainment industry primarily. As a result, the first Maxwell version 1 was slow for animation effects work. This speed issue was greatly addressed at version 2 of the product, although the original ‘slow’ tag remains an issue in the minds of some potential users. The product provides many tools to improve the user experience such as the ability to interrupt and restart renders, interactive previews and adjust the lights during the render in terms of intensity or color without full re-rendering. Due to very effective voxel sub-division it scales well in terms of scene geometry complexity and scales well for parallel farm processing approaches.
There is no doubt that the results from Maxwell are beautiful and it is now being used more widely in TVC work and film. Fuel VFX in Sydney recently did a photoreal Leggo’s commercial which utilized the Maxwell renderer, and Lexus spot for director Matt Murphy. Built in Maya and rendered with Maxwell, Fuel’s artists were able to replicate the Lexus with photoreal accuracy to ensure a seamless transition between shots of the real vehicle, and those shots requiring a CG version. The car was filmed on a static platform which had a small amount of textured surface and was subsequently recreated for the moving CG gimbal. The headland was scanned during a helicopter shoot and recreated in 3D in order to give the artists flexibility during the complex edit.
“What I can say about Maxwell for Fuel in general,” says Fuel visual effects supervisor Dave Morley, “is that for our commercial pipeline there is no renderer that comes close to giving you the speed of look development as Maxwell. We acknowledge that it may be a slow render, but that is changing rapidly and we talk to the guys a lot about what they are doing and where they are going. They have dramatically improved render times on certain aspects and won’t stop now. We find that the look development phase can be 5-10 times quicker using Maxwell, which to be honest nowadays is the most important thing, so the time to render evens out in the end, but you can iteratively show final looks (albeit in a less resolved state) quicker.
“We can turn around a render in a few hours at a quality that allows artists and directors to get a feel for where it is going and then at night can take that same render and just stamp more quality onto it, again showing the next ‘generation’ of quality. This process can be controlled to a particular shading level or based on time, which for commercials is fantastic. If we have a client presentation at 10am we can work backwards from there to make sure each frame can render for the maximum time to gain the most quality, but finish in time ready for comp to prep for a presentation (all this knowing that we can resume the render later). This process allows for a much faster collaborative process to evolve rather than having to commit to a final quality slow render straight off the bat.”
3ds Max Scanline renderer
One of the most common renderers in the world is the 3ds Max Scanline renderer. This is one of four renderers that ships with 3ds Max. According to a source at Autodesk, still today “80 per cent of 3ds Max users still use this in some way or another.”
Until recently it was still used by many departments of major productions such as the ILM’s digimatte department, for camera mapping (although sometimes rendered with Brazil) although not used commonly as the principal renderer on major productions.
Scenes and sequences rendered in 3ds Max benefit from being a part of the larger Autodesk system. For example, in the 2013 release of 3ds Max it is now easy to generate passes and segments for downstream compositing. The feature is called “State Sets” and while it is largely designed to be a new render pass system, it’s not exclusive for that (ie: modelers and game developers who never hit render can use it for controlling visibility of objects, light states, etc.). Another aspect of State Sets is that each state can use a different renderer and optionally output render elements. For example, one could render an AO pass with Quicksilver and have it done on the GPU, then the next state could use mental ray to render the beauty pass and render elements like spec, diffuse, etc. then a third state could be mattes and a Z-depth pass using Scanline. All of this can be automated, and a long time feature requests from users.
Due to a new render pass system in Autodesk 3ds Max, users can create render elements for Smoke 2013 software, Adobe After Effects and Photoshop or other image compositing software more easily.
The Scanline renderer can do two methods of indirect illumination. One is a brute force method called Light Tracer and the second is called Radiosity, which is based on legacy technology developed for Autodesk Lightscape (the result of which is vertex normal shading after an inistal calculation). Radiosity use has dwindled but can still bake in lighting for things like game engines and simulations.
It is worth noting that for many users the simple and effective rendering of the default renderer is all that they seek and more complex photoreal GI solutions are not needed for each and every job. Our focus here is however on the high end market through the ‘glass’ or ‘lens’ of GI in big productions.
Mantra – Houdini (Side Effects Software)
Mantra is still to this day the Side Effects Houdini packaged renderer. It is very similar in many ways to Pixar’s RenderMan, a renderer that many Houdini customers also use. And it is for Mantra, or rather more specifically the voxel rendering that it provides, that lead to this year’s Sci-Tech Oscar success for Side Effects’ Andrew Clinton and Mark Elendt. They were awarded the Technical Achievement Award (Academy Certificate) for the invention and integration of micro-voxels in the Mantra software. This work allowed, for the first time, unified and efficient rendering of volumetric effects such as smoke and clouds, together with other computer graphics objects, in a micro-polygon imaging pipeline.
RenderMan can render volumetrics but Houdini is known for its effects animation, especially things like smoke, gas and volumetrics in general.
Rhythm & Hues used Houdini and Mantra for some of the snow effects in The Mummy: Tomb of the Dragon Emperor.Before Side Effects implemented the micro-voxel feature they had a hybrid approach, with a scanline part that supported polygon surfaces, and the only way to render a volume was to write a shader “to do your own custom ray marching or to render sprites,” explained Andrew Clinton in a story fxguide published in Feb 2012. “So we wanted to bring some of the features of the multi-polygon renderer into the volume renderer, so you get the best of both worlds.” Mark Elendt was also interviewed for that story and added. “So the micro-polygon renderer was almost a standard REYES architecture, where you take a complex surface and split it up into more simple surfaces until you get something called a micro-polygon. Then you shade each micro-polygon and sample those. That worked fine for surfaces but there was no way to render for volumes using that kind of technology. So we wanted to extend the REYES architecture for volumes and do more complicated amorphous primitives.”
– Above: a demo of Mantra’s rendering enhancements in Houdini 12.
Mantra is provided as part of Houdini and has been for many years. It works extremely well with things such as volumertric motion blur and many other complex and cutting edge approaches such as deep compositing. One of the biggest advantages of its micro-polygon approach is the fact that the shading and the sampling are two different things and they have two separate and different quality control knobs. “You can say, ‘I want higher quality motion blur’, and you don’t have to pay any extra cost for shading,” says Clinton. “We can take advantage of the efficiency savings from that, and you get greater control. So you get better or faster motion blur where you don’t have to trace as many rays per pixel to get good quality motion blur. It’s the same thing with depth of field. Also, we’re able to integrate it into our image processing pipeline where you can generate deep images and deep shadow.”
Mantra renders IFD files, which are like RenderMan RIB files, but different, and while Mantra is part of Houdini, other software can be rendered in Mantra. Productions can feed Mantra with animations or models from other host packages.
Modo: Luxology
Modo is a polygon and subdivision surface modeling, sculpting, 3D painting, animation and rendering package developed by Luxology. The program runs on Mac OS X and Windows.
Modo was created by the same core group of software engineers that previously created the pioneering 3D application LightWave 3D from Newtek, originally developed on the Amiga platform and bundled with the Amiga-based Video Toaster workstations that were popular in television studios in the late 1980s and early 1990s. They are based in Mountain View, California.
In 2001, Newtek’s Vice President of 3D Development, Brad Peebler left the company to form Luxology, and was joined by Allen Hastings and Stuart Ferguson. Allen Hastings was the original creator of LightWave Layout and Stuart Ferguson LightWave Modeler. They were the primary engineers on those apps from versions 0 thru 7.5. Ferguson single-handedly worked on the cross platform toolkit that took LightWave from Amiga to Windows PC, Dec Alpha, Mips processors as well as SGI and Mac. In early 2002, Hastings, Ferguson and Peebler started Luxology. After more than three years of development work, modo was demonstrated at Siggraph 2004 and released in September of the same year.
Today modo version 601 is in use across many different markets from architectural, product design, fashion, photography, advertising, games, TV and film with clients ranging from id Software and Valve, to Pixar and ILM, from JC Pennys and Honda to indy developers and artists.
 modo’s renderer is a general purpose physically based ray-tracer. It includes features like caustics, dispersion, stereoscopic rendering, fresnel effects, subsurface scattering, blurry refractions (e.g. frosted glass), volumetric lighting (smokey bar effect), and deep shadows.
As stated at the top of the article caustics can be an interesting problem in rendering – modo has two types of caustics available. Caustics from direct light sources can be visualized using photon mapping, and caustics from the environment and other objects are handled as part of indirect illumination sampling.
It is based on Brute Force Monte Carlo as its basic sampling method used for indirect illumination. Irradiance caching can be enabled to speed it up. Says Hastings: “The ‘front end’ architecture of the renderer is rather unique, however, employing decoupled sampling like PRMan but without the need to dice all surfaces into micropolygons.”
In the press, it is said that ‘under the hood the modo renderer is a fast ray tracer that uses high dynamic range radiance units throughout its calculations for maximum accuracy and quality’. This means that ray tracing code has been heavily optimized, and that the colors emitted by lights, carried by rays, and stored in the frame buffer are all represented in floating point and specified in terms of Watts per steradian per square meter (SI radiance units).
 The render is very physically plausible “if realistic parameters are specified in lights and materials, and if certain settings are not changed (like the indirect multiplier),” says Hastings. “There are just a few phenomena that are not modeled, such as polarization. Shading is customizable through an SDK that allows plug-in textures and shaders.”
Wes Ball used modo’s renderer on his new short stereo CG film, RUIN. “So software was basically Modo for modeling and rendering, something I think might surprise people,” says Ball. “Modo is a pretty young app, but the guys there at Luxology really care about making great stuff and are building an awesome tool. But until last week, modo didn’t do deformer-based animation. So I used LightWave to do the camera and character animation. And used FBX to go back and forth between the two. Came up with some interesting processes with the rigs based on a null hierarchy to do all that stuff. As far as the look goes, it’s all modo. A fantastic renderer. As for GI, brute force monte carlo baby. Modo’s GI is really fast. And the key to it all, in terms of the worlds, was their implementation of instancing, they call replicators. Super powerful stuff.”
All companies at some time need to set an agenda. Given modo’s current growth and the great user adoption of the 601 version we asked Hastings, “if you had to rate speed vs able to deal with huge files vs features – where is your focus moving forward?” He responded, “We have plans for improvements in all three areas. If I had to pick just one it would probably be huge scenes.”
LightWave – NewTek (updated)
LightWave has a built-in renderer which, like much of the rest of the product overall- has had new energy injected into it in the last couple of years. LightWave (LW) has been a main stay of visual effects work in television episodics for many years. Since its launch, LW was key in many episodes of such key visual effects series as Babylon 5 (Syndicated/TNT, 1993 Visual FX Emmy Award), Buffy The Vampire Slayer (UPN), Firefly (Fox – Emmy Winner), Star Trek: Deep Space Nine / Enterprise /Voyager (UPN), Battlestar Galactica (SciFi) and Terra Nova (Fox). Literally almost every major network science fiction series at one time or another used LW.
More recently it has been used on a host of non sci-fi shows as visual effects moved into traditional drama such as CSI / CSI: Miami / CSI: New York (CBS), FlashForward (ABC), Fringe (FOX) and many more.
 While its use in feature films has been less prominent, it was most recently used on the Space Nazi comedy/drama Iron Sky – a film where in the last moments of World War II, a secret Nazi space program evaded destruction by fleeing to the dark side of the moon. During 70 years of utter secrecy, the Nazis construct a gigantic space fortress with a massive armada of flying saucers, who then return to earth.
With the arrival of Rob Powers at NewTek as the VP of 3D Development, LW has made a move to be less of an island and work better in a pipeline environment. Recent additions of things like geo-instancing have expanded the feature set and many other newer industry standards are being actively explored – such as Alembic, to allow productions to use LW in larger facilities where mixed application pipelines are the norm.
(note: fxguide will be doing more on episodic effects pipelines. We will also have a feature Iron Sky story).
LW is used in a variety of other places. It is not limited to either television work or films. Given the long history of the product it has found use in a host of other key markets.
Christopher Short is an artist who uses LW for print work. He works as a highly successful freelance illustrator whose work has appeared in numerous national and international publications including over 40 covers for Newsweek. “I use Lightwave and it’s GI system as my main rendering tool,” he told fxguide.
This image below by Thomas Leitner was developed for the Austrian TV movie “Die lange Welle hinterm Kiel” (analogous: “The long wave behind the keel”) based on a novel from Pavel Kohout “We made 11 shots with the ship,” says Leitner. “Everthing was rendered in LightWave: the ship, the ocean and the smoke (with TurbulenceFD fluid dynamics).” It was rendered in full HD with cached GI (Monte Carlo) in ca. 17 min per frame.
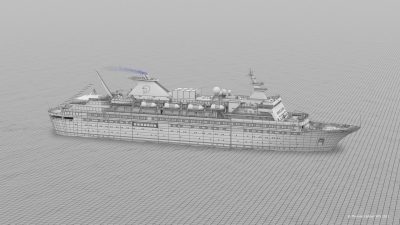

Animation modelling and rendering: Thomas Leitner with Jürgen Krausz also working on the modelling and compositing by Florian Hirschmann.
There is also a plugin GI renderer for Lightwave called Kray. This is a global illumination renderer that allows for fast and accurate rendering of scenes where indirect light plays an important part of the lighting solution. It includes a modern ray tracer with full GI, refractions, irradiance caching, lighting mapping (similar to photon mapping), importance sampling, caustics and is available as either a Lightwave plugin or as a standalone renderer. It runs on a PC or Mac.
CINEMA 4D – Maxon
CINEMA 4D (C4D) has two core renderers and also has integration with Pixar’s Renderman, 3Delight and any other RenderMan compliant renderer. Plus there is a V-Ray and a mental ray bridge available (see below). There is also a specialist renderer for hair and another for toon style non-realistic renders, or NPR (Non Photo Real) called Sketch and Toons.
C4D’s renderer supports multiple processors, HyperThreading and Multicore technology. The two core renderers are the normal render and a physically accurate renderer, the later having only been out for the last couple of releases. Tim Clapham, senior C4D Artist, TD and supervisor, comments: “Last couple of versions, the new physical based renderer has been available and I use it for beautiful depth of field and motion blur.”
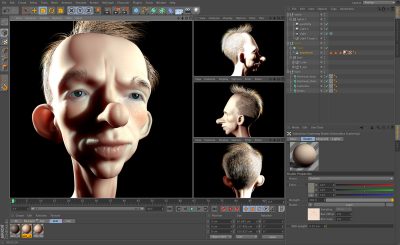
The physical renderer includes real world parameters designed to simulate the optical effects that can be seen when using a real camera, such as depth of field, motion blur, vignette, chromatic aberration. It also offers an additional indirect illumination mode. Physical correct means that a user can adjust the camera like a film camera. The resulting motion blur or depth of field (DOF) blur is very close to a real practical camera. F-stops as well shutter angle can be set by the artist or TD. The results are done without putting the artist into a position where they have to decide if DOF or motion blur will be calculated first, which can be a problem in post processing.
C4D supports volume and surface caustics generated from lights and also image based lighting, although there is an obvious render cost in this. Clapham also points out that Maxon provide CineMan which is a tool to interface with RenderMan compliant renderers. Cineman will translate the native C4D materials into RIB files for rendering, there are also RIB containers within C4D so you can easily import your own RIB files.
One nice feature is the sub-surface scattering (SSS) in C4D is done as a single comprehensive shader. It allows different wavelength adjustment for each of the colors in terms of scattering and Chapham really likes the quality and easy of use of the approach. The SSS was completely rewritten recently and for a quick start it has presets.
C4D’s multipass rendering allows users to easily composite using any standard compositing application. Multiple object-based alpha channels make it easy to layer elements with other 2D and 3D assets. With direct export to Adobe Photoshop, Adobe After Effects, Final Cut Pro, Fusion and Motion, C4D supports rendering in 16-bit and 32-bit color depth for high dynamic range images in DPX, HDRI or OpenEXR format which works well with Nuke, Flame and other high end compositors not directly supported. But in Nuke you use a single input node as the ‘Multi Layer’/channel. Open EXR is supported.
– Above: watch the Maxon C4D demo reel.
To render out separate light passes there is an After Effects exchange which means even down to each light can be written out individually and then formed up in AE as a pre-comp. This separate light pass can also be used or brought into Nuke, but not pre-built. The exchange with After Effects is a roundtrip with the latest version. Export to AE or from AE to C4D, which some users love, allowing use of The Foundry’s AE-3D tracker.
The GI support extends to IBL. C4D’s Physical Sky can be easily adjusted and delivers high dynamic range information. It contains a time and location option, for light/location simulation. The IBL can be done in one of two ways, in the physical render and in the Global Illumination option in the render presets. In the GI Render presets you can choose among several options and methods, e.g. QMC (Quasi Monte Carlo)
According to C4D’s web site some of the renderers supported by CINEMA 4D include:
- 3delight (via CineMan*)
- AIR (via CineMan*)
- Arion Render
- FinalRender Stage 2
- fryrender
- Indigo Renderer
- LuxRender
- Maxwell Render
- mental ray / iray (via m4d)
- octane render
- Pixar’s RenderMan (via CineMan*)
- VRay for C4D
Brazil
There are some other much smaller but very loyal fan base renderers, amongst these are renderers such as Brazil. Brazil is only available for 3ds Max, but it has a very small group of cult-like followers who swear by it. Authored by two ex-Blur studios artists, it is still very actively used by a select community especially some high profiles in the SF Bay area like some digimatte artists and others. It is very robust but not as wildly accepted as V-Ray .
Brazil was starting to gain popularity some time ago but is not as commonly heard of in more recent times. One user commented that “Brazil has a cult like following in the Pacific Northwest and LA, it’s not a huge group but it includes ILM ie: shots in Pirates of the Caribbean and more.”
finalRender – Cebas Visual Technology
finalRender 3.5 for 3ds Max 2010-2012 and 3ds Max Design 2010-2012 is offered in 2 versions. finalRender 3.5 is targeted to the mainstream user base, while finalRender 3.5 SE (Studio Edition) is the perfect choice for bigger production houses and advanced users, seeking the maximum in quality and flexibility. finalRender was used extensively for The Day After Tomorrow and 2012. It integrates well with other rendering engine shaders which is rare (ie: it renders mental ray shaders).
It is primarily used for architectural rather than animation or effects work. finalRender was always a GI solution. In recent times finalRender’s global illumination system has received an overhaul in many areas with its HarmonicsGI, and this release brings a well balanced set of speed optimization and workflow enhancements.
– Above: watch a scene from Alice in Wonderland utilizing finalRender. VFX by CafeFX.
The new 3.5 system is meant as a future replacement of the “older” Image-GI global illumination engine.
The Image-GI global illumination engine was introduced as a cebas first in 2002. It has been completely updated since then, the newer algorithms are multi-core and allow for a wide range of sophisticated approaches to GI method used to create believable and fast global illumination scenery, it is also stability with complex scenes with thousands of animated objects possessing millions of polygons.
finalRender supports caustic rendering effects for reflections/refractions along with volume caustic rendering effects. The caustics algorithms, support multi-threading, enabling fast rendering speeds when using caustic effects.
finalRender offers stereo solutions within 3ds Max in a single rendering pass. The stereo production, Alice in Wonderland, used this pipeline according to their web site. Sam Korshid, former effects eupervisor at CafeFX, approached cebas with an urgent need for a proper rendering solution for 3ds Max that would work out of the box, have no issues with live action footage, and would match rendering setups created in Autodesk Maya. Within the tight production timeline of Alice in Wonderland, cebas developed and integrated a new, true 3D stereo camera model into finalRender 3.5, which proved to be an ideal rendering solution for this large-scale production.
CPU vs GPU
Solid Angle’s Arnold is a CPU renderer and it is unlikely that the code will split to implement a GPU solution. It is not alone, many feel that at the higher end in film production it will be some time before GPU rendering becomes an option. Arnold creator Fajardo points out that it is actually quite difficult to code for GPU work. Simple GPU ray tracing is easy and widely supported, but large volume optimized production rendering is a completely different proposition.
It is perhaps for this reason that most GPU rendering seems to centre around and perhaps focus on 3ds Max pipelines.
Other companies agree with Solid Angle’s position. “We are constantly evaluating various methods to accelerate the rendering engine without imposing limits on the artists,” says Luxology’s Allen Hastings. “We do have plans to expand our usage of the GPU in modo when/where it makes sense. At the moment, by our tests our pure CPU rendering engine is very competitive in raw speed with the best GPU rendering engines but without any limit of data scale or shader complexities. In fact, in many cases our renderer is much faster than a comparable GPU solution. Our goal is always to provide the user with the maximized balance of speed, performance and quality.”
GPU rendering is very fast but not generally used in final high end, large scale film rendering production, and there are various debates around whether there is a strong future in GPU feature film pipelines. Certainly in the short term most GPU farms at the big effects houses are being used for simulation work, not final rendering.
GPU renderering applications seem destined to be used more for previs and on set realtime ‘game engine’ solutions that provide DOPs and actors feedback while they perform and motion capture. In the upcoming Avengers film, during the motion capture of Mark Ruffalo for the Hulk character, Ruffalo – while in the motion capture suit on in the mocap studio – was able to see his performance as The Hulk on the monitors in real time, like a virtual costume.
IRay
NVIDIA has done more than almost any other company to promote GPU rendering and its uses in a wide range of entertainment applications. Iray, from NVIDIA, is offered as both a GPU renderer and a cloud solution, distributed solution. iray targets interactive design, versus mental ray, which is focused on feature film and TV production.
It is hardware accelerated by Cuda but if not present still works on CPU and it is designed for physically-based photorealism.
Gary M Davis, Autodesk Senior Technical Specialist, Media & Entertainment, says: “iray is mostly known as a photoreal renderer for design viz but I’ve been challenged to show it in more entertainment uses and like it more every day. I just got set up with a Boxx workstation running NVIDIA’s Maximus GPU board(s) setup and it’s amazing what one PC can do.”
Davis expands further: “Technically NVIDIA Maximus is the pairing of a Quadro 6000 and a Tesla 2075 in one machine. Other combinations of cards can be done but these two have been branded “Maximus” for marketing purposes. Each offer 6gb of memory and that’s huge. 3ds Max can intelligently work with multiple GPU cards in user defined ways. For example, test renders can use a feature called Activeshade on one card that’s constantly rendering while the other maintains smooth viewport interaction for the user experience while modeling and lighting. Then when you’re ready to do a final production render you can enable all the Cuda cores on all GPU boards present.”
For example, unlike what would clearly happen with a CPU renderer, “Adding motion blur and/or depth of field using iRay doesn’t add render time. That’s pretty amazing and cool.”
Quicksilver
3ds Max comes with four renderers:
1. Scanline – CPU
2. mental ray – CPU
3. iRay – CPU and/or GPU.
4. Quicksilver – GPU requires DirectX Shader model 3.0 and is then hardware accelerated – great for fast turnaround of non-photoreal images and quick interaction
“Quicksilver is fast and good when ray tracing isn’t required” explains Davis. “I’m personally pushing it for animatics/previews/pre-viz, training animations, and some broadcast motion graphics.” And just as with iray, Quicksilver has very unexpected advantages compared to CPU renderers. “Adding depth of field with Quicksilver doesn’t add render time, it’s just an option,” says Davis.
Quicksilver can render most shaders and map types. “If users stick to either the mental ray Arch and Design shader or the Autodesk Material Library of Photometric shaders – then iRay, Quicksilver and mental ray can be used interchangeably”.
Quicksilver is a simplified workflow that is pretty identical to a normal mental ray workflow (whatever a user sets up in Quicksilver can be rendered in mental ray without much effort). Some users use it for faster previews, and client sign-offs, some do use it for actual production if their needs match Quicksilver’s capabilities and then they are able to gain a big performance advantage. It’s certainly not for every user nor for every problem. Autodesk has measured 10X or more improvements at the same visual quality for many scenes over mental ray, but individual relative performance will be hardware dependent.
3ds Max Quicksilver renderer computes GI with the following steps:
1. Sample all scene geometry and generate sparse point set (just like converting the scene into a sparse point cloud)
2. Use reflective shadow map algorithm to render all light views (done on GPU), and project sampled points from previous step onto each light view, get the indirect lighting for each point
3. Generate a set of useful virtual point lights from lit sampled points, and just plug these virtual point lights into our deferred lighting system
Indirect shadows are computed just by enabling shadow map for virtual point lights, in a standard way.
KeyShot – Luxion
GPU rendering is used in product design. While most such applications are outside the scope of this article it is worth noting companies in this area like Luxion’s KeyShot use real time ray tracing and global illumination.
KeyShot is actually the first such realtime ray tracing and global illumination program that uses a physically correct rendering engine to be certified by the CIE (International Commission on Illumination). Luxion aims to address the product visualization needs of designers, engineers, marketing professionals, photographers and others. Much like Maxwell, the software models light very completely so the user controls are minimal compared to a production film renderer, making it easy and simple to use.
Luxion’s customer list includes many of the Fortune 1000 product manufacturers and major industrial design companies including Red Camera company, Dell, HP, Microsoft, Motorola, Nokia, Procter & Gamble, IDEO, frog design and SMART Design.
Octane – Refractive Software / OTOY
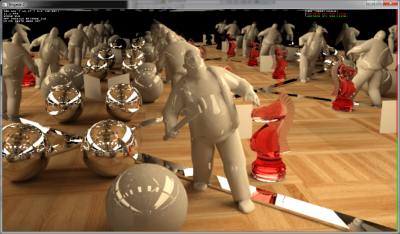
Octane Render is one of the world’s first GPU based, unbiased, physically based ray tracing renderer. But with it, the focus moves from just GPU to cloud based GPUs.
Refractive Software’s Octane Render for 3ds Max plugin is currently in commercial beta.
Octane has, as does much of GPU rendering, a close eye on gaming rather than high end feature film production as the major area of expansion and growth.
Last month Refractive Software (based in New Zealand) was bought by OTOY, a 40 person company, which boasts a commercial association with Paul Debevec of ICT. Last year OTOY partnered with Autodesk to provide cloud rendering tools. Autodesk also invested an undisclosed amount into OTOY at that time.
Brian Matthews, vice president of Autodesk Labs, said OTOY has a great track record in rendering, capture, compression and graphics-chip technologies. Autodesk believes that OTOY’s cloud, rendering, and compression technologies will be useful across a broad a number of industries. OTOY is primarily focused on cloud computing and actor capturing technology.
Oddly enough, venturebeat.com states that Autodesk is also an investor in OnLive, a major OTOY competitor.
Terrence Vergauwen, one of the founders of Octane has stated on their own forums that Autodesk will have nothing to do with Octane via OTOY, although it is hard to imagine how the company will not be in some way involved as Octane runs in 3ds Max.
OTOY has built a cloud-based rendering technology that uses GPUs inside servers in a data center to create images. Those images are rendered with ray tracing as Octane is a ray tracing solution. OTOY is also working on Brigade, a technology to render cloud-based games with high-quality 3D graphics.
With the Brigade game engine OTOY developer Sam Lapere produced this test on 2 GTX 580 GPUs, the illumination is a combination of the environment map and directional light. The model is lit by sky and sun. The sun does cast soft shadows, depending on the distance: the further the shadow is from the object, the softer and less dark it gets.
“We’re about to launch Brigade publicly for game developers in the very near future,” says Lapere, “so indie game makers can use it to create photoreal games with it. The games will (probably) be playable through the cloud: the end user goes to a website and a video stream will pop up (a bit like Onlive), showing an interactive game rendered with full global illumination and all other raytraced effects. We’re currently working on the dynamic part of Brigade, the aim is to have multiple dynamic characters and objects simultaneously.”
Brigade and Octane render will also be used by Autodesk in their cloud rendering platform to “deliver real-timephotrealistic graphics for end users, rendered in the cloud on GPU clusters” he adds.
Note: Cover feature image rendered in V-Ray by Ramon Zancanaro.

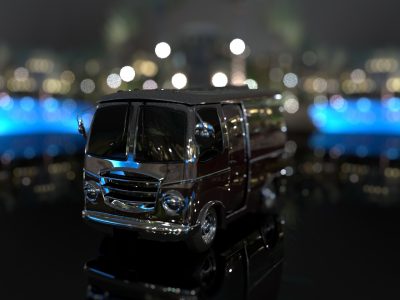
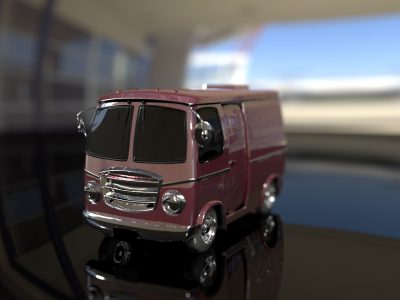
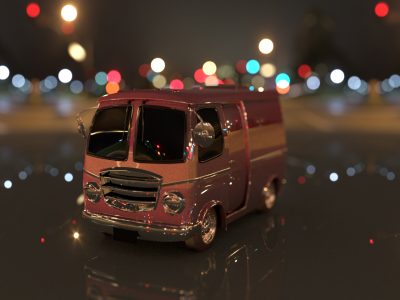
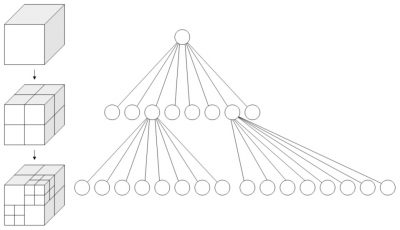
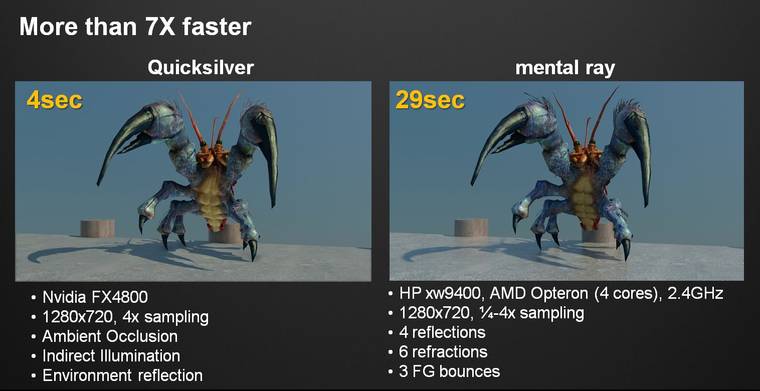
“Renderers are like religion. Rendering is a religion!” ahhah yeah i totally agree. Actually i m more curious about Arnold. Since its website doesnt give any info ( like you wrote) i read some articles from web . people who worked with Arnold in big campanies they all said its really fast. But it seems like we have to wait until when they decided to sell in small campanies.
About mentalray i think they better to rewrite some its code.. Even though i personally “love” mental ray when it comes to calculating GI it begins to test ur stress.. I think thats why lots of people and lots of campanies prefer vray in these days. Renderman’s shrinkwrap tech is also interesting.
As a final word i was actually hoping to see more topics about mentalray
But i have to thank you guys again. This is really a great topic to cover.
Wow. Great Job Mr Seymour. Thorough. Thank you for the excellent information.
Probably the best article I’ve ever read on the subject. It’s a general enough overview to get an idea of everything that is out there and the terminology, but not so much that it is too dry to get through. This is fantastic!
This article appears to be interesting but a little incomplete.
What about the PantaRay engine (Weta Digital), or Newtek’s LightWave3D render engine? They’re both used in production A LOT, well more than other render engines listed in this article.
Something about Pantaray:
http://www.tgdaily.com/games-and-entertainment-features/45279-nvidia-unveils-pantaray-engine
Something about LightWave3D:
http://www.youtube.com/watch?v=r9raYQYdh-E
Yes I am in dialogue to include LW. I expect to interview them soon… I should have included LW.
Re PantaRay – I believe Weta use this as a GPU renderer not for final shots.
We included only some GPU renderers to say this is an area to watch – but to my knowledge – large studios like Weta, ILM, Framestore etc dont use GPU ray tracering GI renderers in production on major films – and it was this angle we took for the article. I could have included many more GPU renderers but I wanted to more flag them as of great interest – but they were not the focus. But if I am wrong about Weta please let me know
Thank you Mike!
You’re absolutely right about large studios, and yes, the GPU renderers list is very exaustive (as the rest of the article, which is brilliant).
Great Article! But surprisingly, there’s no mention of Arion Render by RandomControl?! http://www.facebook.com/pages/RandomControl/117928991593700
Well I think I can answer that Randi
1. the product is not out yet
2. nor is the demo version I believe 🙂
3. It is a GPU Nvida renderer (we were focused not on GPU – but included some to suggest this is an area to watch)
4. the article is about Rendering in production especially features, and we have never ever heard of it being used .. see points 1 and 2 above 🙂
That being said. It does look like interesting tech but without production exposure I did not include it.
Mike
Hello, Mike. I answer back:
1. Arion Render is out since 2 years
2. Demo is avaiable
3. Arion is GPU & CPU.
4. Arion is in production – see 1. 😉
Arion has also some features qualitywise which are unique to this engine (like no energy loss). Here are some Links which may help: Newsletter … http://www.randomcontrol.com/newsletter-2011-12-06 … another Newsletter … http://www.randomcontrol.com/newsletter-2011-12-25 … their Tech-Blog http://randomcontrol.com/blog/ … youtube channel http://www.youtube.com/user/RandomControlLabs/videos
Best Regards,
Randi James
Great article, incredible how far we have come.
One more ‘history bit’ for Arnold:
We had a few people, myself included, working at Station X, that are European and the first reason why Marcos
started Arnold was rather simple.
At the time making lights look like volumes was hard to do, most solutions where as simple as to run a fractal pattern through a cone with mutiple slices and it became a little bit of an inside joke whenever we had make them.
Because we where rather young at the time and fresh from the boat so to speak, most of our weekends, if not working we would be at rave parties since Techno/House etc was at its height in Europe.
And because such parties always featured insane amounts of light effects interacting we always wanted to be able to make this happen in vfx, with the naive idea that some day we could make extra money, free beer and vip access by having a ‘previs simulation’ of a light play, so any rave organiser could make the shows even more spectacular.
One of the very first ‘rendered’ images out of Arnold was a scene of a dancing girl with some gobo’s interacting and it didnt have the ‘cone overlapping’ effect normally associated with additive processes. Marcos knew we had a potential hit.
Andy Lesniak’s ‘live’ Arnold soundboard of course sealed the deal later so to speak 😛
Thank you for allowing translation of great article.
As I mentioned on twitter yesterday, I posted it on my blog here http://maxwellsandy.blogspot.com/2012/04/art-of-rendering.html
Thanks.
This is a great article, very useful and accurate informations. Thank you.
Amazing article, thanks for sharing it with us.
Maybe it was worth mentioning the work done by Digital Domain in the Tron movie using Vray. Also, do you have any information to share about Blue Sky renders? I’ve see you mentioned it, but it would be nice if you have something to say about it.
Great article! Thank you…..FXG
A thing to add is that NVIDIA launched OptiX:
http://www.nvidia.com/object/optix.html
A library which helps writing Raytracers for GPUs.
Thanks for the very good Article, Mike.
Great article, I’m sorry that I only just found it!
One minor correction (sorry I can’t help myself!) regarding Maxwell Render is that it supports the rendering of hair/fibers via Maya Hair and Paint Effects, not via Maya Fur. Essentially it hooks in through Paint Effects and one of the methods for render Maya Hair is by using Paint Effects strokes.
Great article, surprised there was no mention of Vray RT under the GPU tab as it’s becoming more and more capable. Arnold is also very interesting, but how does one learn the software if there’s nothing about it on their website, or anywhere really for that matter. Cheers
Thanks for the comments.
Regarding Arnold, we have a course at fxphd.com this term — and members can get access to the software as well. It’s a great way to learn.
Hello,
I am trying to chose what renderer to invest in. (time, money, training).
I’m a freelance 3D artist, creating prototype sculptures of human characters and manufacturing them to be sold as high-end 3D assets. (A collection of models/assets and scene-files primed for rendering). I use 3ds max and Zbrush.
I need simplicity, speed and quality in rendering still shots and turntables. Special attention to displacement maps, hair and fur as well as SSS.
My budget? well, that depends on a lot, like my break-even analysis and how much training/support I need.
Any suggestions from experienced people?
Thanks for these great articles.
Steve.
[…] out THIS comprehensive and extremely informative article about all things rendering written by Mike Seymour […]
[…] Seymour, M 2012 http://www.fxguide.com/featured/the-art-of-rendering/ […]
[…] The Art of Rendering […]
[…] kadar rekabetçi? Art of Rendering`in (Görselleştirme sanatı) ilk çıkışı üzerinden sadece 18 ay geçti, durumsa çarpıcı […]
[…] The hat is requested by the hard ass client: me. So far the roboboy project has made me understand a lot more about shading in physically accurate renderer such as arnold/Vray. and there is a must read post here that helped understand the background: ), a very good read: http://www.fxguide.com/featured/the-art-of-rendering/ […]
[…] Much of the history of Solid Angle and the development of Arnold by its founder Marcos Fajardo was covered in our previous Art of Rendering piece. […]
[…] Much of the history of Solid Angle and the development of Arnold by its founder Marcos Fajardo was covered in our previous Art of Rendering piece. […]
[…] The Art of Rendering (updated) | fxguide – The goal of realistic rendering is to compute the amount of light reflected from visible scene surfaces that arrives to the virtual camera through image …… […]
[…] – The Art of Rendering 2012 […]
[…] Seymour, “The Art of Rendering (updated),” April 10, 2012 […]
[…] Seymour, “The Art of Rendering (updated),” April 10, 2012 […]
[…] http://www.fxguide.com/featured/the-art-of-rendering/ […]
[…] http://www.fxguide.com/featured/the-art-of-rendering/ […]
[…] razlike izmedju ova dva render engine-a možete pročitati u dva odlična članka, pod nazivom The Art of Rendering i The State of Rendering. Preporučujem svakom artisti koji želi bolje da se upozna sa raznim […]
[…] Sourch : The art of rendering (updated) | fxguide […]
[…] -Seymour, M.S. (2012). Fxguide. Retrieved 23 March, 2016, from https://www.fxguide.com/featured/the-art-of-rendering/ […]
[…] Alec Parking gave a lecture on Rendering, Rendering is the process of generating an image from a 2D or 3D model (or models in what […]
[…] The Art of Rendering. A render farm is a room you can rent out to render your work and you pay for the time it takes. […]
[…] lecture is based on “The Art Of Rendering” […]
[…] The Art of Rendering (updated) | fxguide – Before the expense of ray traced radiosity became feasible for large productions, Pixar’s RenderMan tackled GI in two distinct ways, one using ray tracing to just add … […]
[…] The Art of Rendering (updated) | fxguide – Before the expense of ray traced radiosity became feasible for large productions, Pixar’s RenderMan tackled GI in two distinct ways, one using ray tracing to just add … […]
[…] Use in 3D application for image based lighting […]