Rotoscoping is the process of manually altering film or video footage one frame at a time. The frames can be painted on arbitrarily to create custom animated effects like lightning or lightsabres, or traced to create realistic traditional style animation or to produce hold-out mattes for compositing elements in a scene and, more recently, to produce depth maps for stereo conversion.
As a VFX artist, you are primarily creating motion graphics or visual effects. A thorough knowledge of rotoscoping and roto tools is vital to solving a vast amount of problem solving in VFX: rig removal, stereo conversion, greenscreen compositing, hold out mattes, split screens, and even object or feature-based color grading. It is perhaps one of the widely used tools in visual effects.
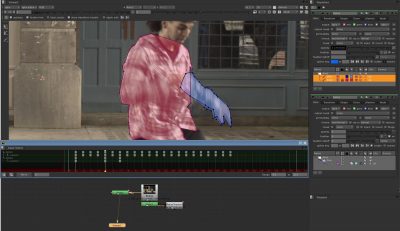 The art of rotoscoping changed considerably with the introduction of digital tools such as Flame, Mocha, Silhouette, Digital Fusion, Nuke and After Effects (AE). With a thorough knowledge of rotoscoping, digital artists can create better live-action or CG composites as well as amazing visual effects. Various rotoscoping techniques are covered below, including matte creation, effects painting, paint touch-up, digital cloning, stereoscopic conversion and motion tracking, as well as a brief history of the craft and summary of the tools.
Historical overview of rotoscoping
Fleischer Studios
A true pioneer of animation, Max Fleischer produced the Popeye and Betty Boop animated series, as well as the animated features Gulliver’s Travels and Mr. Bug Goes to Town. With his brother Dave, he founded the Fleischer Studios in the early 1920’s, which offered a less sentimental animated vision of the world than the rival Disney studio. Perhaps most importantly, Fleischer invented the rotoscope, a device that changed the look of animation forever.
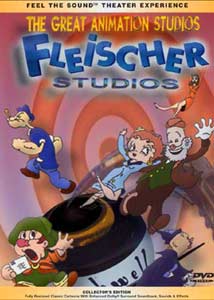 Born in Vienna, Austria in 1883, Max Fleischer immigrated with his family to America at the age of four. His artistic skills were quickly recognized, and instead of attending public high school he opted for the Art Students League in New York. While attending school he landed his first job at the Brooklyn Daily News, where he worked as an assistant in the cartoon department. Within a few years, he was a full-time staff artist with his own comic strip. He then moved on to Popular Science Monthly, which sparked a life-long fascination with machinery and inventions. While working at this magazine, Fleischer began working on his plans to create the rotoscope.
Early animated films were crude, jerky and difficult to look at. They were not very popular and were only tolerated because they were a curiosity. Max Fleischer aimed to change this by inventing a device that would allow them to project live action film onto the glass of an animation stand. The animators could then place paper on the animation stand and trace the live action footage one frame at a time. This device, named a ‘rotoscope’, was patented by Max Fleischer in 1917.
In a 1920 New York Times interview, Fleischer said, “An artist, for example, will simply sit down and, with a certain character in mind, draw the figures that are to make it animated. If he wants an arm to move, he will draw the figure several times with the arm in the positions necessary to give it motion on the screen. The probability is that the resulting movement will be mechanical, unnatural, because the whole position of his figure’s body would not correspond to that which a human body would take in the same motion. With only the aid of his imagination, an artist cannot, as a rule, get the perspective and related motions of reality.”
The rotoscope, though, allowed animators to work from a filmed image, which gave them the guidance they needed to create more graceful and realistic movement on screen. “It was beautiful to watch, rather than very annoying to watch,” Fleischer said.
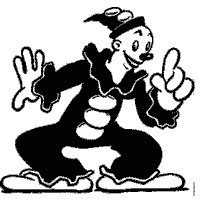 The first cartoons created by the Fleischers using the rotoscope were the Koko the Clown series, and they then went on to utilize it in Betty Boop and Popeye. Though they used rotoscoping to create the main characters, they continued to rely on traditional rubber hose style animation in their cartoons. The Fleischers pioneered other traditional animation priniciples in their studio which changed the face of modern animation, right up to today. Most animators at the time would use the technique of ‘Straight Ahead Action.’ Animators would simply start drawing their sequences at the beginning and straight ahead to the end.
The Fleischers used another technique called ‘Pose to Pose’ animation, in which the animators would produce main extreme poses, or keyframes, then fill in the in-betweens. The difference was that the Fleischers would have assistants draw the in-betweens while the lead animators moved on to create more keyframes. Though at the time this eventually led to labor problems and striking workers at Fleischer Studios, the practice is still used today by traditional cel animation companies, and has been translated into the automatic ‘tweening’ processes found in computer based animation tools.
Disney
During the 1930s, the Fleischers found themselves in an ongoing competition with another animator — Walt Disney. The Fleischers and Disney constantly raced one another to each new milestone in animation — first sound cartoon, first color cartoon, and first feature. But according to Max Fleischer’s son, Richard Fleischer, Max and Dave often came in second, largely because the studio behind them, Paramount, didn’t offer the support they needed.
Walt Disney also turned to rotoscoping, for Snow White. At the time, Fleischer considered suing Disney for patent violation, but in doing preliminary research, his attorneys discovered that before Fleischer’s patent, a company in Wilkes-Barre, Pa., had created a device similar to the rotoscope. The company, Bosworth, Defresnes and Felton, had never patented it, so Fleischer actually was entitled to sue, but he evidently lost interest in pursuing the Disney case after hearing about the earlier machine.
The movements of Snow White herself were acted out by a high school student named Marjorie Belcher, later known as dancer Marge Champion. Initially, Disney intended to use Belcher’s movements as a guide for the dancing in the cartoon, but soon he opted to use it more extensively. This was partly because the animators otherwise used themselves and their own facial expressions as the basis for their characters’ faces, Disney explained. “The artists looking at themselves in a mirror sometimes were not so successful, because they were bad actors and would do things in a stiff way,” he wrote.
Nevertheless, some of the Disney animators looked down on the idea of rotoscoping. One of them, Don Graham, derided the technique as a “crutch” for artists who lacked the skill to do their work on their own. Another, Grim Natwick, said that even when the artists used the device, they used it only as the basis for their work, adding heavy elaboration and even changing the proportions of the original filmed figures. “We went beyond rotoscope,” he said.
But rival animator Walter Lantz criticized the look of the rotoscoped work in Snow White. In press materials for his own project, Aladdin and the Wonderful Lamp, Lantz declared he would use the rotoscope only for timing because of what he saw as its limitations, especially in Disney’s film. “This literal system resulted in two faults — a jittering movement that contrasted with the fluidity of the animals, and the fact that the human characters were too accurate to be seen beside the caricatures,” he said.
Yet rotoscoping did help the artists on Snow White maintain a consistency that might otherwise have been impossible. On earlier animated shorts, each character was done by a single animator; as a result, the characters had a unity of style. Because Snow White was so extensive, however, more than one artist had to work on each character. Working from live-action footage offered them the best way to create a cohesive look.
Analog rotoscoping for visual effects
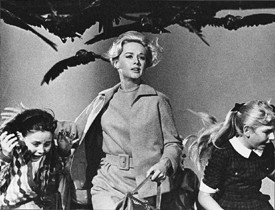 While the technique is useful for animation, rotoscoping eventually became an important tool for visual effects in general. From the 1940s through the 1960s, U.B. Iwerks, a well-known animator, turned to effects work, where he pioneered the use of the rotoscope on films such as Alfred Hitchcock’s The Birds (1963).
Rotoscoping in visual effects was used primarily to make holdout mattes. “You frequently want to composite different elements into the same shot to create that shot,” explained Tom Bertino, who was head of Industrial Light & Magic’s rotoscoping department from 1987-93. “By using the tracing to create black mattes, you can hold out certain elements.”
For example, Bertino imagines a scene of an explosion behind two people on-screen, where the explosion is added after the fact. “You could print the explosion over the frame. But you’d also cover up the people,” he said. “You’d need to isolate them with the rotoscope.” To make a traditional holdout matte, a rotoscope artist would trace the figures that had to be isolated onto an animation cel. The outline traced onto the cel then would be filled in with black paint, so that it would block the appropriate section of the frame. “You create a solid black matte,” Bertino said. This black matte then could “hold out” the part of the explosion image where the two people would appear, so that when the two images were printed together, the people would appear to be in front of the explosion.
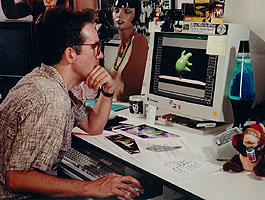 Rotoscoping also could be used to stabilize a shaky film image. To do stabilization, each film frame was rotoscoped onto an alignment chart. A comparison of the charts allowed changes in position to be tracked from frame to frame. Using this information, an optical copy of the film could be made, with the printer offsetting the shifts in each frame’s movement.
Bertino said people underestimate the difficulty of rotoscoping during the photochemical era: “It was a painstaking process. There were so many moving parts to the rotoscope camera, and so many places for things to get out of hand.” Rather than being a refuge for the unskilled artist, he added, rotoscoping was a demanding craft. “The rotoscoper had to be a skilled animator to make the line follow through. That’s actually something that plagued some early uses of the rotoscope as a special effects tool — without actual animators to handle it, it could get jittery.”
Good rotoscope artists were very precise about their work. “It was so exacting,” Bertino said. “It’s almost like — I don’t know if you’ve ever seen those incredibly detailed Chinese tapestries that they made in the monasteries generations ago. They finally stopped making them because the artisans would go blind. I’m surprised that more rotoscopers didn’t go that route.”
Jack Mongovan, a paint and rotoscope supervisor at ILM, began his career in traditional rotoscoping and has been working in the field for over 20 years. He remembers working in rooms that were completely dark except for the light coming out of the projector. The rotoscope artists were at the mercy of the painters who would later fill in their outlines, and who could with a few stray brushstrokes outside the outline make the image suddenly jittery. “I would never go back to traditional for anything,” Mongovan said.
[fx_audio src=”/wp-content/uploads/2011/10/scott_squires.mp3″ link=”/wp-content/uploads/2011/10/scott_squires.mp3″]
– Above: listen to VFX supervisor Scott Squires, formerly of ILM, discuss the development of Commotion.
Digital rotoscoping for visual effects
Today, rotoscoping is done in the computer, using programs such as Nuke, Silhouette, Flame/Smoke and After Effects. The shift to computer-based rotoscoping began in the early 1990s with a software called Colorburst, an image editing tool like Photoshop, that later evolved into Matador. “When computers became prodigiously viable around here, right after the Terminator 2/Jurassic Park era, we realized that the computer had great capabilities for this,” Bertino said. “It obviously became much simpler.”
Mongovan said that today, one rotoscope artist can do the same amount of work that eight used to do, and in one quarter of the time. This is often because in traditional rotoscoping, each frame had to be drawn individually. The computer, on the other hand, can use the previous frame as a basis, which means most of the drawing may already be done.
Rotoscoping software works using splines, which are a series of points connected by a line or curve. These splines are adjusted from frame to frame, so that they continue to conform to whatever shape the artist is tracing. Because rotoscoping software includes the tools to paint an image, rotoscope artists now find themselves doing a lot of paint work as well. “Rotoscoping is becoming the lesser part of what we do,” Mongovan said. “We do so much more painting.” Painting might mean taking someone out of a shot, or replacing a sky, or painting out the tennis balls used as visual effects tracking markers.
Some skills remain necessary, including a sense of what is important. “One of the hardest things for people to do in our department is to realize that they’re looking at a very zoomed-up plate,” Mongovan said. Also, he pointed out, a movie audience will see an image for only 1/24th of a second, too short a time to register flaws that may torture the artists. More important is consistency. “I tell people, ‘You can paint that first frame wrong, just keep it wrong it all the way through.’
That kind of understanding is key, Bertino agreed. “The secret to good rotoscoping has always been — regardless of what it’s used for — an educated eye and good judgment as to what to include and what to leave out,” he said. “Most people think the rotoscope is very literal — you trace what’s there, and that’s it. It’s possible to put too much detail and confuse matters. You need to have that sense for judicious editing. That hasn’t changed at all. And not everybody’s got that.”
Rotoscoping in the modern post-production pipeline
Effects painting
Effects painting is generally used to quickly add new elements to a scene. Instead of creating elaborate particle effects in 3D simulation software like Maya, many effects can be done faster by a skilled artist using a paintbrush or airbrush in a paint application. Effects like lightning or light-sabres can be painted one frame at a time. More advanced roto tools offer auto-paint capabilities which allow you to record brush strokes and then play them back over a selected range of frames. Some roto applications also allow you to add jitter to the brushes, as well as add the ability to paint the stroke out over time.
There are two types of paint engines used in modern graphics applications; Bitmap (also known as raster) and Vector. Raster paint engines are destructive in the sense that they replace the pixels being painted onto with the color from the paint stroke. Photoshop, and the original Flame paint are raster based applications. This is a very fast way of working since the frame is immediately updated and the results can be played back in real time without rendering. Vector based paint engines, like Illustrator, Nuke, After Effects Vector Paint, or others, use points and splines to define a brush stroke, and do not destroy the underlying pixels. This non-destructive process allows you to edit paint strokes at any time, though you pay the price in speed since the strokes need to be rendered before they can be previewed in realtime. The other disadvantage is that hundreds of channels will be created with the spline information even if you do not plan on using them.
Looking forward, 3D paint programs that are used to produce detailed highly complex 3D texture paintings such as the Foundry’s Mari, may hold the future to effects painting. In a sense, 2D layered painting is a sub-set of what Mari needs to do in 3D with multiple layers on extremely large textures using powerful GPU accelerated paint engines. Mari allows artists to do painting detailed, multi-layered textures directly onto 3D models in a fluid and natural way. Mari was originally conceived at Weta Digital, because no existing commercial product could handle the complex, highly detailed look development work required by films such as District 9 and Avatar. One could look to products like Mari and others to be the next generation of effects 2D paint.
Cloning/paint touch-up
Most paint work done in the rotoscoping process is used for touching up film or video footage. This includes removing wires and rigs, removing logos, dust busting, scratch removal, etc. In these circumstances, the roto tool must be able to provide temporal and spatial cloning. Spatial cloning is a type of cloning which takes pixels from one position of the frame, and paints the source onto another position on the frame. Photoshop’s rubber stamp tool is an example of spatial cloning. Temporal cloning allows you to paint pixels from one frame in a sequence to another frame.
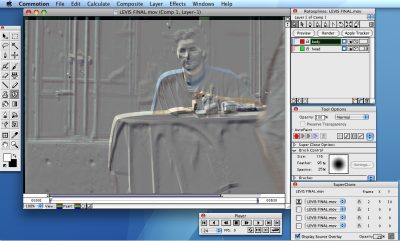
Temporal cloning is not a widely available but has been popular since the great implementation offered back in Scott Squires’ Commotion. A good roto tool should provide both of these options together so users can offset position and frame number together. Other cloning tools include wire removal tools which allow you to draw a line to zip out a wire for example the Foundry’s Furnace plugins provide specialist wire removal tools. Typically, wire removal tools clone pixels from a specified value on either side of the line, then smear the outside pixels together to cover up the wire or scratch. More advance wire removal tools will add advanced cloning techniques to the wire removal process. For example, Furnace provides multiple in-painting / cloning and blurring options.
Matte creation (keying, rotosplining, painting)
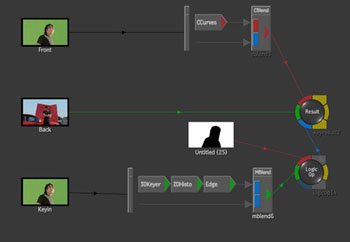
Creating hold-out mattes, sometimes referred to as masks or alpha channels, is a major part of the compositing process. A matte is a grayscale clip which is used to stencil portions of the background footage. Anything in the black area will be obscured, and anything in the white area will show through (in some systems like Avid this is backwards). Any gray area in the matte will be semi-transparent. Roto artists are expected to cut precise mattes with consistent edges which will not chatter. If the matte is sloppy, the shot will look fake. The best compositor will produce unacceptable work if provided with poor mattes. Mattes can be created with three different techniques; Extraction, Rotosplining and Painting. For most situations a combination of these three techniques will have to be used.
Extraction is the process of procedurally generating a black and white matte. This can be done by shooting an element against a blue or green screen, then using a color keyer to knock out the specified color. Sometimes bluescreens are not practical, and in these cases other types of extractions need to be performed. Luminance keying can extract a matte based on the luminance values of the source. Either dark or light areas can be extracted into a matte. An image can be de-saturated then leveled to create a high contrast matte. Sometimes it is better to start with one of the color channels to create an extraction. It is always a good idea to check out each color channel to see how the contrast looks, then pick the best one to start leveling into a high contrast matte. The Shift Channels filter in AE can shift one of these color channels into the Alpha Channel, which can then be manipulated into a final matte.
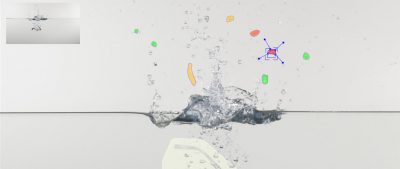
Rotosplining is the process of creating vector shapes to manually cut an element out of it’s background. These shapes can be re-positioned on various keyframes, and the software will interpolate the in-betweens. The process isn’t as automatic as an Extraction, but at least the computer can interpolate some of the frames for you. Good roto tools will offer multiple rotosplines with the ability to keyframe each shape separately. By using multiple splines, complex elements can be cut out from their background. For example, an actor running would have separate shapes for the hand, forearm, upper arm, chest, torso, thigh, shin, etc. By breaking the shapes down into smaller elements, it is much faster to set the keyframes by moving the shape and not individual points, and the software will interpolate much more accurately.
Most applications use bezier splines for their rotosplines, which require tweaking both the points and the handles. While most programs have bezier splines, some also offer B-Splines, which are much easier to control in certain situations but sometimes harder or take longer to set up. B-Spline, also called Natural Splines, do not have the handles found on Beziers. Instead they always create a curved surface depending on how far apart the points are. The points default to an average tolerance, and can be interactively changed to loosen or tighten the curve. Fusion offers B-Splines (see below).
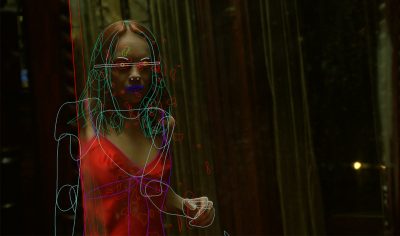
When doing complex roto, such as a jungle with a character running through foliage or something similar with many moving independent motions, it is vital to be able to play multiple shapes in real time over the background footage. Other key tools, depending on the stage in the post path roto is occupying, include:
• color coding and naming splines, UI tools can mean a big difference in managing a complex roto
• unlimited splines
• directional feathering or edge softening
• the ability to add and remove points temporarily
• motion blur mattes based on direction and velocity of the splines themselves (vs the frame overall)
• curve editoring for fine tuning keyframes, filtering and scripting
• rotating and scaling splines and selected points, based on tracking with global position offsets
• fast and intelligent handling of large openEXR, DPX, etc files, while 2K is common, 4K and above is not uncommon.
• good LUT tools for seeing into darks or lights to ‘follow’ objects that may appear to be virtually clipped or crushed.
Of course, mattes can also be generated with paint tools. This is generally the last resort, as painting mattes generally will produce inconsistent results due to the fact that every frame needs to be painted on, plus any revisions to the shot will require re-doing this manual painting.
Auto-paint functionality can help with this consistency problem, but for the most part painting mattes should be left for final tweaking of an extracted or rotosplined matte. Advanced rotoscoping tools offer the ability to paint mattes directly into the Alpha Channel while continuing to see an overlay of your RGB channel. This is sometimes referred to as a Mask Overlay, or QuickMask, and is crucial for painting some types of complex mattes.
Motion tracking
Motion tracking is a computer based process which analyzes a pixel or sub-pixel in a clip, and follows that pixel or sub-pixel to find the exact coordinates on each frame. There are two primary uses for motion tracking. The first is for stabilization, and the second is for match moving.
Once a motion tracker knows where a sub-pixel is on every frame, it can re-position the image on every frame in the opposite direction to counteract a camera shake. This stabilization process works fantastic in most cases. Tracking one point allows you to stabilize position. Adding a second tracker will allow the software to compare the relative positions of the two trackers, which can also stabilize rotation and/or scale.
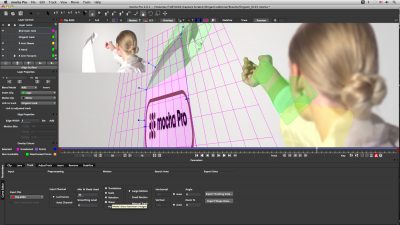
The second use for motion tracking is match moving. If you needed to add a logo to a car door, you can track the handle on the door, then apply that data to a logo on another layer. As mentioned above, a second tracker can be added to match move a logo which needs to rotate and/or scale. If perspective changes, four point tracking can be used to track four points. Each tracker can then be assigned to a corner of a CornerPin filter applied to the image. Finally a full planar track can be done which finds the plane of the tracked object. After planar tracking one really moves to full object or camera tracking solutions such as PFtrack, boujou etc.
Serious roto tools need motion tracking to help automate tedious processes, as well as to produce convincing results. Motion trackers should allow you to track 1, 2, and 4 points simultaneously. Advanced trackers, like the one found in Flame, allow for unlimited point tracking, and access to the tracked data in text format so it can easily be used in other applications. Motion trackers should also allow you to apply the tracking data to rotosplines and individual points on a rotospline for automated matte creation, as well as attaching tracker data to paint and cloning tools. And most importantly, the motion tracker has to be accurate.
Planar tracking for roto is a vital tool in the area of stereo conversion as the results can be more spatially accurate and helpful in building depth maps than just straight roto alone.
Stereo Roto
Roto has seen vast growth with the matching explosion in stereo productions. There are actually two types of stereo roto work: Stereo Workflow and Stereo Conversion.
With stereo workflow, the material has been shot with two cameras and the task is to match as closely as possible roto in the right eye with roto in the left. Failure to match the rotos for certain operations can lead to viewer fatigue and actual motion sickness.
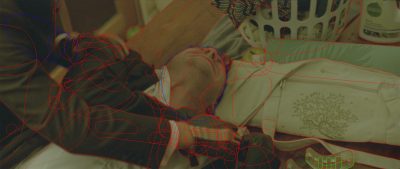
By comparison, stereo conversion sees roto being used to isolate elements in a mono-shot sequence so that a depth map can be made that will allow a second ‘virtual’ camera to be produced – with the correct offset for stereo parallax. In the case of a face this may mean a separate roto for the eyes, the eyeballs, the face, the nose, the lips, the hair and ears. In the simplest form, these roto shapes would then be combined using screen, multiple, darken and lighten, to build up a manual depth map (z-map) of white to black gradated grayscale roto-based shapes that defines the depth for of the face.
Given that every shot of a mono film needs to be processed for a mono to stereo feature conversion, this can mean a mountain of roto work.
Stereo Workflow
The largest area of growth in roto tools in recent times has been in the area of stereo roto tools. Fusion, Silhouette, Mocha, Flame and of course Nuke and Ocula from The Foundry all have stereo workflow tools designed to help roto objects or items seen by both eyes in a way that matches and does not hurt the stereo comfort of the viewer.
The Foundry was one of the first companies to provide tools for working with stereo production. Ocula’s O_Correlate, for example, is a collection of tools to assist an artist when rotoscoping, creating paint effects or doing other operations dependent on image locality. It provides extensions directly to Nuke’s existing Correlate function. Ironically, Nuke itself was left a tad behind other products in providing cutting edge technology for stereo conversion. Nuke’s base roto tools, until recently, were not a priority for The Foundry, as the company focused on stereo production shot stereo, not converted from mono. However, as of SIGGRAPH 2011 and the announcements and discussion at the Nuke Users Group in Vancouver, this seems to be changing.
Stereo Conversion
Below is a series of frames from the recently stereo converted Conan the Barbarian, from 3D LiveFlix. Overlayed on the stills from the sequence are the shapes identifying the various objects and surfaces that needed to be isolated for a successful stereo conversion.
The process typically involves isolating objects using roto tools and trackers, then the building of a depth map and then an additional roto fix-up to patch the missing information revealed in parallax as the second stereo pair frame is created. While both the object identification, disparity map and secondary output view generation all have some automatic tools, there is still a huge amount of roto in stereo conversion.
 As you can see in this breakdown from 3D LiveFlix, there is an enormous amount of roto work to isolate elements. 3D LiveFlix used a mix of different existing tools, including Nuke, After Effects, and more.
3DliveFlix is a really new company and growing quickly. They currently have ten permanent staff developing and working on possible automatization of the process. For Conan they were the single largest vendor, and had a team of 70 people working on rotoscopy and another ten on composition (excluding management and supervision). For stereo conversion, depending on the shot, 3D LiveFLix would have 30 to 120 layers of live action that needed to be separated so as to build the complex depth maps needed for the stereoscopic depth pass.
Top 10 fxguide tips for professional roto
1. Before starting, study the clip, play it over and over so you gain really understanding of what the shapes are doing and what will be ‘in play’ in the shot.
2. Find natural motion points. When doing roto on anything with cyclic motion find the natural motion points and put key frames at these points – do not just blindly add keyframes every 5 or 10 frames.
3. Split up an object or person into sub shapes. Do not try and use one shape for an entire person in motion, limbs and even hands and fingers may all need separate roto shapes.
4. Make sure points on the spline stay on the same point of what you are working on. A point at the end of one finger should remain on the same finger. If not two frames might look correct but they will not interpolate correctly, and you will end up with a keyframe per frame.
5. Label and color code if possible the roto shapes. Keep organized.
6. Retire shapes and add new shapes, also dynamically hide and add points if your software allows. Clumping of too many points will produce inconsistent results.
7. Avoid splines folding back on themselves – the single line of a spline may look ok, but this mathematical knot will not blur or soften correctly and often produce sharp triangular holes in the shape.
8. Use keys and other techniques where you can, a garbage matte inside a key will be easier than an edge roto.
9. A good approach on certain shots is to stabilize the camera movement before rotoing starts, do the roto on the more stable shot, and then then apply an invert stabilization to put the movement data back onto the roto shapes.
10. When objects have sections that stick out from the main shape, these may be best handled with additional individual shapes, especially when the object is turning . you may not want key frames on the main shape for subtle variations in something attached to the main shape.
Outsourcing
One big change since we first published the original Art of Roto piece is the growth of outsourcing roto work. Many very good companies now exist to handle outsourced work. One such company is Boundary VFX , which provides matte generation services as a virtual company. Like other such companies their services can be used to generate either spline solutions or black and white mattes. Their services are used for:
• color grading mattes
• roto isolation mattes
• stereo conversion
• rig removal
• reflection removal
• and more….as seen in the reel above that they put together for fxguide and this story. Note: Boundary VFX proudly have team members who are trained with our sister company fxphd.com, and their work is appearing in numerous major Hollywood feature films, such as Harry Potter and the Smurfs, with more coming out in the next few months.
Summary of Roto Tools
After Effects
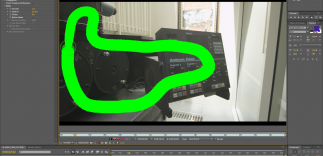 After Effects was the first tool to bring professional compositing motion graphics and effects functionality to the desktop. After Effects was originally developed by CoSA, then acquired by Aldus, which in turn was acquired by Adobe. After Effects had very limited rotoscoping tools in earlier versions, with only one rotospline and no paint tools, but this is slowly changing. Version 4 added multiple rotosplines for cutting mattes, version 5 added vector paint, and version 6.5 has added cloning tools and tracker advancements.
Today, AE is one of the most popular tools in the visual effects world. Known as a swiss army knife of tools, it is able to both generate rotos and import splines from programs such as Mocha. (see below)
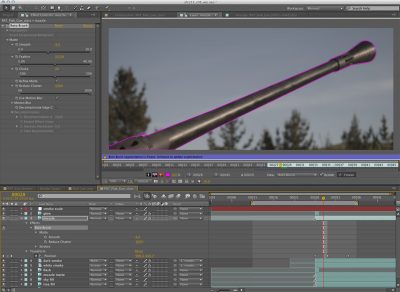
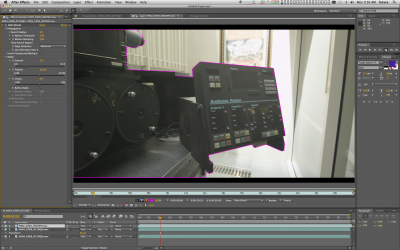
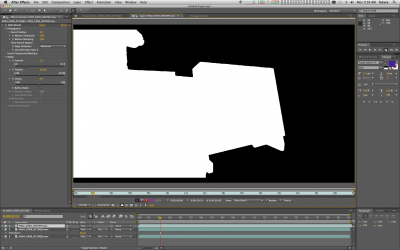
In AE CS5/5.5, the RotoBrush tool allows user to draw a rough brush stroke to create a fairly accurate outline of the shape that needs to be extracted. It can track the shape over a range of frames defined by the user. The matte can be further tweaked by adjusting the values in the Roto Brush settings.
Here is an example. (sidenote: ironically the image here is the original optical printer at ILM – used for combining hold out mattes for many of the greatest optical vfx films ever)
Flame/Smoke
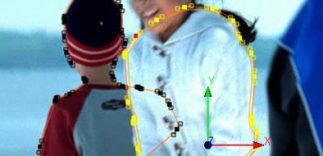 Autodesk’s Advanced System, which includes Flame and Smoke, runs on Linux and MacOSX workstations and ranges in price from $60,000 to over $300,000. These products offer a complete post-production solution, including powerful rotoscoping tools. The painting and cloning tools include point and object tracking but no planar tracking. The rotosplining functionality is good, though not quite up to par with Mocha or Silhouette. In the most recent releases these tools have been expanded to include stereo workflow. But Flame and Smoke use roto to support other functions such as keying and will often have roto work done on cheaper systems and then loaded into Flame/Smoke. If a facility already has Flame software, for example, then they may add Autodesk’s Flare (software only) to do roto and pre-build Batch and the Action 3D compositing setups.
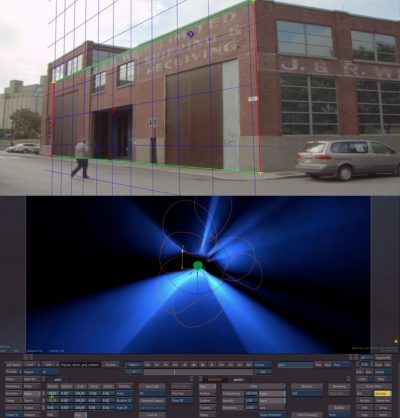
The newest version of Flame also provides Autodesk’s answer to planar tracking by allowing perspective planes to be corner tracked and thus provide a correct 3D plane in Flame’s 3D compositing environment. This allows for rotos on that plane to achieve a similar effect to say Mocha’s planar track. (As seen in the fxguidetv preview of flame 2012×1 Ep115)
Flame’s roto shapes or GMask shapes have advanced now to a point that they can be used to control ‘volumetric’ lighting effects i side Flame’s 3D compositing environment.
Digital Fusion
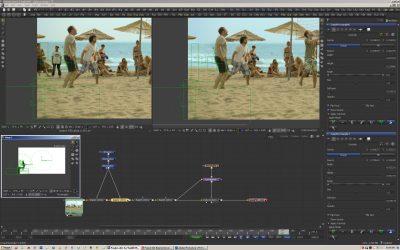 Eyeon’s Digital Fusion started in Sydney and moved to Toronto, Canada. At one stage a version of Fusion was provided with Alias 3D, but today eyeon has gained one of the strongest positions in NT/Windows desktop compositing solutions. Eyeon has multiple products including Digital Fusion.
Digital Fusion 6 is eyeon’s flagship product. Fusion is a popular choice amongst sections of the stereo conversion roto community. The tools are direct and can be applied to the problems of depth map and shape isolation for stereo conversion.
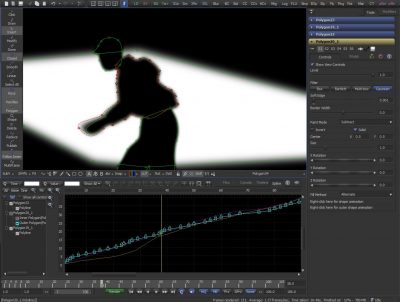
Fusion roto tools include two mask roto types, the Bspline and polyline masks. The roto tool inside Fusion is actually called the polygon tool.
What most users like about Fusion is the workflow, and the speed it affords users. The UI is thought to be very intuitive and fast in practice. It should also be noted that Fusion – like some other products – also works well with a Mocha copy/paste workflow.
Eyeon also offers Rotation which is designed specifically to work with Fusion for film pipelines. Roation’s tools has been defined for the exacting demands of rotoscoping, keying and retouching, and recently expanded for stereo conversion projects. The integrated scripting in Rotation allows larger film facilities to use this to create roto mattes and clean plates as part of a film workflow.
Eyeon also announced at IBC 2011 ‘Eyeon Dimension’, which offers additional specialist stereo tools.
Fusion, like Nuke and Flame, is a powerful 3D compositing environment. This allows the use of camera mapping and camera projection techniques to remove items that once would have required multiple frames of roto, by rotoing/painting a single frame and then adding that clean ‘card’. By piping this clean plate into a tracked Fusion camera solution, this single roto/paint fix can solve the problem for perhaps the entire clip.
These types of solutions normally involve a 3D camera solution and the can be extremely effective when the lighting is not changing dramatically, even for shots with camera motion blur or hand held shots.
Nuke
As discussed above, The Foundry led the pack in developing roto tools for dealing with stereo shot material. Avatar and other stereo sourced films lead to great advances in The Foundry’s toolsets and both ILM and Weta used Ocula in their stereo pipelines.
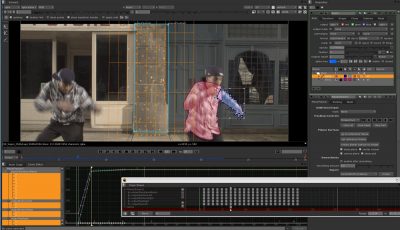 Nuke’s base roto tools however have not been as cutting edge, until recently, and this has lead to pipelines with specialist programs such as Mocha feeding Nuke compatible splines. Roto is done on a specialist roto station and then the splines are exported and can then be adjusted and modified further easily in Nuke.
Nuke does however have the depth of film handling tools and major keying infrastructure needed to solve the most complex film compositing problems in the world.
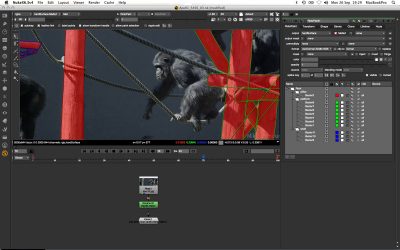 Prior to version 6 of Nuke the roto tools left a little to be desired. Since the introduction of the new RotoPaint tool in Nuke version 6, the application now has a fully featured Roto and Vector Paint solution, including the ability to use both Beziers and B-spline shapes. The new version of the application supports full graph editor (f-Curve) representation of all aspects of each individual point, which means that you can drill down to tweak any animation curve for any point on a shape. Additionally, trackers can be linked to either points, shapes or layers containing multiple shapes. Crucially, every tool supports stereo pairs or SXR sequences and allows the user to dictate whether they are working on left, right or both eyes per shape.
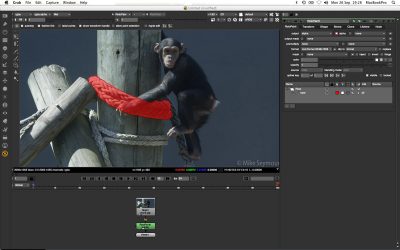 In Nuke 6, The Foundry completely rewrote its Roto and Paint toolset, combining the two tools into one RotoPaint node. For speed, a separate Roto node was also made available. The new tools enabled multiple splines and paint strokes to be combined under a single node along with the ability to add per-point feathering, per-point tracker control, spline edge colouring, clone/offset/time-offset capabilities, spline or stroke life time controls and motion blur. Paint strokes and Roto splines can also now be grouped into Layers enabling a more parent – clild relationship, ideal for rotoing characters, etc.
The output of the RotoPaint / Roto node can be fed directly into Nuke’s multi-channel system enabling mattes to be stored for later use in the main composite instead of overwriting the existing Alpha channel. The Roto splines along with Paint stokes can also store RGB information making them useful for not just matte creation but also patches, vector graphics and the like.
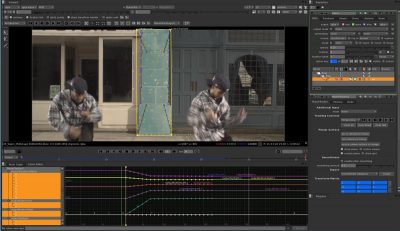 The Foundry have listened to user requests and have included both a Dope Sheet and a Planar Tracker in recent builds of Nuke. These are a welcome addition to anyone doing any serious roto in the application. As the Dope Sheet often dramatically simplifies making timing changes to complex shapes of groups of shapes. The Planar Tracker is also a very helpful addition to the Roto toolkit in Nuke. Nuke’s planar tracker is entirely tied in to the Roto node, relying on Rotoshapes to define areas to be masked or tracked and then outputting Planar transforms to the associate Layer in the Roto shapes list. One really nice new feature is the ability to link Planar tracker maticies to other Rotoshapes layer or Spline or Grid Warpers which can prove very helpful in complex warping and morphing.
In practice Nuke’s Roto feels somewhere between either Silhouette or say Autodesk’s old Combustion, which is not a bad thing at all, but it can tend to bog down on really large scripts, according to a film pipeline specialist we spoke to, who works on major Hollywood Nuke production pipelines.
Silhouette
Silhouette is a specialist tool that has recently had a make over. The product aims to produce a valid matte output from any method or combination of technologies but it is very much written as a pipeline tool.
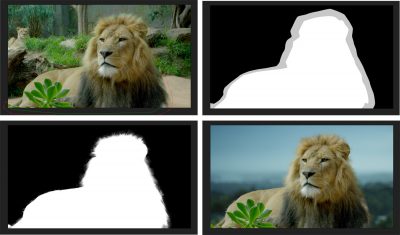
Power Matte is a newer tool in Silhouette v4 that aims to reduce the need for spline based hand done rotos. It is an easy to use interactive matting tool capable of extracting almost any object in an image, even when dealing with fine hair detail, smoke, or reflections. The process does require some manual input for object identification. This extraction process creates a matte including soft transparency. Once a matte is extracted, the foreground object can be seamlessly composed onto a new background, but the matte is pixel not vector based. Vector roto shapes can be imported or combined with the Power Matte shapes, allowing for important garbage matting of say a face, if the Power Matte is automatically producing a hair matte.
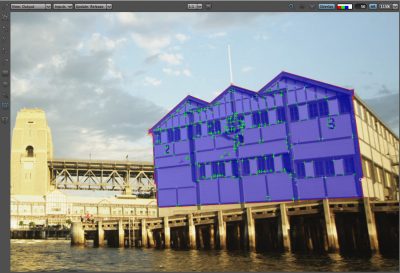
If manual tracking of hair is required, open shapes or lines effectively can now be roto’d. Most shape programs require a spline to be close, making long waving thin lines extremely hard to roto, as the splines fold and produce huge exceeding erroneous bubbles or loops all too easily. This tool (v4.1) is relatively new and thus still rough, it shows great promise and hopefully will improve in coming releases.
Also new in the v4.1 release is a new re-written planar tracker.
mocha
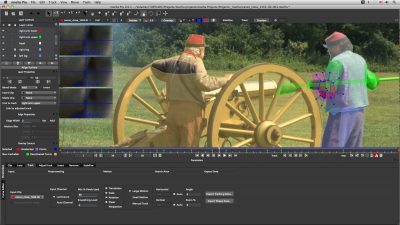
Key to the fast way that mocha, from Imagineer systems, works is the notion of the planar track. A planar track that moves in perspective can be tracked and then attached to that planar perspective move the roto can be applied. With Mocha, the roto does not need to be point tracked or shape tracked, but the plane that the roto sits on is tracked and then the roto inherits this movement in 3 space. So a roundish object that would not respond to an object track directly, does work when its roto plane is moved in perspective, a perspective moved derived perhaps from the object it is attached to. In a sense, you know a lot about how the shapes in a room will move if you know the perspective planar shifts of the walls or floor. If a wall is seen in perspective for example, the door close to camera may make an excellent source of planar tracking data, but the actual movement of the wall would not apply well to a person leaning on the wall (further away in perspective down the wall). A literal track of the roto linked to the close door would move the person’s roto too much as the door has more parallax movement, but the roto of the person will move with the same perspective also seen in the wall and closer doorway. Thus the roto will move correctly in the scene based on the planar track, and the artist is free to also animate the outline shape of the person as they move or talk etc.
Object tracking is much more valuable to a roto artist that point tracking, point tracking produces high frequency jitter and often erroneous results that make the roto little better than hand painting per frame. This jitter is both wrong and highly distracting. An error or inaccurate edge handled smoothly, will be far less likely to be an issue that a boiling or jittering edge. Shape tracking also handles partial occlusion, and minor foreground issues like hairs, smoke or dust.
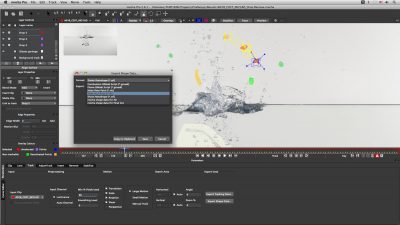
mocha exports easily to AE and Nuke, with the shapes and splines rather than just the rendered shapes being able to then be used in Nuke or AE directly. This is a key feature to mocha working in a modern pipeline and is a major selling point for this popular solution.
The product is available in several forms from mocha Pro to mocha and mocha AE.
Photoshop
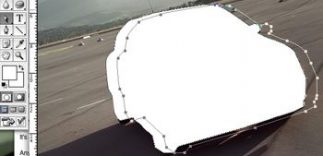 The most ubiquitous graphics application in the world was probably the first digital rotoscoping tool to be used in film and video post production. Though Photoshop was initially intended for still images, it can work with motion by importing frames one at a time or importing filmstrip files from video applications. Photoshop’s brush engine is the benchmark everyone else strives for, and gives excellent control when using pressure sensitive Wacom tablets.
The biggest drawback is a lack of a real time preview of sequential frames. Photoshop lacks temporial tools, in short it is great on a frame and poor when working with a clip. You will not know how well your shapes are working out until you play back your clip in realtime at full resolution. After painting numerous frames in Photoshop, the sequence must be brought back into an editing or compositing application such as Final Cut Pro to see realtime playback and you cant export splines from Phtotoshop into say Nuke’s native spline format. So the result is only a ‘rendered’ output and this is a painfully slow way of working. And since it isn’t intended for film, it lacks advanced travelling matte capabilities, LUT & viewing tools and motion or object tracking.
Other older discontinued products
Shake
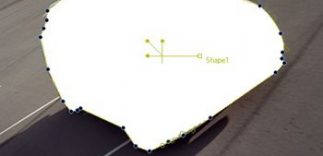 Shake has three options for roto; Quickpaint, Quickshape, and Rotoshape. Quickpaint is a procedural paint package inside Shake. You can paint frame by frame and then view in realtime or paint with interpolation. As all the paint elements can be animated over time it is a reasonable roto tool. Quickshape is a basic roto tool, somewhat now completely over shadowed by Rotoshape.
Rotoshape allows variable edge softness and logical operations between roto shapes. The rotos in Rotoshapes are classic spline shapes with complex parent child relationships – and velocity based motion blur. For complex rotoscoping this gives very accurate results. Both Rotoshape and quickpaint can use shakes 2D trackers. It is worth noting that given Shake is a node workflow model it is possible to paint or roto through a track or image transform.
Shake is not a completely dead product as the source code was bought by several large facilities with some of those extending the product’s code base and thus its working life. But Nuke has been taking over from Shake in nearly all respects.
Curious gFx Pro
 gFx was a relatively new product that showed great promise on the Mac OSX. Unlike other paint programs it is designed around a strong user interface that fully embraces moving footage, as such it could import, composite, track, or stablise footage easily. The spline shapes could not be exported and the product does did not fully import Photoshop files, yet Adobe on April 17, 2005 announced an agreement to license, develop and distribute the rotoscoping technologies of Curious Software. Adobe said then that it intended to use the technology to expand Adobe’s professional capabilities in its own software. To date these tools do not appear to have explicitly reappeared in any Adobe products, the most likely candidate being AE. One of Curious’s founders was the man behind Parrallax, and it shows in the the depth of tools it launched with: 16bit raster paint with an excellent brush engine, and b-spline rotosplines with an excellent transform points UI, motion blur on splines, grouping splines, selective edge feathering (ie. advanced gradient), and more. The rest of gFx was sold, as best we can understand, to VizRT. (www.vizrt.com).
Combustion
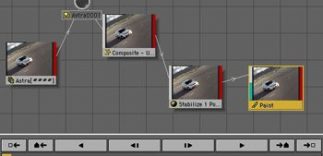 In 1997, Discreet acquired Paint and Effect from Denim Software. Paint offered a vector based painting and cloning system for Mac and PC, while Effect offered compositing capabilities. Discreet re-designed the interfaces to make the applications more Discreet like, and merged the two applications into Combustion. Along the way, they also replaced some of the core functionality like Keying, Color Correction, and Tracking with the same tool set found in Discreet’s Advanced Systems. Combustion 2.0 added additional Advanced Systems features, including the same rotosplines found in Flame. Combustion 3.0 took the product even further with an edit operator, flash output and much more, most significantly a flow diagram UI feature that many users feel more comfortable working with. Combustion roto spline files can be opened directly in the larger Inferno/flame/flint products.
Commotion
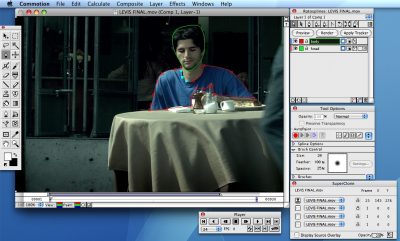 Developed by Industrial Light and Magic Visual Effects Supervisor Scott Squires, Commotion was used for years at ILM before Scott formed Puffin Designs and released it to the public. Commotion, then called Flipbook, was often sighted at ILM and mistakenly referred to as the “secret ILM motion version of Photoshop”. Though Commotion looked very similar to Photoshop in some respects, Commotion’s interface and tools were designed for moving images, and was the first tool on the desktop to offer realtime RAM based playback. This realtime core functionality was the foundation for all of the roto tools added as the product developed.
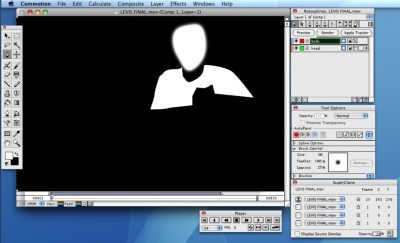 Importantly, Commotion curves could be exported and imported into After Effects, a move years ahead of its time. Advanced roto tools included raster based paint, spatial and temporal cloning, wire removal tools, auto-paint, unlimited bezier and natural cubic b-splines, motion blur on rotosplines, and a very fast and accurate motion tracker. Commotion quickly became the de-facto roto tool in the industry, replacing Matador in most post facilities. Puffin Designs was acquired by Pinnacle Systems in 2000, but sadly development stopped. The group was then sold to Avid and again the code sat on the shelf, sadly to a point that one doubts there would be any use in revisiting it. It is understood that Scott Squires did investigate a few years back trying to revive the product but sadly nothing came of it.
Matador
Matador was originally developed by Brittish developer Parralax, and acquired by Avid along with Parralax’s compositing application Illusion. Available only on the SGI platform and priced around $15,000, Matador was one of the first digital rotoscoping tools which gained a wide acceptance in the film post production pipeline. Matador started as a tool made for editing still images, so many of the tools used for motion work were not well thought out. Matador provides excellent matte creation tools including b-splines, motion tracking, and a full set of painting and cloning tools, with full 16bit/channel support. Avid stopped development of Matador in the late 90’s. The original developers tried to spin it off into a new company called Blue, but that never took off.
Aura
NewTek is mostly known for their 3D application LightWave. Aura was a stand-alone paint application designed for film and video. It wasn’t widely accepted in the industry, and was mostly just used by LightWave users to finesse 3D renders. Some advanced features included a 16bit/channel paint engine, and auto-paint. NewTek stopped supporting the program and as of June 2003.
Roto DV
Originally developed as a product named “Roto” by a failed start-up company called Post Digital, Roto DV was aquired by Radius, which later turned its name into Digital Origin, and then was aquired by Media100. Though it was called Roto, it actually didn’t have very sophisticated roto tools, and the ones that were actually pretty cool never made it into the shipping product. Media100 has no information on their website about this product, so we assume it is no longer developed or supported.
Will there be a new killer roto app?
The world of paint and roto products has changed greatly. While there is great demand for roto in the visual effects industry, the total size of this market is really still fairly small and young hot shot graphics-based startups see much easier ways to make money, as does the large industry heavyweights.
 Autodesk’s SketchBook Mobile is a paint program from Autodesk that is aimed for just the iPhone and iPad markets. In a freeware world, it sells for US$1.99 in the App Store. And yet it has sold a stagging seven million paid downloads thus far (as of (September 2011). “This would mean revenues in the range of fourteen million dollars for the company, or about $9.8 million after Apple’s customary thirty percent cut,” according to 9to5mac.com.
Bloomberg quoted Chief Executive Officer Carl Bass as stating, “Autodesk Inc. spent almost 30 years selling engineering and design software to accumulate 12 million customers. It took a single iPhone app – and less than two years – to attract 7 million more. Autodesk’s SketchBook application, which also works with the iPad and Android devices, has boosted the company’s user base and drawn new kinds of customers”. If you were Autodesk, which paint development team would you back, a roto specialist team or an iPad app team? If you sold a paint program for even $299, you would need to sell 50,000 copies to match those numbers, and like Apple, a dealer network would still take 30% or more in commission.
Thus it is that new paint and roto products will come either from extensions of more specialized products such as a possible move from say The Foundry trying to build and expand on Mari, or from revisions from the already established players.
Special thanks to Matt Silverman (formerly of Phoenix Edit now Bonfire Labs) for the initial Rotoland Article that lead to our original 2004 Art of Roto. Also thanks to Scott Squires, Boundry Vfx, Matt Leonard, Tahl Niran, Mark Christiansen, Ben Brownlee, Jimmy Shen, Ian Failes and John Montgomery for imagery and help.

Finally! A really nice intro with informative details about quite possibly the most soul crushing type of work in post production! 😉 Every visual effects artists needs to try roto for a few hours. It gives you perspective. I was intrigued at why, when I was in only my 3rd hour of roto, I had an overwhelmingly strong desire to “pass off” the work to someone else. Even more interesting, I did not think of someone highly skilled, I immediately thought of passing the workload to someone less talented/skilled… which is probably the exact opposite of what is needed. Roto work is demanding, hard, and requires some real skill to accomplish something that ultimately is never seen by the viewing audience – If the audience can tell there is roto, it’s done poorly.
Hats off to everyone involved in this article – Awesome stuff! ( I will not be trying to get better at roto, however, only avoiding it, hopefully passing that torch to someone with great roto skills).
I am always very impressed with the people who can do great roto work. Roto people rarely have their egos getting in the way – after all, when they do their job extremely well, nobody ever knows they did anything.
So far, Silhouette is still the number one tool for roto: http://www.silhouettefx.com
Awesome! great updated article!
Great article!!
Just came across this article. Like many roles in VFX, there is much depth, involvement, and dedication as an artist in this field. I am a rotoscoping/paint fix artist myself and am impressed by the author’s research and thoroughness in this article. Thanks for writing this article.
Pingback: After Effects Tutorial: Using the Rotobrush Tool | Film Fu
Pingback: WordPress @ vellum » Blog Archive » Roto-Pinsel-Werkzeug in Ae
Pingback: Response to Animation Aid:Response to Animation Aid | Meg Blogs Animation
Pingback: 迪士尼真是神懒神懒的,动画片都能「回收再利用」 - 知乎糗百
Pingback: 广东地税发票|广东增值税发票|广东发票|云帆票务 | 迪士尼真是神懒神懒的,动画片都能「回收再利用」
Pingback: 专栏 | 水5郎:迪士尼的偷懒神器:Rotoscoping(转描)的故事 | 动画学术趴
Pingback: Festival britanskog filma “Film and Chips”: Novi talenti, nove tehnologije | VFX Serbia
Pingback: Portugal Multimedia Blog | Rotoscoping or How make a cool animation without knowing how to animate
Pingback: Rotoscopia: de Branca de Neve a Waking Life – Attraversiamo?
Pingback: GAVI Jobs Analysis | lewis warren
This is a very in depth look into rotoscoping. Well written! Would recommend this to anyone who is learning about Rotoscoping.
Pingback: 2000 Word Text – Daniel – VFX
Pingback: 2000 word text: revised – Daniel – VFX