Here’s a quick look at a couple of the new features of shake, including Photoshop image import, the new MultiLayer compositing node, and the OSX Qmaster rendering feature.
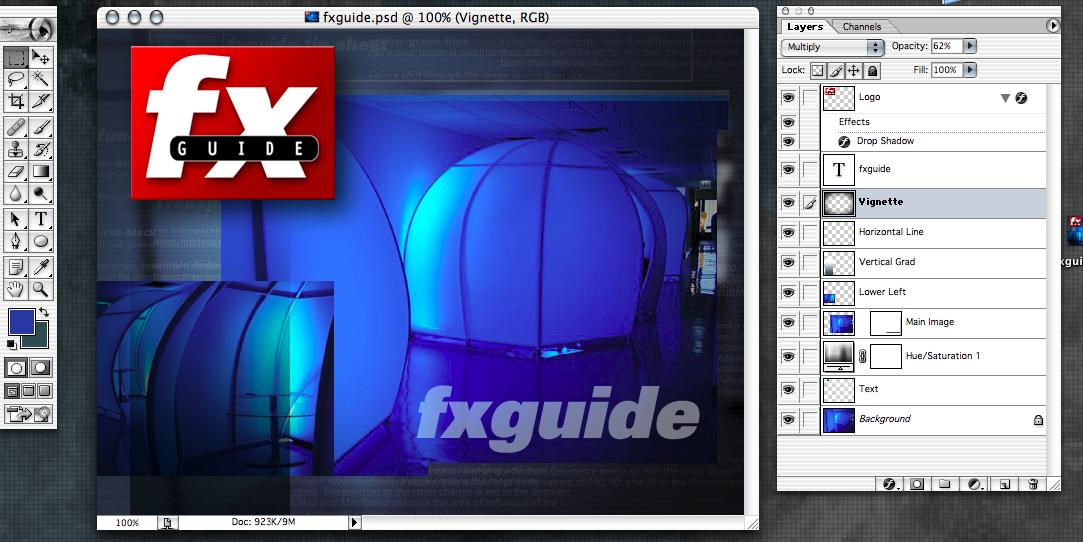
One of the first things I wanted to check out was the ability to import a Photoshop image and have it broken out into its individual layers. In order to see what information transferred, I created a test file in Photoshop which included multiple layers, blending modes, text, adjustment layers, and masks.
|
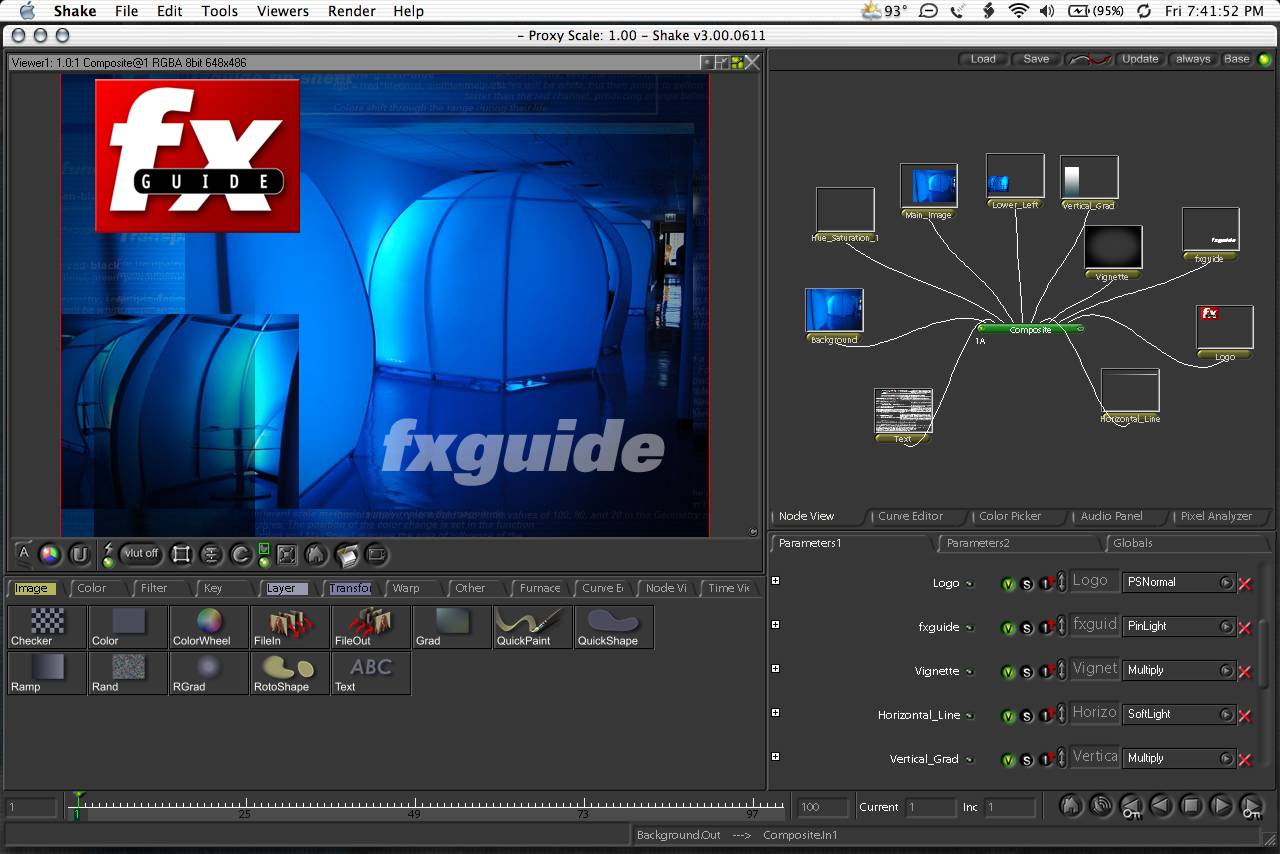
To import a Photoshop file into Shake, you select "Import Photoshop File" from the File.. menu (on OSX). You can also use the FileIn node, but that involves the additional setup of turning the merging feature off. What you end up with in Shake is a series of images feeding into the new MultiLayer node. The MultiLayer node is a great addition to Shake3 as it allows the artist to comp multiple layers within a single node (as opposed to the multiple atomic nodes in past releases). Each layer has its own blend mode (the AddMix, AddText, Interlace and KeyMix modes are not available in the MultiLayer node) and opacity setting. You also have the ability reorder the priority of the composites by dragging the layers up and and down. The name associated with the images in the shake node tree are inhereted from the layer names in Photoshop.
|
The basic Photoshop functions carry over into Shake quite nicely, including text, blending mode (with the exception of color, hue, saturation and luminosity), transparency level, and visibility. There are also well-thought out options which help Shake artists deal with the different way in which Photoshop blends layers (since Shake’s transparency levels effect RGBA and Photoshop only effects A).
What isn’t supported? Among the biggies, layer masks and layer effects are not included in the import. Adjustment layers come across as empty image layers feeding into the MultiLayer node, but they are easily deleted from the node tree.
In the future, the inclusion of layer masks would be a great improvement. I imagine the technical issues of translating the various adjustment layer effects in Photoshop to Shake would be quite daunting. Also, it would be great if the Shake software didn’t always keep the Photoshop file marked as "busy" while a script using the file is active in Shake. I’d like to be able to switch quickly to Photoshop, make adjustments to the file and have them automagically reflected in Shake.
The next thing I thought I’d check out with the new software is the new Rendezvous-based network rendering. How hard is it to use? Does MacOSX make things easy? It seems to…..
| Basically, you install the software package (and an included rendering license called a Shake Render System ID) on any supported G4 machine which you want to use as a render station. A Qmaster item is added to the System Preferences which allows you to turn on the capability and edit various features. | 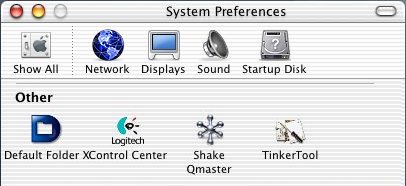 |
| At the simplest level, all you really need to do is turn on the Unix Processing service as well as Cluster Control Services on the machine to be used as a controller.
For my initial tests with the software, I used two systems. I have an "unsupported" (aka "slow") G4 450 Mhz Sawtooth system which I first added to the mix. I set up this computer (accessed via my home AirPort) as both a render system and a cluster controller. The second computer used was my tibook — which served double purpose as both the main Shake artist station as well as a render system. |
 |
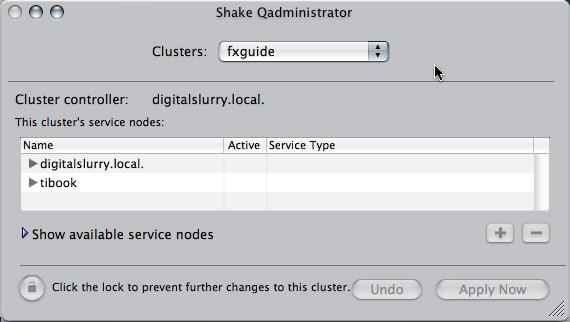 |
| After unix processing was turned on in each computer’s System Preferences, I used Shake Qadministrator to create a new rendering cluster. When the admin program was started, both computers were listed in the available service nodes section — all I had to do was drag from the bottom window to the top and apply the changes. Once you set up the cluster in Qadmin, the cluster will continue to exist, even through restarts. If one node drops out (such as when the computer is turned off or a user has turned off Qmaster in System Prefs, it will show up as unknown). Once the computer returns to the network or Qmaster is turned back on, it will automagically appear back and ready for action in the cluster service nodes.
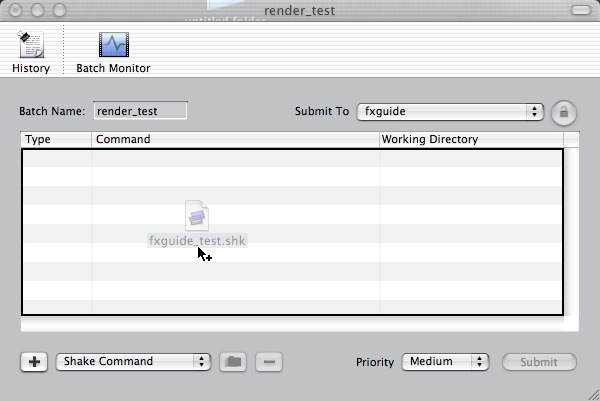
That’s it for the configuration of a simple render cluster. What is also interesting about Qmaster is that you can also submit shell commands to the cluster if you want to have a task run remotely on that machine. To render a shake script, the script and files that the script uses must reside on a volume which is mounted on all systems. You cannot use the root drive (boot drive) on an OSX system because the mount point (and therefore path name) must be the same between all systems. In other words, it must reside under the /Volumes directory on each Mac OSX system. So I set up my second 120G data drive on the G4 as the shared network drive and used that as the place to save files and scripts. It is important that the volume is mounted on all systems when you run the batch process. Starting a network render is as simple as dragging a Shake script in the Finder into the Qmaster app window and hitting the Submit button (you can also set the script’s priority level before submitting the file for rendering). |
 |
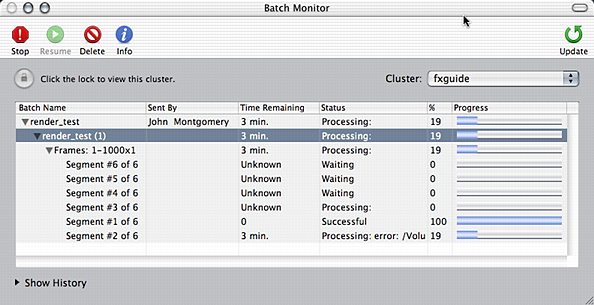
| To monitor renders, clicking on the Batch Monitor button takes you to the monitor page where you can watch the progress of renders in progress as well as viewing any errors which might occur. A history of batch renders is also kept within the Batch Monitor program. |
 |