Adapting David Mitchell’s Cloud Atlas novel into a film was no easy task for directors Lana and Andy Wachowski and Tom Tykwer. For starters, the story spans six different time periods and locations that overlap and contain tenuous but important linkages. Add to that the fact that several actors would be taking on multiple roles and the project would become an independent production.
fxguide’s Cloud Atlas coverage goes behind the scenes for just some of the key sequences in each of the film’s stories – with action cutting back and forth between them in the film. And we’re letting you choose where to start, or you can go straight to Beginnings.
***Please note this article contains plot spoilers***
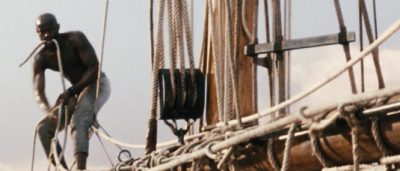
1849 – South Pacific
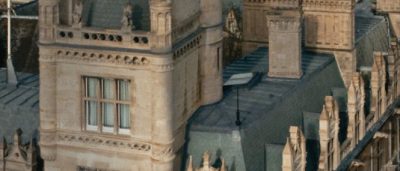
1936 – Scotland
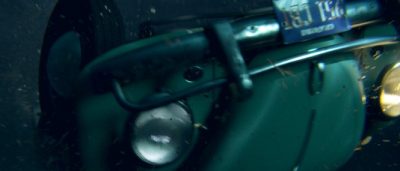
1973 – San Francisco
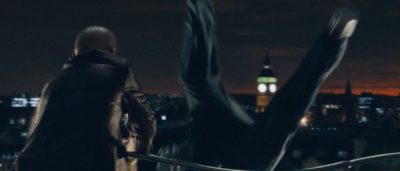
2012 – England
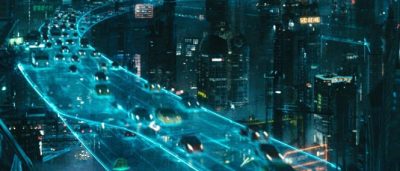
2144 – Neo Seoul
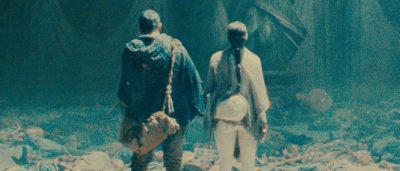
2321/2346 – After the Fall
Beginnings
To help realize the $100 million project – one of the most expensive independent films ever made – the Wachowski’s turned to frequent effects collaborator Dan Glass, now Method Studio’s chief creative officer, who came on board early for a summit held in Berlin about two and a half years ago. “We broke down the script and tried to figure out how we would do the movie,” says Glass. “We had the production designers, DOPs, ADs – the Wachowski’s already knew at that time they were going to share the workload with director Tom Tykwer – and split into two teams. The teams would be merged together at the beginning and in post, but during shooting they would have to manage two simultaneous film crews.”
Three of the film’s stories – Ewing, Sonmi and Zachry – were handled by the Wachowski’s, with the other three – Frobisher, Luisa Rey and Cavendish – directed by Tykwer. Stephane Ceretti joined Dan Glass as a co-visual effects supervisor for the production with the two generally, although not always, splitting duties by directors and location of the vendors. Together they oversaw the work of several visual effects companies spanning the globe – Method LA, Method Vancouver, Method London, Method Design, ILM, Rise FX, Scanline, Trixter, One of Us, Lola VFX, Black Mountain VFX Studios, ARRI VFX, BlueBolt, Gradient Effects, Exozet and an in-house team.
Filming took place at Studio Babelsberg in Germany, and on location in Düsseldorf, Scotland and Mallorca. The DOPs were Frank Griebe and John Toll who shot on 35mm. Makeup effects were shared by Jeremy Woodhead and Daniel Parker, who both had the daunting task of transforming many of the actors into different sexes, races and ages – something the visual effects teams would later enhance for a number of final shots.
The Wachowski’s relied on storyboards and concept work from artists such as Steve Skroce and George Hull to flesh out the worlds of Cloud Atlas, especially for the futuristic Neo Seoul setting. The art department at Method London were also instrumental in realizing concept art that fed to other vendors. A limited amount of previs was also carried out.
Glass notes that the film presented two unique challenges for the visual effects teams. The first was that so many varied stories resulted in “an insane number of one-offs.” Secondly, says Glass, some stories were very photographic and required largely invisible VFX work, while the more sci-fi and post-apocalyptic stories had more epic scenes. However, he says, that did not make the task of rendering these worlds as real as possible particularly different. “While we wanted these visuals to definitely feel, say, 150 years in the future and somewhat alien in their comprehension, they still needed to feel real – not completely fantastical. It had to feel like one of the threads in this complex interconnected movie.”
Title sequence

Method Design contributed the film’s title sequence, combining a graphic atlas with the typography. “The majority of the creative brief from the filmmakers was tasking us with figuring out an interesting way of getting from a super-wide cloudscape of an atlas seamlessly down to the shot of the ship,” says Method Design’s executive creative director Steve Viola. “As we explored options and the concept progressed, we talked a lot about treating the beginning of the shot, adding in graphic atlas elements, and design a main title that feels as though it spans six story lines. The typography of the title itself went through many iterations, while the graphic integration of the six lines remained a great constant thread. Ultimately, we ended up with a very well balanced title with serifs, sans-serifs, flourishes, and graphic lines all adding more references to the complexity of the timeline in Cloud Atlas.”
Back to the top.
1849, The South Pacific – EWING
San Francisco attorney Adam Ewing (Jim Sturgess) is traveling to the Pacific Islands to do business with plantation owner Rev. Horrox (Hugh Grant). There he meets one of Horrox’s slaves, Autua (David Gyasi) who stows away on board Ewing’s ship. Also in this story are the characters Dr. Goose (Tom Hanks), a shipmate to Ewing, the Reverand’s wife Madame Horrox (Susan Sarandon), among others.
Ship at sea
Rise FX (visual effects supervisor Florian Gellinger) contributed shots of the ship at sea, while Trixter (VFX supe Alessandro Cioffi) delivered views of the Chatham Islands and close-up shots of the ship rigging. In one scene, Autua is proving his sailing skills and has to climb up the main mast and jump down. “The sequence was partially shot on greenscreen in a studio where production built the upper part of the main mast,” says Cioffi, “but it was fixed on the ground so it didn’t give a sense of the typical rocking of a boat that is at sea.”
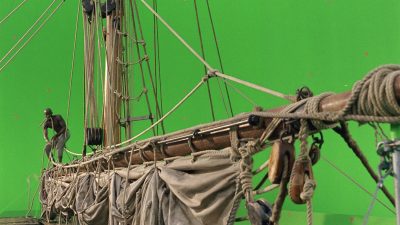
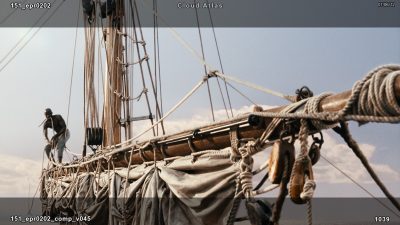
“So we reprojected the plates on some geometry and created a handheld feeling in the camera and matchmoved the mast. We had to re-create the missing parts like ropes as well and make it look shot at sea in full bright light. Just adding some 2D movement wasn’t really convincing so we tried to extract a depth map from the background re-creating the occluded parts giving it a real 3D feeling.”
Character augmentations
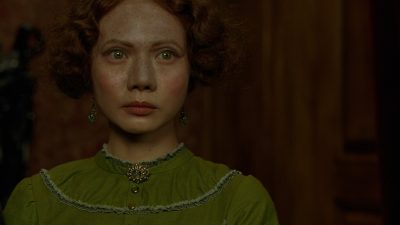
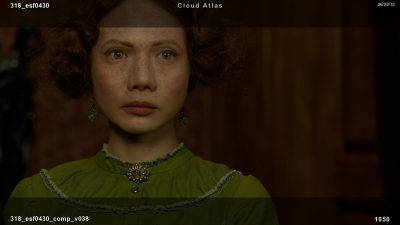
Ewing’s wife is portrayed by Doona Bae, who waits at home for the arrival of her husband. In this story, Bae was made up as a Western woman. Trixter (visual effects supervisor Alessandro Cioffi) made some slight adjustments to her makeup and eyes. “The idea was in the beginning,” says Cioffi, “let’s just substitute the contact lens with some real eyes, but by doing that something was still wrong. So went to some heavy manipulation over facial features and eventually came up with a solution to make her look Caucasian.
The Dr. Goose and Madame Horrox character augmentations fell to Exozet Effects. “For both characters we started off by tracking the various areas of the prosthetic skin that required fixes and enhancements,” says Exozet senior visual effects producer Tyler Kehl. “From there we used various painting and cloning techniques to enhance these areas paying close attention to matching skin textures and grain between the prosthetic skin and the real skin in order to make the transition between these areas appear seamless.”
“For Dr. Goose, this involved making enhancements and fixes to the prosthetics on the temple, nose, bridge of the nose, inner eye sockets, chin, beard, forehead and the top of the head on the skull cap area. For Madame Horrox we focused on the bridge of the nose, inner eye sockets and nose areas of the prosthetics. We found it very interesting to ‘rebuild’ these areas of the face for both characters.” Exozet was also responsible for Ewing’s rotting finger.
Back to the top.
1936, Scotland – FROBISHER
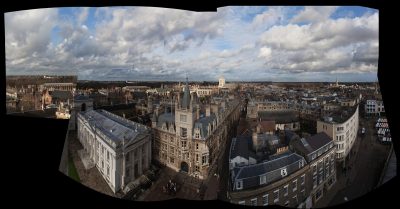
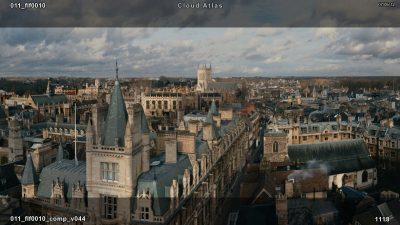
Gifted composer Robert Frobisher (Ben Whishaw) seeks to write a masterpiece symphony – The Cloud Atlas Sextet – after being disinherited by his father and leaving his lover Rufus Sixsmith (James D’Arcy).
Trixter (visual effects supervisor Alessandro Cioffi) created a Cambridge establishing shot for the story, with Rise FX (vfx supe Florian Gellinger) delivering shots of a CG bullet casing and the Edinburgh Tower. Portraying a greedy hotel manager in this story is Tom Hanks. Here he plays an older man and was filmed with a bald cap. BlueBolt worked to reduce some visible glue joins around the temples, nose, mouth and neck by introducing sunspots and freckles. “His head moved around a lot, so we required his head to be roto animated to assist with tracking,” says BlueBolt visual effects supervisor Angela Barson. “With this animated model we were able to then project onto it painted textures of his new skin.” The studio also made subtle augmentations to shots of the concierge (played by Hugh Grant).
Back to the top.
1973, San Francisco – LUISA REY
Journalist Luisa Rey (Halle Berry) is the focus of this 1973 San Francisco setting, in which she uncovers corporate corruption at a nuclear power plant. Rise FX (visual effects supervisor Florian Gellinger) delivered views of the Bay Area, city streets, the Swannekke power plant, a ‘one shot’ car crash as Rey’s Volkswagen is pushed over a bridge, and an aircraft explosion.
Click here to listen to our fxpodcast with Rise FX’s Florian Gellinger, who discusses his company’s visual effects work and Lidar scanning services for the film
San Fran surrounds
Several city street scenes for San Francisco were filmed in Glasgow. Plates for the power station views were filmed on an old runway in Berlin, with a CG bridge, power station and environment created by Rise. Rise’s sister Lidar scanning company pointcloud9 responsible for scanning sets, props and vehicles. “We scanned a whole block,” says Gellinger, “and dressed everything with digital props like telegraph poles to make it look like San Fran. We then just had to track our cameras into our Lidar scan, and then render the houses and telegraph poles, and then had just one lighting setup.”
Car crash
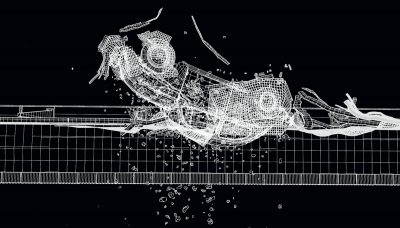
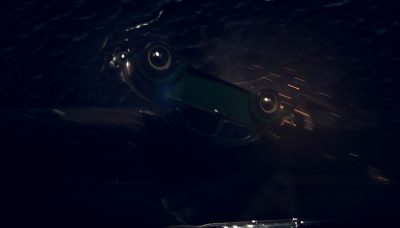
For the car crash and subsequent sinking below the bridge, Rise delivered CG shots of the VW shooting up the railing before it corkscrews and tumbles into the water. The spectacular interior view of the crashing car, which follows right down into the splashing water, was a practical set-up shot on a gimbal against bluescreen. Rise added the backgrounds, the villain’s car, pieces of railing and also objects inside the car to help sell the sense of weightlessness.
Stephane Ceretti notes that, “We wanted to find a way to get Halle into the car and make it so we could feel the zero gravity and her hair coming up. So we took one of the Beetles we had, which was very narrow, and started to look at how we would get a camera in there and get it to make a move like that.” Special effects were able to build the gimbal and a rail for the camera, but only by cutting out half of the VW. Several tests were carried out with a stunt person before the scene was shot with Berry. “The first take she did she was laughing the whole time,” recalls Ceretti. “Each time she came out she said, ‘I want to do it again, I want to do it again!'”
“We removed everything that was just plain dropping and replaced everything with CG props that we fed into a rigid body simulation inside our CG car that we animated to go off the bridge just to see what the stuff inside the car would be doing,” continues Gellinger. “When we thought those bits and pieces weren’t selling the idea of zero gravity enough we slowed them down in the simulation so you can see the cups, postcards and magazines tumbling slowly through the car.”
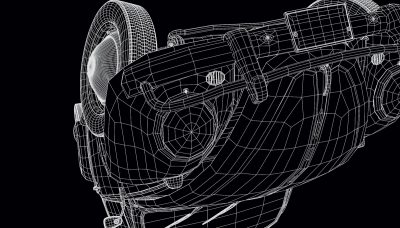
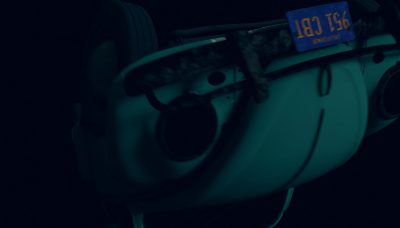
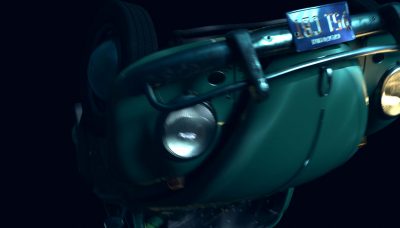
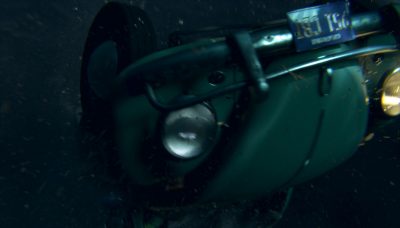
The water crashing through the windshield was also a practical element which leads to an exterior view of the car sinking. “There’s a whole sequence right after she hits the water surface where we’re inside the car with her underwater,” notes Gellinger. “We created this Houdini environment around the car while it’s sinking deeper and deeper in the bay with bubbles and CG murky water in the car, and you can see the cracks in the window around her building slowly – CG cracks we built with a spline-based rig in Houdini. So we could just draw the splines wherever we wanted the cracks to build. Then for the final shot when the windshield breaks we had a tip tank in the studio with a stunt double and sugar glass in the car, and we just did it. I thought it would be too dangerous to have a stunt double in the driver’s seat but they said it was safe and they did it and it worked.”
Aircraft explosion
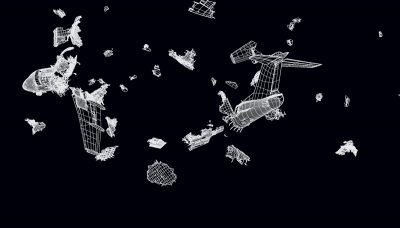
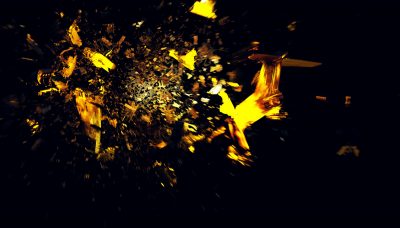
Rise also used Houdini to complete the effects for the exploding aircraft. Gellinger was particularly impressed with Houdini’s ability to have CG fire illuminate the smoke from within the explosion. “With the fireball, as it dissipates into the smoke plume, you still the reflections spreading on the pieces that are flying through the air at 300 miles an hour.”

Back to the top.
2012, England – CAVENDISH
Small-time publisher Timothy Cavendish (Jim Broadbent) is pursued by his creditors after the successful sales of his book on Dermot Hoggins (Tom Hanks). Other characters populating this present-day story include Cavendish’s vengeful brother Denholme (Hugh Grant), his wife Georgette (Ben Whishwaw) and a domineering female Nurse Noakes (Hugo Weaving) at odds with Cavendish, plus others played by Susan Sarandon, Jim Sturgess, James D’Arcy and Halle Berry.
The Starlight Bar
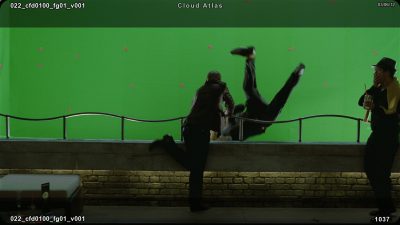
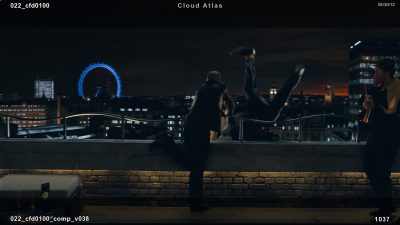
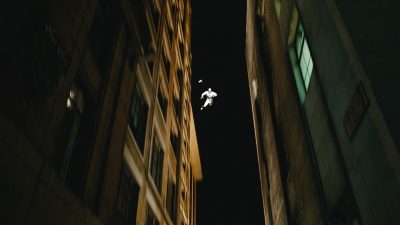
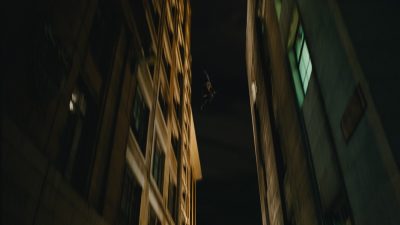
At a literary event, Felix Finch (Alistair Petrie) is thrown off the top of a bar by Hoggins. Trixter (visual effects supervisor Alessandro Cioffi) created the entire backgrounds with matte paintings and projections, adding domestic lights, the London Eye and moving aircraft. “For Finch falling,” says Cioffi, “we created a digi double and animated it. It’s a tragic but hilarious moment. He literally splats on the ground. He’s wearing a scarf and we let the scarf fall a couple of beats later than the actor, so there’s a sort of cartoony feel to it where you see a heavy body smashing on the ground and the scarf softly landing just after.”
“Trixter is a great animation house and they really managed to make the scene funny but not too gross,” adds Ceretti. “I’ve heard a few critics who have seen the film are talking about that scene.”
Pub fight
Trixter was also responsible for a flying tooth effect in a pub fight when one character has their face punched, resulting in a slow-mo shot of a molar traveling across the room and landing in a beer. “In the pub there is some loud talk about rugby,” outlines Cioffi. “Stephane Ceretti had the idea of this tooth flying with a rugby ball-type of a parabola and passing Cavendish’s eyes and falling into a glass of beer. The shot had been prepared without the tooth flying, and was a hand-held camera – the complexity of the shot was first to stabilize it all. We had to animate the tooth which was always in the foreground, but then with a speed ramp we gave to the shot – it was shot at 48fps – the tooth goes in focus and out of focus as it goes past Cavendish’s eyes.”
Character augmentations
With so many characters in this story, a key visual effects effort was required to augment those playing multiple roles and even those playing opposite genders. Gradient Effects, for example, helped turn Tom Hanks into a rugged Scot, while Lola VFX worked on the Denholme Cavendish character and assisted in Hugo Weaving’s transformation into Nurse Noakes.
“The initial prosthetic work on Nurse Noakes was excellent but production wanted to take the transformation further,” says Lola visual effects supervisor Clark Parkhurst. “Some of the specific challenges when it comes to any physical prosthetic is always weight and bulk. When you add a prosthetic to someone’s face it’s going to add to the mass and a big part of the Nurse Noakes’ alteration was slimming down that mass a bit to retain the feminine qualities of the character while not totally losing Hugo Weaving’s likeness.”
For Lola, that meant adjusting the neck, slimming the jawline evening out the eyes and fixing seams and discolorations on the surface. “The neck prosthetic added a large double chin, what we lovingly referred to as ‘The Waddle’,” jokes Parkhurst. “While Nurse Noakes is supposed to be somewhat of an older woman, production didn’t want her to appear too overweight, so we gave her a bit of a tuck under the chin as well as smoothing out bulky, unrealistic deformations that would occur with certain neck movements. There was also a piece that covered the upper lip where you could see Mr. Weaving’s lip moving underneath as he spoke, so we deformed the upper lip prosthetic to sync up with his natural mouth movements.”
Stephane Ceretti adds: “We wanted to retain the fact that this was Hugo Weaving playing a character – otherwise we would have cast a woman! The whole idea was to get the same actors to play different roles in different stories, but retain the same feeling of character and person, so we had to be very careful about not going too far away from what people know Hugo is.”
Lola relied on Autodesk Flame for the shots, following a similar methodology to their work for Captain America and Benjamin Button. Some of the particular challenges included close-up views of Nurse Noakes, but even medium shots involved significant work. Says Parkhurst: “In a few of the medium shots, where we can see her from the waist up, we had to patch out the entire background as we did on Captain America and put her back on top because her head seemed a little too broad in profile, so we squeezed it in a little in addition to the prosthetic work. This, in addition to patching the ceiling where there had been a removable panel for lighting purposes made that scene our most difficult.”
Back to the top.
2144, Neo Seoul – SONMI
Fabricant Sonmi-451 (Doona Bae) is confined as a food server in futuristic ‘hyper-restaurant’ Papa Song, a locale for synthetic meals in a future flooded Seoul. But she is soon shown the truth of mankind’s existence there and receives help from revolutionary Hae-Joo Chang (Jim Sturgess) that ultimately kicks off a full-blown insurrection. The story is told via an interview between Sonmi and The Archivist (James D’Arcy).
Future environments
Method LA (visual effects supervisor Matt Dessero) contributed wide establishing vistas of Neo Seoul. “The directors wanted the buildings to be very custom,” says Dan Glass. “It meant there was very little you could use from the real world. The overriding concept is that ocean levels have risen so the idea is that the city itself is set up with a series of dam walls keeping the ocean out from the older part of the city. Some of the sections have held out the water better than others – some areas are partially flooded, some are reclaimed and you get this overriding sense with the lower levels that they are dangerous places to live.”
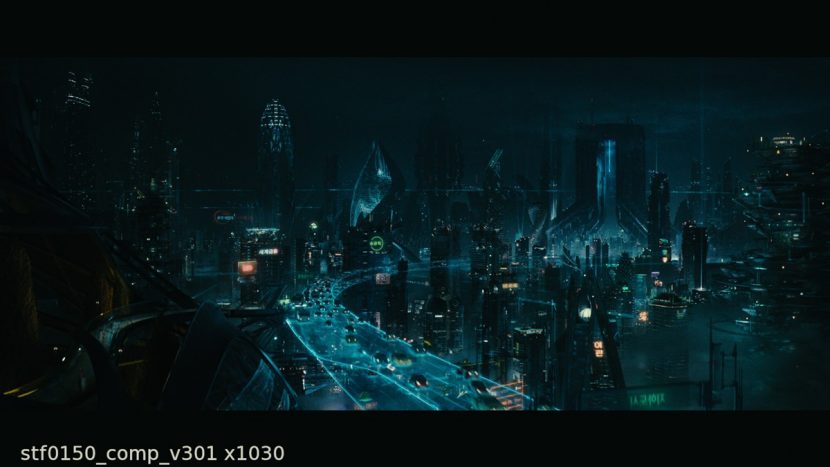
The newer city was envisaged as a growth on top of the older town, giving a vertical layered city with vast drops and canyons below. “For one of our wide establishers,” explains Dessero, “we had CG buildings in the foreground, with CG and projections mid-ground and matte paintings in the background. There was lots of attention to detail, flying ships, people walking. We shot some greenscreen crowds in Germany and they were added in. We added CG waterfalls. Imagine a park built vertically on a building, and from one terrace to the next waterfalls drop and land in these pools and there’s these crazy amounts of detail.”
Method LA also worked on a prison break and sub-stratum fight sequence when Chang seeks to take an imprisoned Sonmi with him. The prison yard environment was a practical courtyard area through which Chang drives a hovertruck, with Sonmi hiding in the back. He must pass through a series of checkpoints before exiting via an elaborate gate, but not before ‘Enforcers’ on floating skiffs and a gunship pursue them.
“In the courtyard,” says Dessero, “it was so simplistic that it was hard to sell scale. It was very neo-brutalism – a very heavy cement feel. We added a lot of exterior detail to the shafts and the truck, but the environment was very bleak. So for our lighting we used a lot of volumetrics to create scale, and added a couple of small floating robots.”
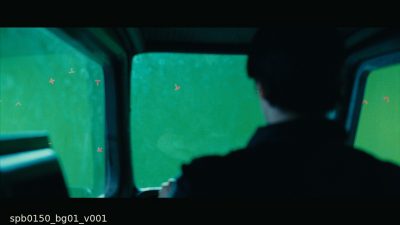
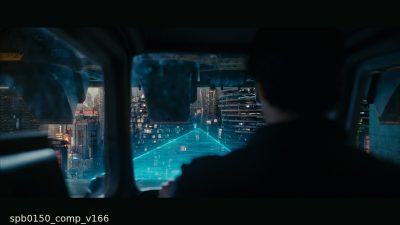
The gate was made of individual teeth, each about seven feet tall, which Method built in CG with an animated piston and accompanying smoke for the release valve. The gates open and another view of the city is seen. “They also come out on these blue glowy transways,” adds Dessero. “The truck is leaving the gates and floating there – it’s got its own internal floatation device but once it goes onto the transway it has that power. They shot a plate for us of the truck coming out – we’re looking back at the prison, truck coming right towards camera. But they couldn’t get the camera directly underneath the vehicle because of the constraints of the setpiece so we replaced the entire prop with our CG vehicle so we could slide the camera underneath.” Method created the transway look with fluid sims, and also worked up a traffic system to manage thousands of cars, relying on proxy geo and the V-Ray mesh format to build the scenes before rendering.
The Enforcers pull Chang over on the transway and then escort him to a lower sub-stratum area, landing on the mid-tier of a building, where he ultimately eludes his assailants and destroys a gunship. “We modeled up lots of detail for our immediate buildings,” says Dessero. “There were three views – the corkscrew view looking up, a view looking back at sub-stratum buildings. There was a set piece built and there were shots that happened around there. We set extended that. Then another view looking out. Any action shot on greenscreen had that entire city vista looking out.”
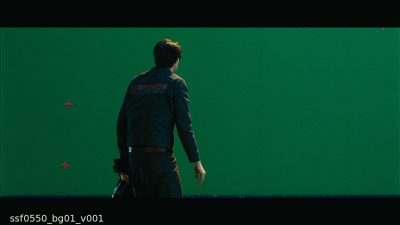
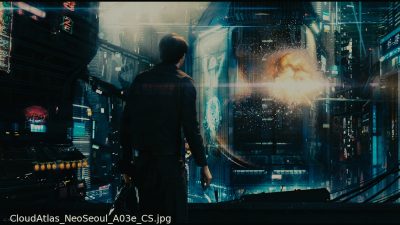
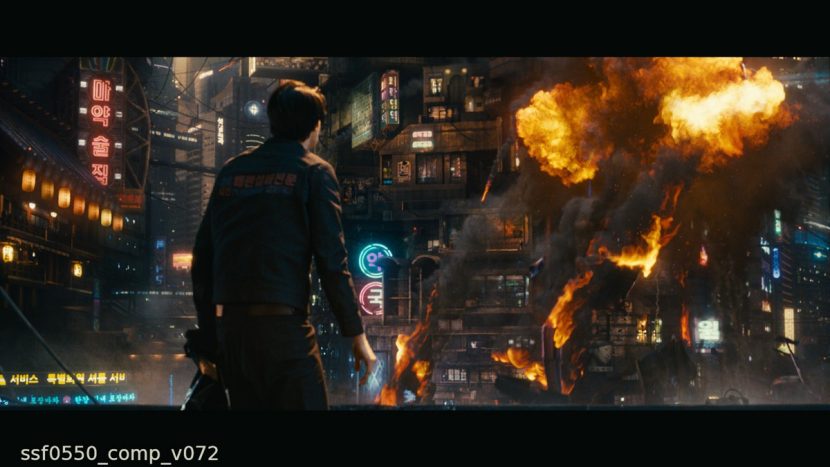
“The sub-stratum was gritty,” continues Dessero. “It was supposed to be like this: the higher up in the city you are, the more affluent, and then it gets seedier and seedier down. In this world we are mid-section. They supplied a lot of signs for shops – pleasure troves, sex shops, drug dens, all in Korean. We didn’t realize what some of those signs said until we had one of our Korean compers here translate it for us!”
Method LA actually relied on a massive matte painting of the city to complete many of the views for the sub-stratum, setting it up in Nuke so that each shot had its own camera and could be called upon by comp artists for a desired angle. A bevy of animated material was also added to give the matte painting life, such as floating banners, signs and rendered volumetric lights.
The Kirby dot gun effect
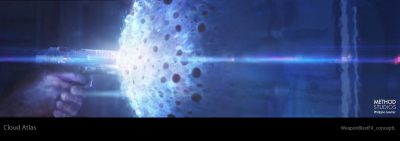
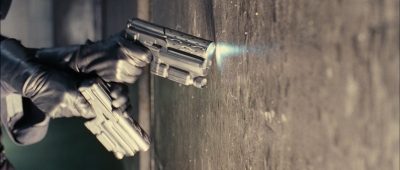
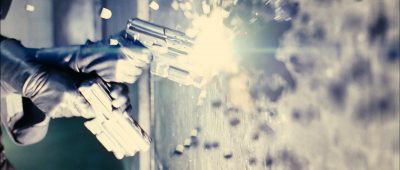
A feature of some of the weaponry in Neo-Seoul was a distinctive look for gun blasts. “Being a Wachowski movie, they didn’t want a conventional muzzle flash,” says Dan Glass, “so we got into concepting and designing this weapon that recorded the ‘Kirby dot’. It references some of the comic images of Jack Kirby’s graphic novels with these black dots. We envisaged they were vapourizing matter from the air around them. It was lots of detail people won’t pick out in the first viewing of the movie but we tried to pay a lot of attention to give the overall feel of this futuristic world.”
The art department at Method London (visual effects supervisor Stephane Naze) was responsible for conceptualizing the Kirby dot blasts and providing vendors with the lookdev. “There’s a huge difference between comic books and movies – the first one is a still frame and the movie is of course animated,” acknowledges Naze. “In the end we kept the black dots but ended up with layers of energy between each dot and a ray of light between them.”
“To develop this effect,” adds Naze, “we had to roto the characters, build the gun in CG and it was always the same layers for all the effects. One layer of dots, a layer of reflection, light, shadow and afterwards you have a layer of energy – done in Houdini. All the dots are connected with energy like lightning with different areas controllable for the comp. And in the lighting for the background you needed shadows of the characters on the wall, so we made basic models of the characters to be able to project shadows on the wall.”
Method London contributed several other shots for the Sonmi story too, creating a prison hall, a slums establishing scene and a view of a Satellite Center.
Safe house
Chang brings Sonmi to a safe house. As they walk into what appears to be a stark room, Chang hits a button on his ‘Orison’ and the room comes to life. Environments here were completed by Method LA. “The floor slides out from underneath,” says Matt Dessero, “and the room reveals a beautiful mountain Asian-inspired cherry blossom tree. He hits another button and cherry blossoms float through the room.” Method created the tree and blossom animation as a master sim with hero blossoms and projected it through Nuke.

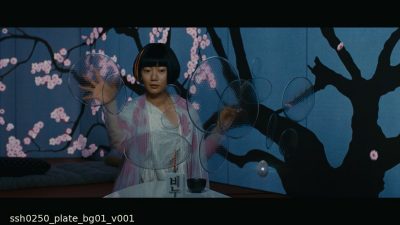
The sequence also features floating Orison discs which Sonmi uses to pull data from one window to the next. “She’s researching future worlds and the history of the universe that she knows nothing about,” explains Dessero. “We worked in UV space to bring these models out of Maya, into Nuke and bring the content and create a base layout and have them animate inside the panel – then projected that back onto the disc and comp’d in Nuke.”
Scaffold plank
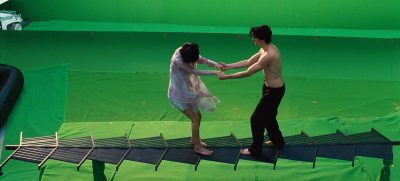
Chang and Sonmi try to escape from the Enforcers by shooting a scaffold plank to a neighboring building. But once on the plank they are faced with Enforcer gunfire and a gunship. Method Studios Vancouver delivered views of the safehouse being stormed by Enforcers (augmenting a practical door blow-out with molten edges and effects) as well the scaffold plank vistas and battle scenes.
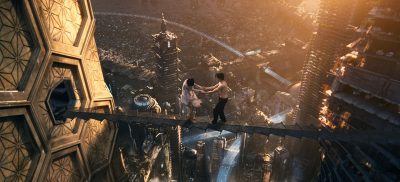
The sequence was filmed against greenscreen with a practical plank, along with a portion of the window frame from which the duo escape. We began with a 3D scene doing some post-viz, working up some low-res models and designing futuristic forms and shapes we could use for blocking out the scene, trying to stay within the art department’s Asian style,” says Method Vancouver visual effects supervisor Geoff Hancock, who shared duties with Olivier Dumont. “The scene is about their story and their escape, but the background could be used to support the story. So the view towards the sky is a little bit hopeful but if you’re looking towards the enemy it’s a little more cloudy, stormier and darker.”
Artists laid out the city in Maya with 10 to 12 hero angles. “Mid-ground buildings were chosen and had shaders applied and then distant buildings were simple geo with non-textured shaders,” says Hancock. “We lit the environment and rendered it out in layers for the matte painters. They began painting up 6K matte paintings to end up with a big dome. We projected those matte paintings back in Nuke onto simplified scene geometry at the right depth, so that as we had solved all of our matchmove cameras within this one environment, we could now apply a camera in this matte painting environment in Nuke and it would give the right parallax to make it work. Then we made decisions with the directors to decide where to position some buildings to open up views or close it in to make it more claustrophobic.”
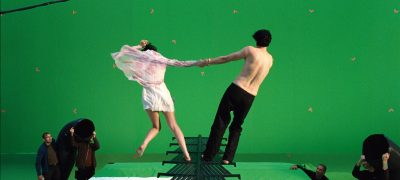
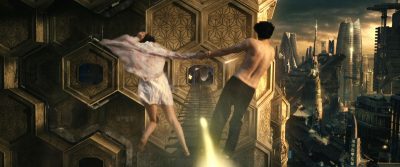
The plank itself was considered to be a kind of nano-technology with thin ridged pieces that would telescope out from a small container. “Chang hoists up this box and this table shoots out of it, and out of that comes mechanized fins and blades, which are like layered scales to form a flat surface,” explains Hancock. “We needed a plausible way for something so small to become so big and be strong enough for them to run around on. It also has a clamping claw that crushes into the opposing building to hold it in. There was some previs to show the concept and based on the practical set piece defined the major components. After we’d done a photo model, we started sliding those components around to make it work.”
A key aspect of the sequence was the unique dawn lighting envisaged by the directors. “We did a lot of early lighting studies,” says Hancock. “We knew generally that the lighting was coming from the harbor side, and we knew from the practical plates that there was a lighting direction dictated by that. But on set there can be a lot of creative lighting changes, and the sun angle might change, so we had to find an optimal angle that would tie in the practical plates and also be sympathetic and desirable for what would work for the city. We also had to make sure the lighting wasn’t too pretty because the scene becomes quite menacing by the end.”
Watch the hero gunship shot.For one gunship shot, in particular, Method accommodated an iris pull “where you start down low looking at the city,” notes Hancock, “and then as the craft hovers up we iris pull with the tilt up so by the time we get back to her the sky’s not as blown out and the ship’s lights have hit her.”
The gunship was a shared asset with Method LA, and was rendered in V-Ray, a renderer Vancouver moved to also for the buildings. The studio also established a traffic system worked out in Massive and Houdini for the transways, and a crowd system in Houdini that populated places such as open-air malls and surrounding balconies and buildings.
Effects-wise, Method Vancouver had to deal with the gunship shooting up the plank into pieces of shrapnel and having pieces of building falling off and crashing around Chang and Sonmi. “Chang also had an interesting weapon,” adds Hancock. “The directors said it would cut through steel like butter or a buzz saw to chop people in half. We did some simulations in Maya and Houdini to try and figure out what was the spiralling, helix-ing projectile and how does it spray across the window slicing each one of the Enforcers.”
The skiff chase
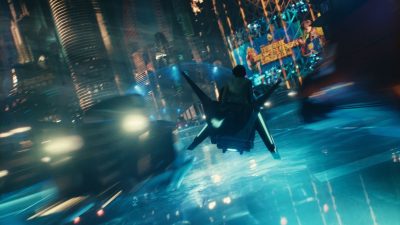
Aboard an Enforcer skiff, Chang and Sonmi embark on a dramatic chase through the city, weaving in and out of traffic and evading Enforcers and a warship. The sequence was completed by Industrial Light & Magic and overseen by visual effects supervisor Russell Earl who worked closely with Dan Glass. Referencing previs, production filmed the actors on a skiff gimbal against greenscreen with pre-programmed moves. “It had generic movements,” outlines Earl. “We could make it show us here’s what it’s like when we’re travelling fast and weaving in and out of traffic. When we got back to ILM, we would also take movement from the camera and translate it back into the skiff. There’s a shot where the skiff comes skidding towards us and goes sideways like a hockey stop. A lot of that movement was in the camera so we took that and put it back into the skiff.”
Editorial made selects from the gimbal footage and that was re-worked into the cut. For ILM, the ultimate effect was that shots would sometimes be a combination of the practical footage or a blend of element to CG, or all CG. “Also,” says Earl, “the way the practical skiff was set up on the gimbal, any time we saw the bottom of it or the back of it, we knew we’d have to extend it. We had tight matchmoves for everything and then it was always our plan to light the skiff in CG later on to help make it blend with the world. There was great interactive lighting on set and then we made tweaks to make it sit in with rendered traffic and the rendered world.”
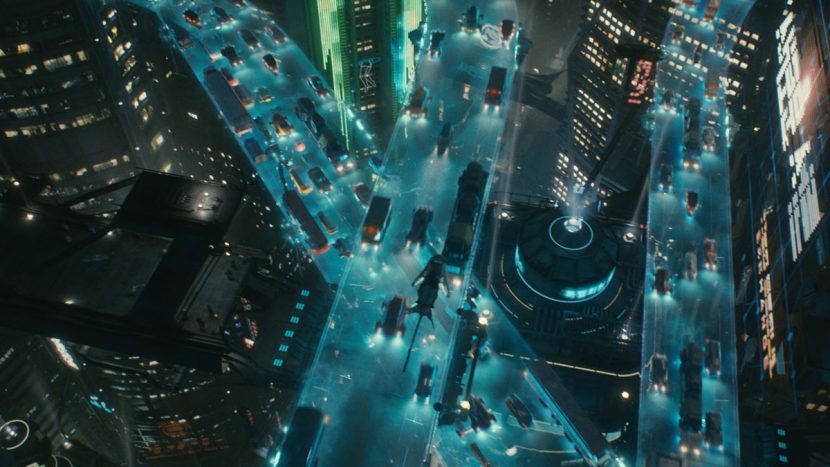
To create the buildings and backgrounds seen as the chase continues, ILM matched artwork and created scenes that matched to the shots required. “We had a library of generic buildings and then a handful of hero buildings,” says Earl. “We also built Asian-influenced architectural pieces and floating signs that we could pepper in throughout the city.”
For the transways, artists created a proprietary fluid sim to have the skiff and other vehicles interacting with a smokey and watery surface. “We had the base level, emitter lights, interactive light from the skiff and back onto them,” says Earl. “We did a little bit of a wake pass as well. It was very angle and shot dependent.”
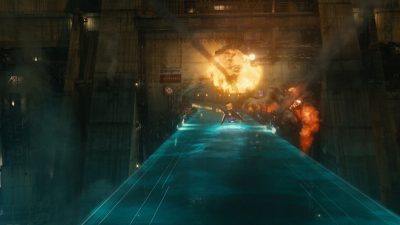
Buildings were created in 3ds Max, with rendering in V-Ray, while the transways and skiffs were created and rendered in ILM’s Maya/Katana/Arnold pipeline for raytracing. Digi-doubles were also required for several shots using hair sims on wigs and cloth sims for Sonmi’s dress. Extra background details included people on buses and trains and escalators. “Our creature supervisor was even rendering passes where you could see the two people were having a conversation,” says Earl. “They’re not just in default poses.”
A gunships attack on the skiff results in missiles hitting a building. “We used Plume, our proprietary software, for explosion renders and debris and smoke,” says Earl. “A building gets hit behind us and as they escape into a tunnel at the end there are some more CG rendered blasts. We did dust and debris and fire. The software we use for fire – I mean, it’s just come so far over the years – that I sometimes have to ask, is that an element or CG?”
The reservoir tube
Chang and Sonmi continue their skiff escape along a reservoir tube before an explosion causes a flood of water. Scanline Munich (visual effects supervisor Rainer Zoettl) completed these shots. Research for the look of an underwater explosion began with reference and early animation tests. “We explored lots of different ideas with smoke, fire, big bubbles, small bubbles, few bubbles, massive amounts of bubbles, implosions, vortex effects, pull forces and more,” says Scanline CG supervisor Ivo Klaus. “But the one thing that defined the idea of an underwater explosion, the one recurrent element, were the bubbles. For the final underwater explosion effect it was a careful balance between the fire, smoke and bubble elements that sold the shot.”
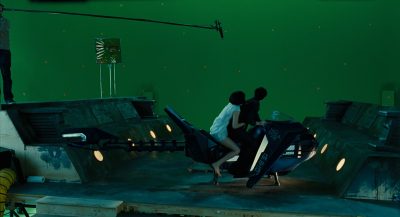
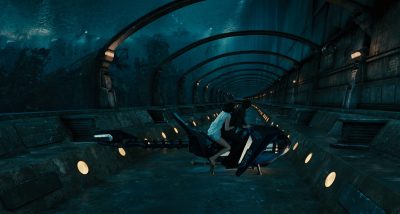
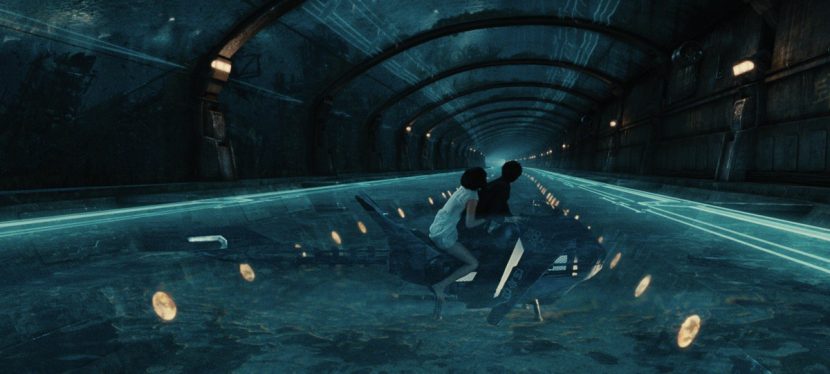
While Scanline knew its proprietary fluid simulation software Flowline could be used for explosions, the bubbles had to dynamically split and merge. But the team was happy to learn that Flowline could indeed handle bubble sims. After the explosion, the tube caves in and Flowline was used to simulate the resulting flood. “Initially the overall dynamic was choreographed by using a low resolution fluid simulation which would then be used as basis for additional refined fluid simulations and spray simulations,” explains Klaus. “The look of the water was furthermore refined with particle bubbles inside the water volume, volumetric lights, extra lighting passes, passes with various index of refraction values so that the background could shine through in the fluid and even sub surface scattering passes of the fluids inside that gave a nice glow to certain areas.”
Slaughterboat
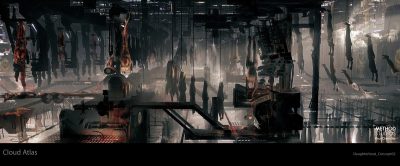
Scanline Munich handled shots of the slaughterboat visited by Sonmi – actually a gigantic Papa Song ‘slaughtership’ – revealing the truth behind ‘fabricant’ clones. “We had to create thousands of clones for the exterior shots, where we applied Massive simulations,” says Zoettl. “The rest of the exterior was a 3D environment with a projected matte painting.”
“We even simulated the water in the harbour area around the ship to get nicer reflections and movement of the harbour water,” adds Klaus. “In the entrance hall, our comp department mapped actual footage of the clones onto cards and then populated the CG environment of the entrance hall with hundreds of those cards.” The processing chain was constructed with individual CG bodies and machines, with Scanline relying on rigid body sims, cloth, hair, fire and water sims. Practical elements were also used for scenes of blood running down the corpses.
Papa Song’s Restaurant
The restaurant’s initial gray existence is – once ‘activated’ – transformed via holographic projections of skies and a floor of interactive water inhabited by Koi mutations. Black Mountain VFX Studios was responsible for the Papa Song interiors, working on concepts to final shots.
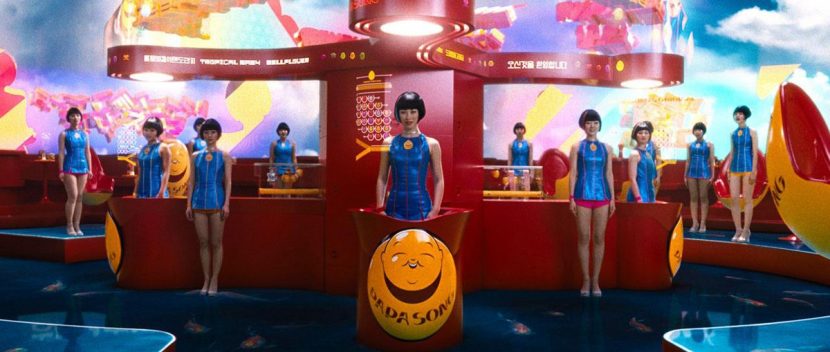
“The holograms where supposed to be absolutely perfect, without the typical and well known artifacts,” says Black Mountain visual effects supervisor Andreas Illenseer, who shared duties with Falk Buttner. “At the same time the holograms should have had an intentionally artificial and surrealistic look. Important references were the paintings of Salvador Dali, the Emerald City from The Wizard of Oz and also the film Speed Racer.”
Production filmed with gray, then red furniture post-transformation against greenscreen, with Black Mountain adding the holographic sky as a projected matte painting based on real footage and the floor imagery. “The idea of the floor combined a glass high tech display with the special properties of water like ripples and depthfog,” says Illenseer. “When somebody walked over the surface area the typical water-ripples had to appear. The ripples were made in RealFlow. If necessary, the actors were animated in 3D and used as collision and reflection elements. The Kois were completely 3D animated.”
Other features of Papa Song’s included commercials playing while patrons dined, and a food preparation machine showing meals appearing layer by layer – created in CG. “As a first step we created for each individual self-contained object a volume and in that way we were able to cut or fill the objects at will,” notes Illenseer. “For the huge food parts we used a customized bool procedure. With all these tools we rendered a linear in layers growing up 3D food. The Alembic file helped us to realize a rig for all three foods, so the animator was able to create different timings of the animation in almost realtime.”
Character augmentations
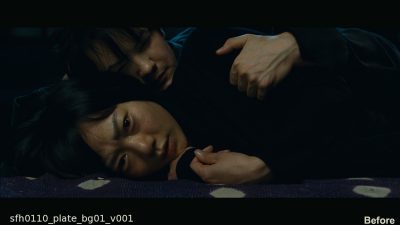
For Chang, Jim Sturgess wore prosthetics and makeup on set in order to give him an Asian look. To further enhance his eyelids and clean up certain areas, Method LA touched about 100 shots, making sure to preserve the actor’s likeness in the final look. “It started with a test phase but we quickly realized that consistency was going to be lost because each artist was moving in parallel,” says Dessero. “They would get slightly different looks. Then the next week we found out there would be more shots, so we knew we needed a better process.”
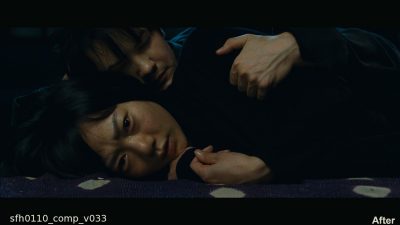
The final process worked like this: a cyberscan of Sturgess in Chang makeup was firstly acquired. Method artists used that to model an in-between version of Change (since the makeup would change slightly day to day), a solid track of the plate was undertaken, then the CG head was unwrapped in UV space on which paint and clean up work was done, and finally the head was wrapped back onto the model and tracked back through Nuke.
Method also blended the hairline and added CG eyelashes, skin for the eyelids and even rendered eyeballs where necessary. “We didn’t have great texture reference for Chang so we shot some guys here and took their pore details,” notes Dessero. “We took those and texture painted it all up and created some really nice spec maps that the CG guys would render through. You lose high frequency detail when you do all this work so we needed high detail texture maps. And because the prosthetic blocked out a lot of the sub-surface skin properties of a typical human, we rendered some sub-surface properties and kissed that back in in the shots, along with extra shadows, especially occlusion in the eye areas.”
BlueBolt also contributed various character and makeup augmentations for this story. “The Archivist, played by James D’Arcy, needed a lot of work on his protruding forehead and deep set eyes, as well as changing his eyes and reshaping his eyebrows to look more Asian,” explains BlueBolt visual effects supervisor Angela Barson. “We needed to rebuild his eyes in order to bring them out from the shadows of the forehead.” Mephi (Hugo Weaving) required brow, eye area and chin implant fixes, as well as the slant of his eyes. In addition, BlueBolt altered the shape of Seer Rhee’s (Hugh Grant) eyes, and carried out subtle fixes and grading to the eyes of Ankor Apis (Keith David).
Back to the top.
2321, After the Fall and 2346, Hawaii – ZACHRY
This story bookends the movie and tells the tale of goatherd Zachry (Tom Hanks), who is a tribe member and survivor of a planetary cataclysm. We see Zachry at two ages in this story – his older self is shown telling stories by campfire, while his younger self is seen escaping cannibal warriors and meeting his wife, Meronym (Halle Berry), an advanced human being from a community of ‘Prescients’.
Environments
Method London (visual effects supervisor Stepane Naze) handled several of the environment shots for the Zachry story, actually delivering both the lengthy first and last shots of the film set in Zachry’s village. Here, artists carried out matte painting work for the setting, adding in stars and also very particular sparks and spirals from a campfire. “There were key points in the speech which matched with particles,” notes Naze. “The idea was to put in place a method to have maximum control on this effect and be very precise – it wasn’t a random effect.”
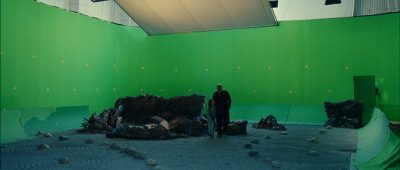
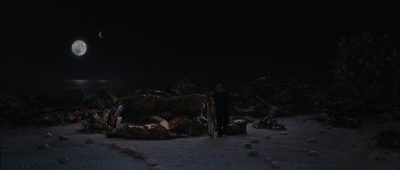
Other environments completed by Method London included the Mountain (Mona Sol) views, distant shots of the Satellite Center and a destroyed city. “For the destroyed city we had a plate at sunset and had to keep the feeling of the time of day,” says Naze. “We built the topology of the environment and built the different models of the city. We projected the DMP onto models. We kept in rays of light and dust with lots of layers.”
Trixter (visual effects supervisor Alessandro Cioffi) was responsible for several shots of Zachry and Meronym climbing the mountain while scouting the Satellite Center. It is on the mountain that the two encounter Old Georgie (Hugo Weaving), actually an imaginary vision inside Zachry’s head who is walking perpendicular to the mountain wall. That effect was achieved practically, but Trixter’s role involved taking the greenscreen plates and compositing the actors into separate backgrounds.
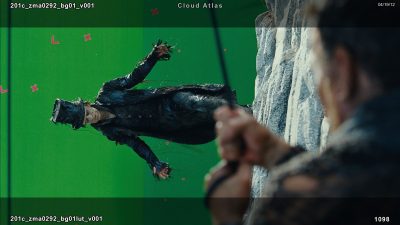
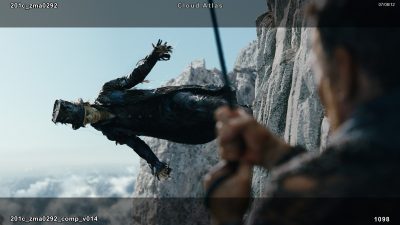
The backgrounds were shot in Mallorca, Spain from a helicopter and then reworked by Trixter into large matte paintings projected in Nuke onto different planes for parallax. “We isolated some iconic elements,” says Cioffi. “There are two peaks in the background forming a U shape rock formation – that was the center of the entire sequence that we could see from different angles. Once we’d selected all these main paintings which were re-constructions from real footage, we added details like the moving vegetation in the wind, clouds surrounding the area and tried to nail down the sun position.”
Rise FX worked on exterior shots of the Satellite Center, tracking helicopter mountain plates of Tom Hanks and Halle Berry. The company’s pointcloud9 Lidar scanning services were crucial in getting an accurate track of the mountain on which to place the CG Center. “We generated all the necessary camera angles one by one and aligned them to make sure we had pretty much all the shots covered in terms of the geometry for the mountain angle we had to cover,” says Rise visual effects supervisor Florian Gellinger. “From that point on everything was fairly easy from a matchmove point because we had the geo of mountaintop in Maya. We then built the Satellite Center in CG.”
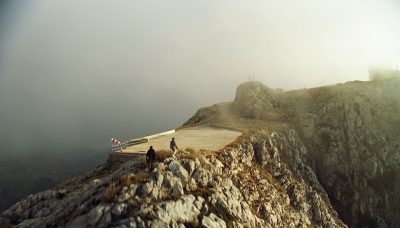
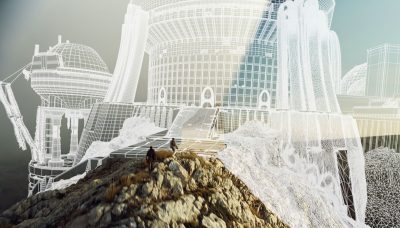
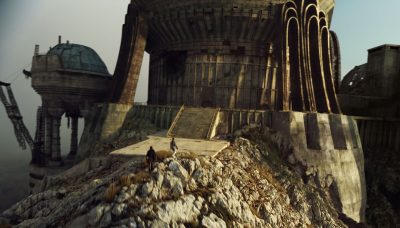
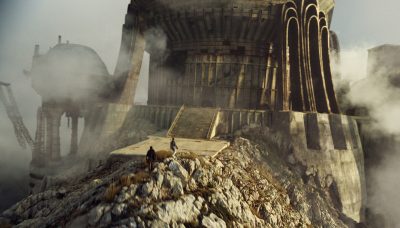
“The entrance of the power plant in the 1970s San Fran story with Halle Berry is the same entrance as the Satellite Center communication has on the mountaintop,” adds Gellinger. “We Lidar scanned the powerplant entrance and transformed it into the same entrance. The scale and number of windows is exactly the same, but it’s thousands of miles higher on a mountaintop.”
Clouds were also an important part of the sequence, with Rise using Houdini’s microvoxel rendering capabilities to fill out the surrounding skies. “We rendered the whole Satellite Center in Mental Ray through Maya, took the geometry of Alembic files into Houdini and used that as a hold-out for the clouds we were moving around the center,” explains Gellinger. “While it worked OK I wouldn’t say it worked great – there were lots of fix-its. We want to evaluate going straight through Mantra.”
Satellite Center communication devices that Meronym interacts with were handled by One of Us, under visual effects supervisors Dominic Parker and Tom Debenham. The studio relied on Imagemodeller to create a model from photogrammetry of the set, then created the devices in Maya, Softimage ICE and Houdini and rendering in V-Ray. Meronym carries a hand-held device (an Orison) that projects its own screen and connects with a table. From the table a tower of crystal rings rise, emanating beams of light. On the table itself, One of Us also created layers of content in After Effects and Nuke responding from cues from the actors.
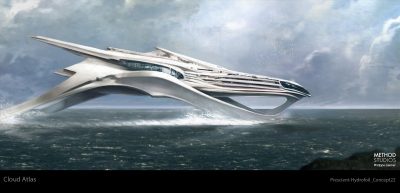
Zachry’s story also features Prescient hydrofoil-like hoverships, realized by Scanline Munich (visual effects supervisor Rainer Zoettl). In one particular shot, a ship is seen approaching an island. It began with a practical camera pan that Scanline reworked, as CG supervisor Ivo Klaus explains: “The ocean was replaced and the remaining plate footage was reprojected onto helper geometry. Essentially that gave the production the ability to change the camera move on the already filmed material. For the prescient hovership we employed a large scale Flowline fluid simulation that covered the entire length that the ship traverses.”
Other views of the Prescient ships were required for moorings in the island bay and for a speeding version. “The original plate was extensively remodeled to allow for adjustments to the camera move,” says Klaus. “The complete ocean was done in CG, leaving only parts of the sky and the background island projected and extended from the original plate. Simulating the hydrofoil ocean interaction was done in various steps because the production had very specific ideas on how the visual quality was supposed to look like. Originally we attempted to accurately simulate the interaction but discovered that we needed a lot more control over the process and created the final look by using half a dozen different simulations that were partially simulated attached to the hydrofoil to deal with its extreme speed.”
Character augmentations
Exozet Effects (visual effects supervisor Falk Gartner) delivered shots for the Sloosha’s Hallow and Kona Rampage sections of this story featuring the cannibal warriors. “For these scenes we added CG arrows, custom look muzzle flashes, look development for the loading of Meronym’s (Halle Berry) futuristic weapon, 3D FX impacts on trees and 3D CG blood,” says senior visual effects producer Tyler Kehl. “For the look development of Meronym’s gun loading and the custom look muzzle flashes we used multiple particle systems to give a sense of moving textures within the center of the light source.” Click here for Exozet’s Cloud Atlas reel.
One particularly challenging shot involved an extreme close-up of Kona Chief (Hugh Grant) being shot through the back of his head. “We first object tracked his head and created a CG skin patch for the arrow to protrude through the front of the skull,” outlines Kehl. “We then hand animated the skin tearing matched to the arrow animation. For the CG blood we used a complex fluid simulation system paying special attention to specular highlights and subsurface scattering to give the blood added depth and detail. Finally, we modeled blood on the CG arrow and added flying skull debris as a finishing touch.”

Zachry’s sister Rose, is played by Xun Zhou, with Gradient Effects tasked with augmenting the Chinese actress’ eyes. “The eyes were transforming in 3D space and the only way to maintain a natural reflection, refraction and shading of the eyes prompted us to go full CG instead of a 2D solution,” explains Gradient Effects visual effects supervisor Olcun Tan. “Color correction was impossible since the dark brown eyes of the Rose character made it impossible, due to the missing information in the pixels. So the only solution was to create a new procedural shader for Mental Ray, written in C, which mimicked the eyes of Tom Hanks, with some clever realtime solutions for caustics.”
To track those eyes into the scene, Gradient wrote a new tracking application that could automatically detect the iris and create a stable 3D path, under which the CG iris was grouped. “This allowed us to 3D track all shots in a very short time,” says Tan. “We are still surprised how flexible this new tool is, we are using it currently on shots, which have all failed in our commercial 3D tracking applications.”
Back to the top.
Endings
Having spent more than two years on Cloud Atlas, both Dan Glass and Stephane Ceretti pointed out that their existing working relationship with Lana and Andy, and with each other, made the project possible. “It was a big internet connection craziness,” admits Ceretti, “but it shows you can do jobs nowadays where people are not in the same place. But because we’ve worked together a long time we know each other very well – it’s kind of seamless really. Lana and Andy are very used to that too, and so was Tom.”
It helped, too, that this was a film in which visual effects supported the story. “The first thing Dan Glass told me was, ‘This is not a visual effects movie’,” says Ceretti. “I said, ‘Great! I like it – the story doesn’t need it’. It’s a powerful story and it’s all about the characters and their interaction and the way they live, and all the connections and the stratifications and resonances between them. I was very very pleased that it was not approached as a visual effects movie – the effects support the story rather than being eye candy for the sake of it.”
Images and clips © 2012 Warner Bros. Entertainment Inc. in The United States of America and Canada, and © 2012 Cloud Atlas Production GMBH and X Filme Creative Pool GMBH.

Amazing amount of work. Really appreciated this article except for a couple things. What’s your take on revealing critical plot spoilers (like the Slaughterboat) with a movie that’s only been open for less than a week? (It opened in the USA 6 days ago)
Hi Navarro – thanks for the feedback – we’ve now included a spoiler warning.
[…] http://www.fxguide.com/featured/cloudatlas/ 배두나 나오는 기대작, 클라우드 아틀라스 (Cloud Atlas, 2012) 영상효과 아나, 영상첨부하고 싶은데 링크가 따로 없다는,,,,, (클릭해서보세용.대본 자막 영화 OR 미드 제목 클라우드 아틀라스 자막 (Cloud Atlas, 2012) SF, 액션 영화감독 앤디 워쇼스키, 라나 워쇼스키, 톰 티크베어 개봉년일 2013.01.09 출연배우 톰행크스, 휴그랜트, 할리베리, 배두나.클라우드 아틀라스Cloud Atlas, 2012 개봉한지 거의 2년이 넘었는데~ 이제야~ 손을 덴 클라우드 아틀라스~ 매트릭스를 매우!` 좋아하는 1인으로서. 미안한 마음에 디븨디를 구해다가 봤다!~ 다들~ 좋아하는. 720p 다시보기 클라우드 아틀라스 감독 톰 티크베어, 라나 워쇼스키, 앤디 워쇼스키 출연 톰 행크스, 배두나, 휴 그랜트, 할리 베리 개봉 2012 미국, 독일 리뷰보기 클라우드 아틀라스 Cloud Atlas, 2012 영화 한줄평: 배우들의. 클라우드 아틀라스! 난해하고 대중적이지 않다 하더라도, 새로운 구성과 새로운 시도 그리고 그것을 완성해냈다는 것에 감독과 배우, 모든 제작자들에게 박수를 보낸다! 클라우드 아틀라스 <Cloud Atlas,2012>클라우드 아틀라스 감독 톰 티크베어, 라나 워쇼스키, 앤디 워쇼스키 출연 톰 행크스, 배두나, 휴 그랜트, 할리 베리 개봉 2012 미국, 독일 평점 리뷰보기 클라우드 아틀라스 Cloud Atlas는 우리나라 배우 배두나가. 클라우드 아틀라스 – Cloud Atlas,2012 감독/위쇼스키 남매(앤디,리나),톰 티크베어 출연/톰행크스,휴그랜트,할리베리,배두나,벤 위쇼,짐 스터게스,휴고 위빙 외 다수. 개인적인 별점:★★★☆☆ 영화포스터를 보면. 클라우드 아틀라스 (Cloud Atlas, 2012) 제임스 다시, 벤 위쇼 프로비셔(벤 위쇼)가 식스미스(제임스 다시)에게 보낸 편지들의 내용들이 나레이션으로 흐르는 부분들 중 하나. 벤 위쇼 이상하게 좋다. 클라우드. 블루레이 한글자막 개봉 2012 미국, 독일 리뷰보기 엄청난 케스팅으로 영화 관람 전, 정말 기대를 했던, 아니 할수밖에 없었던, 클라우드 아틀라스. 공식 예고편이었던 짧은 예고편만 한번 봤을뿐, 클라우드 아틀라스에 대한 어떠한.리뷰보기 클라우드 아틀라스 (Cloud Atlas, 2012) 바쁠 땐 영화관에 갈 수 없으니까 볼 영화가 넘쳐나더니 요즘은 영화관에 가는 횟수가 많아지니까 볼 영화가 없다. 미국에서 흥행에 참패하고 우리나라에서도 그다지.클라우드 아틀라스 감독 톰 티크베어, 라나 워쇼스키, 앤디 워쇼스키 출연 톰 행크스, 배두나, 휴 그랜트, 할리 베리 개봉 2012 미국, 독일 리뷰보기 아직 내 머리론 이해할 수 없는. 고화질 클라우드 아틀라스 15분 쯤에 Ben Whishaw 벤 위쇼가 연주하는 곡 있잖아요. 비비엔이. com/ Track Listing: Cloud Atlas Original Motion Picture Soundtrack 1. "Prelude: The Atlas March" – 0:00-0:30 2. 클라우드 아틀라스 영화에서 식스미스 조카 매건 역을 연기한 배우가 누구인가요?. Chi 2012 Cloud Atlas Megan Sixsmith / 12th Star Clone 2012 Shanghai Calling Fang Fang 2011 The Evoque Effect. 클라우드아틀라스 영화 예고편 초반에 나오는 피아노로 치는 음악 너무 좋아서그러는데 어떤건지 알수가 없네요 ㅠ 알려주세요 ㅠ Cloud Atlas – Sextet […]