We take a look at two stand-out sequences in Timur Bekmambetov’s mashup adventure Abraham Lincoln: Vampire Hunter. Both required unique approaches to place action inside dusty, smokey and shadowy environments as imagined by the director. For the much talked about horse stampede, Weta Digital employed its new deep compositing shadow solution called Shadowsling, and in the climactic train showdown Method Studios relied on a volumetric smoke and Nuke set-up for the final shots.
How to throw (and catch) a horse: Weta Digital
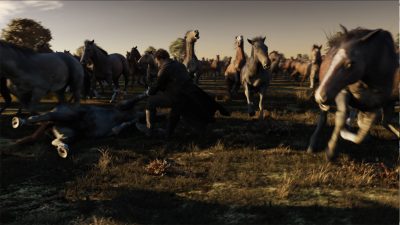
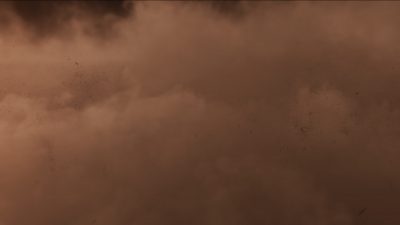
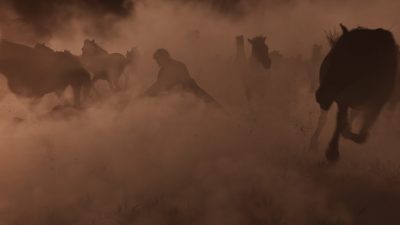
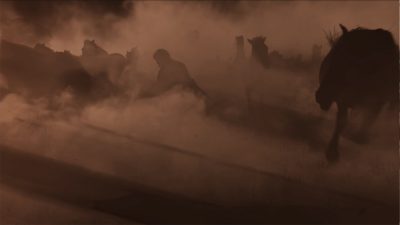
One of Vampire Hunter’s signature sequences has to be a dramatic encounter in a horse stampede between Abe and Jack Barts, a plantation owner and vampire who killed Abe’s mother. During the fight, as 3,000 horses rush by the two characters amid a cloud of dust and dirt, Barts throws one of the horses at Abe, who without a second thought manages to both catch the beast and straddle it to continue the battle. Here’s a step-by-step look at how Weta Digital used some incredible new rendering, deep compositing and ‘camera space volumetric shadows’ tech to pull off the astonishing scene.
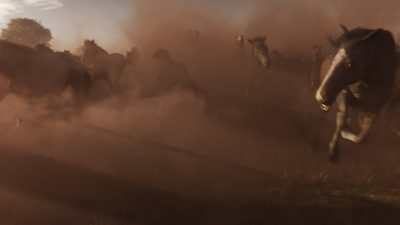
1. Previs
Director Timur Bekmambetov’s own visual effects company CGF (part of production company Bazelevs) created the previs for the sequence. “It was really great and really showed the tone Timur wanted,” recalls Weta Digital visual effects supervisor Martin Hill, who oversaw the entire stampede VFX aside from one added helicopter shot at the top of the scene. “Things had to be added and augmented and shots changed around but pretty much we just picked up the whole stampede sequence from the previs.”
2. Live action shoot
On set in Louisiana, Bekmambetov looked to shoot as much as possible with the actors and real horses. But the stylized stunts required and the sheer amount of dust being thrown up ultimately necessitated a fully digital horse solution since the dust would get in horses eyes. “Actually,” says Hill, “some of the parts of the sequence where the horses get really dense meant that the dust had to be really thick and Timur would be telling us, ‘The amount of vision you’ve got is like driving through very thick fog with headlights on – there’s things coming out of nowhere!'”
Plates were shot of the actors – Benjamin Walker playing Abe and Marton Csokas as Barts – fighting on the ground or running through the terrain. “Timur wanted everything to be magic hour looking to give those shafts of golden light,” notes Hill, “but only one day was scheduled for the shoot. Plates were shot with screens over the action to block the midday sun out and we had to fake in extra shadows onto the plates for some of the shots.”
3. Horse gimbals
A second live action took place on gimbal rigs representing the horses the actors would be riding on. Designed by Matt Kutcher’s special effects department, the rigs were calibrated to provide as real a horse motion as possible to match horse mocap that Weta Digital would also be relying on. “We worked with them to make sure the actual action of the gimbal – the position of the withers and the seat of the horses – was comparable to our motion capture cycles,” says Hill.
To do that, Weta rendered our side-on turntables of its digital horses with positions marked on them that would trace a path in the air. Then an LED tracking marker was placed on the gimbal and a long exposure of the rig going through its cycle was taken. The motion of the rig would then be tweaked until the action matched, and so that it also suited a traveling speed of about 35 kilometers an hour with a horse gait that had been calculated to suit that speed.
The gimbal plates, shot against greenscreen, were filmed on the Phantom camera at 96 frames per second since several of the shots would later go into ‘hyper’ ramp-up and ramp-down modes. In addition, the plates were all shot in mono, although Weta Digital created the final sequence entirely in full stereo, one of the only ones in the film not to be post-converted. “If you’ve got a camera shot raking across the backs of horses or the manes of 3,000 horses with semi-transparent volumes of dust in-between,” says Hill, “you can’t just render out mattes and give them to a dimensionalization house and hope they can depth everything correctly, there’s simply too many layers.”
Weta did need the plates pre-converted to stereo. “One of the first things we did when we saw the previs was work out the interocular and convergence of the cameras to give the sense of stereo,” says Hill. “Only after buy-off on the stereo in animation, which did change a little over the course of the production, did we get the plates which had the retimes, camera shake applied by us, sent to StereoD with our cameras to dimensionalize the plate.”
Hill notes that the actors did an incredible job working on the horse gimbals. “Marton Csokas did this backflip off one of the gimbals which was really quite impressive,” recalls Martin. “It’s one of the shots we put right at the end of the shoot because we thought we wouldn’t get it in-camera and it turned out to be one of the best ones. We still did a lot of digi-doubles though.” (see below)
4. Animated horses
Weta Digital is no stranger to computer generated creatures, of course, and had ample experience with digital horses from The Lord of the Rings trilogy. “We had libraries of motion capture data from there,” says Hill, “but the anatomical models and rendering models were getting a bit long in the tooth, as it were.”
The solution was to revisit the horse creature set-up and start from absolute reality. “We phoned up Massey University Veterinary Department in Palmerston North where they have a really comprehensive vet school and educational practice,” says Hill. “They loaned us their veterinary treadmill and a recently retired racehorse which we covered in tracking markers and put on this treadmill, and put our motion capture stage with eight cameras in there.”
“We looked at skeletons,” adds Hill, “for example, looking at the carpus (knee) and the way they articulate. Rather than being a single pivot which we assumed before, their ankles blend in two pivot points. They have a combined joint with 2 pivots one of which always flexes twice as much as the other one until it gets to a very extreme amount of flex. These are the things that are fantastic to know. The nuances when you apply them to our digital model suddenly give an extra level of reality.”
Weta Digital transposed the mocap data to its new anatomical horse muscle and carried out a number of kinematic studies overseen by creatures TD Julian Butler. “We would render out the various gaits and apply it to our bone, muscle and tissue rigs and we were actually able to give those back to the University and they were able to use those as an educational tool,” says Hill.
The same University research and data was used to fashion Weta’s muscle, tissue and fascia system for the horses. “We used it to work out how thick are the various ligaments and how thick is the tissue between the dermas and the muscle that connects to the tissue – the fascia – which is the key to getting all the secondary wobble of the skin,” notes Hill. “If you see the abdominals on the neck of a horse, there’s so much extra wobble to it which is all due to the weight of the muscles and the flexible fascia and fat layer between the muscles and the skin.”
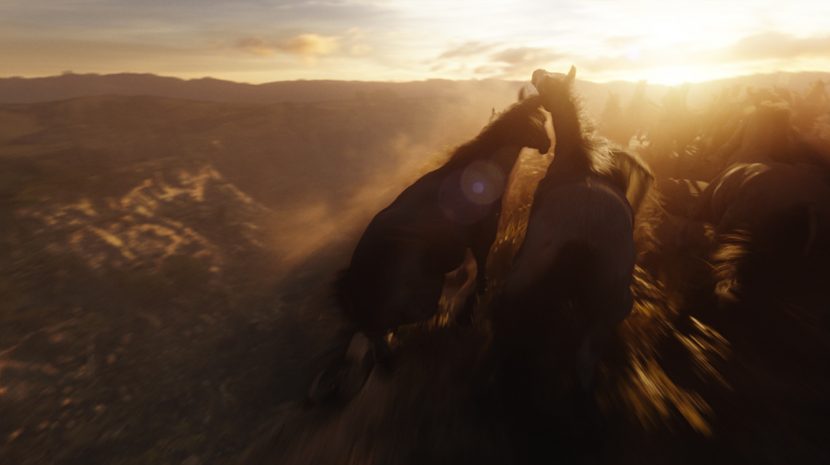
For one particular hyper-real moment in the stampede, a galloping horse is seen closing in on one of the characters, exuding a crazed expression right up to camera. Our animation supervisor, Richard Frances-Moore, took some of the reference camera footage from the horses and used it as a basis and exaggerated the facial expression. Our creatures supervisor, Michael Corcoran, had said if we wanted to overcrank this we could relax the amount of connected tissues, we could make the muscles a little bit more wobbly in the face and let the face be a bit more malleable than it would be. It was the same physical sims but a more extreme take on them.”
The actual gross movement of the stampede of horses, based on the mocap data, was initially set up as crowd animation by Massive supervisor Jon Allitt. “He would take variations between the 30km run cycle and the 40km run cycle and push that through Massive to give us the gross animation,” explains Hill. “It looked great, but it tended to look blander than it could have done, and originally the shots were a lot longer so we wanted to have something more interesting going on with not only the foreground horses but also that horse that is 20 rows back. So with Richard Frances-Moore he made some extra key event animations, sometimes taken from hero animation shots that we put back into the Massive cycles. We could pick out horses to fire particular actions at any point in a fairly manual way. It broke up the continuity of all the horses to give it more texture.”
5. Horse hair
Hill knew the 3,000 strong stampede would be a rendering challenge, based on the sheer number of horses, the dust, and the horse hair – a mix of longer manes and shorter body hair. “For the short hair,” he says, “we came up with a surface BRDF model which was based on data we got from Massey University. We got the follicle density of horses at various points over their body and in our digital world what we would do is render swatches of fur. We’d also render out all the information that was required to go into the shader – the flow direction, amount of elevation of the hairs and the deviation of the hair, the curvature, how occluded they were – we’d store that into spherical harmonics.”
Weta Digital would then take the information and maps and swatches and ‘texture synthesize’ them over the bodies of the horses. “These information maps could be used to still pipe into the same shaders used for the close-up horses with the full fur to render what is essentially a shader BRDF version of the fur,” adds Hill. “We got it to the point where it was pretty seamless between the horses using RiCurves for the fur and the BRDF model – geometrically we also had six levels of detail for the horses.”
Only the horses closest to camera had the full fur set-up. “So in any given shot you’d have 12 horses with full fur which was still heavy to render,” says Hill. “We needed to make it efficient as possible, so we had an automatic stochastic pruning system on the fur which would automatically reduce the amount of fur as the horse got smaller and smaller in the screen space, and compensate by increasing the width of the remaining hairs, letting an object come closer to camera and seamlessly blending detail without it popping on or off. Pixar released a paper for this some time ago and our code team headed by Alasdair Coull implemented it in our fur system, and Jon Allit into the massive procedural which generated the manes and tails for the massive horses.”
6. Digi-doubles
In the original brief, Abe and Barts were only required as digital actors for background scenes, and so their CG counterparts were not initially built for hero shots. But as with many productions they ended up being much closer to camera and the models were up-res’d accordingly. “We ran a FACS session to get all the facial capture and we got casts of their faces and scanned those,” explains Hill. “Usually we like to take the scans directly off the actors, but logistically we got casts made up over in New Orleans where they were filming and they were sent here. Production also gave us reference of key expressions. Martin’s performance was also very stylized and he ran with a sort of strange gait, and he was a little bit maniacal in his facial expressions, which we matched to.” Weta used a quantized-diffusion (QD) sub-surface scattering model to achieve the desired skin look, an approach similar to that relied on for Tintin (although without the ‘internal blockers’ added to the model as used on Prometheus – see our coverage of that work here).
7. Environments
Although plates were filmed in Louisiana, the actual setting is Illinois, so much of the backgrounds were replaced. “Our camera department, Matt Mueller and myself, went out to Plimmerton here in New Zealand to the hills and shot sky domes for a number of days to get a good sunset panorama,” says Hill. “We used a lot of the hills there as a basis for a matte painting. So although everything’s meant to be set in Illinois, the backgrounds are just north of Wellington!” Weta Digital also created the ground plane and background trees and objects for many of the shots.
8. Dust and shadows – bringing it altogether with Shadowsling
Perhaps the most significant advancement made by Weta Digital on the show was its rendering and deep compositing solution for the unique shadows required, and to integrate the CG horses, digi-doubles, live action actors and mass amounts of dust. “There was so much interactive dust and all the shadows, and it covers such a large volume,” comments Hill. “Well, our traditional methods of ray marching volumes would have been entirely possible but they were going to be slow, and slow to iterate. If we change a horse, that means we have to change the dust plumes and re-render for all the shadows. And if change the lights as well. Our effects guys put six or seven layers of dust per shot, plus procedural/ambient dust that was created in Nuke (overseen by Brandon Davis and Guillaume François).
FXFACTOID: OpenEXR v2
After quite a bit of behind the scenes work, Version 2 of OpenEXR is finally going into a public beta. ILM, Weta Digital, as well as a number of other contributors have formed the hub of a collaborative environment that has been responsible for the development of OpenEXR v2. Some of the new key features included in the Beta.1 release of OpenEXR v2 are:
Deep data: pixels can now store a variable length list of samples. The main rationale behind deep images is to have multiple values at different depths for each pixel. OpenEXR v2 supports both hard surface and volumetric representation requirements for deep compositing workflows.
Multi-part image files: with OpenEXR v2, files can now contain a number of separate, but related, images in one file. Access to any part is independent of the others; in particular, no access of data need take place for unrequested parts.
In addition, OpenEXR v2 also contains platform independent mechanisms for handling co-existing library version conflicts in the same process space (currently implemented in IlmImf).
OpenEXR v2 Beta.1 can be found here.
And they’ll be an OpenEXR B.O.F. at SIGGRAPH 2012 on Tuesday 8th August at 2pm.
To make the process as efficient as possible, Weta Digital wanted to de-couple the lighting from the volumetrics. “We’ve been using a lot of deep compositing and this was clearly the way,” says Hill. “Early on in the show we got together with CG supervisor Luke Millar, Peter Hillman who authored a lot of our deep compositing software, and Johannes Hanika, who was working on PantaRay, our shadow ray-tracer, which only really does shadows for surfaces – it doesn’t include volumes at all. We wanted nice soft area ray-traced shadows for all of our horses, but we had no particularly good way of doing that for volumes.”
The studio came up with a ‘camera space volumetric shadows’ technique – dubbed ‘Shadowsling’ – which takes a PantaRay shadow, a point cloud result of an area light shadow over a scene, and transposes it into a volumetric shadow. “Effectively it turns into a 2D raytracer,” explains Hill, “as a height map of the scene as seen from the light and ray-traces it in the 2D quadtree from camera to get an ODZ which contains the information of where that light is turned on in terms of visibility and turned off again in depth per pixel.”
“It means the shadows are completely independent from the volume itself,” continues Hill. “It has an awful lot of flexibility and power – it means I can not render my volumes, I need to render them into my deep format (ODZ) but I don’t need to render any shadows in them. So the effects guys can render their volumetric clouds and plumes and spot hits and hoof hits and puffs of dust, and the lighters can shift the light around, and the two of them can be combined in Nuke, with also a scattering phase function which gives the volume a bit of color. You’re able to ‘deep merge’ them or deep multiply the shadow and the phase function and the volume depth to give a final result.”
The benefit, says Hill, is that it “gives the compositor an awful lot of power. Without needing to re-render anything I want to create a volume here and take an area of the volume or one of the layers of the volume and make it thicker or less thick. You don’t need to re-render anything, they can all be augmented directly in the comp.”
9. Stereo
As mentioned above, the final shots were all completed in stereo. “For the live action plates,” says Hill, “StereoD kindly dimensionalized these based off our cameras and we could bring them back in. We sometimes needed to re-converge them to get the right depth. StereoD actually gave us disparity maps from the hero to the secondary eye, which is effectively a UV map. So you’ve got a UV map you can apply as an off-set to your plate to get the right eye from the left eye. But because it’s a UV map and it’s not baked in we could multiply it up a bit to give it more depth or tone it down a little to give it less depth to fit in with any production change that happened later.”
10. ‘Like a hammer throw’
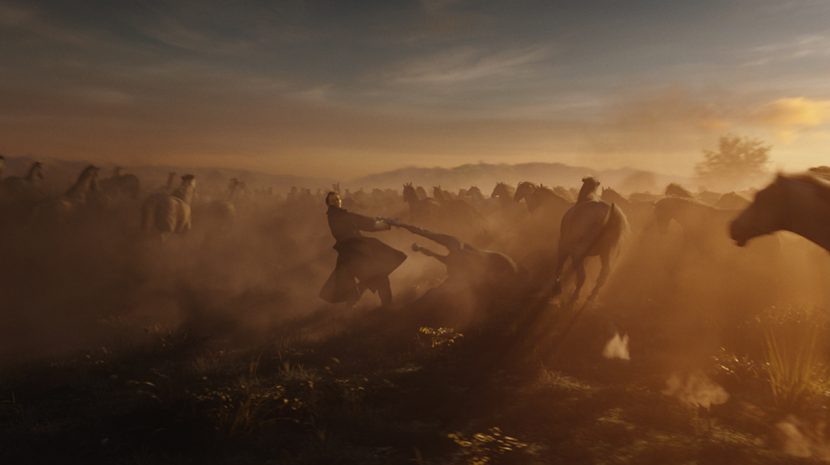
Armed with the above approach to the horses and the dust, Weta was then able to accomplish the signature horse throw in the sequence. The first plan for the shot had Barts being hoofed in the face, before grabbing a horse leg and hammer throwing it at Abe. “In the original previs, Abe just sort of ducks under the horse and then they go into their parkour around the horses,” says Hill. “This horse just lands in a heap and other horses are meant to be piling into him and there’s this pile of bodies.”
“But it wasn’t going to be acceptable (in terms of ratings),” continues Hill, “so Richard Frances-Moore came up with the idea of, Barts is doing this evil thing to the horse, what if Abe saves the horse? After Barts throws the horse, what if Abe runs back a bit and catches the horse and saves it? What if we took it one step further and to show that horse is actually OK, he gets on top of the horse and it turns Abe into the hero in saving the horses?” The final shot has the thrown horse rolling over as Abe hangs on before it rears up and Abe gets ready to continue the battle.
Horror express: Method Studios
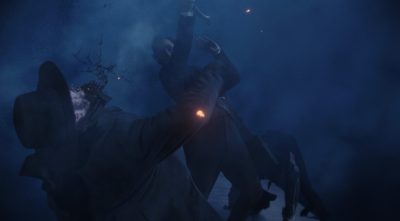
Another spectacular Vampire Hunter sequence is the climactic train ride. Here, Abe, William Johnson and Joshua Speed find themselves barreling along a train heading north in an attempt to stop a silver shipment, but not before they are attacked by vampires. The eight minute long scene ends as the train explodes on a burning bridge. Method Studios completed both the train-top visual effects, featuring hand-to-hand vampire slow-mo combat through shafts of light, and the bridge scenes. Here’s how they did it.
1. Shooting atop the train
Production filmed the actors performing on two box cars against greenscreen. “It had very limited interactive light,” notes Method Studios visual effects supervisor Randy Goux. “Our challenge was to create it happening at night, with moonlit shadows casting down through the trees, and with the smoke from the locomotive enveloping them as they fight. There are vampires coming in and out of the smoke, with shadows happening – embers coming out of the locomotive whipping by camera. To get that mood to what was shot on the plate – what you see on the greenscreen plates to what you see in the final movie is quite drastic.”
The main beats of the fight, in which Abe wields his deadly axe, were previs’d, but effectively only minimal interaction occurred on set. “They thought about having smoke on the set,” says Goux, “but that’s a danger right there – because most often when they do that we have to take the smoke out anyway. We talked about trying to get the right interactive light happening and dappled from the moonlight. That was a CG effect we had to do. It’s tricky because when you’re trying to get dappled light from moonlight racing by at 50 miles an hour onto a live action actor, you’re dealing with a lot of tricks in comp to fluctuate the highlights and modulate the shadows. So basically it was ‘shoot the plates’ and set the mood in post.”
The plates were filmed mostly on the ARRI Alexa at high speed to enable speed ramps. Method would look for particular moments to emphasize the action and also help with ‘stereo moments’ (the shots were post-converted). “When the frames were almost stopped we would have say an ember come right past camera,” explains Goux, “and then the next shot it would be on the other side of the actor and continue on.”
2. Digital environments
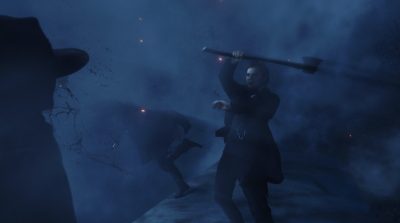
On the train, the fight progresses through heavily wooded areas, more sparse areas (with ‘toothpick’ trees), and then an area going against brick wall, before reaching the bridge. “That let us give some variance into the sequence, and the shadows helped give us a real sense of speed,” outlines Goux. “The camera’s also very hand-held, but we learned really fast that if you don’t have those shadow cues, the smoke and the embers, it doesn’t look right.”
To create these digital environments, Goux started by shooting several plates of background forests in Louisiana. “We shot every angle we could from a railroad track,” he says. “What we ended up doing was using a handful of those plates but we also ended up creating a full CG forest in Maya. Some of the camera moves got so dramatic. We could have spent the time stitching the plates together, but we found that the speed we needed to be traveling for the action to be exciting for a movie was pretty fast, which meant we could render out the trees with motion vectors so we could use motion blur. So mostly it’s a 3D forest and rock wall and it worked out really well because of the motion blur and nighttime and smoke occluding out the background.”
Wide shots of the train were achieved with a digital model created in Maya, and several digi-doubles were required although there were no hero hand-offs. CGF handled many of the blood hits and spurts seen during the fight, which were then com’pd by Method. The embers flying past the characters were created in Maya. “It turns out that old wood-burning trains did actually spew embers out the top of trains,” notes Goux. “This really used to happen and caused fires all over the United States, until they went to coal. Getting the swirl and eddying around them would give a good cue to the audience for stereo shots and it was really fun to play with in slow-mo.”
3. Through the smoke
The sequence required a definitive sharp shadow and smoke look – like God-rays – similar in some ways to the horse stampede outlined above. Goux says Method considered using a deep compositing solution to deal with the smoke. “We considered it,” he says, “but when you’re dealing with an eight minute sequence, if you just start doing the math on disk space, we realize we’re not there yet, well, we weren’t there at the time.”
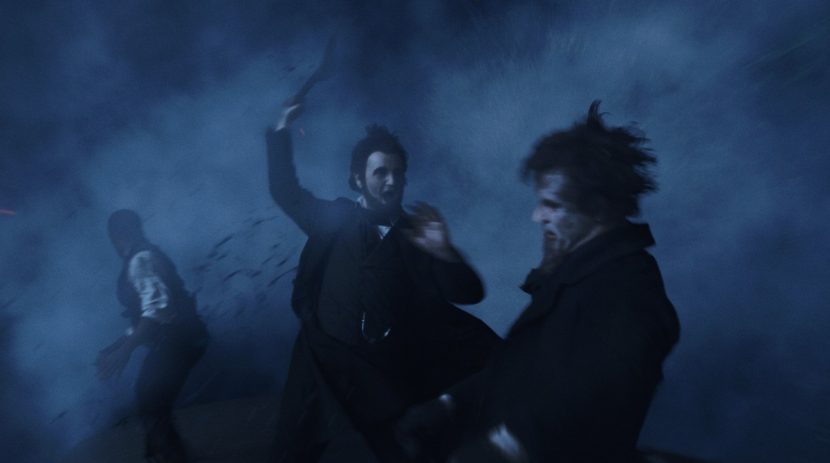
The solution for Method then was to rely on volumetric smoke, a Nuke set-up and articulated roto. Says Goux: “You can matchmove a 3D character and just cast the shadow through a smoke sim, and that’s a killer, or, and this is what we did, we did quite a bit of volumetric smoke and then created dynamic shadows.”
Artists began by rendering out an 8K sequence of smoke in Maya fluids as an ‘orthographic’. “We used that in Nuke and mapped it to an oblong sphere,” explains Goux. “Most of our shots were either looking down the train or perpendicular to the train. If the camera wasn’t doing too much of an angular shift – say 20 degrees right or left – we could be looking down the train and mapping the smoke onto it like a texture in Nuke. It looks great and you really feel like you’re in that smoke. What you’re missing, though, is that the smoke needs to get in the middle and envelop them and go around their arms. That’s where we would run a volumetric pass, which was doable with overnight simulations. We could then carefully roto that actor in and out of that smoke.”
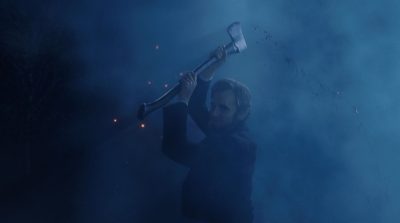
A synthetic God-ray was then added to a character’s arm, say, once the smoke had been roto’d and was wrapped around the person. “The smoke lets you simulate all the cues that are there from the moonlight, but you don’t have to do a volumetric shadow render,” adds Goux.
This successful approach had also been through a proof of concept, and would be shown to the director along with all the breakaparts. “Timur’s savvy enough that he didn’t just want to see a final shot,” says Goux. “He wanted to know how we were doing it. We were doing look dev and breakaparts of shots last July to show him. He would always say, ‘I want to know how you are doing it because I don’t want to ask you something that’s impossible.'”
4. Bridge on fire
Having been set on fire, the bridge trestle succumbs to the heat and flames as the train approaches. “Basically it’s a race to get to the end before the train crashes,” explains Goux. “Half-way through, the bridge ‘unzips’ all the way up the middle from the frames, and collapses. The last car of the train separates and that’s where they are – they have to leap from one car to the next because it’s burning underneath them.”
Watch a breakdown of the burning train section.Method created the bridge and fire entirely in CG, with the bridge built in Maya, then animated and rendered in Houdini. “The procedural nature of Houdini let us curve and bend the bridge,” says Goux, “to tell it where its weakest points were. Incorporating that into the render of the fire was very important.”
For the collapsing timbers of the bridge, Method wrote a shader system that accommodated the vortexing nature of the breaking pieces. “The faster they flew through the air,” explains Goux, “the more this orange ember shader would come out, just like with a burning piece of wood, the more air you push into it the more it starts to heat up and get brighter.”
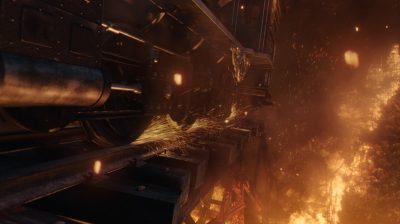
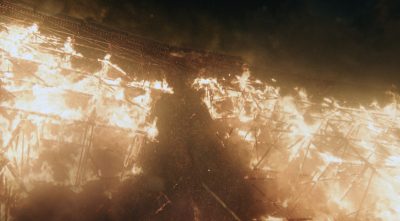
Plumes of smoke were also rendered through Houdini. “We got low-res sims out first for approvals,” says Goux, “and could be pretty confident that it would have the same characteristics when we went to hi-res and still have all the detail we needed. We were right up close to the smoke and Houdini let us sub-divide that smoke as much as we needed to to let us go through it.”
In Nuke, Method performed some re-lighting on the characters as they face the fire, and then had individual ‘fuel’ and ‘heat’ passes to comp with. “If we found we needed some more hot core happening in some of the smaller fire, for example, the compositors had the control,” notes Goux. “In terms of the final look, the embers gave it scale, smoke gave it a dirty gritty factor, fire gives it danger – there’s a recipe for all that stuff where we had to give it the right balance.”
All images and clips copyright 2012 Twentieth Century Fox.

Wonderful!
[…] Stampede shot in the movie Abraham Lincoln: Vampire Hunter: https://www.fxguide.com/featured/vampire-hunter-two-killer-sequences/ […]