Having supervised the visual effects on Iron Man 2, Janek Sirrs was well suited to return for Joss Whedon’s The Avengers. Along with producer Susan Pickett, the visual effects supervisor oversaw the creation of approximately 2,200 shots completed by several vendors. These included ILM, Weta Digital, Scanline VFX, Hydraulx, Fuel VFX, Evil Eye Pictures, Luma Pictures, Cantina Creative, Trixter, Modus FX, Whiskytree, Digital Domain, New Deal Studios, The Third Floor (previs and postvis), with titles by Method Design.

The film was an enormous effort in bringing together existing elements of the Marvel universe seen in various incarnations of recent superhero films. “In terms of the characters,” says Sirrs, “most of the R&D work had already been done for us, and we could see what we liked or disliked, based upon the previous Marvel pictures. I’d already had direct experience with Iron Man from the last show, and the relevant folks were on hand to discuss Thor, Captain America, etc. It was more a question of what direction we wanted to take those characters in. Hulk and the aliens were the tricky items as they really had to be designed from the ground up so we started them as early as possible in pre-production.”
Previs’ing The Avengers
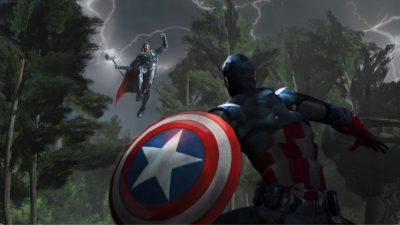
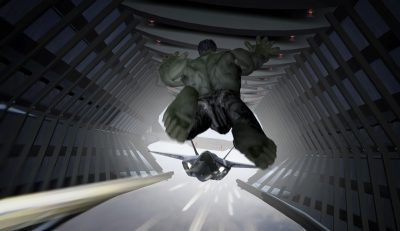
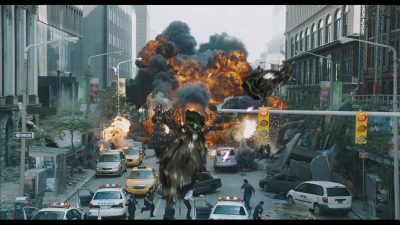
The Third Floor, Inc previs’d and post-vis’d many of the film’s major sequences, including the flight to Stark Tower, the mountain battle between Thor, Iron Man and Captain America, the Helicarrier attack, interactions with the Hulk and the final New York City battle. “We started with shot and sequence design,” outlines previsualization supervisor for The Third Floor, Nick Markel, “while keeping in mind the technical constraints for actually achieving the shots. Once a sequence was pretty much locked creatively, we then broke it down for techvis, usually focusing on the most complicated shots for production.”
Janek Sirrs recognised that storyboarding, previs, production and post on such a large effects film had to happen simultaneously. “Only one or two sequences were 100% previs’d to completion before we actually got around to shooting them,” he says. “As long you can define things enough to know what gear you’ll need, or what part of the set you actually need to build, I think it helps to keep things flexible and let things evolve a bit more organically. And there’s not really any distinction anymore between previs and postvis. They both blur into a single continuous task that runs from pre to post. On Avengers, many of the sequences didn’t start really coming together until post, once we knew what we had in the can. Marvel is also very keen on developing key frame illustrations that convey the spirit, or key action moments to get the crew excited, and the vibe they’re all aiming to create.”
Using Maya and After Effects as their main previs tools, The Third Floor worked on many iterations, including for the incredible New York battle. “It was important creatively to keep all the Avengers involved and not feel like we were leaving any one character for too long,” says Markel. “We also needed to keep logistics in mind so that the action stayed in specific areas within the digital set build.”
That battle, too, required a significant level of postvis. “The sequence was massive,” says Third Floor postvisualization supervisor Gerardo Ramirez, “not just in length but because it involved an extensive battery of action, effects and important character moments to highlight each of the Avengers special abilities. One of the more challenging tasks was to postvis a shot that took us to each of the characters – starting on Black Widow riding an alien craft, following Iron Man down to help Captain America, then traveling to Hawkeye who shoots an arrow which takes us to the Hulk and Thor. The Third Floor team first previsualized the shot to help map out choreography. Once the elements were filmed, we were tasked with combining them into one continuous shot.”
Leading the charge – ILM (podcast)
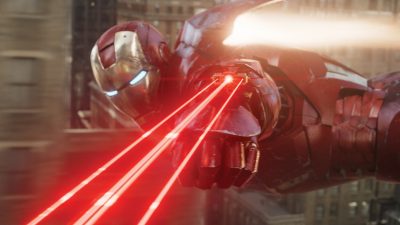
ILM was a principal vendor on the film, responsible for creating many of the film’s digital assets – from the Helicarrier, to New York streets and buildings, to digi-doubles of the characters, plus the Hulk and Iron Man. Many of these assets were also shared between vendors. Below we take a look at the studio’s Hulk work and virtual New York.
For a more detailed account of ILM’s visual effects on the Avengers, listen to our fxpodcast with ILM’s vfx supervisor Jeff White.
Hulk and character work
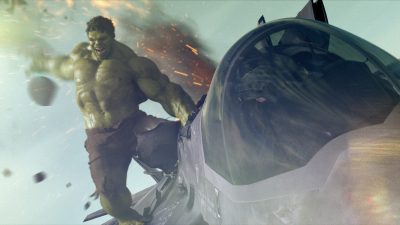
ILM built virtual body doubles, digital characters and aliens for The Avengers, but to the surprise of many perhaps the scene stealer of the film is the Hulk played by Mark Ruffalo. This is due to the less than fully successful earlier attempts at digital Hulks.
Ang Lee’s 2003 Hulk and Louis Leterrier’s The Incredible Hulk both failed, for many people, in producing a Hulk that could walk the digital tightrope of impressive near undefeatable strength, huge body mass, fast agile movement, raw anger and likable performance.
In previous versions, especially the ‘skipping’ Ang Lee version, some critics have said that the Hulk failed to have weight and thus the character was unbelievable. Including the much loved TV series, Mark Ruffalo is the first actor to be both the Hulk and mild-mannered scientist Bruce Banner. Ruffalo is quoted as saying, “So it was really important for me to do the motion capture and to play the Hulk as well as Banner. I probably wouldn’t have done it if I couldn’t do both of them, and as an actor that was the really exciting thing for me and the thing that made me say, well, this is how I’ll be different – I’ll actually get to play The Hulk as well.”
ILM’s Jeff White points out that they “did a lot of animation work in terms of selling the weight and that was hard slog to get it right and to get all the pieces working together to make his mass believable, beyond that we did several rounds of simulation as far as the muscle dynamics and the skin – to help make that all work together”, he explains. “Fairly early in the production cycle we had that shot where he (the Hulk) is running behind Black Widow and that felt like the slow motion: ‘Olympics footage’ – where we were going to be able to see everything – see every detail, see the muscles jiggling up and down – everything that would go into a 1600 pound guy running down a hall.”
As the weekend opening audiences have demonstrated, ILM succeed and this is the most successful Hulk, having both dynamic action sequences and crowd pleasing moments of humor and dialogue. To achieve this ILM deployed advanced motion capture and a new facial animation system. The face of the Hulk was built out from a life cast / scan of actor Mark Ruffalo’s face. It was then modified in ZBrush to become the Hulk, while still retaining an essence of the original actor.
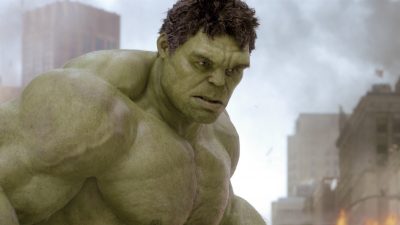
Both the face and the body movements of the captured Mark Ruffalo had to be re-targetted for the Hulk. Compared to Ruffalo, the Hulk “has that huge Hulk brow and he has a much longer distance between the bottom of his nose and the top of his lip,” explains White. “It was quite a process, we started with a Mova capture session to get Banner’s training library essentially – we had a wide range of motions and then we expanded it out, and then transferred that whole library over to the Hulk with some great retargeting tools.”
Ruffalo was on location for each actual filmed performance with the other actors, in a mocap suit, which was captured by the hero camera and four extra motion capture HD cameras (2 full body, 2 trained on his face). Once the cut was roughed out, and the shots were staged, “Mark and Joss came back to ILM and we were able to do another capture session on the mocap stage,” adds White.
Naturally there was a range of shots that had to be straight ahead keyframe animation, since Ruffalo could not jump on buildings or leap around as much as the script required. The seamless integration of the motion capture with the keyframe animation is a testament to the outstanding skill of the ILM character animation team. One example of a hybrid shot is the gag doll “puny god” shot where the Hulk slams around Loki in Tony Stark’s apartment. Not only is the scene extremely funny, but it blends captured face and body animation with key frame animation, simulation and RBS. It also involves dialogue lip sync animation for the Hulk. “He has some interesting mouth shapes there, when we first applied the motion capture, he looked a little ‘fish lipped’ – it was difficult for us, as there was quite a lot of subtlety – just a few pixels difference on where his eye lids were or where his eye brow was – could really change his expression quite a bit,” explains White.
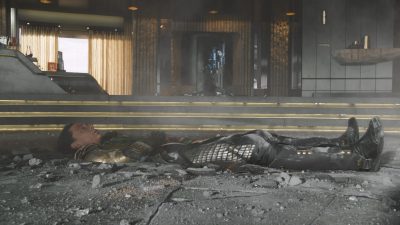
The single “puny god” line is both a fan favorite and also a very difficult problem, as the line is actually a subtle joke, playing off an earlier Loki line. The Hulk is meant to be primarily brute force aggression and not really a natural candidate for nuanced one liners – which could break ‘character’ on the vast animated figure.
“That shot in particular, with him delivering that line of dialogue – we spent a lot of time in animation – just tuning the shape of the mouth and tuning the delivery – to get it just right,” points out White, who also went on to compliment the director for not only getting great performances from the actors but also from the animators – who are in effect acting in many cases.
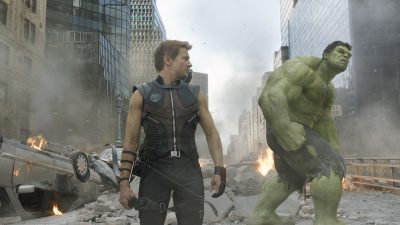
One of the great difficulties of a digital character than is both humanoid and yet very different is managing skin color. This was an issue for the various teams involved with the blue skinned characters inn Avatar.
ILM once again faced this problem with the green Hulk. “It was extremely difficult, we had a slogan on the whiteboard behind us, ‘Green is hard’,”- jokes White. “Initially Joss picked a great color for us to start with – the Hulk was much more de-saturated than previous iterations. If you are going after skin then going after something more in the realm of skin tones – even if it is green rather than skin color – helps a lot… Even after we had done the initial skin look development in multiple environments, blue sky, interior etc – his color changed so much in every shot” and the team had to work hard to maintain consistency.
One of the problems ILM faced was that the Hulk had to interact and be on screen right beside the other characters, so on several occasions the team completely desaturated the Hulk to grey scale, balanced him into the shot and then slowly re-worked back in a green tint, to get a believable look. Without a subdued color range, the Hulk would stand out, virtually popping out of the scene “in a completely unbelievable way,” explains White.
To build further realism in the skin, building on the facial capture approach, Mark Ruffalo’s actual skin was scanned and cast for use as the Hulk’s skin. “Mark was incredibly agreeable to everything we put him through,” says White. “As far as data acquisition, we got right into his mouth, his gums and teeth. We did a full Lightstage of his head, which gave us really good geometry and textures to work with.” in general, Lightstage using polarizers, can isolate via specular and diffuse separation incredibly fine detail skin texture, without the weight and deformation that naturally happens from putting plaster on a face for a lifecast.
Hulk returns, in this clip.
Virtual New York
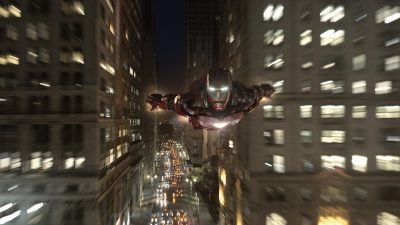
The vast majority of the New York of Avengers is digital. About ten city blocks by about four blocks was digitally re-created. “I had just finished Transformers: Dark of the Moon,” recalls White, “and it was great in Chicago – since you could just fly your helicopter over the streets, but in New York you are not allowed to take your helicopter lower than 500ft above the tops of the buildings, so we knew right away that there was going to be a lot of building reconstruction since there are several sequences flying around the buildings.”

To rebuild the streets, ILM sent a team into New York to photograph the city. “It was the ultimate culmination of building on the virtual background technology (at ILM),” says White.
“We started with the biggest photography shoot I know we have done here, which was 8 weeks with four photographers out in the streets of New York.” The team shot some 1800 x 360 degree Pano-spheres of NY, using the Canon 1D with a 50mm lens – tiled, and as an HDR bracketed set.
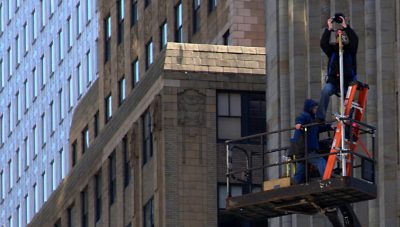 The ILM team worked their way down the streets at street level – shooting every 100 feet down the road, and then started again doing the same street via a man lift at a height of 120 ft, then they would move to shoot every building roof top.
But given how long it takes to do a bracketed tiled set of images, especially in sometimes high wind, it was not as simple as just moving down a street. By the time the team would get to the end of the street it would have taken so long that the sun would have completely shifted, thus making one end of the street lit from morning sun, but the end of the same street lit from the opposite side by afternoon light.
To allow for this the team had to zig zag across New York, and try to capture most of the streets from the roughly same time of day, but on different days. Even this was greatly complicated by changing weather. Once all the images were captured, tiled and combined, another team set to removing (painting out) all the ground level people, cars and objects. Then a third team would re-populate the streets with digital assets ready to be seen in perspective or perhaps blown up. ILM came up with complex algorithmic traffic scripts to populate streets and create the sort of traffic grid lock any real world incident like this would naturally cause.
And all of this is before the vast destruction simulations were done, cars flipped or the aliens were animated to flight the heroes. Ground level, is one problem, but much of the action takes place many stories up in the air, requiring entire buildings populated with windows – most with offices or apartments theoretically seen behind them.
EXCLUSIVE: An Actual 50 MEG PANO from Avengers from ILM – 16 bit 4K plate element. TIFF file format.
This image is very large ZIP file and may take sometime to download, but it is taken from the location in NY used as Stark’s apartment, the MetLife building in Manhattan. Copyright ILM & Marvel/Disney.
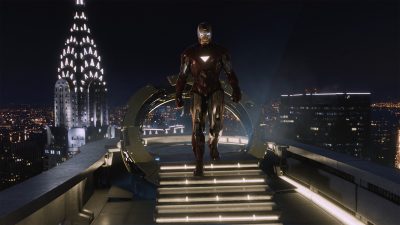
Below ILM’s Ironman rendering skills were developed over the previous Ironman films.
To hear more on Whedon’s directing of the animators or the reconstruction of New York and ILM’s blind/curtain window solution to the buildings – listen our the audio fxpodcast with Jeff White.
The Helicarrier
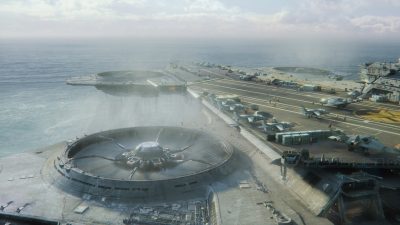
A major feature of the film, and a major visual effects asset, was the S.H.I.E.L.D. Helicarrier. Several visual effects vendors contributed to elements of the ship, based on significant modeling work by ILM, which launches from sea into a flying vessel.
“The trick to creating believable large vehicles such as the Helicarrier is to always incorporate features and aspects that are present in similar real-world objects (if they exist, that is),” says Janek Sirrs. “Design-wise, the Art Department referenced Nimitz-class aircraft carriers, which are about the same size as the Helicarrier, as the basis for the look of the flight deck. And that immediately created a foundation that the audience would be familiar with, making the whole thing an easier sell, as opposed to something more science fiction looking.”
“If you carry this philosophy through to the smaller details as well,” adds Sirrs, then that’s how you preserve the sense of scale no matter how wide, or tight the shot. For example, simply having flight crew moving around on the deck instantly clues in the audience to the size of the Helicarrier as they know big a person is. Even without people present, everyday objects like handrails, windows, etc. all achieve the same purpose as you inherently have preconceived notions about how large they are, and the brain works out the rest relative to those familiar objects. It’s equally important to convey some sense of how the Helicarrier is fabricated/constructed. Again, if you can steal from the real world, the end result will be more convincing. For example, the hull of the Helicarrier is built of built of many panels welded together in exactly the same manner as a large ship.
Launching the Helicarrer

Scanline VFX, under visual effects supervisors Bryan Grill and Stephan Trojansky, completed early reveal shots of the Helicarrier, from the moment Black Widow and Captain America introduce themselves to Bruce Banner on the carrier deck up to the point where it lifts off as a flying ship. To do this, ILM shared its carrier assets with Scanline, which then relied on its fluid simulation software Flowline to complete the water work.
The deck sequence was filmed on an airfield in New Mexico. “They blocked out the airfield with the set design of the top of an aircraft carrier,” says Grill. “They had a couple of planes and bucks but the area of the tower was just a 40 x 40 set piece. It was only dressed 40 x 10. There were some shipping containers on top to fill out some of the top area, but we needed to fill out the shots with water, sky, jets and parts of the ship.”
The Helicarrier then begins its transformation into a flying machine. “There were a couple of shots where we were looking at the water and you couldn’t tell if it was getting ready to submerge,” notes Grill, “so we took a lot of care to make sure we didn’t give the gag up too early. Once you start seeing it lift out of the water and see the fans, you get what it’s going to be.”
“For this,” adds Grill, “we received ILM’s model and then added more detail where we needed. We would throw it through every one of our cameras that we were going to be rendering. They allowed us to add things in as well and also to keep the scale, so that when we did get to the water sims it did look like a three football fields-long thing. And then our updated models also went back to ILM to Weta for some of their shots as well.”
Using Flowline, Scanline completed several types of water sims from flat ocean, to heavy bubbling and then dripping water as the craft lifts. “With the bubbling, we noticed if it only occurred in the area that the actual real sim would happen, it would be much smaller than it ended up being,” says Grill. “We enhanced the bubbling area to make it feel like the thing underneath it was really big. Then the dripping water took a few rounds because we wanted to make sure the water had progression. It would be thicker coming off the Helicarrier but as it fell down it transitioned to more misty water.”
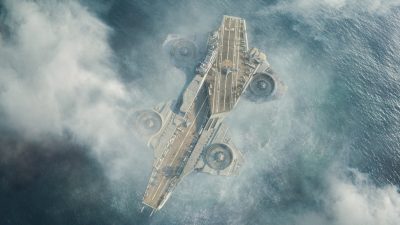
A rainbow effect through the dripping water was done via compositing in Nuke. “Our dripping water was rendered with the Helicarrier underneath it,” explains Grill, “so if it’s clear water you see what’s underneath but it’s being distorted. Then there are multiple other passes that are used to enhance the effect – we would add a lot of refractive qualities. The rainbow look was based on opticals of where the sun was and integrating the sun flare.”
Scanline received assets from ILM as Maya files, and then converted these to 3ds Max – with animation, lighting and rendering done in Max through to V-Ray. Flowline, too, worked through Max, although the software can also be Maya-based. As well as the water sims, Flowline contributed to the mist and clouds and smoke where required.
Not only just a flying fortress, the Helicarrier is further revealed to contain a cloaking device, achieved mostly by Scanline as a 2D comp in Nuke with some added element renders out of Max. “We wanted it to look like it was technology that might exist,” says Grill. “There’s a lot of new technology coming out where materials or paints have LED-type of science. That’s what we based it off – a film or paint on the outside of the carrier. It’s out there now in real life – you can print on any material and have it light up with LED lights.”
“We referenced the idea of a Jumbotron at a sporting event which when it activates you see the pixels light up,” continues Grill. “And so we took that all the way to the point of seeing the clouds distorted and refracted. It wasn’t 100% invisible – there’s almost that almost Predator outline – but if you were far away you would never know it was there. It was all UV driven. We got the UVs of the carrier and the attached pieces and started creating different wipes and smaller subsets of transitions.”
Hawkeye attacks
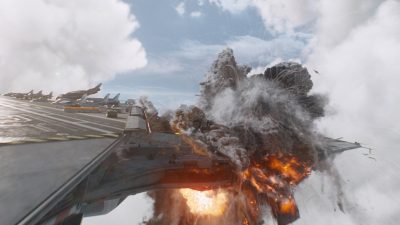
Hawkeye, under Loki’s control, flies up to the Helicarrier and blows up one of its rotors. Part of the sequence that follows features Captain America and Iron Man trying to repair the vessel by re-starting the damaged engine. Weta Digital, using shared assets from ILM, worked on these shots.
“Firstly,” says Weta visual effects supervisor Guy Williams, “we came up with a new paint scheme for the Quinjet Hawkeye was in to make it look like a mercenary jet, as opposed to one of the S.H.I.E.L.D ones. Then we took ILM’s model of the Helicarrier and dressed in a lot of dressing, so we had lots of little pieces of the Helicarrier that we could then paint back onto it. So when we got into a close-up we would add double the amount of polygons that you’re seeing in the frame, and all these little piping and boxes and hatches detail all over the surface. The closer you got to it, you still felt like you were getting more detail.”
Weta crafted some specific builds for views of the Helicarrier in the sequence, including the shot of Hawkeye’s arrow penetrating the ship prior to the explosion. Artists also spent significant time working on volumetric clouds for surrounding shots. “There are about 5km of clouds in every direction,” notes Williams. “The clouds have light scattering approximation – you get that bleed through the cloud with the light scattering and bouncing from one surface to another. So if you have a bright light shining on a cloud it will actually indirectly light the other parts of the cloud.”
For that, Weta used isotropic scattering – where the light would bleed along the axis that it entered the cloud. “Light scatters in the direction that it entered,” explains Williams. “If you’re looking at a cloud along the light vector, instead of the cloud just clipping out to a flat white blob, what you’ll end up with is that you’ll still be able to make detail out on the cloud. It’s because light doesn’t scatter sideways and even out on the values – it scatters into it. In real life, if you’re looking at a cloud and light’s behind you, it’ll look like the cloud has a dark edge to it. It’s because the light is absorbing – the thicker the cloud gets the more light goes into it. It’s also why when you look at a cloud and the sun’s behind it, you get a white line all the way around – the edge of the cloud scatters light more towards the viewer than the center does.” The volumetric cloud solution also allowed for Thor’s lightning to light clouds interactively in other shots. Weta also added a faint layer of volumetric cloud passing through camera to give a sense of the way the Helicarrier was traveling.
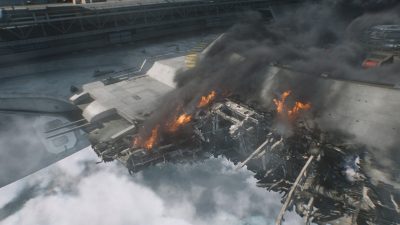
After firing the arrow, Hawkeye sets off the bomb, created as a high resolution fluid sim by Weta. “I’ve dealt with a few shows now where I’ve blown up ships,” says Williams. “The difference between this show and past ones is that we’d take as many fluid sims as it took to get the size and scale of the explosion right. This time the tools have come so far that the explosion of engine three was all done in one simulation, in one fluid cache. The advantage of that – it’s actually 5 or 6 little explosions – but each one is actually interacting with the other one and lighting it. So as an explosion is propagated, the next one along would actually push that out of the way instead of just colliding with it.”
“The big explosions and smoke columns were simulated with Maya fluids in an alternate file format for sparser data,” continues Williams. “Most of the other fluid effects like dust, hydrogen leaks, Iron Man’s thruster exhaust – we simulated in Unagi, an in-house solver we use through our volume/particle framework called Synapse. Synapse is currently our main workhorse for large scale fluid and particle simulations. It’s a bit like a sophisticated levelset compositing tool connected to our in-house solvers. Some simulations were done in Houdini – some of the Iron Man thruster layers, and the Loki sceptre blasts, and others in Maya. It was really down to what tools artists were most comfortable with.”
Again, Weta was able to rely of deep RGBA for compositing rendered elements. “All that stuff was rendered without hold outs and then the hold outs were done at comp time,” says Williams.
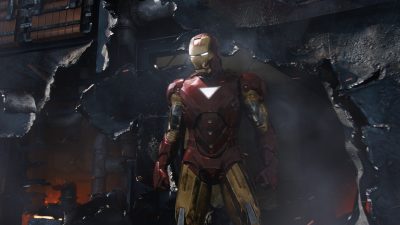
Captain America heads out to the engine in hopes of repairing it and to fight off the mercenaries. Sections of the damaged Helicarrier where Cap is working were modeled out and passed back to ILM, with a few digi-double additions also necessary. Then, the engine and blade section was also modeled in high detail for Iron Man to attempt to spin it into a re-start.
“The model from ILM was so beautiful but it was never meant to be viewed from that close, so we got to go in and show what was inside it,” says Williams. “We took the stuff in the script that called it a Maglev section and embedded a bunch of these copper magnets in the tips of the blades and also along the wall, and then hid them by carbon fiber appliqués that went over the top of them so it still looked a relatively smooth wall, but the damage would blow away an entire section of the panel, so you’d see all these banks of copper magnets.”
Weta took ILM’s Iron Man CG model (see further discussion under ‘forest duel’ section below) for shots of the superhero spinning the engine. “There are sparks and fluid sims for the liquid nitrogen coming up of the ruptured pipe and spraying ice crystals all over him,” notes Williams. “Little touches like that really add to the scene. The fluid interacts with Iron Man as he’s working, and is buffeted by the wind. All the pieces had to support each other and feel like they were there on the day.”
The Helicarrier iso-cell
Weta’s final contribution involving the Helicarrier involved Thor being tricked into the iso-cell by Loki and being sent hurtling towards the ground. “In every shot he fell through clouds – every shot!,” jokes Williams. “It helped with showing him falling, even though there aren’t that many layers of clouds normally. It was a bit of a cheat but it allowed us to get a sense of travel and scale. That first shot – where you’re looking up at the Helicarrier and the iso-cell whip pans passed you and you travel with it as it falls down along a cliff face of a cloud. The fact that it’s all three-dimensional really gives you a sense of vertigo and a sense you’re falling with the iso-cell.”
Views of the ground plane were created as several detailed matte paintings from different altitudes. “We also painted full 3D cycs so we could tumble the camera through them,” adds Williams. “Wherever you looked around you could see the horizon and clouds up in the sky. We also put our 3D clouds outside from the iso-cell so when you look out there they were. It sounded really cool to do and it made sense to do, but in hindsight, everything’s moving so fast that you don’t really get the chance to perceive the parallax of those clouds moving past the camera.”
A handful of the close-up iso-cell shots were replaced with digital versions, with a real Thor in the plate, to accommodate the fast movement of shadows as it falls. “We also tracked Thor for all the 3D shots and then rendered back a digi double for all the reflections on the glass,” says Williams. “And we ray traced the iso-cell into the glass so you also saw the proper occlusions of light and sky in the glass. But we sometimes had to turn those off because what looks correct isn’t always correct. But we always set out to do what’s right first, because if you start from there you’re always at a much better point than if you just ignore realism and try to be artistic. You’re still being artistic but you’re basing it on what the eye can see.”
The forest duel
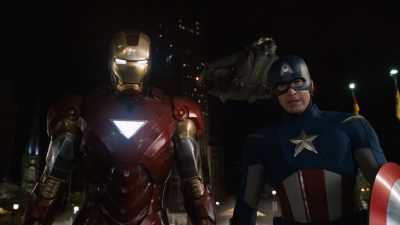
The forest duel follows a vignette that begins as Loki steps outside the museum, transforms into his armour and is confronted by Iron Man et al. “We worked on that all the way through to the Quinjet to the scenes of Thor taking Loki and all the way to the end where the forest blows up and it’s Thor, Iron Man and Captain America saying ‘are we done yet?’, says Weta Digital’s Guy Williams.
For the initial fight scene in the car park, production flipped real cars on set in Cleveland during night shoots. “We would send our photographic team out there and took photos of every building within five blocks,” recalls Williams. “And we photographed all the cars and props, just to cover us. We knew we’d put a blue glow into the sceptre Loki carries, but we didn’t anticipate they’d have a stunt sceptre on set for safety reasons. So we ended up replacing that in every fight scene since it was a rubber blade and put the blue glows. There were plasma shots from one of our effects guys that left a nice trail.”
Scenes of Iron Man in the fight were digital Weta creations, using ILM’s model – one of many assets successful shared during the production. “We also had the fantastic suit from Legacy Effects which was really nicely painted,” notes Williams. “It was excellent lighting reference. Then for the CG model, we’ve developed some tools to help migrate things from other companies. We take their texture space and use ray tracing, for instance, to migrate over to ours. And then we start painting what maps are missing, for example. They might use projected textures or procedural textures that can’t be passed off, so it’s easier for us to do the paint work.”
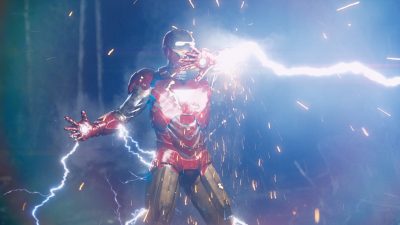
“It’s not a push button, ignore the effort affair,” says Williams, “but the thing is ILM are good people, and are easy to talk to and there’s nothing negative about the process. It was just a matter of making sure our Iron Man looked the same as their Iron Man in shots. There are subtle differences but I don’t think most people will be able to tell.”
For Weta, the most difficult part of the shots involved re-creating Iron Man’s reflective metal surface. “The gold on his face has to look a certain way and the red paint has to look a certain way,” says Williams. “The red paint on his body is basically a car paint – micron-sized metal flakes suspended in a transparent red paint, a quarter of a millimeter thick. So you get a very specific look out of the reflections in the red. And then to top it all off, just like a car paint they actually put a clear polish – a veneer of glassiness on top of the whole thing. Which means you get both red reflections and clean, white reflections.”
“When you put Iron Man out in daylight,” adds Williams, “he wants to go purple really fast because the blue reflections of the sky into the clear coat make it really challenging. It takes a lot of tweaking to get the right levels for the clear coat and the red saturation for the red material to look correct. In a nighttime shot, the problem is the lights are blue once again, making the red want to go a dark purple. Not only that, you don’t have a large broad sky lighting the character, you have lots of discrete little points. If you look at a chrome ball at night, it’s like a dark ball with lots of little points around it – and you don’t want to turn Iron Man into a black hole with little glints around him.”
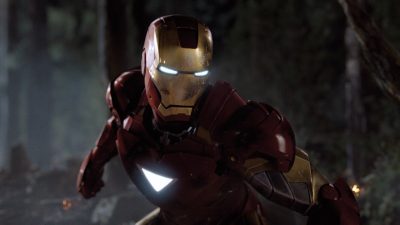
To deal with these challenges, Weta shot HDRIs for every scene and then built high resolution image-based lighting set-ups (IBLs). Explains Williams: “We had some cool tools we wrote that let us take an IBL and define crop regions on it and it would pop out area lights for those to do the actual geometric lights that you could pass back into the renderer. The area lights do proper lighting that have proper shadows and fall-off. It takes the cropping of the IBL into the light as a light texture, so that any reflections of that light source show up properly. We used a lot of direct area lights which gives you even better shadowing. Then Panta-ray allowed us to cast shadows – all of our shadows were ray traced so that, depending on the size of the light source, you get the various sized shadows and that was really important in making everything look more naturalistic.”
“The last part of the equation is that everything was ray traced,” notes Williams. “So Iron Man’s reflections are put back onto himself and his environments are ray traced for the specular, so that you would see his arm reflected into the gold of his face plate. Also the edges of the panels get exactly the right kind of occlusion and glints and lights based on the right surfaces. The gold on the face has a brushing pattern to it – anisotropic – so both the reflections and ray traced reflections that proper anisotropic specular look.”
Using an ILM model of the Quinjet and a digi-double of Thor, Weta then created shots of the flying God taking Loki onto the mountaintop. “We ingested both of those things into our system, adding detail to the jet and built our cloth sims into that based on our own systems,” says Williams. “We re-groomed the hair from scratch because no two hair tools are ever going to be the same. For our digi-doubles we have a Gen Man asset that forms into the general shape, so that we can leverage all the tissue and muscle stuff we’ve done for development into every digi-double. So that means all the digi-doubles get their own A-level treatment instead of having to be developed from scratch, because at the end of the day everyone has a bicep and a tricep – so as long as you do that once you should be able to migrate it.”
Watch a clip of Iron Man and Thor dueling in the forest.
Iron Man confronts Thor and the two battle it out – aggressively – in the forest. For those shots, again the Legacy suit was used for reference but most shots were digital. The forest scenes were filmed in a reservation outside of Albuquerque. “There was a real thought given to not damage any of the land,” says Williams, “so any kind of destruction was either added digitally or achieved by bringing stuff in and taking it out again. We didn’t hurt any real trees. A couple of prop trees were built that only went up about 30 or 40 feet that had destruction applied to them. There was also a fire ban so all the lightning effects and fire had to be done in post.”
The stunt team had worked out most of the fight in great detail, relying on wire work and tree rams, with Iron Man’s stunt person wearing a markerless mocap suit featuring black and white panels on location and witness cams set up to record his performance. Ultimately, many of the shots would feature fully digital characters and forest elements created by Weta. “When they come careening through the trees and the tree breaks and lands on the ground and falls behind them, both those shots are completely digital,” says Williams. “All the tree falling was done digitally. It allowed us to choreograph the action and take it that 5% further. The digital extensions were done using a combo of matte painting, 3D trees and bushes. When Thor is jumping up to hit his hammer on Cap’s shield, the profile shot – both the characters are digital and so is the forest.”
Weta developed CG trees that resulted in individual pine needles – exceeding 300,000 – all individually solved. “So as the tree whipped around you got that nice follow-on from the trunk to the branch to the smaller branch to the pine needle,” notes Williams. “All of that was done as a hierarchical curve simulation. For a lot of it we used particle sims, but also rigid body and fluid solvers for dust – Maya has a nice adaptive fluid solver now. When Iron Man is sliding into frame and kicking up dust and pine needles – the twigs and pine needles were done using rigid body solvers, dust with fluid sims, dirt with particle sims – all layered back together using Nuke. In the case of the dust we used deep RGBA compositing, so you could put the dust back together without rendering hold outs.”
Williams worked closely with Aaron Gilman, Weta’s animation supervisor, to choreograph the appropriate moves for Iron Man and Thor. “He and I would get into a lot of discussions about what a superhero would do,” recalls Williams. “So things like, if a person throws a person, what happens? Yeah, well, Thor’s not a person, well neither is Iron Man. Iron Man weighs more. And you get into over rationalizing things to a geeky gleeful level – it helps bring a little bit more of that fun comic book to life.”
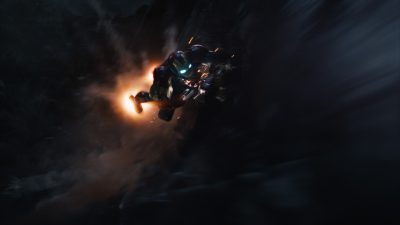
At one point the two characters become airborne and fly through the treetops and crush up against a rocky cliff face. “We have a solver for shattering rocks,” says Williams, who notes that Weta use an in-house tool based on the Bullet rigid body solver in Maya. “You give it a bunch of rocks and give it a force and it’ll figure out the proper breaks and give you individual pieces after the breaks and you can put that through a rigid solver.
As Iron Man is grinding Thor’s face into the cliff, all the rocks peeling off – the cliff is made of a few large rocks that are getting shattered as his face goes through them. Those shattering rocks burst into smaller pieces and all the big pieces birth off fluids and dust. The beauty of doing all this in 3D is that all the lighting can integrate – so all the light from Iron Man’s boots lights up the dust and and backlights the rocks that are directly behind. We ray trace everything – the shadows of the dust back onto the cliff, the shadows of the rocks from Iron Man’s boots back onto the cliff – everything is integrated in the lighting equation.”
“We also fractured some trees on-the-fly with a procedural shattering tool inside our solver toolset,” adds Williams. “In some cases, we both pre-fractured elements and also solved more fracture generation in the solve. Most hero close-up destruction required enough art direction that we combined both techniques. Mid and distant stuff was mostly procedural or even rigid body grenades – emitting rigid bodies from a particle emitter, part of our in-house rigid body toolset.”
Earlier in the sequence, Iron Man encounters the wrath of Thor’s hammer lightning, which has the effect of both increasing his power but also melting the suit somewhat. “We had a lightning tool,” explains Williams, “where you pick a point in space and it will march along towards the ground and change direction. There are parameters for how many times it tries to change direction, how often it will fork itself into a separate branch – that existed from Tintin. We extended it a little bit so that it actually carried temperature with it – so it forks and bends and the thinner it got, the less temperature it carried. It allowed us to do the comp’ing a bit better, so you actually had color aberration based on how hot the lightning bolt was.”
“We also changed the tool to allow us to do point-to-point lightning. So you could define two points in space and make a bolt – as it marched along it would make itself go towards another position in space. You put one or two points on top of the hammer and then put a hundred points over Iron Man’s body and it’ll randomly pick points to go between. It flickered a little bit over the course of the shot on the hammer, but the lightning bolt was always popping around on Iron Man’s body.
It would even fork on the body – so at one point the bolt splits and hits him in the face and the arm at the same time. That tool was also used two more times in the same shot, once to get lightning to now birth off of Iron Man’s upper body and fork down towards the ground, and also to have very tiny lightning bolts come off his feet and anchor into the ground, so it felt like he was arcing into the ground.”
The sparks were achieved with Maya particle tools and Weta’s own widgets which could alter their temperate, life, ability to break and to collide. “Sparks don’t motion blur like other things,” says Williams, “since they’re very dependent on sub-frame motion blur – so you have to render them differently. We have a tool called Tracer, since it’s also used for tracer fire, which will take the path of the spark and the motion of the camera and create a curve segment that draws the path of the spark inside the shutter, and renders it without motion blur. So what you end up with is a beautiful sub-frame squiggly line that is actually based off what it should be as opposed to an arbitrary squiggle.”
Screen graphics and Iron Man’s HUD
Responsible for on-screen graphics in the NASA JDEM Lab, S.H.I.E.L.D. Helicarrier bridge, and science lab sequences, and for Iron Man’s HUD and some other Stark devices, was Cantina Creative, headed up by Sean Cushing (Executive Producer) and Stephen Lawes (Creative Director) and Venti Hristova (Visual effects supervisor). fxguide spoke to freelance 3D VFX and screen designer/animator Jayse Hansen who worked with Cantina on these shots.
Iron Man’s HUD
There are two HUDs in the film, one for Iron Man’s Mark VI suit, which drew on original designs from Iron Man 2. The second HUD was created for the Mark VII version of the suit. “He’s got a lot of new bells and whistles incorporated into the new suit,” notes Hansen. “It was kind of an open book but the new HUD had to live and feel like the previous ones, although it was more sophisticated and a bit more organic.”
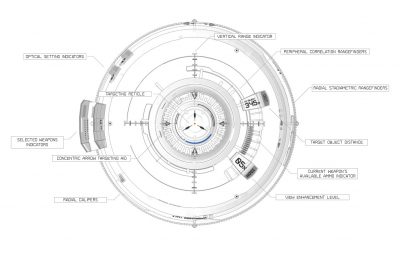
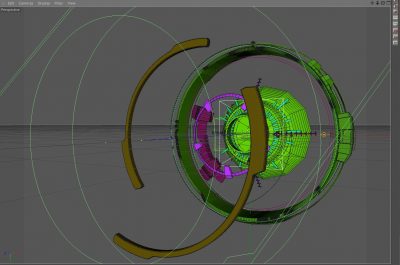
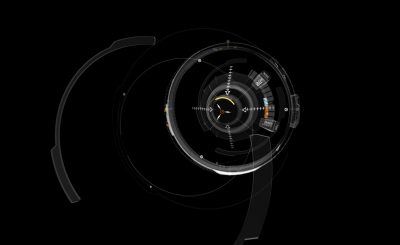
Hansen began HUD designs on paper – “I’ve got three notebooks that I’ve filled” – and would show concepts to Hristova, Lawes and Cushing. “Their input was invaluable in keeping it within the Iron Man universe,” he says. “I’d then design it out in Illustrator and bring that into After Effects, animate it out, and basically have a full composited HUD to illustrate a new story point. We’d sometimes do that within a day or two just to give it to Joss and Marvel to get their feedback.”
For HUD research, Hansen turned to flight simulators, books and an actual fighter pilot named Johnnie Green. “I would ask about the altimeter, for instance, and ask him in low altitude situations chasing targets what would you want on your HUD?’. He would say, ‘Well, I’d want ground speed, I’d want a VVI – a vertical velocity indicator – and I’d want a G meter so I know I’m not pushing too many Gs and would pass out.’ So that kind of feedback was invaluable and I designed it, in a way, to his specs, if he was facing that similar situation.”
The shots began with footage of Robert Downey Jnr shot against bluescreen and wearing just a black shirt. “They just wanted to let him act and do his thing,” says Hansen, “and then we would create what we needed on top of that. Once we get that footage, we tracked it in 2D using AE’s point tracker – the simplest way possible. They had looked at 3D tracks, but the most simple and predictable way to do it ended up being using point trackers on both of his eyes and the end of his nose. From that, Stephen Lawes had worked out if you averaged those tracks and shifted out the average in z space, you could get rotational values and put that on a center null.”
After tracking, Cantina made skeleton rigs without story point graphics on them, but they contained all the necessary movement. Then the designed graphics were added via After Effects. One particularly challenging HUD design was for the new Mark VII as Iron Man is about to attack an army. Here, the HUD actually spins around from a neutral state with diagnostic graphics to a new ‘battle mode’. “Joss wanted that to be really dramatic,” recalls Hansen. “He said, ‘Why don’t we spin the HUD and the front of it is the good stuff, but 180 degrees behind him is the battle mode.’ Well, the rig that Stephen created in After Effects – actually for Iron Man 2 – was never meant to spin around. So we thought, ‘Can we even do that?’ But by the end of the next day I had it spinning. Joss loved it.”
To enable the spinning around effect, Cantina had to adapt its rig, which is tied to a center null around Tony Stark’s pivot point of his head and tracked to his movements, by using an alternative rig that could rotate. “We used a ton of Expressions to get everything to tie together and extend the capabilities,” says Hansen. “For instance, we used CC Sphere, but it doesn’t really pay attention to a camera naturally. So Stephen had come up with some Expressions to do that.”
“We came pretty close to breaking AE with the Mark VII HUD,” adds Hansen. “Because of the way the graphics are duplicated for the eye reflections and duplicated for the facial highlights for interactive lighting, the elements on screen approached 20,000 little pieces – Variations of the suit diagnostic contained over 1,000 elements. We had each piece separated out in pre-comps. We did additional color grading on Robert Downey Jnr’s face for interactive lighting. We’d take a comp of the graphics and duplicate it, do a few different things to it, which was then corner-pinned to his face, and then blurred it out in color dodge blend mode.”
Avengers also marked the first time the HUD had been done in stereo. “One challenge with that was that there was a lot less depth of field,” says Hansen. “On the previous films you could rely on a lot of blurred out graphics for that depth, but in stereo it doesn’t work as well. There was a lot of time spent on how widgets and graphics would actually function because you could actually see everything.”
Helicarrier screens
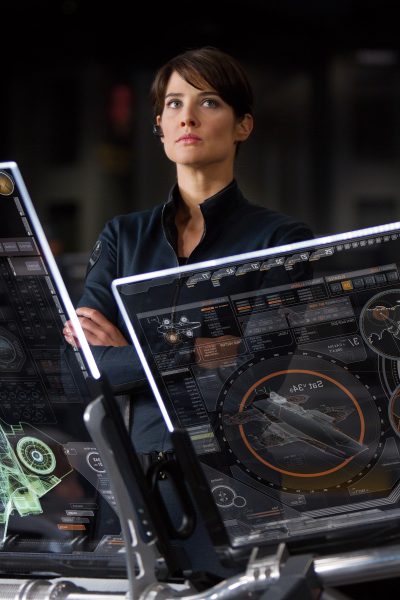
During principal photography, hero screens on the S.H.I.E.L.D Helicarrier bridge were shot as empty glass panels, with a plethora of other screens featuring graphics generated by Cantina for on-set playback.
The two main bridge screens are Nicky Fury’s 4-up setup and Maria Hill’s 3-up layout. Cantina also fleshed out the scientific screens used by Tony Stark and Bruce Banner in the Helicarrier’s lab as they analyse Loki’s sceptre and search for the Tesseract.
“For the Helicarrier,” explains Hansen, “it was almost an empty slate at the beginning. I started by researching real aircraft carrier screens and then designing based on what purpose each had. We came to the conclusion that Fury’s screens would be the overall screens and he would have a high level view of basically everything in the Helicarrier and the world. There would be map screens with globes. We did a lot of maps on this! It also had security cam footage, and video feeds from news footage. Hill’s screens were more hands-on with detailed views. She wasn’t flying the ship – but she could make things happen from her screen.”
Cantina generated both 2D and 3D elements in After Effects and Cinema 4d, and then produced slap-comps to show the client for approval (the final screens were comp’d by Luma Pictures and Evil Eye). Asked whether viewers should look for Easter eggs in the read-outs, Hansen declares, “Of course! You’ve got to put stuff in there. Although, we were so busy working on this that we might not have taken all opportunities we did have for Easter eggs. There are a few – I tend to put J4YS3 in all my screens. That’s in the Mark VII HUD next to Black Widow and Pepper’s pop-up window. Stephen Lawes puts A-113 in all of his screens he’s done – I think it’s the room where he went to school. Apparently a lot of directors and people from that class have put that in their films.”
Rounding out the VFX work
Evil Eye Pictures
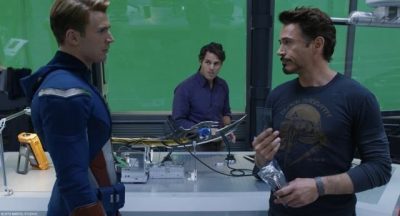
Evil Eye delivered multiple shots inside the Helicarrier, including compositing in views from the Wishbone Lab (shot against greenscreen), comp’ig in monitor graphics and adding FX for Loki’s scepter. The work was curated by VFX supervisor Dan Rosen, co-VFX Supervisor Matt McDonald and executive producer John Jack.
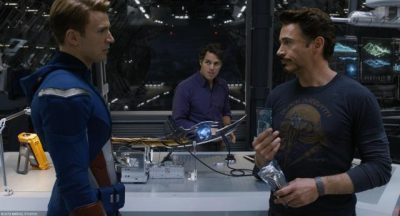
The studio used ILM’s Helicarrier asset to flesh out the atrium seen from the lab, including day and nighttime skies, and even populated the shots with digi-doubles where necessary. Evil Eye also completed shots for the Quinjet that brings Captain America to the Helicarrier – adding sky, water, fog and other effects in the composites from a practical jet set.
Hydraulx
“We did the opening ten minutes of the movie, other than the opening set-up in space,” says Hydraulx’s Colin Strause. “Loki arrives at the S.H.I.E.L.D. base, then escapes. A black hole forms and the whole base is destroyed, then the jeep and chopper chase Loki, the tunnel implodes and the chopper crashes and Loki escapes by driving off. We also did the last shot of Loki and Thor where they re-activate the cube and blast off at the end of the movie.”
The S.H.I.E.L.D. base was a real location of a high school under construction. “It was a blank cliff that we added to with choppers, a 3D base, satellite dishes, hundreds of Massive characters and CG cars and trucks,” explains Strause.
“For the actual destruction shots, they were 100% digital,” he says. “So we had to make every building and light and pieces of glass and cars, and add in the fireballs and explosions. We modeled in Maya, rendered in Mental Ray, and then did all the destruction using Thinking Particles in 3ds Max, Krakatoa and Fume FX for the dust and particles and explosions.”
For the jeep chase, a truck was filmed driving down a tunnel. Hydraulx artists roto’d it, did a camera track and added a fully 3D collapsing tunnel around it. “The tunnel destruction was done by hand-animating the big chunks of rock, shattering them in either Maya or Max,” says Strause. “All of the smaller stuff was then simulated.”
For Thor and Loki’s departure, production filmed one plate with all the actors, and then filmed another clean plate with just a circle around it. “Originally we were going to paint out Thor and Loki and have them get sucked up,” says Strause. “But in the end we did a fully 3D Loki and Thor, with cloth sims on the cape and everything – we also built the Tesseract cube in the cylinder. Then we added RealFlow and Naiad sims. We took the render of the characters and projected it back onto the geometry to make it feel like they were evaporating. We comp’d in Inferno mixing the passes and added a combo of plasma elements from the earlier cube shots.”
Luma Pictures
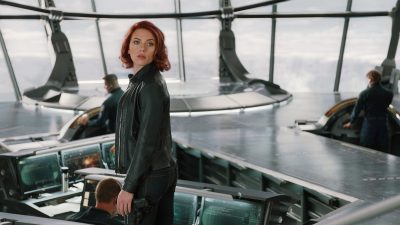
Luma Pictures worked on shots featuring the Helicarrier’s bridge, carrying out both set extensions and compositing in graphic and monitor displays developed by Cantina Creative. Exterior views as the Helicarrier flies also featured volumetric clouds.
“The bridge was a set with a very large bluescreen surrounding it,” says Luma visual effects supervisor Vincent Cirelli. “They had Lidar’d the set, and so everything was keyed and then we built out the set. The set was very dense because it needed to hold up from various distances. The geometry was very heavy and we ended up partitioning it out so that at render time – we used Arnold – we could pull it in and render specific angles as the camera was moving.”
The volumetric clouds were created in Houdini. “We cached out quite a few sims running at different speeds and different layers that had volumetrics at different frequencies and details, and that were all animating,” says Cirelli. “We didn’t want it to feel like it was a 2D effect when the Helicarrier was traveling through clouds – so we had stand-in geometry in there so when the fluids push up against the carrier the fluids move around. The clouds are wisping off the windows. It was cached out of Houdini into a buffet of voxel data – we could bring that back in and dress up the shots aesthetically and create a consistency across the sequence.”
For the monitor and graphic display inserts – composited in Nuke – Cantina provided Luma with hi-res files with some broken into layers. “They did such a great job on those,” notes Cirelli, “but there was of course still an incredible amount of paint work to be done – the monitors were just panes of glass and across moving shots and reflecting everything.”
In addition, Luma contributed shots of the bug device Stark places underneath the monitors, and the ‘virus arrow’ fired by Hawk-Eye. Finally, the studio completed a few Thor shots after he is ejected from the Helicarrier, which involved lightning and cloud work and his armour materializing around him as the sky opens up.
Fuel VFX
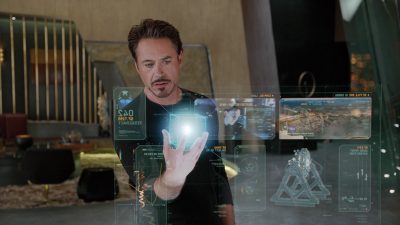
Fuel VFX completed shots for sequences taking place near Tony Stark’s penthouse in Stark Tower, including hologram, New York views and extending the CG facade of the the Tower. Visual effects supervisor Simon Maddison oversaw the work.
“The design of the holograms was based on some of the work that had been done in the earlier films,” says Maddison, “where the Iron Man OS is called Jarvis. This went in a slightly more 3D direction. The story point was that it had to show Stark Tower being powered independently by the arc reactor.”
Robert Downey Jnr acted out touching the screen, including picking up the Tesseract cube, and Fuel added in animated pieces and interactive lighting where necessary. The scenes were filmed on an apartment set against bluescreen. “We tracked the camera and gave that to the 3D guys who were animating in Maya and rendering in RenderMan, and to the Nuke guys who had 3D cards for flatter stuff,” says Maddison. “All the data running up and down the screen was generated in After Effects and layered in in Nuke.”
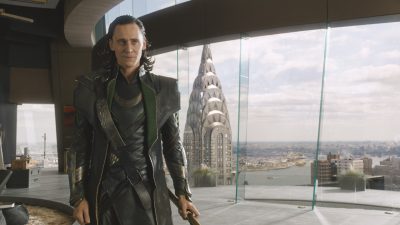 For extensions and for the New York cityscape Fuel shared assets created by ILM, particularly the Stark Tower. “They built a partial set which was a single floor plus the catwalk they were on,” explains Maddison. “So we needed to extend that apartment both up and down as well as putting the background cyc in there for the New York city stuff. ILM had got on top of the Metlife building which is geographically where the Stark tower is situated, and they shot the full 360 degree panoramics which came in as a big sphere.”
Fuel also added some detail to the Stark Tower model for extension shots, and also dealt with numerous reflection and refraction issues from the glass-laden area. Additional work included replacing the stunt spectre used in the fight and adding FX animation, plus background shots of aliens and chariots – rendered on cards – as the New York battle continues.
Watch behind the filming of a scene from Tony Stark’s apartment set.
A further contributor was Digital Domain, which, under visual effects supervisor Erik Nash, created CG set extensions for the asteroid environment seen as the first and very last shots. The environment is also featured where Loki and The Other meet. DD created an all-CG floating staircase, and also augmented the The Other’s prosthetic makeup.
And Whiskytree lent its matte painting and set extension skills to establishing shots for Russia, Calcutta, and Central Park in New York. The Russia matte painting was a 3D city view before action moves into the interrogation room with Natasha Romanov (Black Widow).
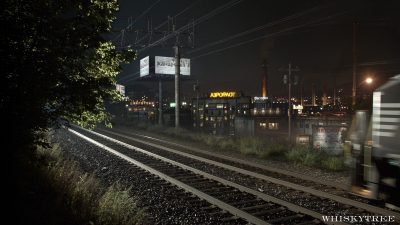
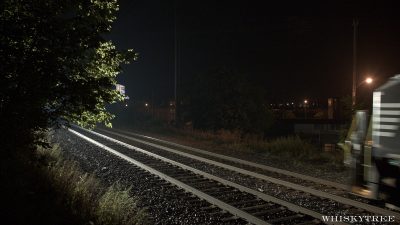
Janek Sirrs provided Whiskytree with a rough sketch that was fleshed out with photographic and 3D elements, and the move required set extension and rig removals. Inside the factory, Whiskytree had to re-time the plate, since the rafters, cables, ropes, and roof trusses caused significant oflow artifacts. The studio also produced an establishing shot of the Calcutta shack to which Bruce Banner is lured by Black Widow, again made up of 3D assets and photographic plates to extend the slum area. Then for the Central Park scene, Whiskytree added Stark Tower in the background and recreated existing winter foliage with CG trees to create a summer-time feel.
Trixter
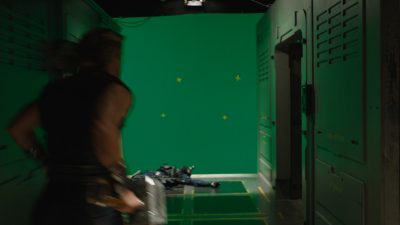
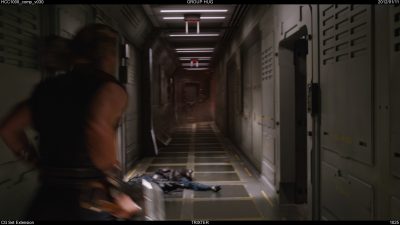
Trixter worked on several sequences over 200 shots that required a variety of effect types, “including classic green screen compositing, CG tracer fires and explosions for the amazing NYC sequence, designed and animated CG props like Loki’s nasty eye-scanner, set extensions and shot enhancements,” according to visual effects supervisor Alessandro Cioffi.
Tracer fires were simulated in FumeFX for 3ds Max, with explosions created in Particle Flow and Particle Flow Tool Box for Max and rendered in V-Rya. “When we started on the NYC sequence we received some look development examples of the alien tracer fires, done by ILM, which we naturally used as a visual guideline,” says Cioffi. “After some initial encouraging tests we then rapidly found a convincing look and a solid set up between simulation and compositing. Also rendering a set of secondary passes for relighting and integration helped us complete a good number of shots, not only in that sequence. CG explosions and fires in the New York City attack, Loki Detention and Escape sequences helped to enhance the sets, which were already impressive in terms of scale and complexity.”
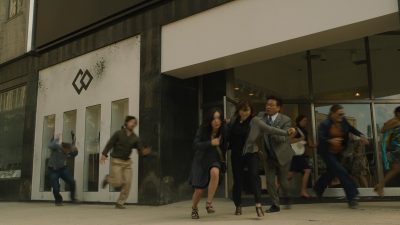
“We had a lot of fun with one particularly challenging shot,” says Cioffi, “which features random people running away from the alien attack in front of a shop. The shot was set up as a split screen between practical impacts and running people, each filmed separately. We added the tracer fires, bigger blasts and the fun part, an entire action sequence that is reflected in the shop window! We see New York buildings on fire, more explosions and even the reflection of the aliens raiding!”
Trixter’s set extensions included those for the Helicarrier, one where Thor rushes down a corridor to stop Loki escaping from the iso-cell. “In reality,” notes Cioffi, “Chris Hemsworth was acting in front of a green screen, as the corridor set was only partially built. Our task was to extend that corridor and recreate the ‘red alert’ atmosphere in it. We completed the shot entirely in Nuke by projecting a digital matte painting on some rough geometries and adding all the atmospheric and lighting effects directly in compositing.”
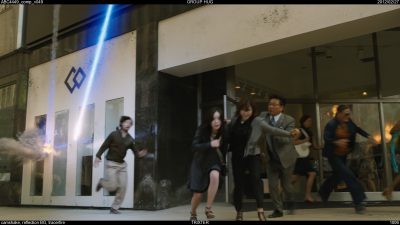
“Towards the end of the same sequence,” adds Cioffi, “when Agent Coulson shoots Loki with the alien gun, we added the ‘destroyer-like’ laser beam and it’s effects on Loki and the Helicarrier walls. The destroyed walls, scorch marks and all the signs are actually a matte painting. Tom Hiddleston was wired up and pulled towards the surface of the wall. We then enhanced the impact of the alien gun shot by adding a fiery explosion. In the following two shots we see how Loki breaks through the thick walls, wrapped into CG smoke, debris and fire to finally escape. The matte painting is used in several of the following shots.”
Main on end titles
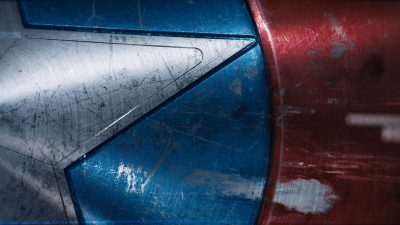

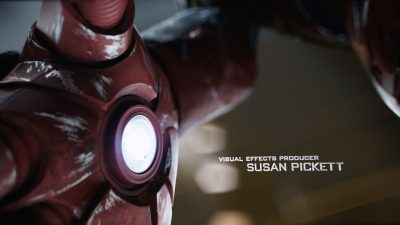
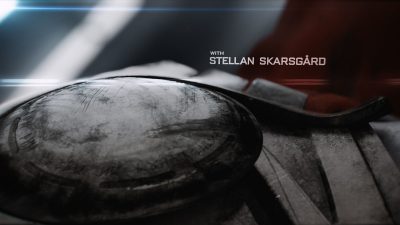
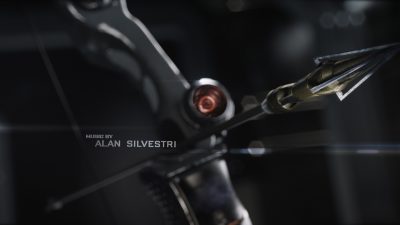
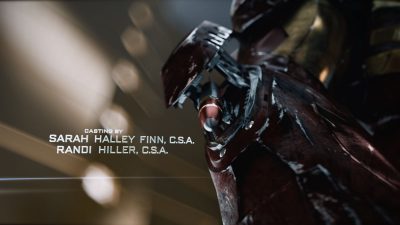
Method Design, part of Method Studios, contributed the main on end titles for Avengers, a sequence that traverses through the battle-scared costumes of the film’s heroes in super macro. “Marvel and Joss’ approach to the film was based around these primary characters and the way they are forced into a group,” says Method Design creative director Stephen Viola. “They’re all very unique personalities and character traits and have unique powers. So it’s a story about group chemistry and how they are forced to work together. They wanted to really focus on that and the real stakes was a big theme for Joss.”
Viola notes that his team jumped on the idea of group chemistry. “Our original presentation was six or seven concepts,” he says. “We initially had experiments with particles and fluid effects that could be an abstract representation of that theme. We tried a lot of teamwork concepts. Joss really liked some of the imagery we had in this one concept which was the real stakes concept. It was post battle and the idea was that we see all these different items that represent each hero. So we could get away from the heroes themselves, a little away from the characters, and re-group and focus on the imagery post-battle to look at what these guys went through.”
Method pitched boards for each concept, relying on sister VFX company Method Studios for help in realizing some of the approaches. “We also had three motion tests,” says Viola, “and one of them – it wasn’t the concept chosen – but it sold the sense of pacing and the feel that we were envisioning for the main titles, and showed them we were on the same page.”
A key part of the titles that had caught Joss Whedon’s eye in the concepts was Captain America’s shoulder. “It had blood on it, tears, dirt and detail and spoke to him on that stakes mentality,” recalls Viola.” The final look settled on macro views of the costumes and the areas the costumes are stored in the Helicarrier.
Using the actual CG assets built mostly by ILM, Method tended to add battle damage in certain areas. “Some of them had not been made for such macro shots,” notes Viola, “so we did some up-res’ing and re-painting textures and creating the environments using Zbrush to add in dents and tears to the suits and clothing. We used V-Ray and mental ray for rendering. We had After Effects and Nuke for comp – AE helped with the look and flares and stylization. And we also had help from VFX teams of compers and 3D from Method.”
“We learned a lot about what the VFX guys had gone through, too,” adds Viola. “Janek Sirrs had explained how the shield would react, and the fact that the scuffing on the shield would be tearing and chipping paint, but not damage because it doesn’t receive damage. We did that Iron Man too to work out the way it would react to battle conditions.”
The typeface for the titles was a custom font based on Bank Gothic. “I wanted to somehow get some sense or hints from the original comic books,” says Viola. “There are certain things in the font that tie into the original Avengers logo, just small hints.” The moving titles were also created with stereo very much in mind. “For instance,” says Viola, “there’s a shot of Hawk-Eye’s bow where you can see the arrow coming out of the frame. Everything was established to be stereo. We started with stereo rigs and as we did the camera animations – some of it we would shoot live and run it through a 3D tracker and bring that camera data into Maya, so we got a nicer more realistic feel. It helped some of the macro shots feel not too CG.”
Method worked to a temp track of music from X-Men: First Class. Says Viola: “We thought that was really appropriate and we used that for all our initial motion tests and versioning – on this film and on Captain America actually. In the end the scoring session for the main on end titles came fairly late in the process and I believe Alan Silvestri actually scored to the animation.”
The final title also appropriate connects with the film’s ending tease. “We did a little back and forth with DD for the space teaser shot,” explains Viola. “The camera pulls out of an area of extreme distressing on Iron Man’s chest, pulls across to reveal the final title as we’re looking towards the glowing chest piece on Iron Man. We pan across that, it flares out to reveal the moon and now we’re in space and it goes up the floating staircase.”
“The other thing is,” he adds, “was that originally we didn’t include any of the S.H.I.E.L.D team, but then we added those in – the Black Widow belt buckle, and the gun holster for Nick Fury. Joss was very excited to get his title on top of Black Widow!”
The hero shot
Here’s how visual effects supervisor Janek Sirrs made ‘that’ New York battle one-shot possible – an aerial scene that follows the action around New York and features each of the Avengers working together
That shot was definitely a challenge for everybody. Joss always knew conceptually what he needed – The Avengers working as a team – but the trick was how to illustrate that idea without it coming across as a series of simple vignettes for each of the characters, linked together by some unmotivated camera work. And the problem was further complicated by the differing abilities of the characters – some could fly, and traverse great distances, whereas others would essentially be stuck in a single spot.
Watch The Avengers work together.
Designing the entire shot was really an iterative process – we’d come up with ideas for the beats for each character, and then rough them together in crude previs form to see if the overall balance and feeling was correct. And slowly…. and I do mean slowly…. the shot came together. One of the hardest aspects was actually keeping the energy level up throughout the course of the shot – as soon as the camera slowed down, so did the action. So the trick was to always keep the camera moving, and fill any quieter camera moments with other action to compensate. And to do this in manner that felt like the camera happened to be passing by events as they occurred, rather than deliberately seeking them out.
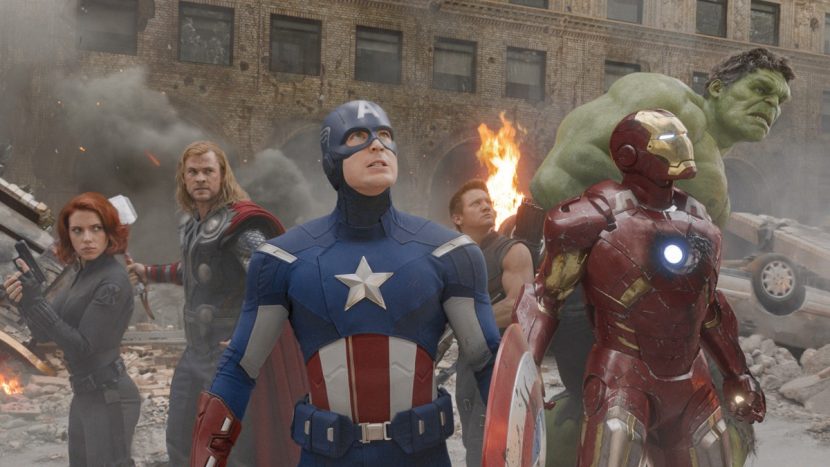
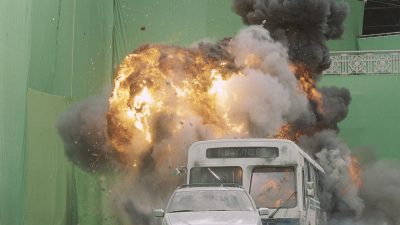
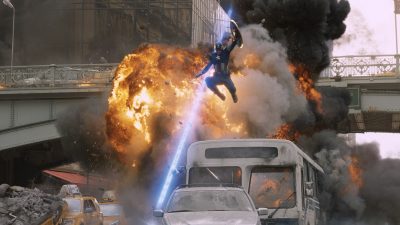
In the completed shot, the environment is 100% from start to end, created from extensive stills shoots of NY, and some of our set builds in Albuquerque. Given the speed and path of the (virtual) camera, there’s no way you could actually film any useful motion picture plate material in NY – it’s too fast for any sort of crane setup, and too low for something like a helicopter. Not to mention that shooting in NY is incredibly restrictive, especially in such busy areas as Park Ave. and around Grand Central.
 A dedicated stills team shot for 6 weeks on location in NY to gather all the photographic textures needed to recreate the environments seen in the all-in-one shot (and during the rest of battle at the end of the movie).
Panoramic stills were shot from tripods on the ground, from building rooftops and windows, and from 120′ condor cranes stationed every 50′ along the hero streets, such that we ended up with close to blanket coverage of all the key locations we thought we would need to support the action. From there, these stills were projected onto building geometry to create the basic streets, and then these streets populated with a huge library of digital cars, fleeing people, destruction, smoke to bring them all to life.
There are 3 only live action components in there – Black Widow, Hawkeye, and Thor. All of these were shot against blue screen on either partial set pieces (that were ultimately replaced), or on forms that represent the objects/creatures that see in the final shot. For example, Scarlett Johansson is actually riding on the back of a stunt man on a motion base system so that we could get not only banking/flying motion but also reactions from the pilot creature that she’s supposed to ‘riding’.
The all-in-one shot was one of the first to be started, and probably the last to be delivered. Even though we’d mapped things out as much as possible with previs, there was still a great deal of discovery and adjustment made as the shot progressed. As one area improved, it would highlight an issue, or an imbalance elsewhere that would have to be addressed. And toward the end of the show, multiple teams were all working around the clock on the various sections in tandem. I’m still debating whether Joss is a sadist, or a masochist, or some combination of the two at this point!
Avengers workflow
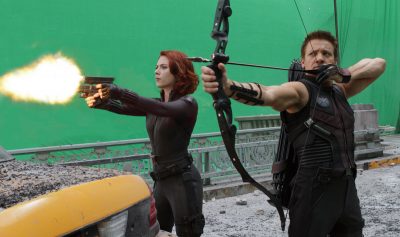
Finally, Sirrs outlines the workflow used on set and in post to manage the production
I think we took a fairly standard approach to gathering all on the on-set data that we needed. Camera information – focal length, tilt, height, etc. – was collected manually, and we shot HDR lighting spheres, and reference material (maquettes, swatches, etc.) on the motion picture cameras for each and every distinct lighting setup.
From the outset, we decided to record data for every shot, regardless of whether it was intended to have VFX work or not, which was a wise choice given that nearly every shot in the movie ended up have some VFX components.
Key sets/locations were LIDAR’d as we knew in advance that we’d either have to be recreating and/or extending them digitally. To accompany the scans, we also shot blanket coverage HDR textures, and panoramic HDR spheres of every set/location, using Canon stills camera. Even for the lesser sets/locations, we always made sure that we had enough stills coverage that we could derive the geometry via photogrammetry. The stills also provided the backgrounds for many shots that were conceived after principal photography was completed.
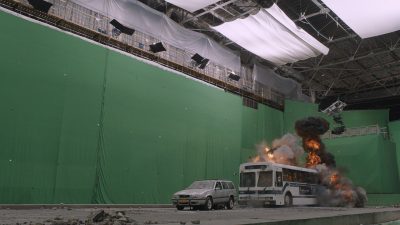
Principal photography was captured primarily with the ARRI ALEXA (as ARRI RAW files), but we also used 35mm cameras for high speed material, and Canon 5D MkIIs for crash camera work (as digital Eyemos, if you will).
Watch behind the scenes of shooting on the Helicarrier bridge.
Ultimately, these varying formats were all converted/scanned to 10-bit DPX files for delivery to the vendors so that we had a single standardized format, and the vendors delivered that same format back to us. With so many vendors working on shots right next to one another, it was critical that the material cut together seamlessly, and DPX format seemed like the lowest common denominator at the time. For future projects though, I’d probably try to standardize around EXR files.
We used one facility (Efilm) to perform all the debayering and file conversion work so that we could could guarantee 100% consistency in the treatment of the material, rather than leaving it up to the individual vendors. In pre-production, we actually tested a bunch of commercially available debayering solutions and got a rather frightening variety of results in terms of resolution and color fringing.
All the files delivered to vendors were also pre-timed with the collaboration of the DP, and the show’s colorist, so that everyone could feel confident about composite balance choices, etc. This meant a little bit of extra effort during principal and the early stages of post, but really paid off toward the end of the show when things were at their most hectic – completed shots largely just dropped into the final DI session with only minimal tweaking.
All images and clips copyright © 2012 Marvel Studios.

great article! really cool to see how some of the sweetest shots of the movie came together!
“Stephen Lawes puts A-113 in all of his screens he’s done – I think it’s the room where he went to school. Apparently a lot of directors and people from that class have put that in their films.”
A-113…that’s the Pixar number. Seem to remember it being the room number at Disney where Lasseter, Bird, etc worked. Its in justabout every Pixar movie along with John Ratzenberger
[…] Interview with Jayse discussing the technical aspects of The Avengers screen design at fxguide. […]
[…] Link: http://www.fxguide.com/featured/vfx-roll-call-for-the-avengers/ […]
[…] For a good look at the immense number of computer generated effects, check out this article from FxGuide. In The Avengers there are “approximately” 2,200 effects shots in the film, with many […]
[…] VFX roll call for The Avengers (updated) […]
[…] Viola says,“They’re all very unique personalities and character traits and have unique powers. So it’s a story about group chemistry and how they are forced to work together. They wanted to really focus on that and the real stakes was a big theme for Joss.” (Quote courtesy of fxguide.com) […]
[…] In your interview for FxGuide you mentioned that this was your first production done in stereo. This makes it even more important […]