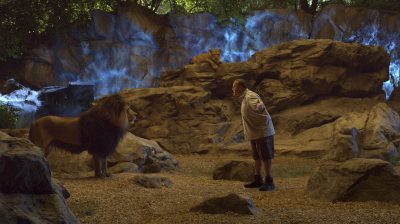
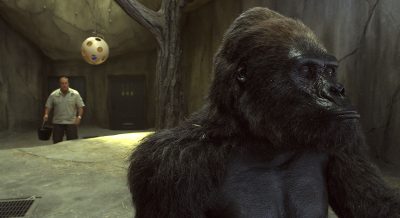
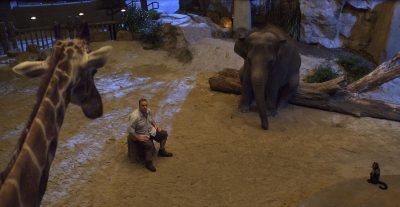
Imageworks visual effects supervisor Pete Travers delves into the challenging world of working with real animals and creating CG ones for Frank Coraci’s Zookeeper. In particular, Travers talks about the film’s signature zoo meeting featuring grizzly bears and other zoo inhabitants.
fxg: In this film you’ve created animals digitally and also enabled talking ones, but it also seems like a lot of the animals were there in the original plates. What kind of grounding does that give you from a visual effects point of view?
Travers: Well, that’s everything really. The grounding is a great word for it. In CG we’re very good at integrating something into a plate, but having to start from scratch can be challenging. In context on Zookeeper, we would take a look at the animals we were trying to shoot and then we would say, ‘What about CG grizzly bears, what about a CG lion?’. The conclusion almost always from the filmmakers and myself was that there was incredible value in having the animal be there doing the performance. It required a lot of patience on set – one of the most challenging I’ve ever been on. They weren’t little dogs or cats – the grizzly bear was 1,300 pounds. There were a number of animals there that could kill you!
fxg: So how did you prepare for that in the meeting scene, given there were so many animals?
Travers: Each and every animal had its own trainer or set of trainers. There was one overall master trainer Mark Forbes, who wrangled the whole thing. The bear trainer Doug Seus was the one who originally had Bart the Bear, who died a few years ago, and he has a number of them on his ranch in Utah. It was an eye-opener for me. They were really large animals and we couldn’t necessarily get them to do things that we had hoped they could do on a dime. That being said, the preparation of the movie was extremely important. When we were doing the previs, we tried to understand the animals and how they related to each other. For example, the grizzly bears couldn’t be by themselves with each other. And if they were, the only thing you could get them to do was wrestle. And of course we couldn’t shoot any of the other animals with the bears.
We had to figure out the order of shooting too. If the bears came in and smelt the pee of another animal they would freak out – understandably – because that’s what they are, predators. So for the animal meeting, I had this huge grid of the order by which we shot. You would ordinarily shoot a human-based movie by bringing in the actors, film the scene, the actors go away, bring in the doubles and then you start setting up the camera and the lighting and once you’ve got everything right you bring the actors back in and you do that shot. But for the animals, because we had limited time during the day – the animals are all essentially not fed until the time of shooting, so that they will be feeding while we’re shooting to get them to perform. So you’ve got a narrow window.
 fxg: What did the actual shoot involve?
Travers: Well, for example, we had to shoot multiple shots of the bears in the animal meeting at the same time. So there would be four cameras pointed at the bears in their spot to let us capture front on, the two shot, the wide shot, the motion control shot coming over the giraffe. So we were moving in and out of shots – almost a strange way of shooting, because once you’ve fed the bears, they’re done. They’re done until tomorrow. But if we had made a decision to not use the grizzly bears at all and go with CG bears, there was no way it would have looked as good. The performances and nuances of the bears we used was amazing.
fxg: How did you decide what should be real and what would be CG?
Travers: In the end, we did do probably more CG animals as full CG than normal talking animal movies. There weren’t too many fully CG animals, but I mean we did more full CG muzzle replacements rather than projection. When you’re doing a projection method, you’re taking something that’s got baked-in lighting and distorting it. If you change that angle of fur just a little bit, you’re not going to get that specular ride down the fur. But we really wanted to make that read on film, especially for the bears who have really dense fur on their muzzles.
Another reason for going with fully CG head replacements was that bears’ mouths are so flexible – they can do so much with their muzzle – much more so than a lion. A bear in the wild can make an ‘Oooo’ shape with it’s mouth, whereas a lion can’t. A lion’s mouth is made to open up and bite and kill something, but a bear can grab things with its lower lip. At first we thought that would be something that would hinder us, but it turns out that the flexibility helped. With all our animals, we wanted to make sure that the face shapes we did use stayed in the confines of what a real animal could do, to an extent. The bears and the monkey gave us the full capability because their mouths are very flexible.
fxg: Can you take me through the steps you took in actually modeling and animating a bear muzzle?
Travers: The first step was data acquisition. We had to build and get some kind of representation as a starting point for the shape of the bear’s mouth. This was tricky -put it this way – what’s a neutral pose for a grizzly bear? But we still did a scanning method, not a normal cyber-scan because they wouldn’t sit still. It was more of a photogrammetry method. We take photos that are sync’ed that are a certain distance apart and then from the differentiation of those we build our 3D data. If you add CG fur you won’t get exactly what you want – you’re just getting the outer edge of the fur surface. You have to take that in spirit and shrink it in to the appropriate spot of where the skin would actually be, because we’re rendering fur with a certain thickness.
 We then build our models as best we can. Except for the animals that are fully CG like the ostrich and the frog, we would build it all the way down to the base of the neck, just above the shoulders. So we had fully CG renderable heads of all of the animals. Then we build the internals of the mouth, texture mapping and rendering it. You’ve got to get into a lot of CG details there like sub-surface scattering on the tongue, especially when say the sun hits the bear’s tongue and gums.
Also, grizzly bears are very messy animals and there’s a lot of saliva in their mouths and stuff on their fur. They’re not perfectly clean so we had to build that in. There’s a scene where the bears are teaching Griffin how to walk. There’s a number of shots in there where you’re cutting to a live action bear that’s not talking, so we weren’t replacing that muzzle. Then it would cut back to a bear with a CG muzzle, and so our stuff had to match exactly. Which was another challenge because the bears were moulting, so they even looked different throughout the movie.
So we have our muzzle, and then we get our fur and comb that and render that. Probably the hardest part of all of this is tracking. It’s not like an ordinary match move. Tracking onto a surface like a head is particularly hard because a bear’s head has all these moving parts. Where’s the rigid track start? Do you track the eyes? The jaws? It was subjective where to start, but the guys did an amazing job so when we replace our animation on top of that we could trust that our CG would blend into the live action animal. If the real bear is bending and moving its mouth, you have to track that in. We call it a soft track as opposed to a hard track (which would be tracking the skull).
So we can then replace the muzzle using a projection method or a full CG method. We use the projection method around the perimeter – just imagine around past the muzzle of the bear there was about an inch band around the bear. That would be where we would blend from our CG bear to the live action animal.
Two of the things that came up watching other talking animal movies were, one, literally the cinematography and how they shoot these animals. We wanted it to feel like the rest of the movie, as if we were just shooting human beins, without being really quick lock-offs for the humans.
And, two, the tricky nature of talking animal stuff is that you’ve got an animal doing one thing and a person doing another thing. They are two different performances and you have to merge them together and make a new performance. In order to do that, we wanted to shoot the ADR of the actors playing the animals first. We recorded their voices and shot them on video. So then we had that video and we could use that as reference for shooting the animal. When it came down to the bear turning its head left or right, you want that general head turn to match whatever the actor did. If it’s off just a second, it’s going to look like the performances aren’t matching. Once we got the performances of the animals, and if their performance didn’t match with the voice actor, we would go back and record with the actors on video.
When you’re shooting animals for a talking animals movie, you are kind of shooting like a documentary. You’re basically pointing the camera in simple terms and letting the camera roll for a minute or two to get what you need as you’re trying to get the performance of the animals. We then had some back and forth with the editor about which takes to use. In theory, you get your best ADR, your best video from that ADR sync’ed up, and your plate. Then we took the video of the actor and put it picture in picture into our plates, so the animators could use that and constantly gauge the performance.
 fxg: What were the main tools you would use for the animation?
Travers: Primarily we’re animating in Maya and rendering in RenderMan. The tracking and projection methods use our proprietary tools. The rigs that we used for our bears were a lot more curve-driven – a lot more arbitrary than we would typically do for a human being, because their mouths were so flexible. It was best to add a lot of curves and the animators could pull it and tug the upper and lower lips any way they wanted.
For the fur, it depends on what you’re doing. The fur on the monkey is very different from the bear. We used RenderMan on Zookeeper, but all renderers have some kind of curve primitive that you’re using. The real trick is not the hair itself, but how the body of hair works together, how it animates and how it lights at a micro-level. Going into our next generation renderer we’re using, which is Arnold, you get a lot more advantages and you can do a lot more things.
fxg: Would you be tweaking other parts of the face in order to get the right performance?
Travers: Well, if you smile right now, the back of your head moves ever so slightly. This is something I learned on Watchmen doing Dr. Manhattan. I need to see that motion propagate other movement in the face, otherwise a CG creature doesn’t work for me. If a bear is panting, you should see that movement way back on the bear past its eyes, almost to the point of its ears. So in a projection method you’re limited to how much you can move things before the image starts to break down, which is why we went with all CG quite a lot. It gives you that capability to really hit those facial shapes, and sometimes we had to control eye movement and lower the brow.
