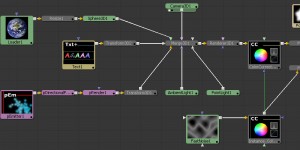
After more than a year of development, Eyeon Software’s Fusion 5 began shipping over the last several weeks. The new version boasts numerous improvements, the highlight of which is a new 3D compositing environment in the procedural workflow. In this week’s fxpodcast we speak with Isaac Guenard, Senior Product Manager for Eyeon, about the new features in the software and how they have been received by the users.
Fusion 5 – with the word “Digital” now dropped from the product name – was first shown publicly in 2004 and has received a good reaction from effects artists who have had a chance to see it in person. There are some dramatic changes in the new version….from the underlying file architecture to the new 3D compositor to new masking tools.
In the coming months, we’ll be taking a more detailed look at this release of software, but in the meantime here is an overview of the major new features.

3D Compositing
2D images can now be applied to planes and moved in 3D space. Multiple 3D objects are then merged via the 3DMerge node and fed into a 3DRender node — converting the pipeline back into a 2D image. Some of the key features of the 3D support in Fusion 5 are:
- 3D Particle System
- Lights: Ambient, Point, Directional, Spotlight (can cast shadows)
- Camera Import from Max, XSI, Maya, and Lightwave
- FBX support for camera, lights, and geometry/texture data
Masks
Masks are another area which saw major changes in the software. The masks are now nodes in the schematic like other nodes — though their output is a single channel and not RGBA. Each mask node also has a mask input so that multiple mask nodes can be combined before feeding into the mask input on an RGBA tool. In addition to the new way masks are handled in Fusion 5 workflow, artists now have access to double polyline masking so that each shape can have a different inner and outer softness. What is nice about the way these are implemented in Fusion 5 is that initially the inner and outer softness lines are linked — as well as centered on top of the main mask spline (aka no softness applied). This way, if you only want softness on one side of the mask in some areas, you simply drag out from the main mask on one side and you have one sided softness for that point. In other apps, I’ve found that starting out working on a shape with identical softness on each side of the spline is more problematic — you end up having to modify way more points than you have to do with the way this is handled in Fusion. You can also add points on one softness curve without having to add a matching point on the other softness curve.
Bspline mask types are also available — as is the ability to switch back and forth on the fly between bspline, polyline, and bezier mask types. The mask maintains its shape when doing so (within the constraints of the type of mask).
ASCII File Format
Composition files (formerly known as “flow” files) are now ASCII-based instead of binary files. This allows facilities to access data within the files via internal or external scripting mechanisms. For large facilities, this is a big step forward. That being said, a serious downfall of this is that it does break compatibility with previous versions — you are not able to load pre-Fusion 5 files into the current release. So keep your old/current version of Fusion around…you’ll need it to access these older files. It would be nice to see eyeon or an enterprising third party create a translator for these older binary files, because you never know when you’ll need to access an older setup. It would also be useful for compositors who have built up an arsenal of custom task flows for various operations.
Instance Tools
There are now “instance tools” within compositions, allowing you to create a copy of a node and have this copy reflect all changes you make to the original node. Consider creating a color correction node (parent) and wanting to apply this to a different image. Create an instance of the parent node and attach the second image to this instance node. Now when you adjust the color values of “parent”, changes are reflected in the instance. Furthermore, you can unlink certain values/sliders in the instance node from the parent. So if you wanted to apply RGB Master Gain a bit differently in the instance, you could deinstance this value and change gain independently — but still have all the other values linked.
Other Changes
OpenEXR support has been expanded to support multi-channel files.
There is a new “white balance” tool, which allows the user to select an area of pixels in an image which should be neutral and have the software auto color correct the image.
You can quickly drag the cursor from one slider to another in order to create an expression linking the two. This is very similar to the click and drag expression behavior found in After Effects.
Those familiar with Photoshop as well as Flame’s batch navigator will recognize Fusion’s new flow navigator — a small box in the corner which allows you easily maneuver around a large schematic.
Artists can connect to bins on other systems over the network instead of only on the local machine.
New vectorscope and waveform views, as well as smaller subviews which can show histograms, inspectors, navigators, or other informational views.
QuickTime Overviews
For a look at these new features in more detail, there are some teaser movies about Fusion 5. The following QuickTime movies from eyeon were created by Isaac Guenard to highlight feature changes and improvements in the new release.
