It’s hard to believe when watching this stunning Shell ’Shapeshifter’ spot with VFX from Framestore that there’s not one, but four, incredible characters inhabiting the screen. Filmed in Chile, and then finally realized with close attention to art design, environment re-creation, character animation and effects sims, the TVC presented agency J. Walter Thompson, production co MJZ London and Framestore with several significant challenges. Visual effects supervisor Russell Dodgson walks us through it.
fxg: What was Framestore’s brief for this spot?
Dodgson: The commercial’s goal was to create a cinematic chase scene in which a car is pursued by a creature representing the three biggest threats to an engine’s life; corrosion, wear and gunk. In the initial meetings director Carl Rinsch had made it clear he likes to trace character design back to some known basis before evolving into an original design. With this in mind, Corrosion began as a shrimp, Wear as a particle-based mechanical spider, and Gunk as an ape. All three of these would combine to form both the hybrid final-monster, as well as the small critter that is left at the end of the spot. From this base we then moved into concepting each character.
fxg: Can you talk about the concept work involved?
Dodgson: The first step was having our art department create creature silhouettes, trying to find the right feel for the character, before our CG Art Director Grant Walker created some concept turntables to help get everyone on the same page. These concepts were created by building up the meshes from a library of mechanical parts until a character truly emerged. Characters need names, and so now we finally had Mr. Rust, Mr. Wear, Mr. Gunk and Mr. Hybrid.
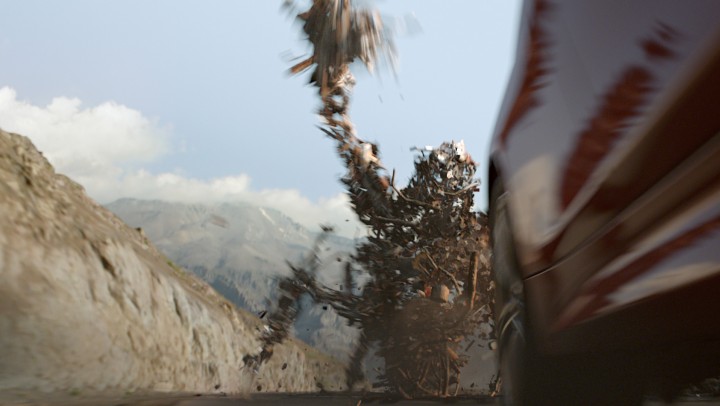
Mr. Rust would be a clumsy, ever-evolving and improving creature, formed from many small parts of rusted metal, magnetically attracted together to give a “dynamic looseness” and mass.
Mr. Wear became a corkscrew design with arms, both propelling and drilling its way through the tunnel…and giving us some issues later on.
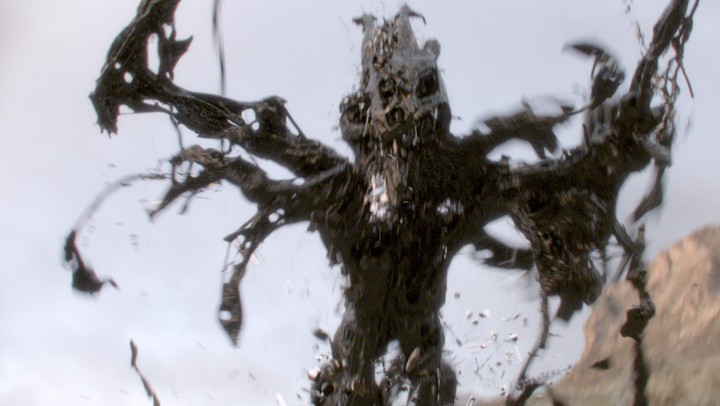
Finally there was Mr. Gunk, an elastic and sticky creature, able to both split-in-two to traverse the fastest route, and yet form one single, large creature, towering over the car. As is often the case with design processes, we really got into how the characters could move and attack, and, is also often the case, ended up with more than we could fit in the commercial.
fxg: What kind of previs was created?
Dodgson: The previs was devised upfront to sell into the client and agency the type of advert that Carl wanted to make. The creature had not yet been defined so it could never be specific previs, but it could sell the main beats, tempo and sense of urgency, plus get across both the relentlessness of the monster and the edit. It informed a lot of shot ideas that Carl wanted, and the amount of shots he was after for each sequence’s narrative, but in could never capture the final style or scale of the creature, as that was too complicated in the previs’ time frame.
fxg: Can you tell us about the shoot?
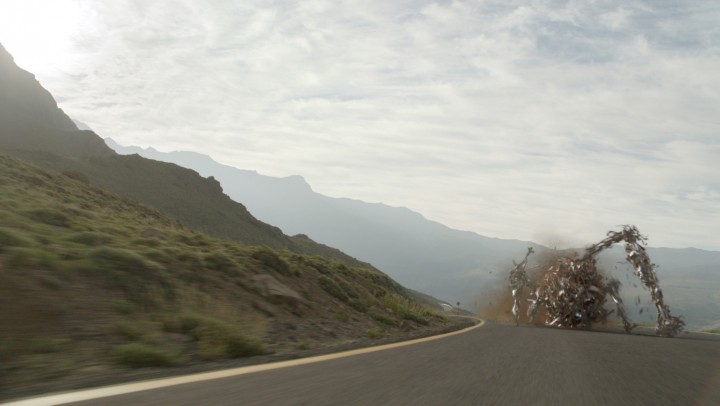
Dodgson: When we were actually on the ground in Chile the shooting conditions and time didn’t afford the luxury of shooting specific shots. Carl is extremely seasoned in filming car commercials as well as action sequences, and his approach was to combine helicopter and Russian Arm rolling simultaneously. He sat in the Russian Arm chase vehicle and directed the camera movement and driver whilst he trusted his incredibly talented heli crew to follow his brief. For the mountainside chase sequence with “Mr Rust” we had a few runs at it at different times of day so we could shoot, review and get pickups. One of the challenges was that at the time of year we were filming the sunset and sunrise is extremely fast, so getting a continuous feeling of lighting was almost impossible.
In terms of on-set practicals we opted not to shoot anything as we as we were still designing the creature. We knew that whatever we would shoot would not fit with the animated monsters’ scale and movements. Knowing how good our effects team is we knew we could rely on them for the so we concentrated on getting as much survey data as possible. At first we were intending to only shoot on a section of the winding mountain road but soon this sprawled all the way down the mountain side with extremely long takes. To prepare as much as possible we turned to reference we could use for photogrammetry. We combined aerial reference stills, drone footage and an almost-disturbing amount of ground level photo reference. By the end we had almost the entire mountain side as reference from different altitudes. When we returned we set to running these references through Photoscan and re-topologising the results so that we had pretty accurate set data for all of the positions that we filmed. This ended up being as useful as we predicted for a number of reasons:
– Due to the slightly unpredictable nature of the shoot it was impossible to get accurate, per take, lens info as both cameras were always running with zoom lenses we knew it was going to be difficult tracking work. Also when you don’t know the lens data and everything you are filming is organic it can be really hard to work out the correct focal length. Geo for lineup can be super useful when this happens.
– We had a lot of environment reconstruction and cleanup to do so this geo served us well for this for both reprojection as well as for scale reference.
– Having this geo gave us really great topology for fx interaction and animation.
For the lighting reference CG Supervisor Robert Harrington knew he couldn’t get specific reference per shot as health-and-safety had the locations on lockdown. The best option was to find areas where we could photograph as much visible sky as possible, combining these with Photoscan meshes to get the right hillside reflections. This conveniently skipped any potential spatial problems you can get with HDRIs, but also meant camping out for hours at a time, taking many, many light probes.
fxg: How did you create “Mr. Rust”?
Dodgson: Before we knew exactly how the creature was going to look and behave, we knew that we were going to have to re-create the effect of rust and corrosion.
The two main challenges we had to solve with Mr. Rust were, how he moved, and how do the components he’s built from look? The first challenge we tackled was to create a procedural solution for eroding geometry in a convincing and natural way.
We had to convincingly sell the idea of rusty metal. Because portraying rust and erosion was one of the key elements in the story, we spent a good amount time studying lots of reference of old metal and junk; paying close attention to how and where the rust forms, and where it’s most likely to cause the structure to break apart. Using Houdini, we developed a procedural way to analyse any piece of geometry and degrade it in a way that recreated the erosion that would naturally occur.
Once the concept art was signed off, then came the challenge to re-create what the concept artists gave us, as a fully rendered and animated character.
After exploring various different methods, we settled on a solution that, at its core, was driven by Houdini’s bullet solver. It was absolutely perfect as is gave us the flexibility and control of a particle system, but also maintained the real world dynamics that you’d get from an RBD sim; realistic collisions that respect the shape and mass of an object, as well as collision detection. Because the creature is so rusty, he is constantly shedding bits of rusty debris and dust. Collision detection was used to trigger the emission of these secondary elements.
Proceduralism was our ethos. The result was a robust system that would allow an artist to pull in an animation cache, the environment geometry that it’s running around in and hit render. A few hours later you would have a sequence of renders, of all the elements needed to put a shot together.
Once the system was in place, one artist was able to push out first-pass renders of 10 different shots in one day.
Creating a convincingly rusty creature wasn’t enough, he also had to interact with the environment in a natural and realistic manner. The system we developed was set up in a way to automatically detect if the creature was interacting with the road or the dirt banks on either side of it, and would then emit the right amount of dust and debris accordingly.
Houdini gave us the flexibility to do all of that. Being able to setup dependencies in a procedural manner, we ended up with 14 different stages of caching and analysis, before propagating into 4 separate renders passes, each with their own various AOV’s.
fxg: How did you create “Mr Gunk”?
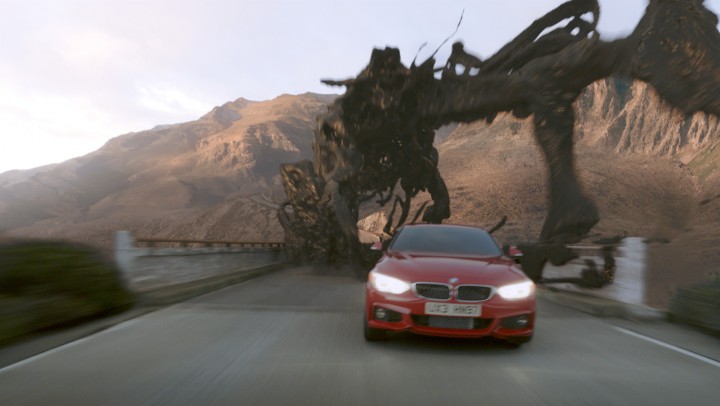
Dodgson: “Mr Gunk” posed one of the larger animation challenges for us as he had to fit three animation briefs over a short period of screen time. When he first appears he has to be able to move fast enough to keep up with and eventually catch up with the car. Following the chase he had to emerge from under the bridge and form a giant ape creature that could tower above the car, in this form he then had to be able to walk backwards along the bridge to stay above the car.
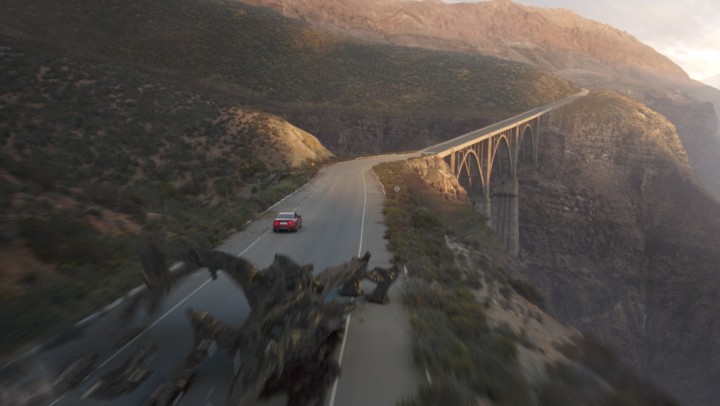
In order to achieve all of this in the time an “elastic rig” was created that would allow the animators the freedom to move him in a variety of different ways so that the different goals could be achieved. In an aerial wide shot we see the gunk creature traversing the side of the bridge in a “stretch armstrong” fashion, this rig was the same as the one used throughout the sequence. He was also rigged so he was able to split in half and then rejoin, this allowed us to achieve the shot where he appears from both sides of the bridge.
The final character was all achieved through simulation in Houdini and Mantra. To achieve the “gunk” material the character had to have a highly viscous look and feel but at the same time had to form very specific and varied shapes. This meant that his setup had to to be flexible enough to receive a wide range of animations yet appear visually similar from shot to shot. To do this the character creation process was divided into three steps.
As the result of this first stage was a mesh that rigidly matched then animation a second step was required to give the monster the feeling of a highly viscous, dynamic liquid. For that purpose an initial FlipFluids simulation was created, (this step was done per shot). The initial position of the animation served as the initial state of the FlipFluids particles, giving a pre-roll of 10 frames to the particles to settle. The viscosity property was set to a high value and a strain field was created in order to give elasticity to the fluid. The simulation was guided using a SOP solver that was updating the velocity of the particles with the velocity of the original animation, but when the particles reached a threshold distance were released. This simulation gave extra details on the surface as well as reaction to the movement and a realistic release of bits.
With the character created the next step was environment interaction, for this a second FlipFluids simulation was developed. The emission points were selected based on the proximity between the legs of the animated geometry and the environment geometry. The properties of viscosity and strain were kept from the previous simulation. The emission ran for the entire shot length. The monster’s FX mesh was bigger than the animated one which meant the emission wasn’t visible as it was always happening inside the monster.
After the generation of the polygonal lines in the first step, and the particles on the second and third, meshing the monster was the remaining challenge. It was done by creating a VDB representation of each step separately and then combining them. This approach gave Mr Gunk a scalable resolution and uniform mesh.
The monster also needed to attack the car all the time, so the effect for that was developed separately. The goal was to have “gunk trunks” that the monster fires down into the car’s path. Due to shifting animations what was needed was directional trunks that could be easily modified and flexible in length, duration and position.
An emission zone from the monster’s animation geometry and a target zone on the bridge geometry were selected. Each point on the emission zone was converted to particles in order to get the id and age attributes. After that, a look-up for the closest point in the target zone was carried out, its position was stored as an auxiliary attribute on the particles. Having an initial position, a target position, an id and an age, the remaining task was to create a geometry from that. Using attribute Wrangle SOPS, a transition line was created. This master line was copied several times applying different noises giving the feeling of evolving dense fluid. The output of this was polygonal lines that were connecting the monster and the bridge.
In a similar way to the creation of the mesh of the monster, the output lines of the system described were meshed together using a VDB representation. This process was repeated for each trunk just changing the trigger frame, emission and target zones and the duration of the effect.
fxg: Can you talk about establishing the right movement and animation for the monster?
Dodgson: Working out how the monster moves in all its different incarnations was definitely one of the biggest challenges. We really wanted to have distinct characteristics for the different materials that the monster represented, we also wanted to create something with a slightly different twist.
At first we very much discussed each creature and it’s “motivation”. When we first see him he is dormant on the back of a truck – he has slowly been corroding and digesting. He is disturbed by the BMW, “his next victim”, and decides to give chase. Our initial idea for this would be that, in his Mr. Rust form, he would be very clumsy and barely able to keep up, but over time he would get into his stride and start to catch up. In the screen time we had to tell this story it was difficult to get that much progression but we worked really hard to give the creature an cumbersome yet threatening quality. One of the neatest aspects of the animation was that the rig allowed joints to slide across the creatures surface, this meant when he fell or lost control we could do some interesting things.
Modeling and rigging
From character rigger Kimon Matara
To manage the sheer number of rig permutations, we wrote up a whole new pipeline built around PyMEL and pervasive Python class inheritance and overrides. This worked a little bit like ‘render layers’, but for automation.
To create limbs that could slide across the body and work in all orientations, we turned to Maya’s oft-neglected ‘underworld curves’. Various other types of NURBS attachments enabled WYSIWYG keyframing on top of complex procedural deformer effects.
The project was interesting because it reversed the conventional sequence of model > rig > animate. The animators made a lot of calls on the character’s configuration on a shot-by-shot basis. To accommodate this we scripted up some dynamic proxy geometry generation. This allowed us to throw character variants together, and start to animate, before changes could ripple back to the modelling asset.
The tunnel section turned out to be one of the toughest things to get across clearly. Our design was part spider part giant corkscrew and in the original previs there were just enough shots to get across the design without compromising the action. In the final edit the tunnel sequence got massively reduced and ended being 2 shots, because of this we had very little time to establish the creature and what he is doing. In the end we opted for a reverse shot of it travelling away from us, which although somewhat abstract, hopefully conveys the concept of “wear”. We also slightly made a rod for own back by making the spider’s limbs too long in the concept. When we came to animating him in the tunnel it was extremely hard to fit his movements in without compromising readability.
For the gunk creature we knew the later part would be “giant gunk ape” but for the beginning as it traverses the bridge we wanted something very different. In the end the brief we came up with was similar to one of those gooey toys you throw at the wall and it then travels down it by sticking as it falls.
The animation team worked wonders with the characters and created a lot of iterations as we tried to hone in on the right animation style.
fxg: Can you tell us about making the tunnel?
Dodgson: We had offered up a CG tunnel after the real one proved too restrictive on the shoot. This gave many benefits (no multiple-shadow interaction issues, no set replicating, not locked into framing issues with an as-yet unfinalized monster, etc.) versus only the one down side (making it all).
In many ways though, the real tunnel was pretty straightforward – it didn’t have tiles, just rock, road, cement and some hanging light fittings that were art-directed away. The only pesky question was how could it be lit. The real one had sodium lights, but sodium’s spectral power distribution is a sometimes-unpleasant thing.
Undecided light colours combined with 30+ million polys (…without a monster) and lots of raytraced lights meant one thing: work it out in comp. Going on the basis that each light-type would have its own general temperature, we rendered out each group as a separate pass, letting us re-colour each light group in Nuke, iterating through possibilities and adding the end result together. Quite a few passes yes, but look at all the node graph space we can fill up. We simulated a mashed up floor in Houdini, shared Alembic caches, did the Maya/Zbrush/Mari asset workflow and rendered it all in MtoA via ASS files. The only “thing” was matching lights between MtoA and Mantra, but that’s just a planning issue.
fxg: What were some of the other challenges you faced in creating the commercial?
Dodgson: Besides the vast amount of lighting animation, rigging, fx and rendering we also has a large amount of environment replacement and reconstruction. We also had several shots that were not supposed to be more than character insertion but due to various reasons ended up being all reprojected environments, CG car and monster. We also had to deal with the inevitable reflection issue of a live action car having a large CGI creature placed around it, in these cases we actually ended up match animating the car and then recreating it in CG.
fxg: How much of the environment was altered?
Dodgson: Almost every shot had some kind of environment alteration or was completely generated. There are some great hidden replacement shots in the first part of the add but from the point in the commercial that we enter the tunnel up to the end of the spot is almost entirely or in a very large part rebuilt, matte painted or entirely rendered. The Photoscan geometry worked wonders for environment augmentation shots and for the rest the environments we used several of the 100K pano’s that we took on set as the base for the paintings.
fxg: What was your lighting and rendering solution – especially given this happens in daylight and involves metal?
Dodgson: The monster was always Houdini/Mantra, and the environment/car were always Maya/Arnold. The general lighting route was to techgrade the plates, find the (most) appropriate HDRI and create another light source to add the sunlight that couldn’t be captured by the HDRI. These were published as settings for both Maya and Houdini. From there it was a case of “going by the numbers”, and if your lookdev follows certain principles, then things work out predictably — metal, or plastic, or mud, or…
fxg: Any final thoughts?
Dodgson: We are really excited when jobs of this scale come through the doors at Framestore as they tend to ignite a fire in the artists. One thing that really stood out was that we were very much on the same page as the director and the agency who very much gave us the room to explore and come up with what we thought looked great. The end result of this was that we never really missed the mark when presenting work and there was very little re-doing due to following the wrong aesthetic. In the end the whole experience felt very collaborative, which is always a treat and both agency and director were a pleasure to work with. Finally from a supervision perspective I couldn’t have been blessed with a better team and the work they produced was astounding.