
We recently had a chance to test drive the new Canon EPIC mount, so we headed out for a wild day of swinging and eating out – with monkeys, gorillas and wild cats.
At fxguide we have been shooting with the RED EPIC since March this year, but one piece of the jigsaw puzzle we have lusted after is the Canon mount for the EPIC. As we discussed in earlier articles, the EPIC is a great camera that lends itself to small lenses and handheld work, and combined with RED’s very high owner/operator ratio, we felt certain that the fully electronic mount would be extremely popular. But fxguide’s first love is vfx and this mount also opened up the opportunity for affordable moving medium level HDRs. With this in mind we have waited for a Canon mount since the day this idea was floated several years ago.
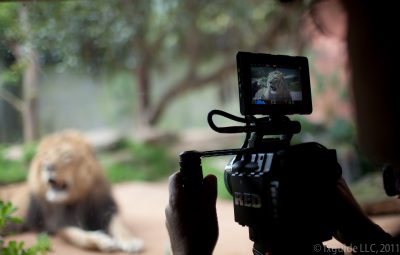 While in some respects the Canon mount is only a different way to attach a lens to a camera – in much the same way Alexa allows on board ProRes 4:4:4 and thus made life simpler for producer and DOP combined – we feel the Canon mount will just make life easier for many operators who can now afford a huge range of lenses. And there is no doubt that Canon L series lenses are magnificent glass and are, relative to PL lens, cheap.
Proof is in the footage
Of course we could show you loads of images of Canon lenses on the EPIC but we figured a better solution is to show what the camera lens combination is possible of producing. This clip below was shot all in one afternoon. The footage was processed in REDCINE-X Pro – many shots were blown up, but none were slowed down in post, any slow downs were done in camera. The selects were graded in DaVinci Resolve. Offline in FCP.
This file is heavily compressed and down res’d for the web.
Build quality
The lens mount is very well built. Period. Canon should get lessons for RED on this score alone. We have supported the EPIC on the lens tripod mount of a 70-200mm lens and reversed just as successfully the weight of the 70-200 on the EPIC – with an EPIC tripod mount. In both bases it was rock solid. This is due at least in part to an additional locking wheel that adds extra stability and confidence when attaching a lens.
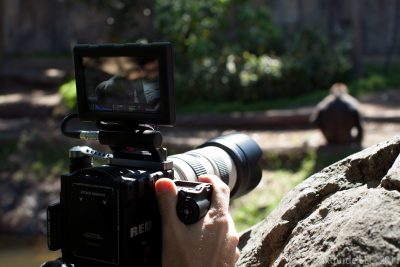 The Canon mount is also dead easy to install and field swap. It takes under a minute and involves nothing most people could not easily do. The only catch is to watch the four corner screws falling into the sensor. If you lie the camera on its back this is dangerously easy to do. The screws are no worse than any others, but perhaps some clever safety system that stops them completely coming out could be developed, and then the screws could stay with the mount. You should also develop some clever container for your unused mount, whichever is not on your camera, as the inside of the mount should not be scratched or hit. Finally, the tolerance mount to the sensor is vital so a loose mount will seriously affect your work. You need to firmly but not foolishly tighten the mount. Do not leave it finger tight – the micro differences of the back focus require a correct tightening of the mount, and the screws are not standard flathead or Philips head style.
Positive points

Once fitted you can use almost all the normal Canon lenses with confidence. The F stop is reflected on the UI screen, lenses like the 70-200 correctly image stablize, it is heavenly. Rare lenses such as shift and tilt can now be used in 5K glory at 120 fps!
A Canon 5D has a bigger sensor than the EPIC, so Canon lenses that work on a 5D will never vignette – there is a huge error margin that makes the EPIC much more like an APS-C sized 7D. For example, as we will discuss below, the 8mm Sigma fisheye that produces a full 180 circle on a 5D will be cropped off on an EPIC. Interestingly in video mode it will be clipped on a 5D as well since the video output is reduced to 1920×1080 and the video active area is smaller than the stills area on the 5D. The good news is that the Sigma 4.5 mm APS-C fisheye works perfectly, matching very closely to the 7D in height. Overall, the 7D rule of thumb is very close top to bottom and the EPIC is slightly wider across, but you could happily mentally just think 7D field of view and lens equivalents. Thus it is that a 50mm L series Canon lens looks much more like an 85mm PL mount lens, and a 200mm lens will be much closer to a 300mm PL mount (not quite).

The Canon glass is lighter and less expensive than PL equivalents, due to the combined economies of scale Canon enjoys and the brilliant Canon optical engineering. It is not a perfect match but for a lower budget or self operating EPIC owner this is a gift of vast budgetary significance.
We shot in and around many landmarks with the EPIC and perhaps it was just luck but a modestly equipped EPIC with Canon glass seemed to draw less attention to itself. Speaking as a team that has been thrown out of locations for producing an EPIC with a professional lens – this is not insignificant, and will be helpful to documentarians.
High resolution slow motion: compared to a 5D that cant really go above 1920×1080 at 30 fps, especially with the line dropping and moiré issues being amplified, having 120 or 300 fps footage in RAW with vast resolutions like 5K is breathtaking. It took some time when operating to remind ourselves we could shoot action sequences wider and crop in later without any penalty. Of course on a drama one will frame for the scene and the correct emotional response but when shooting animals as we were for this story, the first magazine we shot was all shot without any ‘error’ room. Thus as the chimps ran right and not left as we expected, we missed the shot. Later we learnt our lesson and framed wider knowing we could crop in and get the hero shot – framed just as we liked. All at 120 fps.

During one part of the shoot we have apes that were dark moving from strong afternoon light into shadow and back out, sometimes very quickly. Normally ridding the exposure would have been tough without a professional crew and even with a full crew – the animals seldom did anything twice. In this situation we simply enabled the HDRx mode and in some cases used the A track and in others we moved into the X track, all in REDCINE-X Pro. With the new version of this free app we could also easily export single frame .r3d HDRx frames during rushes review, thus building a folder of reference images that had all the original metadata, and any cropping or preliminary grading ideas as a perfect snap shot. And while the .r3d is still 5K, HDRx and RAW, a single frame as shown here is only 2.5M, which compares very favorable with a .cr2 file. In fact we found ourselves immediately wondering if we could convince Adobe to read HDRx .r3ds in Lightroom.
Negative issues
It should be noted that the lens mount is still in development – we gained an early look.
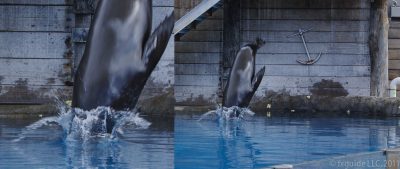
Shooting stills: When you are filming with the camera as more of a stills system, it is heavy. You really notice the extra weight, so while the mount helps this, just putting the mount on the EPIC does not make it suddenly a perfect stills camera. Much has been written about the combined stills and motion duality of the EPIC, and the Canon mount brings this into sharp relief. For example, the theory is that you will just lift stills from a vision stream, but if you are shooting motion you might reasonable shoot at 1/48 exposure for 24fps. But one would not normally shoot stills at 1/48th, rarely less than 1/125th. So if you expect to be shooting motion for final stills you will want to jack up the exposure to a much shorter exposure than you would normally use, or risk the subject’s natural motion softening the image. Similarly the volts will run out much faster than you are used to etc.
Shooting video: The problem with shooting video on the Canon lenses is the same as shooting video on a 5D – the lens gearing is designed for fast auto focus, so manual Canon focusing can be testing. Similarly, the lenses are not designed to pull focus or zoom without some breathing. For some this is a non-issue but for others PL glass will start to make sense.

At the moment there are software opportunities that are not realized. With a new version of the software about to be released it is not sensible to list them as they will be out of date faster than you can hit a refresh button. But that is the point: this camera is a work of art in progress so things such as the Canon mount and for that matter any part of the EPIC workflow is so subject to change you need to test your build very carefully to make sure it is consistent with what you expect. On our Canon camera updates are so infrequent that one develops muscle memory and you end up being able to operate it almost without looking at the controls. This comes at the price of stagnated features, but it is annoying to have to think how to operate, rather than focus just on the action in front of the camera.
HDR workflow opportunities
Typically on set one is keen to take an HDR of the scene, but this has nearly always been done as a still at a single point in space. At this one point we bracket the images in several directions and then these stills are combined into one HDR. This works well but it is not moving or dynamically changing. It neither moves from its original location nor does it update if, for example, there is a flicker fire or moving lights in the scene.
With the EPIC camera we can now film limited moving HDRs. While one would do a wide range of bracketing for a full and correct HDR, the EPIC can automatically take two such exposures and given that the files are RAW this produces a reasonable moderate HDR file.
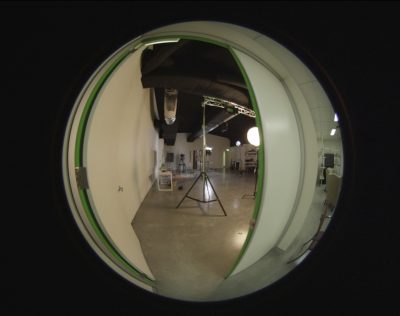 There are two methods to do this, one is by shooting with a spherical lens such as the 4.5mm Sigma. This is a great approach for shooting sky plates, for example, as it will capture horizon to horizon in real time. Multiple HDRx clips can be combined as we are currently doing on our sister site fxphd as part of fxphd’s BKD course.
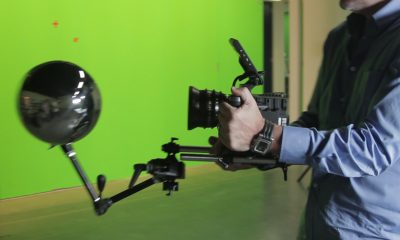 A second option is to film a mirror ball. This gets a 240-270 degree of HDR angle, but is limited by the reflective quality of the ball and the distance you can keep the ball from the rig to minimize reflections (which are inherently erroneous).
Either way you work, you need to bring the images into the post world without baked-in gamma and colorspaces. One method described in our Art of Digital Color story is to use an ACES workflow, but in a pure RED workflow such as this, where the concern is the purity of the color science, a recommend path is slightly different.
You do want to process the HDRx to a unified timebase, using something like REDCINE-X Pro this would mean using the Magic Motion option of combining the A and X channels. The next step is to export, but not in ACES. ACES is scene referred, linear light that we want, but RED Color 2 is a preferred path. ACES still has a legacy to film, and a goal to help produce movies. Here we are less concerned with film than a clean set of mathematical operations.
In ACES there are key “viewable image” transforms – the RRT and ODT. Basically they’re too complex for this purpose and impart a strong rendering intent. Because they’re very complex they’re implemented with 3d LUTS which might add noise to the image. As the HDRx is focused on light sampling, a simpler more direct color science is desirable. Don’t forget, while a standard HDR has loads of data, the HDRx – HDR sample is made with just two good bracketed RAW shots, so the cleaner the pipeline the better. RED themselves would argue that for ANY RED job, HDR or not, this is in fact a great workflow, (REDColor 2 to OpenEXR). Of course this is primarily valid on all RED projects as there is no way to place any other source into REDColor space, and RED has stated it has no real interest in opening up tools like REDCINE-X Pro to read other files and as the app is free one can see why.
For HDR moving cameras or moving clips, you can normally get the better results using more standard transforms and HDR processing on top of a REDColor2 export.
In summary
The Canon mount would seem vital to anyone who has their own camera and likes the freedom to be experimental, independent and give up no image quality. RED may have taken a few months to release the mount but the build quality shows that this is something the RED boys themselves like to use. This is not an accessory it is a vital component but it is $2000 which is not inexpensive.
We look forward to more software control of the lens and cool promised pull focus features and alike (many of which we have played with in the ‘lab’ at RED’s studios but are not yet released public betas). But if you own your own RED – buy this – it is the single best add on yet produced for the EPIC bar none.
