SIGGRAPH 2015 begins at the LA Convention centre and fxguide will have coverage all week. But before SIGGRAPH once again we attended the co-located DigiPro event.

DigiPro 2015
DigiPro has doubled in the last few years from about a hundred attendees when it started in 2012 to 275 this year. It aims to be a conference which presents production proven, peer reviewed work to “the right people – together in a focused group” and the organizers are to be praised for making the day such a strong event in just a few years.
Keynote speaker was Luca Fascione, head of rendering research at Weta Digital. See our exclusive fxguidetv video interview with Luca recorded just minutes after his keynote. Luca presented an overview of both the history of why we do research and a view of some of the issues ahead.

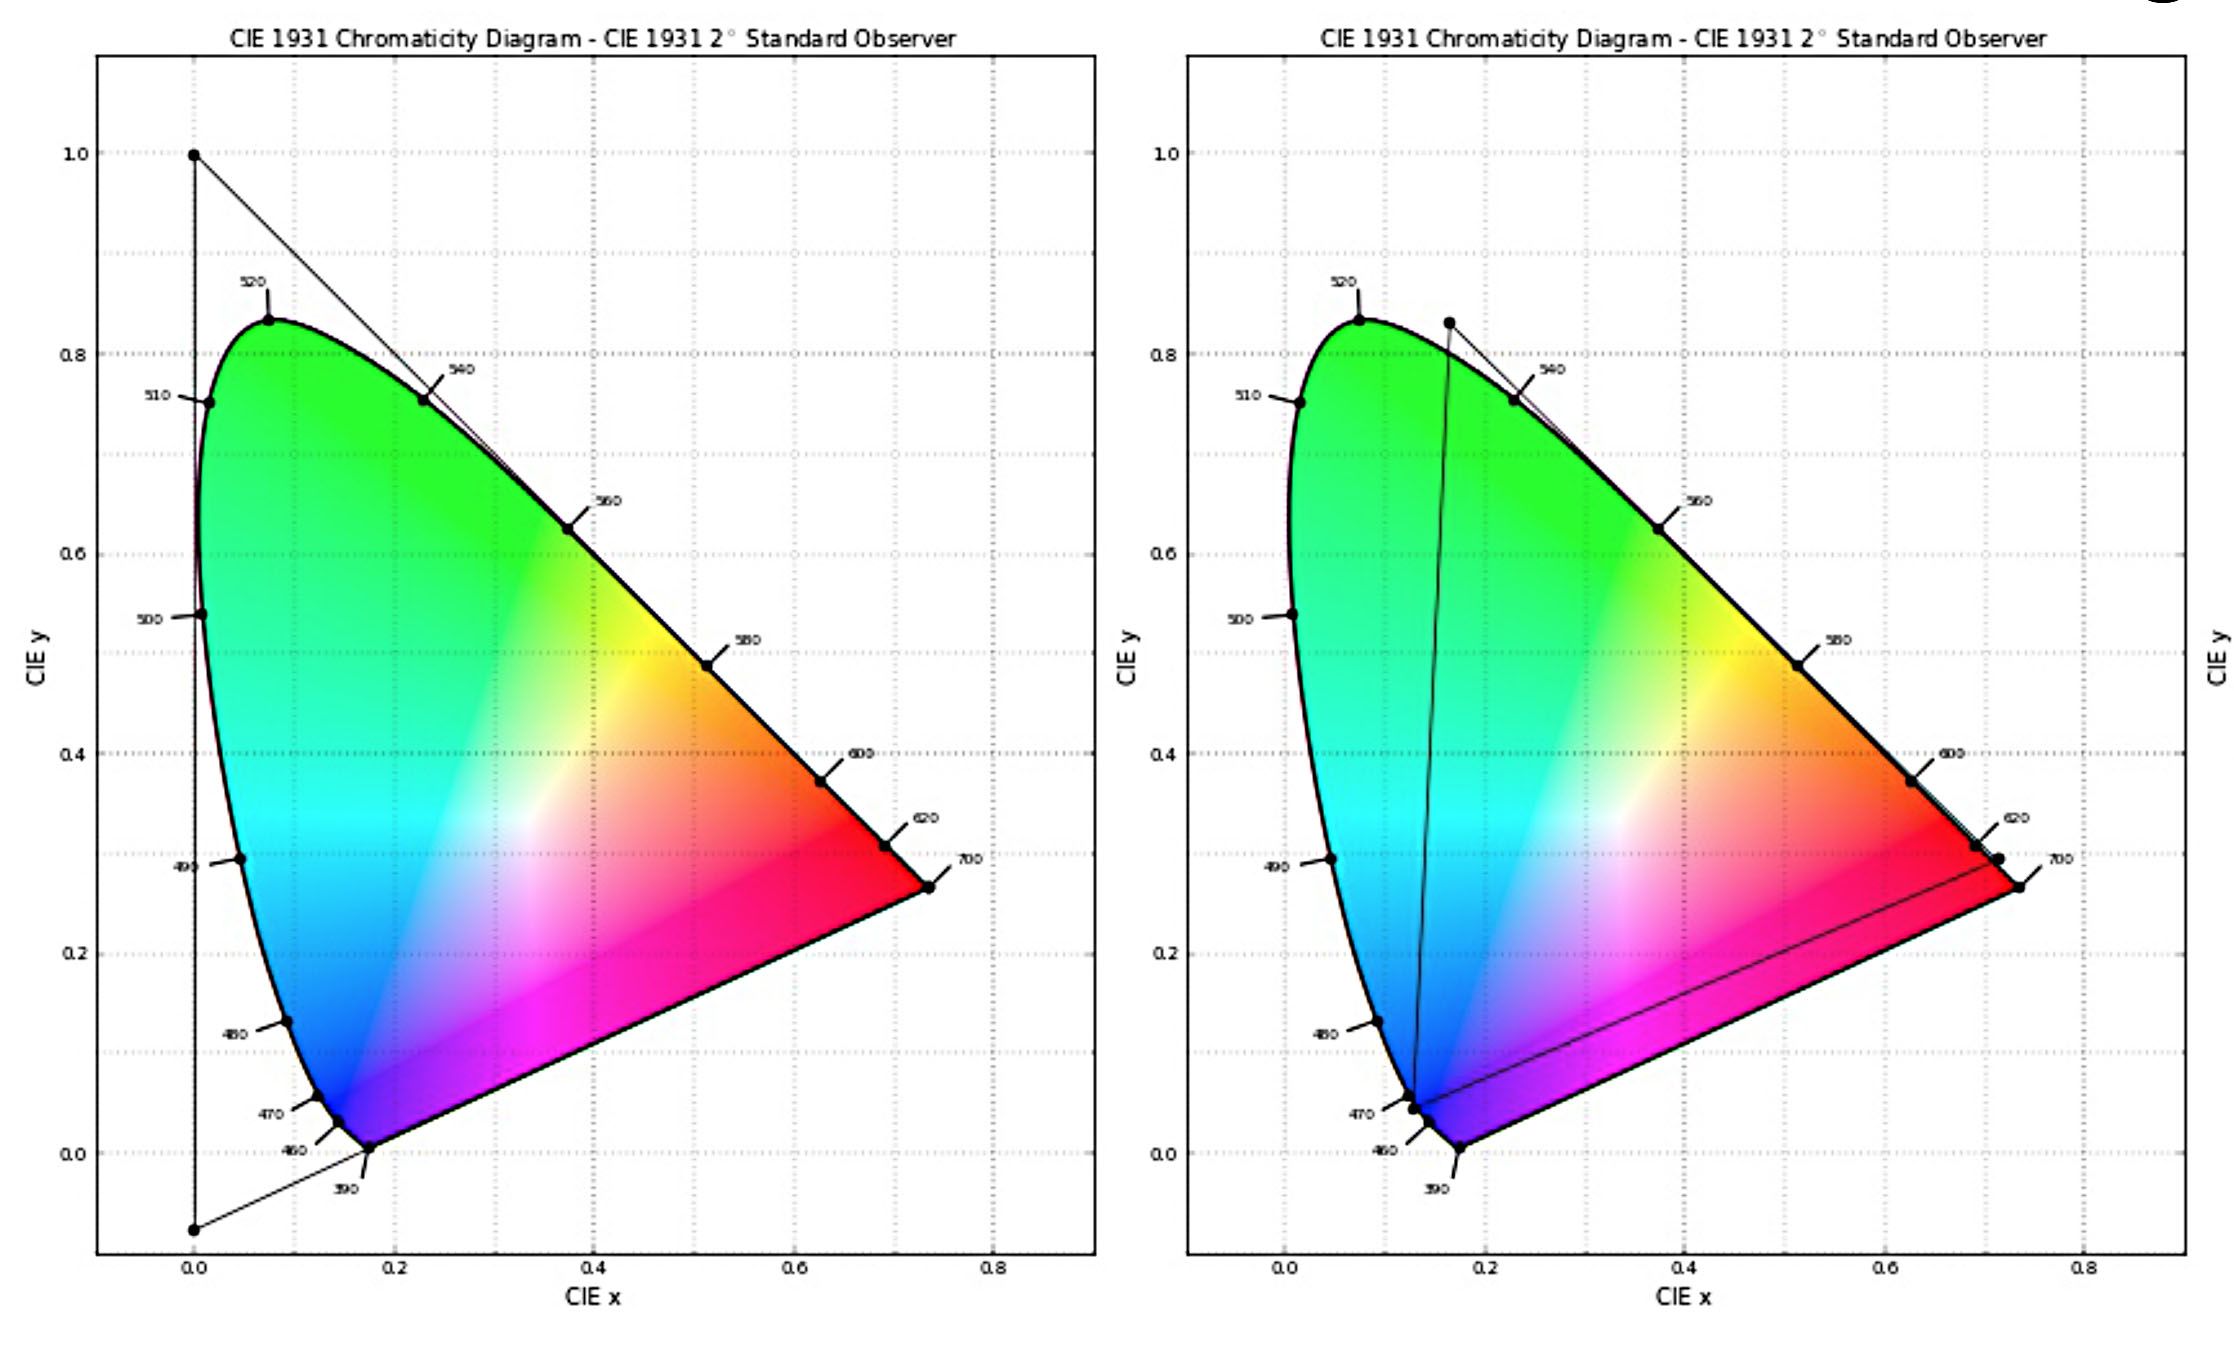
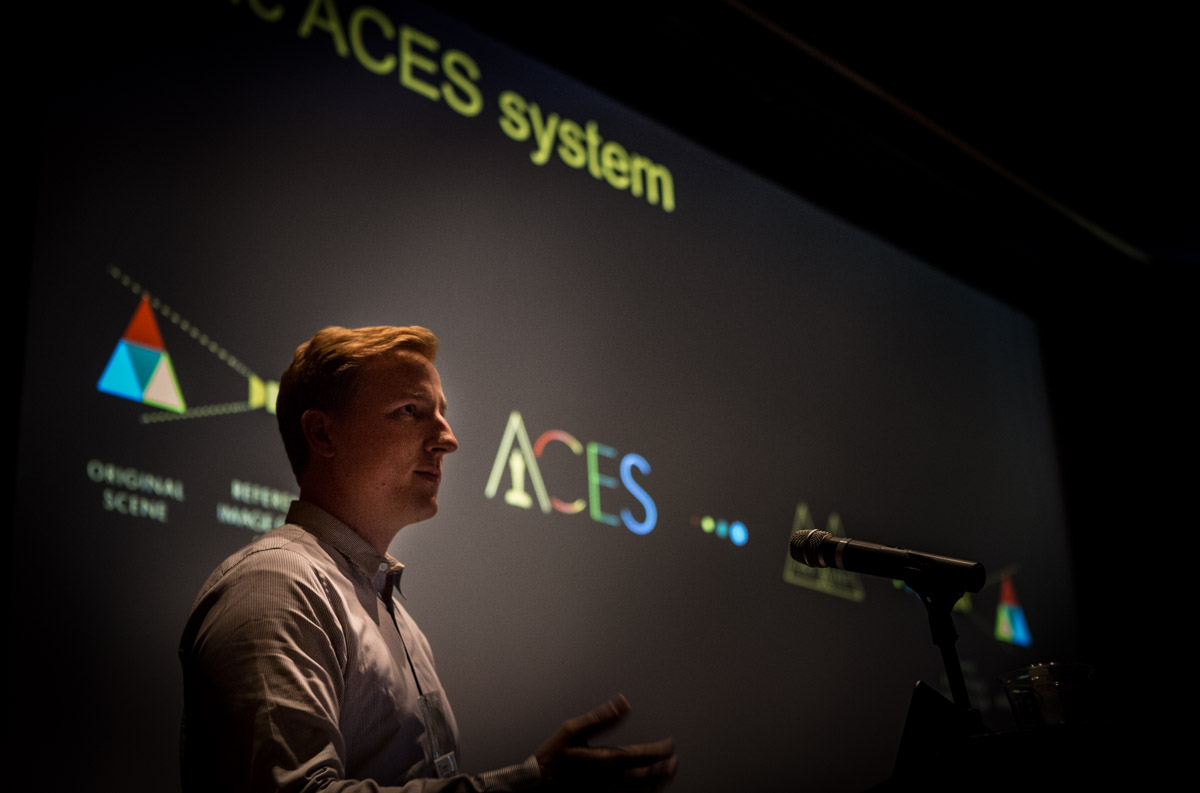
One of the really interesting talks that was unusual for DigiPro was a presentation on the new ACEScg format and workflow. Aces 1.0 just shipped not long ago as a way to address the loss of underlying standards in the film to digital transition, but this new format addresses some of the issues that intended to be worked upon. As the Colorspace is such a wide Gamut it also covers a lot of ‘impossible’ colors, this leads to it not being very artist friendly. The first ACES covers 100% of all colors but that is vastly more than what can be displayed on any monitor or by a projector.
The ACES color space is meant to define a digital color image encoding appropriate for both photographed and computer-generated images. In the flow of image data from scene capture to theatrical presentation, the
ACES data encoded imagery is meant to sit in the middle in a form suitable for creative manipulation.
The problem is that things like a color wheel or adjusting saturation just don’t seem to respond naturally with such a huge wide gamut. Enter the new ACEScg format. It is almost all of the colors in the world but not quite (only 99.98% of them(!)), but by contracting especially the Green primary and the blur just a bit – the controls on your color wheel suddenly become a lot more familiar and easier to use.
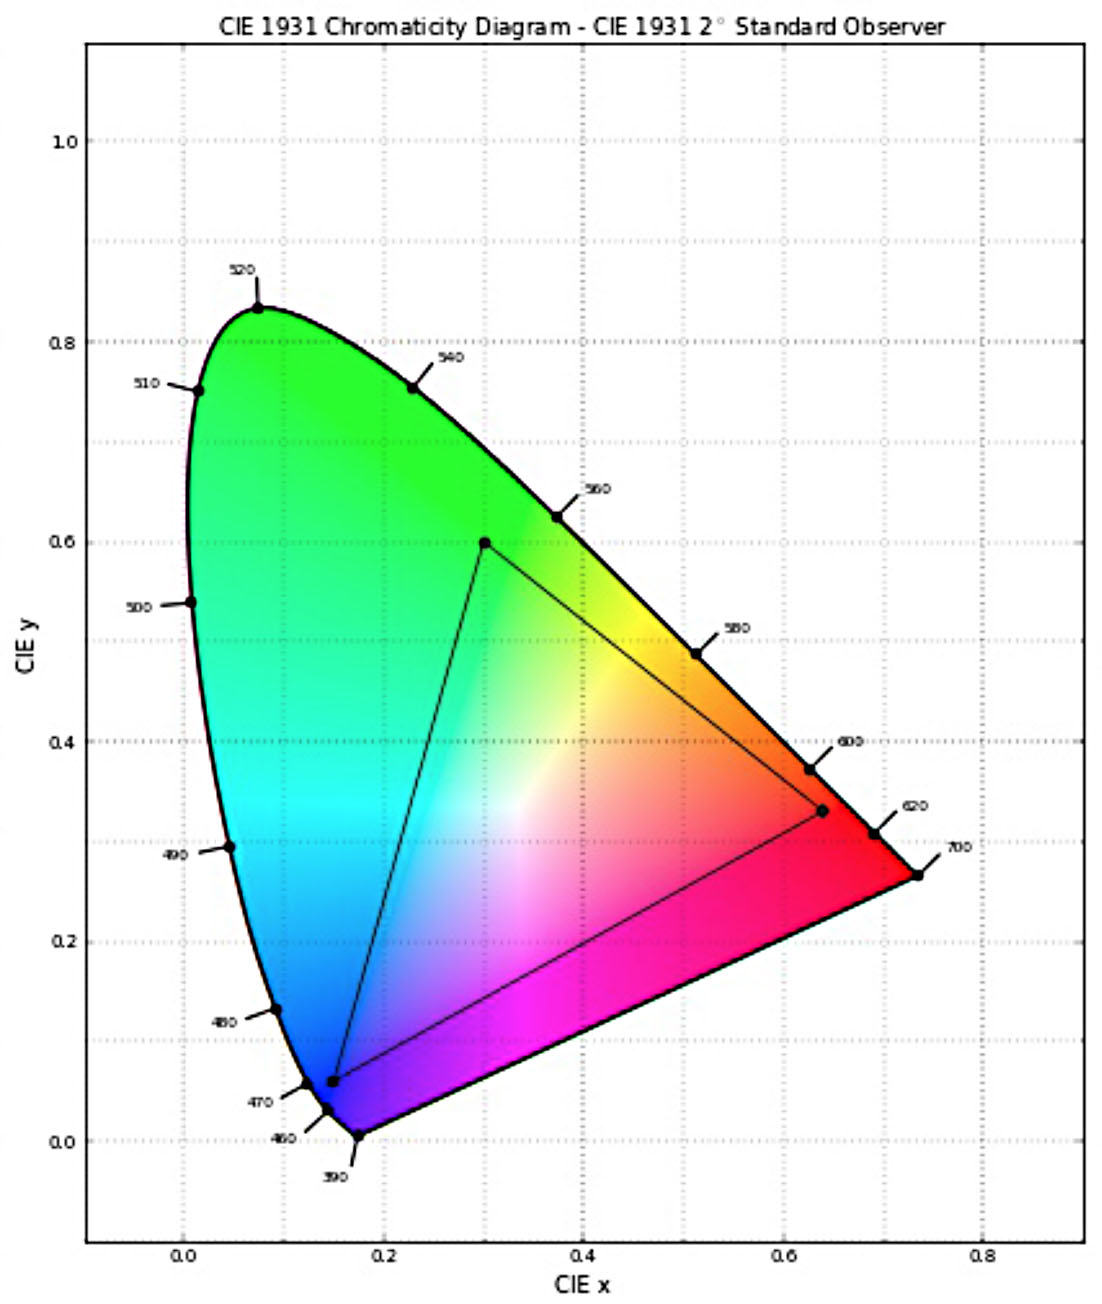
Before one gets concerned adversely, Rec 709 only handles only roughly 81% of possible colors and the new ACEScg is still significantly more than Rec 2020. It is easy to convert to the full ACES if you need, but by just reducing the gamut a small amount makes a huge difference to the real world use. In practical terms the normal ACES has been too wide for practical use, it is not artist friendly, since it is hard to interpret, primarily as it has too many imaginary colors in gamut.
Think of ACEScg like OpenEXR. We think of OpenEXR as floating point, in reality it is only half float, but everyone happily ignores this since the effective format is float and it is nearly impossible to point to real world cases where OpenEXR is not enough. Similarly one would be hard pushed to imagine any combination of color corrections that would be better if done in ACES vs. ACEScg – as it (near as damn it) preserves the full spectrum of visible HDR colors using its RGB primaries (for all effective purposes).
Color correction controls closer to artist’s expectations produce smoother transitions, in real terms ACEScg allows for the encoding of the majority of the visible spectrum and all the multi-gamut real world displays that
are needed, since most productions deliver masters for multiple classes of displays, with multiple sets of primaries.
As such, companies like MPC which adopted ACES in production have now moved to ACEScg.
2013 – The Lone Ranger, Maleficent – texturing only, experimentation in other departments
2014 – All productions using ACES for texturing, Pan, Tarzan use ACES across all departments
2015 – All moved to ACEScg for texturing, 2 large productions using ACEScg across departments
In Godzilla, for example, we heard in the main SIGGRAPH conference, the pano pipeline which captured HDRs and background plates imported all the stills from RAW stills to be titled into spherical mappings and converted the files to ACEScg as part of the stitch pipeline.

There were other excellent presentations at DigiPro, Chris Horvath, now in Google, presented what might be described as a “love letter to Tessendorf waves,” giving an excellent talk on Empirical Directional Wave Spectra for CG. This paper described with the bare minimum of actual complex maths practical applications of several emperical based directional ocean Spectra for use in Fourier synthesis of animated height field waves. While Chis is now doing robotics at Google, he has spent years building wave pipelines at some of the best VFX companies in the world and clearly both loves the subject and is able to explain complex problems in an accessible but still meaningful way. Wave spectra connects wave energy to wave frequency, or how tall are the small, medium and large wavelengths for a patch of ocean. Horvath built up from the pre-computer observational Pierson 1958 “practical methods for observing and forecasting ocean waves by means of wave spectra and statistics” to modern day digital ocean pipelines.
DreamWorks submitted an enormous number of papers this year and as such got 5 papers in the DigiPro conference. Sven Pohle started the day with Dreamworks Animation’s facial motion and deformation system which runs at about 60 fps, with direct control or direct manipulation of the face of characters with real time evaluation. Pohle discussed this with fxguide in our earlier fxpodcast.
Blendshape pipelines can be very sensitive to model changes, mapping to different character models is hard, and there is a high number of combination shapes to really make a face work. By comparison, a direct drive pipeline is less sensitive to model changes and is thus easier in terms of mapping to other characters but the system is more complex. The DreamWorks solution is a combination of these two, central to the DreamWorks solution is feature lines. The main animation or deformation lines Dreamworks uses can be thought of as mini combination motion systems, where every feature line is pose-able.
Nicholas Chaverou, one of the founders of Golaem, presented another good paper on Motion Retargeting for Crowd Simulation. Golaem is an artist orientated crowd simulation plugin for Maya. Golaem is a French company that is a bit different from Massive in that they started at the TVC not feature film level and with smaller companies, of course by comparison Massive started from a team with Weta Digital.
Along with this small company focus meant small amounts of pre-production and the need for reuse and re targeting – or simply getting motion from outside company. In Motion Builder one can of course re-target, but with large crowds it is not feasible to re-target each one individually. With the Golaem system you can convert your skeleton into a Golaem skeleton (.gsk ) – then convert your motion capture into Golaem’s motion file format, and you are good to go. This solves not only the crowd problem but it can aid in building up libraries for reuse. Tools such as their Auto-compute Skeleton mapping and other work flow tools really help make the tool useful.

Finally it is worth noting the good work DreamWorks Animation has been doing in working with Deep OpenExr 2.0 deep images especially in the area of combining say volumetrics with rigid bodies.
Deep already works very well with combining two volumetrics but there can be edge issues when combining a volumetric with a hard edged surface model. This is due to the lack of effectively anti-alising in the deep data.
With Deep Imagery the 2D image has the capacity to store multiple color values and of course deep samples
but it lacks any form of sub-pixel spatial information to resolve overlaps – so a deep sample lead to aliasing
for the hard object transparency and anti-aliasing or sub pixel coverage in the same alpha at the edge – once combined it can’t be re-separated. DreamWorks worked out a way to add sub -pixel masks (normally 8×8) one mask per deep sample (so 64 bits 0-63 :8×8). But the DreamWorks solution is to have a fixed mask 8×8 – the problem is OpenEXR is designed to store floating point numbers not masks. Bit-pattern storage is not natively stored in OpenEXR – “so we had to hack OpenExr a bit to make it work”.
The system has two special cases – all bits off and all bits on (for full coverage) – this means in reality one only really ends up having to use the data on the edges of objects. The team decided that while one could argue for variable bits ( 4×4, or higher 16 x 16) – it was just not viable to have such a variable mask format and so after experimentation settled on 8×8. The new system helps with pixel filtering, hard surface blending and matte object handling.
SIGGRAPH 2015
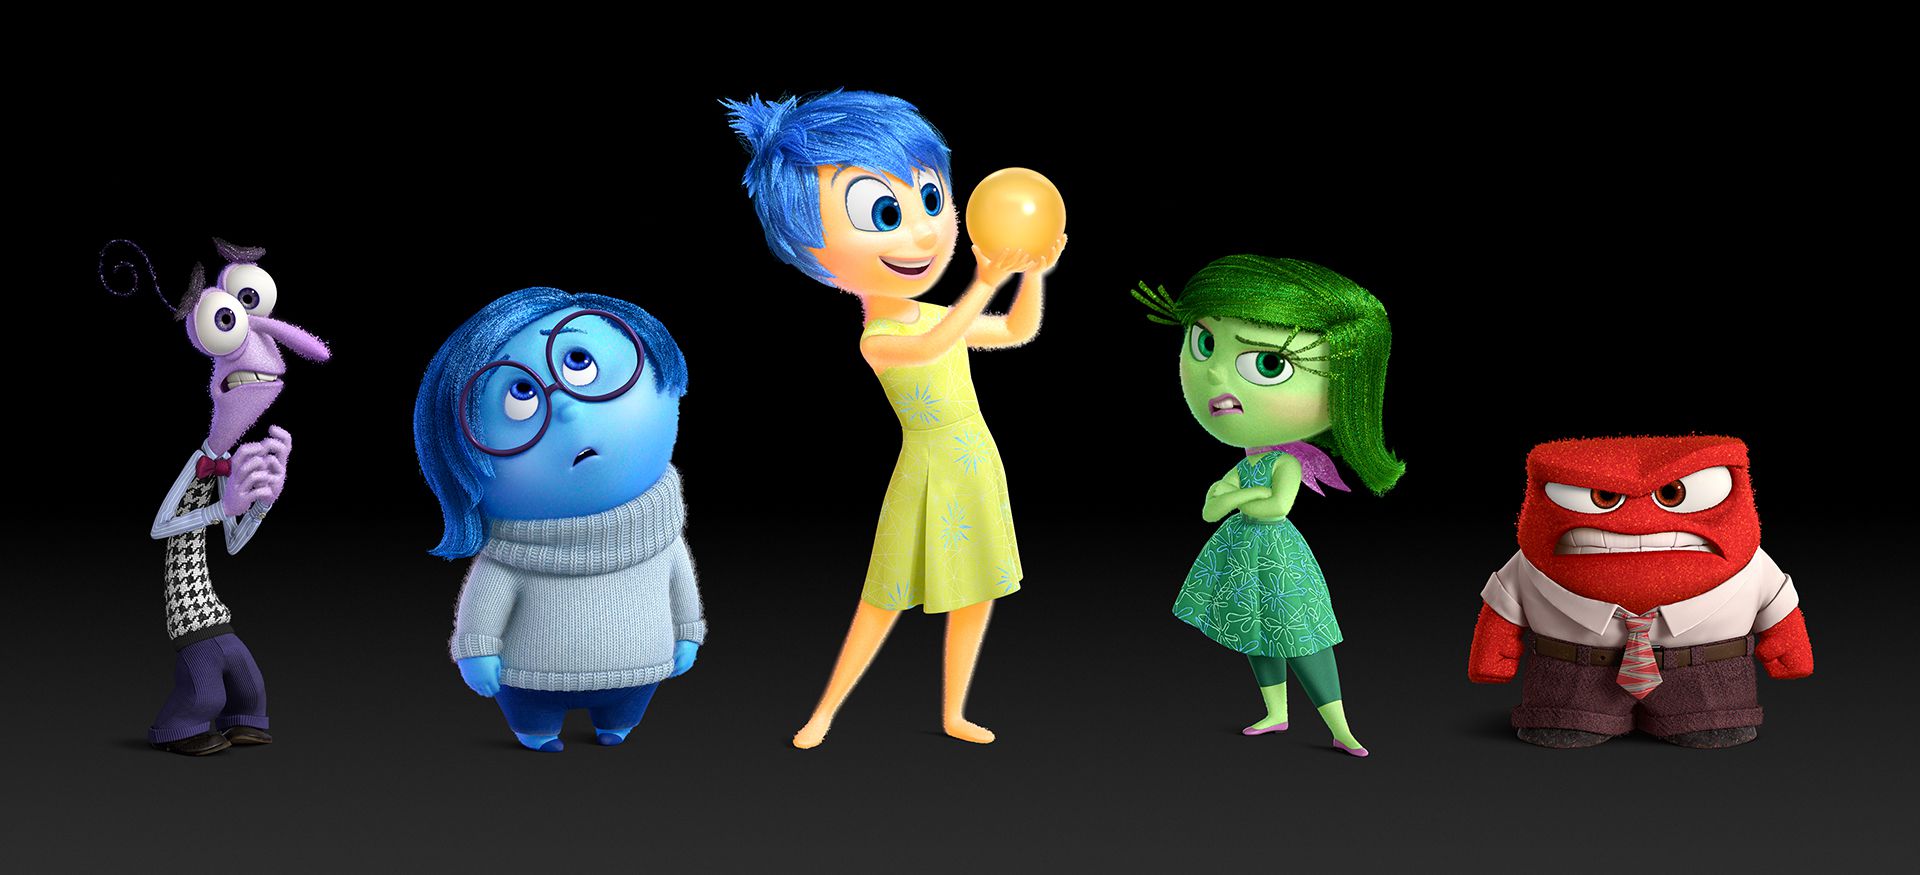
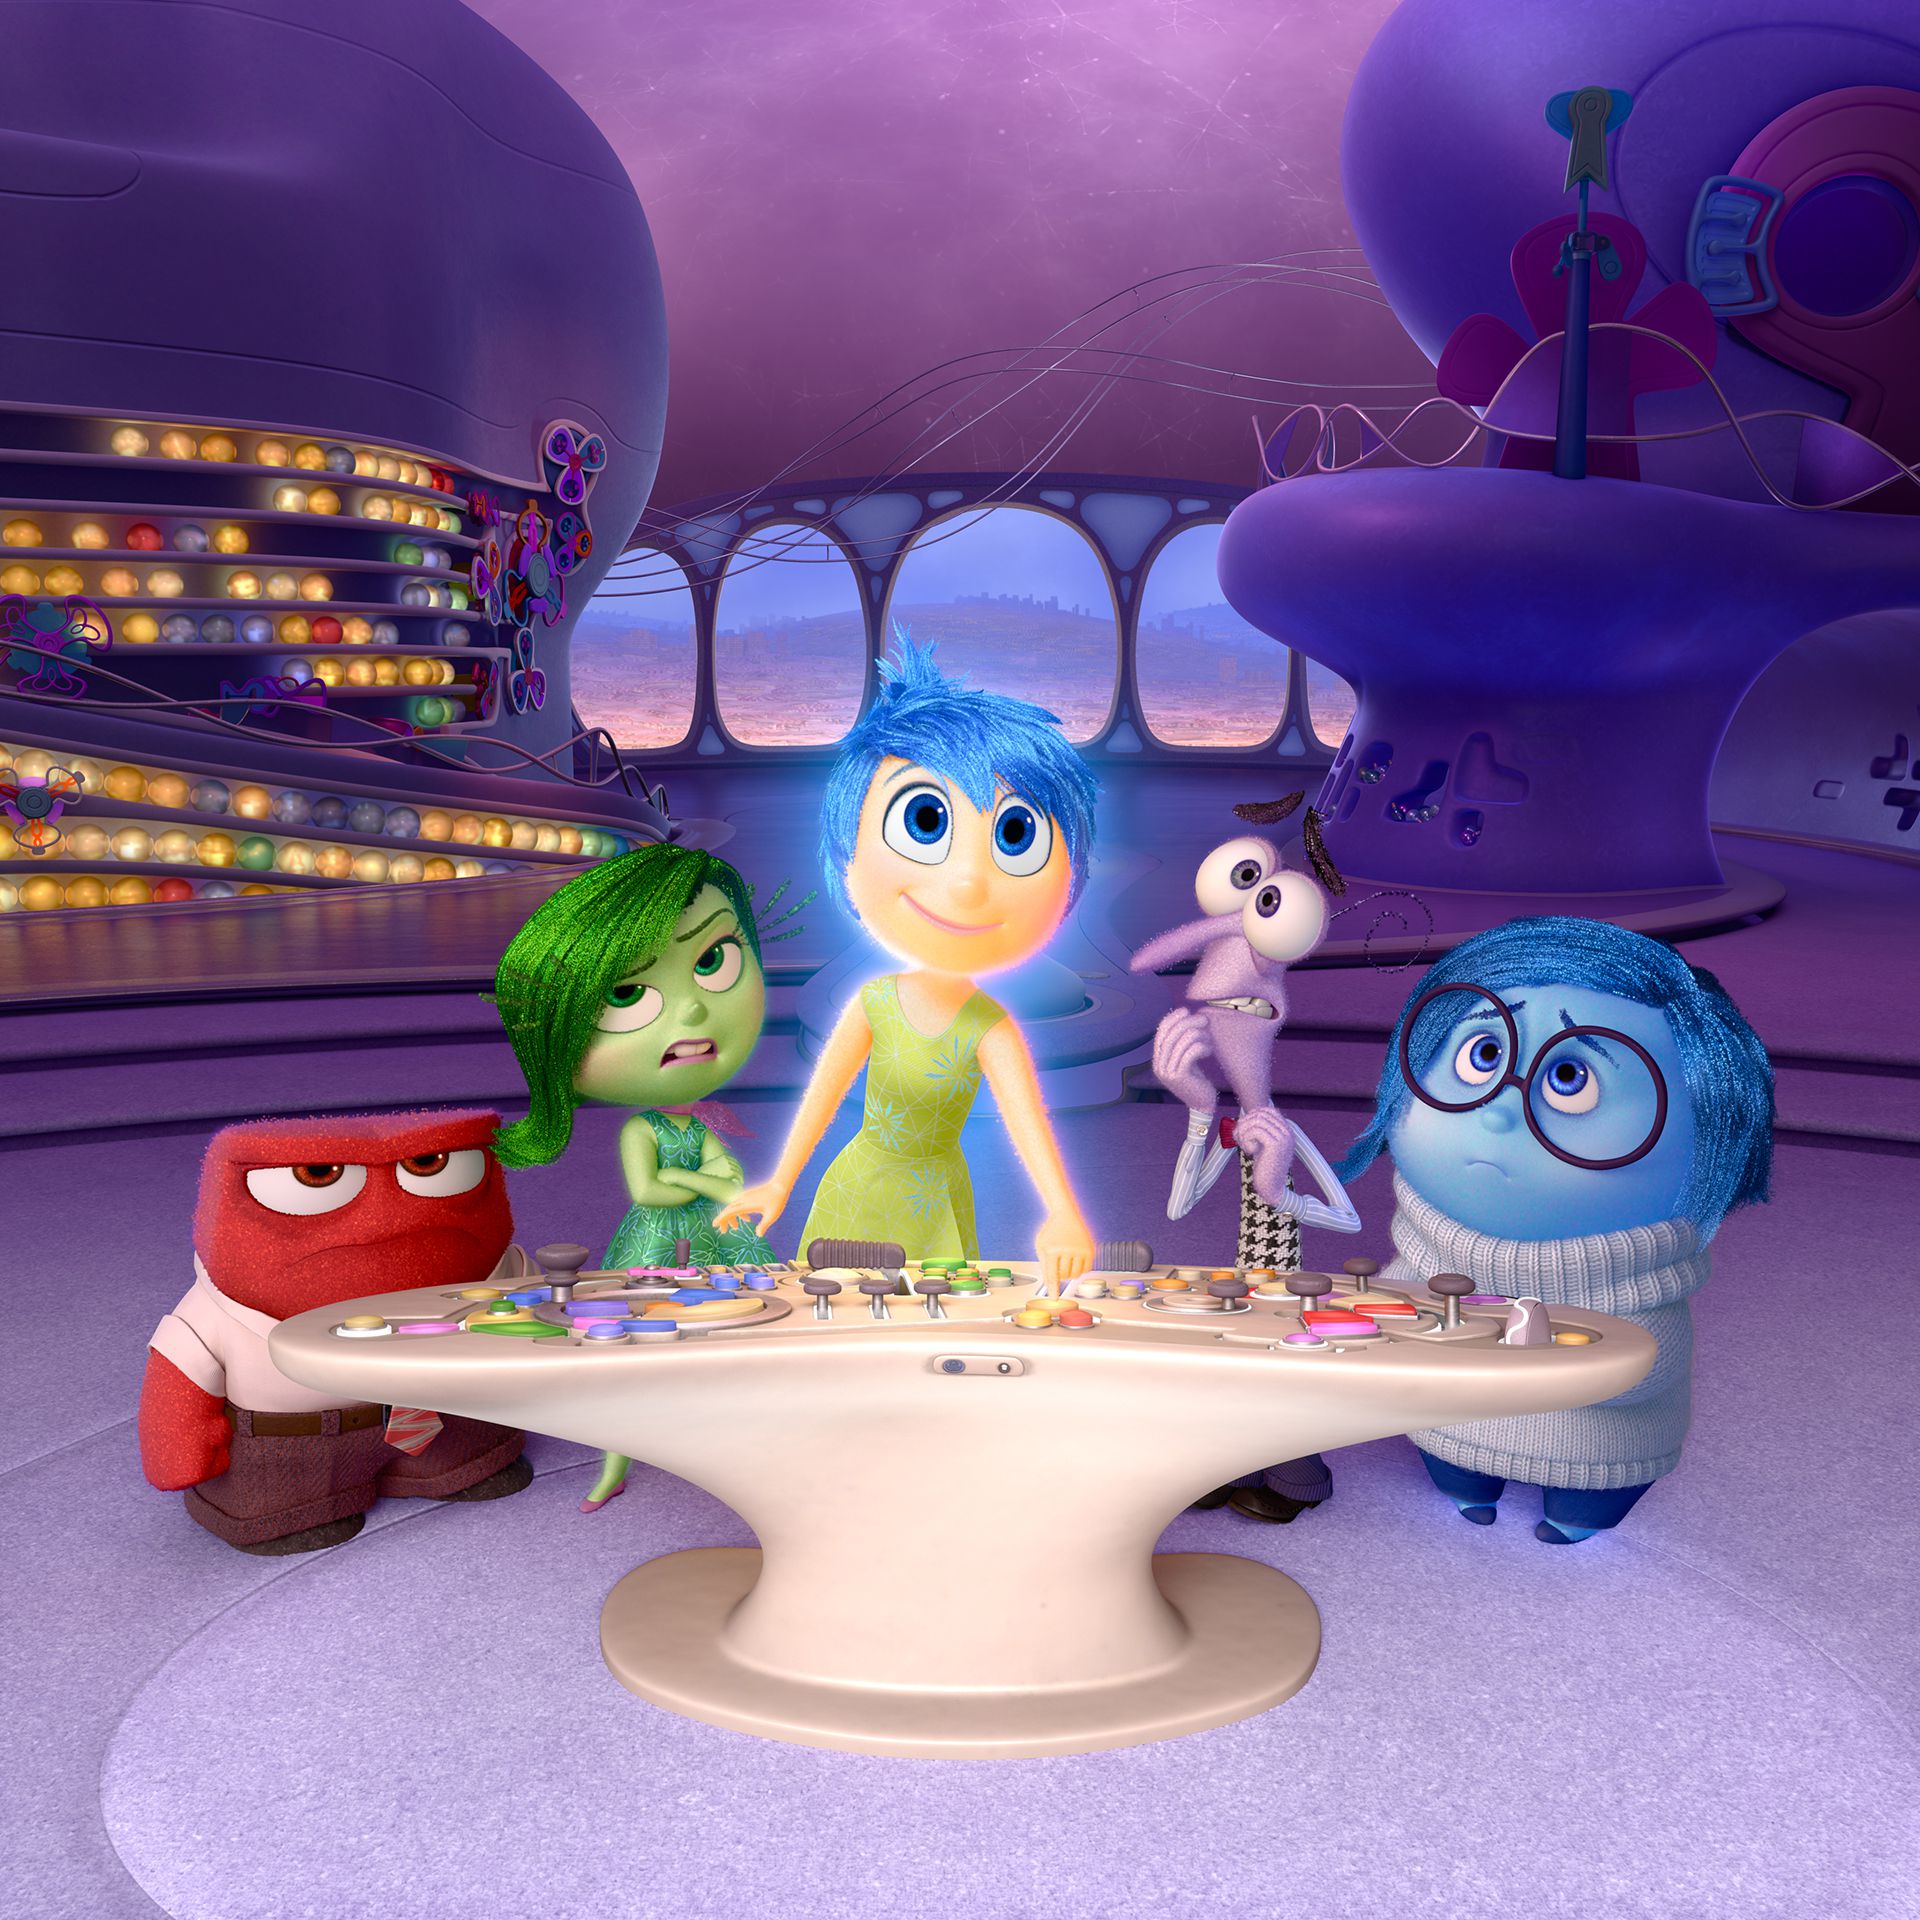
Pixar has been a large supporter of SIGGRAPH for many years, this year the company is presenting papers that are not only tech papers and talks discussing the production aspects of their latest film Inside Out, but also talks on their unique in-house tools. In a brilliant session on the first afternoon of SIGGRAPH, Pixar focused on the specialized animation tools that the teams have at their disposal at Pixar, many of which have never been presented before.
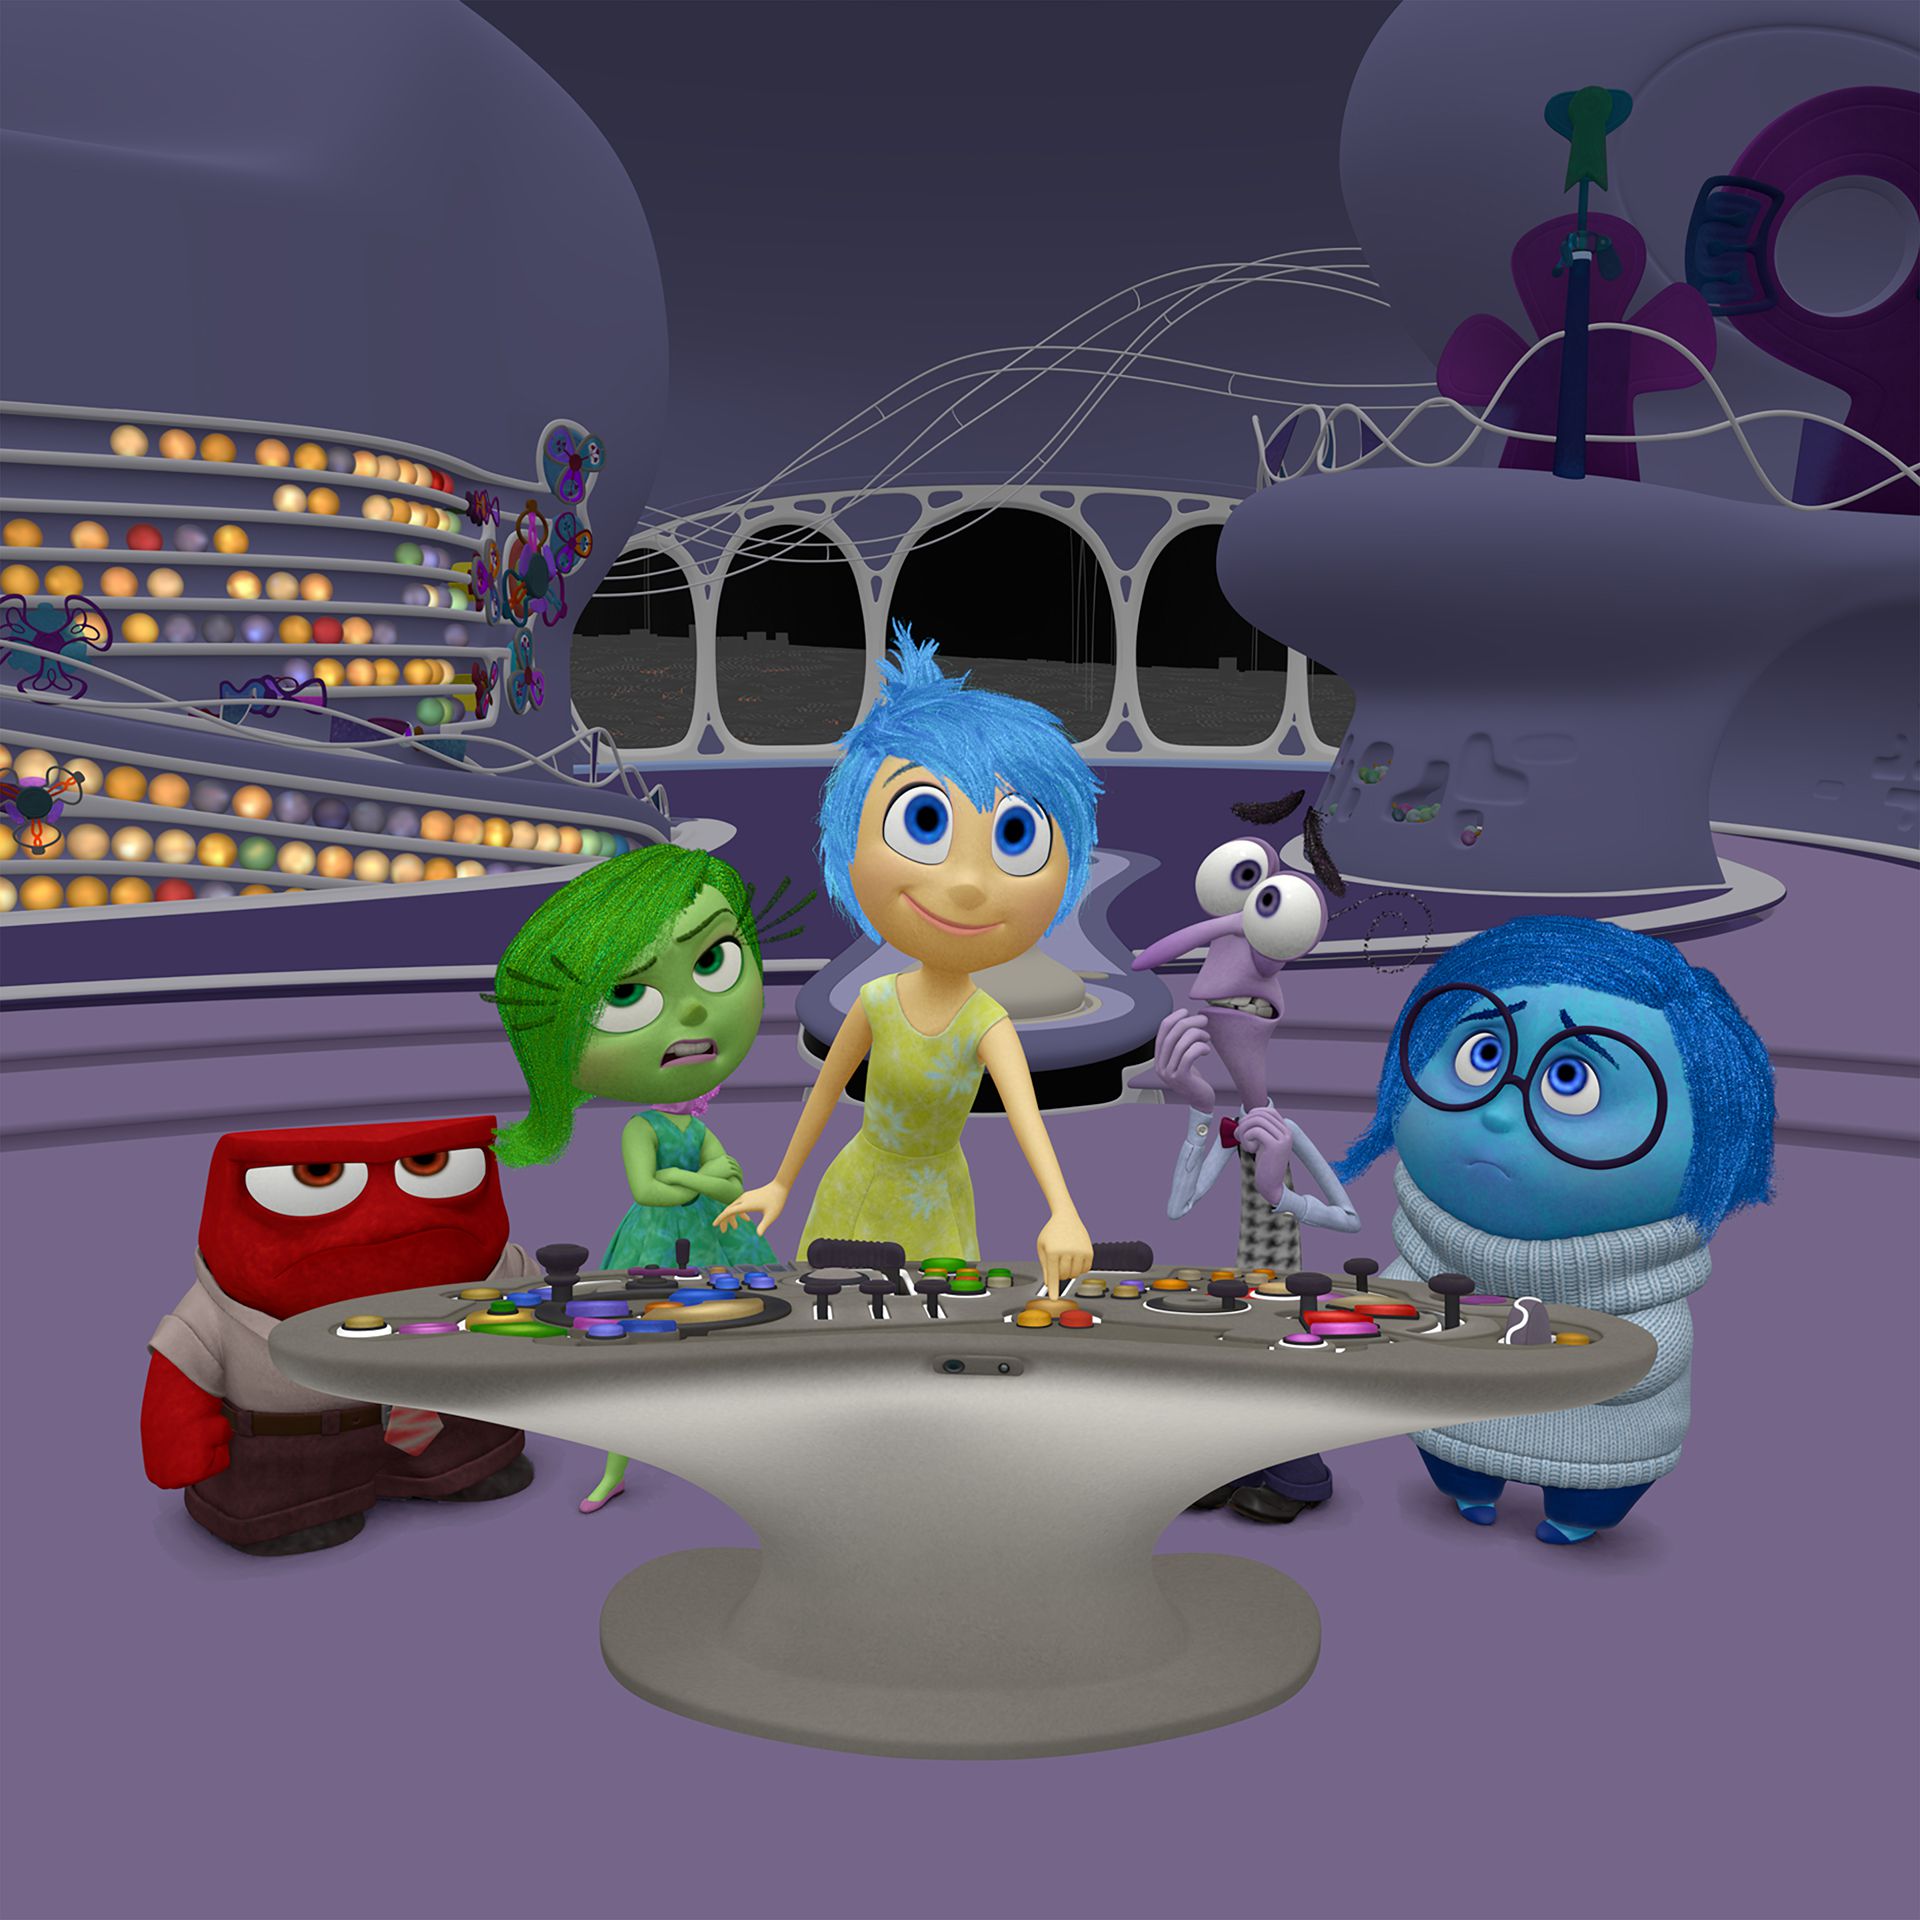
Pixar Engineer Ryan Steizleni and artist Brett ‘Brook’ Parker (also the voice of – the babysitter – in The Incredibles) started the session by presenting the Presto animation system, which was shown for one of the first times using Arlo (voiced by Raymond Ochoa) from The Good Dinosaur. The system is a remarkable animation tool. When looking at the user interface you are presented with say three panels – a spline editor, a pallet of faces or expressions for the character and a timeline. But it is the product’s ability to literally sketch out ideas and have those solved into the character rig that was unexpected. As one moves your mouse near any part of Arlo that is ‘sketchable’ the cursor changes indicating the current position, you can then draw a new line. To make a new animation pose for Arlo’s tail, one just draws a new tail line and the tail moves to a new curved dino tail position.
This is exactly how the team animated the rope rig for the trunk of Bing Bong in Inside Out.
The product is designed for sketching animation as well as being used for rigging and layout. So while the graphical user interface is valid it also allows a rigger to adjust using a nodal graphical rigging primitive system for the solver. The system also works with forward and inverse kinematics.
You can use Presto to sketch ideas, so it was designed to have immediate response and be very user friendly. Parker explained that the sketching product is still being adopted and rolled out throughout the company. This part of Presto was used more on A Good Dinosaur than Inside Out, and “even more on a film you guys haven’t seen yet – that I can’t talk about…but I can say the artists are really liking it.”
The UI primarily drives rigs, you can also sketch onto a rig that has squash and stretch in the rig, but you can’t directly sketch squash and stretch in Presto on a whole character. The Inside Out character Joy’s eyes were attempted to be manipulated by this tool in Presto. Her eyes have some 30 variables, and thus it has too much complexity to directly go from sketch to final. While one could mask or reduce the set of variables that the Presto sketch drawing refers to, it was thought that this would make the system much more complex and somewhat defeat the purpose and design aims of the software.
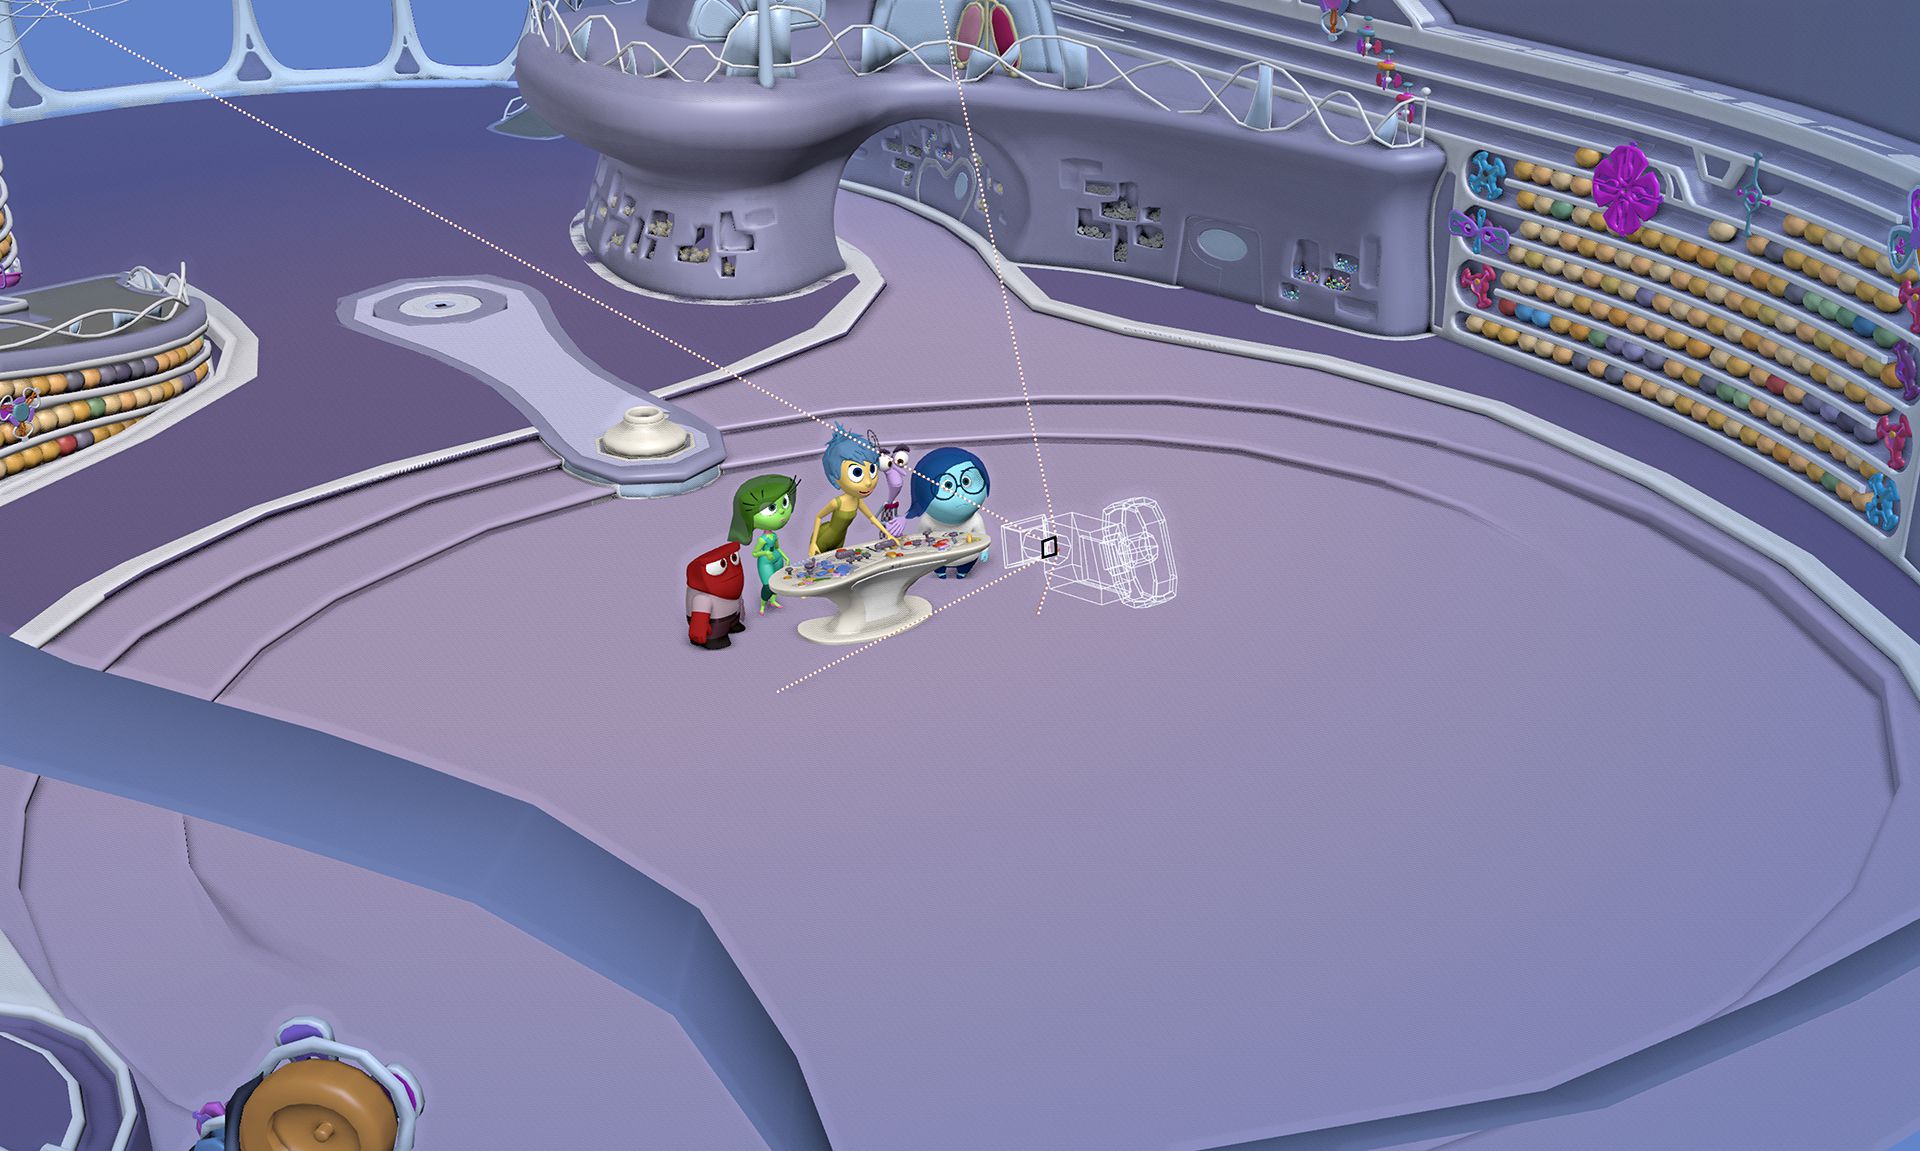
While the sketching tool does not act on regions. Pixar does have a tools for drawing character outlines that does. This software is called ‘Silhouette sketching’ and was the second of Pixar’s animation tools that were presented. It can be accessed from within Presto also. It complements the ‘line of action’ sketching that Presto is aiming at. For example, in Inside Out, there was a scene with Joy hugging an ’emotion’ ball. In the shot one can just draw the outline of a cheek or shoulder to a new outline as seen in silhouette. The 2D line manipulates the edge of the 3D that is that part of the character. This allows an artist to draw where the cheek should sit in outline or silhouette, and it effectively shifts the artist’s stroke from a 2D line to a 3D deformation. It is used as a subtle polishing tool rather than a primary sculpting tool. But once someone has a near final pose, this tool provides “us back this amazing control and simplicity that we had lost but we now have back through this silhouette sketching tool,” explained Parker.
This is effectively a per-shot sculpting, as the changes are not to the base model. Spacial deformation instead of Laplacian Surface editing was used, as a surface change will just adjust that specific surface. By doing a spacial deformation all of that part of the model (not just that one surface) is modified. This could create problems as other close by parts of the model might also accidentally get affected in a general spacial deformation so the artist can mask off any other shapes so they are excluded.
In terms of animation, the system allowed transitions so the effect is eased in or out, and of course, it is only ever an addition on top of the base animation and applied as a deformation layered on top of the model, thus allowing it to be adjusted or revised freely. It also is applied with a falloff control which can be thought of as a blending tool that blends the deformation back into the normal state of the model.
 An unexpected benefit is that the cloth team discovered that if a cloth sim was not moving the fabric exactly as the director wanted, the artists can use it to bend out a dress so it seems to flutter more than the sim would alone dictate. Thus it worked to save time in sims and reduced the overall model fixes or modifications that might be required on a show without these tools. So successful has the silhouette polishing tool been for post-simulation cloth work that Pixar’s R&D are now going back to explore this approach for more advanced cloth tools.
Pixar sees the work as a way to recapture much of the flexibility and easy animators had in 2D now that animators are working with volumes not drawings. These tools were highlighted in a separate talk on “Creating Joy” on the lead character in Inside Out.
As fxguide covered when the film was released, Joy was a complex character to build and light. Over 13 looks for Joy were tried in 13 weeks before arriving at the final solution which included the inner glow, skin points, outer glow, and projection body with animated particles. Jacob Merrell and Alexis Angelidis explained the various volumes and how they were rigged in Presto. Alexis pointed out that Effects TDs do not normally get to work on hero characters, so he “was very happy to be on the project!”
Joy had three volumes – her skin inner projection, her smaller outer white glow and then a larger blue glow. They tried a distance field to get the outer glow but this did not work, nor did sculpted and deformed glow. A convolution seemed to work as a third solution but then failed in terms of her working with props and the set, as she would glow through them. After this third approach failed the team finally the team finally settled on a weighted solid angle field solution.
The outer glow is anisotropic and with special body intersections. The higher energy inner glow was similar but it scattered more light. It used a voxel glow approach (as did the outer glow), but required special code to avoid body parts doubling up as limbs moved close to other body parts. Her inner glow was a soft edge with a projection, for example her wrists can just be seen to be transparent. This partial transparency becomes a problem with the mouth rig, clearly one did not want to see her mouth rig inside her skull.
Angelique Reisch joked she was presenting with the youngest ever SIGGRAPH speaker ever – her unborn 5 month’s pregnant baby (!). She showed at the start of her talk a great technical ‘goof’ reel of render-rigging failures and accidents – from missing faces to crazy hair – the collection of errors ranged from funny to completely gross. Reisch described it as one of the most challenging lighting projects ever at Pixar as their primary characters had to emit light thus they had to work out how “to light a light blub”.
This was a problem for example with selling facial definition on Joy, since on her face there was no shade and definition: when the character herself was lighting the scene. In the end, the solution was to use color not shade to define the character’s facial features. This lead to her key light always being blue and cool, while her off-key side (fill) was always pink and warm with the final overall glows. This all fitted perfectly with RenderMan’s decision to support area geometric lights or geo-lights. The team did not have the geo-light at the start of production and at Christmas it was in doubt if the team could use it but it was integrated on March 14 just in time for final lighting (some scenes were actually done and had to be re-done, but this was a small price to pay for such a useful tool and “a huge win for our film”, explained Reisch. “It was easy to use and gave us both the creative and technical tool we needed.”
Chen Shen rounded out the session when he was introduced as a “technical chef” at Pixar to share recipes from the Pixar cafe (!!!) .. .”and I guarantee at the end of my talk anyone can cook,” he said. His talk centered not around Inside Out but the upcoming Finding Dory (Finding Nemo sequel). In reality he outlined the Presto tools for producing the swimming production characters “using Pesto – sorry Presto”.
Shen started at Pixar from UC Berkley but claimed he was a completely hopeless animator. His lecture showed how to use scripts to produce very animation friendly cyclic animation such as swimming or walk cycles.
At the start of Finding Dory, he met with Disney who were looking at advanced machine learning and several other ways to automate animation. In researching for the project he found a document from the first film on how the animator’s animated Nemo. He read this and thought the animation instructions offered a great way to make a swimming ‘recipe’ for making great procedural animation.
Inspired by this animator’s ‘trick’, he developed an automatic system called ‘The Animation Recipe’ that can help animators turn their rough blocking, done with a minimum number of hand-crafted key frames, into fully detailed animation with the click of a button.
The recipe was a collection of multiple parts or ingredients, along the long chain of the concatenated items. In short the nature of animation along a chain can be summarized as a series of value offsets, scalings and finally time shifts.
By using value offset, value scale (including invert) and timeshift inside Presto with some simple python, his system has a swimming cycle with controls that can amplify, dampen and adjust most animations that are defined as cycles. This same ‘recipe’ approach can be used to make a desk lamp jump (not perfect but a great start), or a stingray swim, or a dinosaur run, and many other character cycles. Shen showed many characters working with the ‘recipe’ and then adjusting the values to magnify or exaggerate the movement. While procedural animation was not perfect compared to an animator’s hand generated walk cycle, it was remarkably good and very flexible. Each recipe was learnt from the animator’s notes on how to animate the character and then applied to very simple base movements. For example, just a simple two axis motion would – with the a series of simple recipes – become a complex character walk cycle.
Fast Forward
As is always the case at SIGGRAPH Day 1, the conference included the huge Technical Papers Fast Forward which showcases 118 technical papers, with a 30 second summary of every paper from each presenter or team. It’s always fun as presenters tend to go to extreme lengths to make their papers appealing to the packed and vast West Hall B. Even if you don’t intend to watch the actual and somewhat serious technical papers sessions, just attending the Fast Forward can give one a great sample of the industry’s current interests and research topics.
This year was no different with goofy videos and some of the worst produced audio mixes (why can the SIGGRAPH community never learn how to mix a demo video’s audio so the Hall can understand their no doubt brilliant paper??) But it is also a great chance to understand past the title what a paper may mean to the community. A well presented 30 second video can serve as both explanation and compelling ad to explore the paper further while demystifying some rather dry academic papers.
 This year we had ‘hamburger eyes’, too many cat videos and a lot of pitch corrected audio. The actual papers this year have a lot more Light Field papers and many more dealing with 3D printing. Strong amongst the papers we liked the sound of were facial animation papers and a set of great image processing papers…all of which we will try and cover over the next few days.
Finally a big thanks to the people who joined us at the Yard House pub for a drink after the Fast Forward – it is always a joy to meet readers and members of fxguide insider and fxphd. We have had loads of people coming up to us (some even hugging us!). If you are at SIGGRAPH and you see any of the team please say hello.
Tomorrow is the ILM 40th and we have great coverage and exclusive shots of the event – and much more!