The Thanksgiving holiday weekend in the U.S. is a great time to catch up with some great vfx movies. With iTunes now providing not only HD movies but DVD style entire films with extras, we figured it was time to highlight a few films that have recently been released with great visual effects. We start by talking to CIS Vancouver and Dneg discussing Angels and Demons.
CIS Vancouver
CIS Vancouver visual effects supervisor Mark Breakspear offers an insight into his studio’s digital reconstruction of three churches for Angels & Demons
fxg: What was your role on the film?
Breakspear: My role was as company supervisor for Angus Bickerton who was the production supervisor on the film. CIS was hired by Angus Bickerton and Barrie Hemsley, the visual effects producer, to undertake building the CG environments for three specific churches in the the film. The three churches were the St. Peter’s Basilica, the big shots. Then we had two smaller churches where scenes play out inside – St. Maria del Popolo, where they have this little chapel and they go down into the ground and find that a priest has been killed by filling him full of soil. Another church was St. Maria della Vittoria where they hang a priest above a fire and burn him to death.
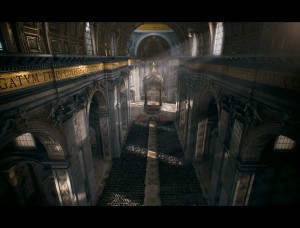
We’d worked with Angus and Barrie on The Da Vinci Code where we did a CG church. Because of our specialty in CG environments, we thought it would be really cool to undertake these big CG spaces. We’ve really pushed our software for recent projects like Changeling to do these vast moves and replace everything except the humans in the shot – all the old problems of whether they’re really there walking on the floor, whether the shadows fall across CG objects correctly. You want to avoid that hokey, virtual reality-looking set look. You don’t want it to look like someone’s giving you the weather. So we took on the shots knowing that it was going to be a pretty big challenge.
fxg: How did you get started on the work?
Breakspear: We knew that Angus’ style as an effects supervisor was to get towards a final shot as soon as possible and then spend a month tweaking the shots. With an environment, you can make the key look great, you can make the space look great and when you put the two together you can say ‘Oh, that looks pretty good,’ but there’s always something else you can work on. Like dust particles floating in the air or working on the highlights bleeding through the red channel to the right side of certain pixels. These sound like stupid little details, but when you put all those things in, suddenly everything starts to become real.
We shot some elements where we just shot movement with a Technocrane, which have extremely specific movements. When you 3D track that, you can add the Technocrane movement to your CG camera so when you’re doing say a beautiful arc around something, it will actually have a little bit of the wobble from the instability of the head of the Technocrane which you need to put back into the shots. You don’t want your shots to feel CG, you want them to feel a little imperfect. So that last month was putting all the imperfections into the shots to make them look real. We’d add in the typical limitations of set photography into the CG work so it looks like it was filmed for real.
fxg: Can you talk about the modelling process?
Breakspear: Well, we had to build three churches. We had a pretty good tried and tested methodology which was: research the location as much as possible – the history of it et cetera. I’m a big believer in knowing how a place was built for real. We had someone at work whose relation was a head of Architecture at Rome University. They were able to help us find through the public archives, plans of the Vatican being built over time. So, what always happens is, you get an architectural plan and it says this is how big it will be and then they start building it and they find out they can’t make it like that because of some problem. So there’ll always be changes. And those changes are very important to know because if you’re projecting textures onto objects taken from photographs taken on location or from textbooks, it needs to be pixel perfect.
We went to Rome and did a lot of research. We experienced all the different churches by going in there and spending as much time as we could, virtually like tourists, getting a feel for what it was like at different times of the day or night. What it was like full of people. What does it sound like? All this kind of research stuff to make sure we undertstood it. We took our CG supervisor and our compositing supervisor because if you’re trying to tell a group of people what it looks like, it helps if you’ve been there!
From our research we initially built a very basic model. Our process was not to build a version of the church that could be lit, shot and viewed from absolutely any angle – it was purely to build a basic model to use on set. This was so you could say to people on set in LA, ‘If you’re looking in that direction in the church, you’re looking at these columns, down towards those windows or the nave’. One of the things I made everyone learn were the names for things inside the church, so we could refer to specific things, not just ‘the bit on the east side’.
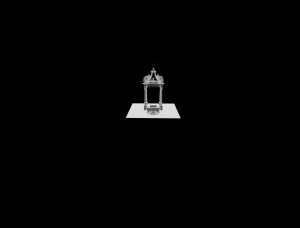
These churches are so big that when you’re inside you can actually see the effect of greying the atmosphere from distance. I’ve never been in a space so big, and to think these things were built 500 years ago is pretty phenomenal. And then in St Peters, right smack in the middle of it you have this four poster bed sculpture by Bernini called the Baldacchino. It was one of things where you go, ‘Oh my God, we’ve got to build this thing!’ We were able to find literally how Bernini went about manufacturing this thing at the time. It’s got these shapes that you think are just spirals. But when you try to build it to emulate it, you realise they’re weird spirals that have been compressed and then twisted more. So to build them, we learned about how they actually manufactured these columns 500 years ago. The CG team learned about how arches really work versus what you really think they are – you make a CG arch that looks perfect and it just isn’t.
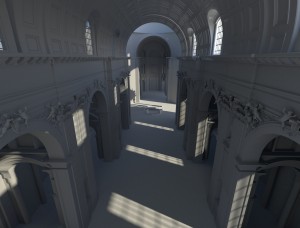
To make a long story short, we basically just researched the crap out of everything, then took all that gobbligook and filtered through what we needed and what we didn’t. At the time we didn’t know what was important. We built that basic model, took it on set and used it as a kind of previz model. It was very simple – it rendered in real time. We’d use it to show Ron Howard (the director), Todd Hallowell (second unit director), Salvatore Totino (the DP) and Angus Bikerton what they were looking at on set in terms of what would be in the final shot. We’d take a feed from the camera and work out the angle and show them what they were looking at. That was really useful.
We were shooting on Stage 25, I think, at the Sony lot which was like the size of a small toilet. It’s an absolutely tiny stage. So they had the biggest environment in the movie shot in the smallest stage at Sony. I actually think it was an error – like a cupboard for brooms! The ceiling was a quarter of the height that it needed to be to let us put cameras up there for big wide moves. So we had to do a lot of compounded moves.
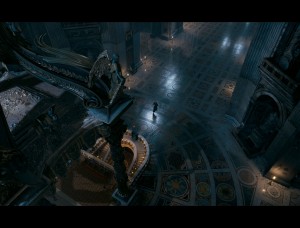
One in particular was where Ewan McGregor, the Camerlengo, is running down the nave which is the longest north-south part of the church. Ron wanted to do this shot where it reveals him coming around the Baldacchino at the very top and swooping around to show where he’s running to. Firstly, we couldn’t get any data from the real location, because you can’t access that area to look down. Secondly, the roof in the greenscreen set was only 30 metres high and we needed to go higher – 90 metres. So we previsualized a Technocrane with all the right controls and worked out what the lens and what the compounded moves should be for shot. On set we were able to take the feed from camera, feed that into our previz of the real move and prove that we were able to get the shot we needed. That was great fun, because when you’re working with someone like Ron Howard and Todd you really need to know your stuff. It was a bit of a ‘Thank God’ moment to realise that it actually did work.
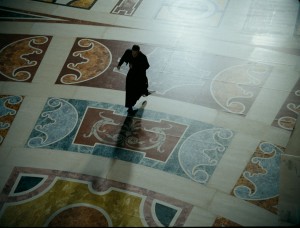
The problem with the set was that it was a fifth of the size of the environment. For the Ewan running sequence, they wanted to cover that in two shots. They’d actually made the floor tiles for one small section of the church – these beautiful mosaic floor tiles of crazy, crazy designs. They’d built half of the curvy ones and half of the square ones. It really located him in a very specific part of the real church. So we ended up having to take out most of the practical floor and replace it with a digital one.
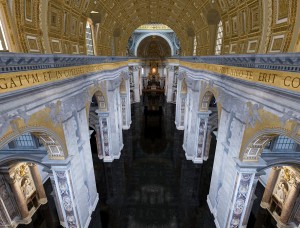
We previsualized all of this out so that they knew on a given shot if he was running from point A to point B in the church, then he’d have to run from this corner to that corner on the set. Then we’d flip everything around, do a French reverse and shoot it from the other corner to the other corner. We’d then link the two shots and make it work. That was a lot of crazy organisation but a lot of fun to put together. On a show like this where you’re on a greenscreen set for two weeks and the entire crew is basically green by the end, you have to plan it out well because no one other than visual effects and Ron and Todd know what’s being shot. We planned it all out with crazy diagrams to follow. The Technocrane guys were excited, I think, by the fact they had this CG Technocrane they could move around to help show them where to go.
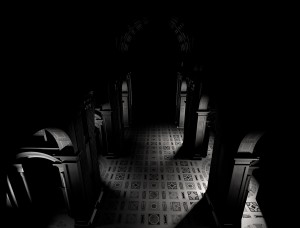
Once we shot all our angles and had everything we needed, we went back to Rome for more reference and used our knowledge of what all the shots were going to be – we didn’t know what the edit was going to be – but we knew what the potential shots were. We built a more detailed model, based on the needs of the lens and what we saw. We wrote a script that basically took our greyscale model and coloured it where it needed to have the most detail. So we could completely ignore certain parts of the church based on the fact that we would never see that angle. It really streamlined the process because on a big project like that you don’t want to building everything. So in Rome we got all our textures and photographs based on the angles we needed, and then back in Vancouver we cleaned up the textures, painted out the tourists, and the existing lighting – just cleaned everything up.
The model building was an on-going process. A lot of producers will ask, ‘How long to do the build?’ and you go, ‘Well, when’s the movie being delivered? ‘Cos that’s when we’ll probably be done!’ But it was actually a good process here. Our visual effects producer Chris Anderson did a great job balancing the creative and production demands.
fxg: What tools did you use to model the churches?
Breakspear: We used both Lightwave and Maya. One of our artists is a very talented modeller in Lightwave. We then brought all the models through Maya and rendered in mental ray. We’ve got Renderman, but mental ray worked great for solid body-type objects. Every shot had about 25 to 40 layers, just for the CG. Finding an efficient renderer was key to us. We composited in Shake. We’ve got a lot of talented people, compositors too. We tracked everything in Boujou. And we used Photoshop for clean-up.
fxg: What were the main challenges in executing the shots and making sure they looked real?
Breakspear: Well, I think the main challenge with all visual effects – the most important thing is that every day when you come into work you almost have to forget what you assumed about a shot you thought the day before. You’re going to see the same shot hundreds and hundreds of times and you’re going to watch it in the cut. If you’re not careful, you get into this lazy ‘I think I know what this looks like’ attitude and you stop seeing the shot for what it is. So the challenge with any visual effects shot is to constantly breathe new life into what it is you’re looking at.
Constantly asking opinions of people is really important as a visual effects supervisor. We’d use our dailies here as an opportunity for everyone in the room to ask questions and give criticism, as long as it was constructive. If we were looking at a shot 20 times and then someone in roto said, ‘Did you notice that the person’s head is chopped off over there?’, we’d all realise we were concentrating on the CG column instead. So you need that fresh approach. One of the big challenges is to constantly review your work impartially and unbiased. Forget what you saw yesterday – what does it look like today?
fxg: What sorts of things did you add to the shots to give them an extra realism?
Breakspear: Firstly, I’m a firm believer that every compositor should go to a ‘learning how to see’ course. It’s the same for CG. I certainly try to get all our team to look at things in a different way. When you start looking at things you take for granted, you start realising there’s a mathematics to everything in our world. Almost everything we do can be explained by X,Y and Z graphs. I know I’ll sound incredibly nerdy right now – I’ll try not to. If you take a digital photograph or use film, if you ever zoom in to look at it, on certain types of lenses you get certain types of artifacts.
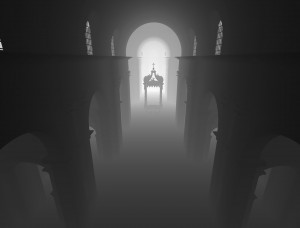
One of the things we had in Angels & Demons was a lot of depth of field. Now, a lot of people think they understand depth of field, but it’s important to do a little refresher course about what causes it and what causes bokeh which are the interesting textures that are inside the circles of confusion inside the depth of field. We wanted to add heat haze to a lot of things. Even in a cold space, you still get atmospheric distortion. Heat haze is usually associated with heat, but that’s incorrect. It’s actually associated with movement of air that you see over a large distance.
So, Angus and I shot some elements to add into the depth of field. We set up a little point-source light, a 5K light, put it in front of a heat bar and projected the distortion onto a white cloth. Then we filmed the white cloth to get all the beautiful distortion. Rather than trying to simulate it in a computer, which would probably do a good job, we got these great columns of heat haze meandering over each other. It looked very real. We then took that element and whenever something went out of focus, we took those circles of confusion and then keyed within that the heat haze. It depended on the shot and the look required.
When something goes out of focus, instead of it being this perfect digital de-focus with a plug-in, all of sudden things started to take on a reality. It looked real because it wasn’t quite clean. Also when things started to go out of focus, artists started to understand that the background should enlarge slightly, and as it focuses on the background or rack focuses on the background, it should shrink again. So understanding those processes is just one of 20 things we went through. I’m putting together a thing for our team which is ‘the top 20 things you have to apply to every single shot’ as a compositor. We found that once you go through those things, the shot’s pretty much rock-solid.
fxg: Do you prefer working on these invisible-type effects shots than more in-your-face ones?
Breakspear: I think so. My personal feeling is that I like to tramp through a movie, but never be seen. Still, I love watching those big special effects spectaculars. But my personal ambition is to work on a movie where the effects are unseen. I’m working on another movie coming up where I have to create a famous landmark because of the difficulty of shooting in that location. I love that kind of stuff. And some people say, ‘Don’t you want to do a man in a leotard swinging through two trucks on a web?’, and I’m like, ‘Absolutely not.’ I couldn’t think of a worse waste of my time. I think you have to have a certain sensibility to do those shots really well, and I don’t think I have the sort of sensibility where I can talk seriously about a man in a leotard flying between two buses and what that would really look like. Because who fucking knows what that would look like?
But I was first in line for Star Trek. I’m quite sure aliens or spaceships don’t really exist. But it’ll look great. And I worked on the Star Trek TV series for years in LA. It’s a lot of fun. You get into very serious conversations about which side of the spaceship should blow up and would look real. It’s a completely different type of environment to work in. There’s almost two types of visual effects. I was very impressed with Zodiac when it came out. That did for me what visual effects should do – they enhanced the story without you knowing. Same with Changeling. They won the best supporting visual effects this year at the VES. You look at that and you go, ‘Wow – all that effort put in to re-creating that space’. I think that type of visual effect is being used more and more. I think there will always be room for both fields. And I do have total respect for more in-your-face visual effects, but I am not skilled to do that kind of work.
fxg: It sounds like visual effects was treated as a key part of the overall production ofAngels & Demons, in terms of you getting involved early with your early modelling and planning on set. Is that a sign of the times?
Breakspear: That’s certainly the case. As supervisors we are channelling our resources earlier. I’m working on two movies now and we’re involved very early on. And I think it’s not necessarily from us wanting that, but it’s the studios and the productions realising that visual effects is no longer this bunch of annoying wankers you shoot with at the end. It’s not how it used to be with shooting everything you want to shoot first and then putting the vfx guys in a corner and complaining they’re going into overtime at the end of every day. I think visual effects is now a very legitimate and big part of the movie process. If it’s cheaper to do something in visual effects that the art department was going to spend two weeks building, then best they find out about that early on.
Certainly, with The Da Vinci Code a lot was built on the set that we ended up replacing that became known out there afterwards. So for Angels & Demons it was a case of working out the minimum they had to build. Admittedly, we ended up replacing the floor completely sometimes, but it was a very good tracking grid and reference. All big productions, and even the smaller ones, are realising that visual effects can save you money. I think they’re realising we are a legitimate part of the process. If you look at a project like Benjamin Button, that’s a good example of having an entire character run and be developed by the visual effects team. I see a time where we’ll even have our own trailer!
DNeg
We also spoke to Graham Jack (CG Supervisor) and Ryan Cook (VFX Supervisor) at Dneg in London, who worked on 256 shots.
fxg: What shots did DNeg’s work involve?
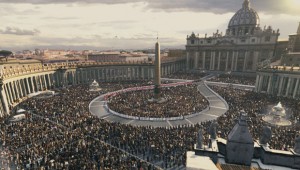
Dneg: We did all of the work for the exteriors St. Peter’s square. This included the environments of St. Peter’s Basilica, and all the surrounding area of vatican city and Rome, including the aerials. We created the crowds within St. Peter’s square, and also the anti-matter explosion over Rome. The interior of the basilica was done by CIS vancouver.
fxg: : Greg what was your role on the film?
Dneg: Double Negative Visual Effects Supervisor(not to be confused with the overall production visual effects supervisor Angus Bickerton), I led the effort at dneg, along with 2d supervisors Victor Wade, and CG supervisor Graham Jack.
fxg: What sort of reference or previs did you use for your shots?
Dneg: We sent a team of artists to Rome to capture as much photographic data as was possible under the circumstances. We were able to obtain HDR data for a considerable portion of the vatican area, and helicopter aerial plates were shot on long lenses from outside Vatican airspace. Wherever we could we shot multi-bracketed HDR tiles of buildings to get the maximum possible resolution out of our texture reference.
We received previs from Angus Bickerton, the overall Visual Effects Supervisor for the shots in St. Peter’s square. The shoot was done in an open outdoor area at Hollywood park in Los Angeles, where they build sections of St. Peter’s Square, a section of the steps leading up to St. Peter’s Basilica, a section of collonade, the bottom half of the obelisk, one fountain, and the first buildings along Via Concilazione at approximately 50% scale. It was extremely useful on set to orientate everyone and allow Ron Howard to compose shots, but in the end to allow us to maintain the scale of the location, we ended up replacing most of the set in all of the wide shots.
fxg: : How much reference material did you shoot? As you could not use tripods – was there any attempt at HDR? Did you consider shooting on film for increased dynamic range?
Dneg: We did use tripods wherever we could, and we shot everything HDR. We also used in-house photogrammetric solver called photoFit to survey St. Peter’s square to build our environment. Obviously we wouldn’t have been given permission to lidar the set, so we used photogrammetric techniques to build the set.
fxg: Can you take me through one of your main crowd shots in the film ? What decided if Sprites could be used or not?
Dneg: We had two types of crowd techniques, sprite and 3d simulation. Our team (including Gavin Harrison, Christophe Amman, and Ziah Fogel) and led by Graham Jack developed a system in houdini using CHOPS to blend motion capture cycles. We decided to avoid using massive as the houdini approach allowed us to have much more granular control over the crowd agents. We’d run a particle system in houdini that would calculate the paths and avoidance of the agents, and then it would select and blend motion capture clips (previously captured in a shoot at AudioMotion) to fit the motion path.
Our R&D team led by Jonathan Stroud designed a motion capture database to efficiently store the motion data, and along with Kevin O’Conner developed a procedural skinning dso for renderman to do the skinning at render time. Kevin also developed an openGL plug-in for maya to allow us to load the data into maya and do the skinning in realtime on the graphics card for real-time visualization of the agents at different levels of detail. This was useful since our lighting pipeline and pass management system is based inside maya (we render in renderman, but do our rib generation and pass management using a proprietary tool called rex).
The sprite method is an extremely simple but effective where we shot hundreds of vignettes of 3-5 people together on greenscreen under various lighting conditions. These were cleaned up and keyed, before being converted to renderman textures. Inside maya, we had a simple system first set up on Atonement, which uses particles to place and manipulate the cycles. This was used on most of the shots in the square where people were just milling around and there weren’t large camera moves that would give away the 2d nature of the sprites.
fxg: How the building modelling differ from say the Chicago work in Dark knight? Did you still model inside the rooms behind the windows?
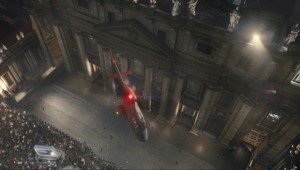
Dneg: Whereas Chicago is mostly modern architecture and skyscrapers, the building geometry is not as detailed and complicated as Vatican city. St. Peter’s square is covered in intricately detailed architecture and statues, which is much more difficult to model and texture. Buildings that are generally flat along the facade lend themselves to texture projection, whereas St. Peter’s Basilica and the surrounding collonade areas required a tremendous amount of detailed sculpting and texture painting.
Our environments pipeline includes a module called windowBox where we take 8mm fisheye lens HDR images of as many rooms as possible in the environment from the window position looking in. At render time, based on the camera position we can look up the point that would be viewable from outside the window, and procedurally modify the windows turning lights on and off, adding blinds, etc. We did use the system for the vatican, but obviously without getting access to the vatican we had to improvise, using other similar locations to build the library of interiors.
fxg: Could you discuss the solution for the cloud lit explosion of the antimatter?
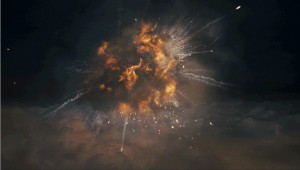
Dneg: We have been using our own proprietary volumetric renderer called dnb since batman begins, which has been further developed on shows such as World Trade Center, The Dark Night, and Hellboy. We also developed our own fluid dynamics engine called Squirt to handle all of our fluid simulations including fire, smoke, and water, which was used to do the antimatter explosion.
Our concept designer Christoph Unger developed some concepts for the look of the explosion, and a team led by Viktor Rietveld developed the volumetric effects and simulation. Two of our lead dynamics td’s, Timo-Pekko Nieminen and Kari Brown, developed the volumetric shaders and tools for the explosion and nebulae effects respectively.

[…] St Peter’s Square in Angels & Demons, with CGI [Source: fxguide/IMDB] […]