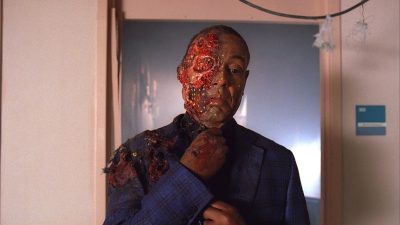
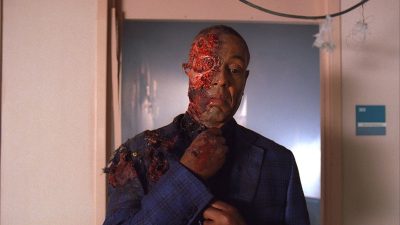
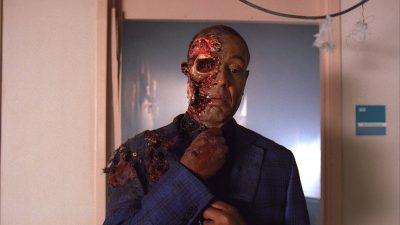
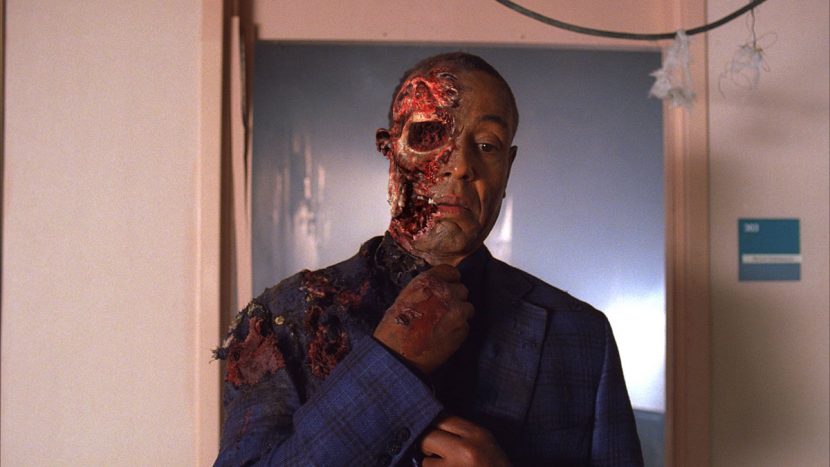
In ‘Face Off’, the final season four episode of AMC’s Breaking Bad, the notorious Gus character meets his gruesome end via a homemade bomb detonated inside a nursing home. Gus’ death is revealed in a single shot, showing first the explosion and then actor Giancarlo Esposito’s disfigured face, before he collapses. Visual effects supervisor and producer William Powloski of Velocity FX takes us through the practical and digital work for the stunning shot.
fxg: How was that particular sequence conceived, in terms of what would be shot live action and what would be a visual effect?
Powloski: It was a real team effort from just about everybody on the show. In January this year, I was having a meeting with one of the producers when Vince Gilligan – the creator of the show and the writer and director of this particular episode – popped his head in and said, ‘I want to do a shot where there’s an explosion, somebody comes out of the room, the camera sweeps around and we see that half of his face is gone.’
I asked about Two-Face from The Dark Knight and also if the person survives, but Vince said he didn’t want to see too many ligaments moving and that the guy only survived long enough to make some sort of gesture until he collapsed. So from there we just had to figure out how we were going to approach it. Since the style of the show was very organic – they don’t like to cut for the visual effects, they want to cut for dramatic effect and move the camera for dramatic effect – we had to adapt the VFX approach to how the shot was going to be done.
fxg: How was the shot planned out?
Powloski: We knew in the final assembled shot it was going to look like a oner, meaning we’d see the explosion, we’d see Gus walk out, and the camera swing around and the face missing. I think the best thing we did was to combine it with special make-up effects and special effects. The production had already worked with KNB EFX Group, so Greg Nictoreo and Howard Berger from KNB designed the maquette. They had taken a mold of Giancarlo and then did a maquette to simulate what kind of damage would be done. The one thing that Vince was emphatic about was that he wanted to be able to see inside the head. It wasn’t just the normal prosthetic where you’re adding mass or adding material to an actor’s face. He wanted to remove mass so that we saw inside of it.
Meanwhile, in Albuquerque, where the show is produced, the on-set special effects supervisor, Werner Hahnlein, was figuring out how to do the explosion practically. He was using nitrogen canons to move the door and the debris, but he didn’t want to have any residual smoke.
Howard Berger and myself flew down to Albuquerque and Howard did a make-up appliance on Giancarlo that simulated the damage – the missing face. There was a prosthetic for the missing parts that also had tracking markers on it. Because the maquette was built by KNB and the make-up was by Howard, it was a one-to-one mix. This meant we could figure out in post production where we were going to be transitioning from the practical make-up appliance to the digital appliance.
fxg: As you said, it comes off as a single shot, but how was the explosion and face reveal filmed?
Powloski: Well, we couldn’t afford the time to shoot motion control for a shot like this, so it was just filmed on a dolly. We locked the camera down for the explosion. That element was all practical, and it threw the debris across the room. We were actually expecting it to clear the frame, but the debris ended up being right in front of where the camera was going to be moving. So on the fly we had to figure out how to digitally replace that debris afterwards, because we had to film the next part of the sequence without the debris as we went up to the actor.
So after the debris shot, we then unlocked the camera. I think we did 19 takes with the actor in make-up. This is his swan song, and we wanted to make sure he was comfortable with his performance, and also that the director was getting what he wanted. Fortunately we ended up using the last take as our select.
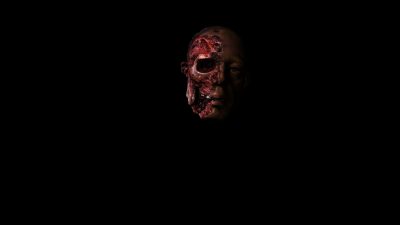
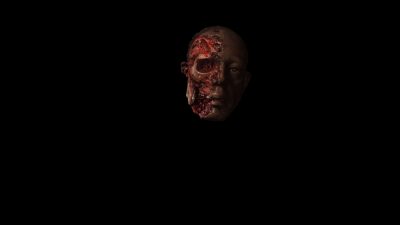
fxg: And then what was the process of putting the plates back together and creating the CG?
Powloski: Once we got the footage back into post production, we started tracking the background and Giancarlo. Very quickly we got something that matchmoved pretty well. Then it was just a matter of determining how much we were going to be slicing into the actor’s head. When we were putting it together, we realized that the skull should be slightly lower than the skin level to make it feel it was inside. Also, the one note we got from production was that they didn’t really want to see any gushing blood. The director’s approach was that somehow the explosion cauterized everything so there wouldn’t be any blood spurting during this shot.
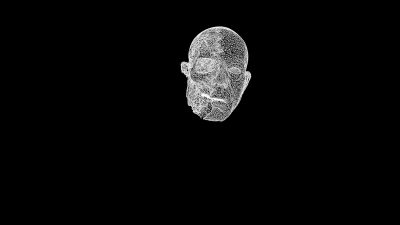
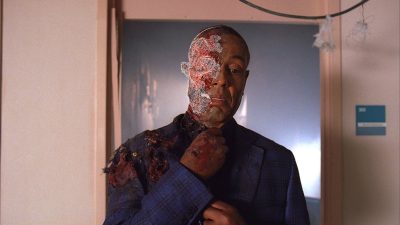
So after the matchmove and applying the CG textures, then we determined where we were going to be sliding between the make-up to the digital part. We also had a scan of the maquette from KNB. Basically, we just kept the very leading edge of the make-up effect and then quickly transitioned to the CG. Then we had to of course match the lighting and movement of the actor’s head. We added some secondary animation for the jaw bone which was loose, because it’s not really connected to anything. We also added an optic nerve inside the eye socket as if it was trying to move an eye that was no longer there – just to add that little extra detail and make it a little more gruesome. And finally we added in some steam coming off his head from the wound area and a little bit of float to the shot after it was completed, just a subtle effect to help blend it in a little better.
fxg: So how did you approach the debris that needed to be re-constructed?
Powloski: The reconstruction of the debris at the head of the shot wasn’t really planned for. After the camera moves in for take one of 19, basically all the debris is gone. But we had shot enough elements that we were able to re-project and re-create the debris during that 3D move as the camera went up to Gus. That actually ended up being more complex than the Gus effect.
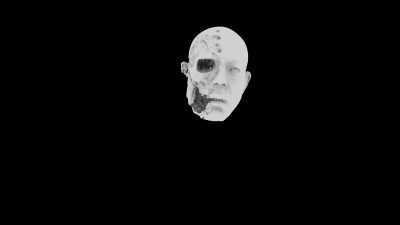
fxg: What were the tools you were using?
Powloski: The model was built in Lightwave. We used Boujou for tracking and the 3D components of the shot were composited in Fusion. The debris fix and the dust and smoke blend was all done in Nuke. We shot a couple of different plates with the smoke, and then combined different elements. The 3D supervisor was Bruce Branit and the 2D supervisor was Steve Fong.
It was shot on 35mm – one of the few shows that still is. I just love the look of the show. The DP, Michael Slovis, is fantastic and it just has a real cinematic quality to it. Once it gets into post production, we convert everything to DPX files and that’s the basis for our workflow.
fxg: What are some of the other effects you’ve worked on for Breaking Bad?
Powloski: We do quite a lot of subtle additions. There was one bigger effect from the end of season three when Walt runs over some dealers in one shot, which we augmented with CG. And then in the episode just prior to the season four finale, we did some work for a shot where Walt is spinning a gun on the table. He was at a table in the backyard and it kept landing while it was pointed at him. He finally spun it a third time and it pointed at a planter, and you don’t realize the significance of that until the last shot of season four(meaning that Walt poisoned the little boy). But they had a special effects rig on set with a Lucite tube going up to the gun to determine where it was pointing. The problem was they were shooting on a patio table that was glass and had mesh work underneath it, and you could see the rig spinning it, especially because there was a camera move ending up looking at the rig.
This wasn’t designed to be a visual effects shot, but they approached us afterwards and asked us to fix it. With the reflections and shadows on the glass and the way the light moved, it was almost impossible to just do standard rig removal. So we actually had to create a 3D table. Again, we’re able to augment something that was there in the plate.
fxg: That invisible effects work certainly continued to the Gus face effect as well, then.
Powloski: Yeah, and I think KNB brought a level of detail to the sculpture that perhaps a 3D artist would not have done on their own. Even though it was a digital finish, the initial approach was very analogue and very practical. It really used the best parts of everybody’s departments. I think for most visual effects, the ones where everybody plays well with each other are the ones that make it the most seamless.

Pingback: Descubre la postproducción de ‘Breaking Bad’ | Blog de La Sombra Producciones
Pingback: Pre-Production Part 3: Strong Narrative Construction – whitingsasec