In this new series, we will look at a set of independent and small productions using the latest technology and the project is either self-financed or done as a ‘garage’ indie project. While major productions are shut down and restricted worldwide, there is a host of small innovative projects being produced with amazing results.
Memories of Australia
The first project in this series is by Andrew Hamilton and his Memories of Australia UE4 film. Hamilton who was born in Australia but moved to Europe in 2005. Hamilton grew up in a small town just outside Perth, in Western Australia, but he now works at Embark Studios in Stockholm, having previously worked at DICE (EA Digital illusions). He is an Art Director and Digital Environment Artist, this project started with a trip back to Perth.
FXGUIDE: What content did you collect on your trip back to Perth, which was I believe Christmas 2019?
AH: I’ve been working with photogrammetry since 2012, so it’s almost muscle memory to grab a camera when heading out to any natural wonders. I had the opportunity over the Christmas break to take a little time and capture content that I could use in building out an Australian biome. Creating a love letter, a little tribute to my growing up in Australia, has been a project on my mind for quite a few years, and I am glad that I finally found the time for it.
I used the same type of camera and equipment that I’ve been using since I began working with photogrammetry in 2012 – a Canon 6D with a 24mm lens, colour chart, and a matte blue sheet or board. I like to keep it as light and simple as possible so I can easily jump around, especially in conditions where time is limited. All the nature content you can see in this project I captured myself in Australia, taking photogrammetry scans of ground surfaces, trees, logs, leaves, cliffs, etc. Taking reference photos is also a big part of these excursions. The biggest challenge in creating these biomes is less about building the content itself, and more in how to reconstruct the location from the few pieces gathered. Visiting locations, taking reference and video, but most importantly just soaking it all in – the feeling, the heat, – really helps to inject that experience and emotion into the images.

FXGUIDE: In your work, you rely on using Sequencer, could you explain your workflow, please?
AH: The Sequencer tool in Unreal is a crucial piece of the puzzle. The ability to create movie-quality layering of components and camera movement has helped enormously to give this short a light narrative red thread, conveying emotion that would otherwise not be present in still images.
My use of Sequencer starts with giving motion to the cameras I have laid out in the scenes, pushing the cameras towards key features, leading the viewer through each frame, and naturally transitioning between shots. One of the most important features used was the built-in Camera Shake options that can be layered on top of cameras, giving a realistic and natural feel to the camera work, replicating the imperfections of navigating with a camera by hand. Lastly, I would layer in assets to be animated, assign custom animations – or keyframe basic movement along an axis – to give life to many of the shots.
FXGUIDE: Were all the assets generated from Maya, Substance, or were you using the marketplace or some other library?
AH: All of the nature content I created myself based on my photogrammetry scans from Australia. The high-resolution scans are run through RealityCapture, and processed through Maya. Keeping all content from and within the same biome is crucial in maintaining consistency, rather than sourcing from various biomes and working to align them. When the content is captured from a single biome, there is little work in ensuring all content is cohesive, with correct PBR calibration and setup, it all just fits together harmoniously.
Below is an image that represents all of the content, which you can see is not a large pool of assets. This set of assets is intentionally minimal, to provide just enough variety of content, while not overwhelming the need to maintain many assets. I capture only assets that are crucial to recreating the scene, focusing on features that are not overly unique or stand out in appearance so they can be rotated and reused many times without any noticeable repetition. By including only the key components, the imagination fills in the blanks of missing pieces or additional variation.

I did a GDC talk in 2016 where we go through the photogrammetry process in quite a bit of detail on our work for Star Wars: Battlefront (2014). Some processes and workflows have improved substantially since then, however, the mindset and focus when capturing photogrammetry content remains mostly unchanged.
FXGUIDE: Was the project storyboarded and if so, how closely did you stick to it? Could you discuss the narrative development? Was each shot conceived in this order, for example?
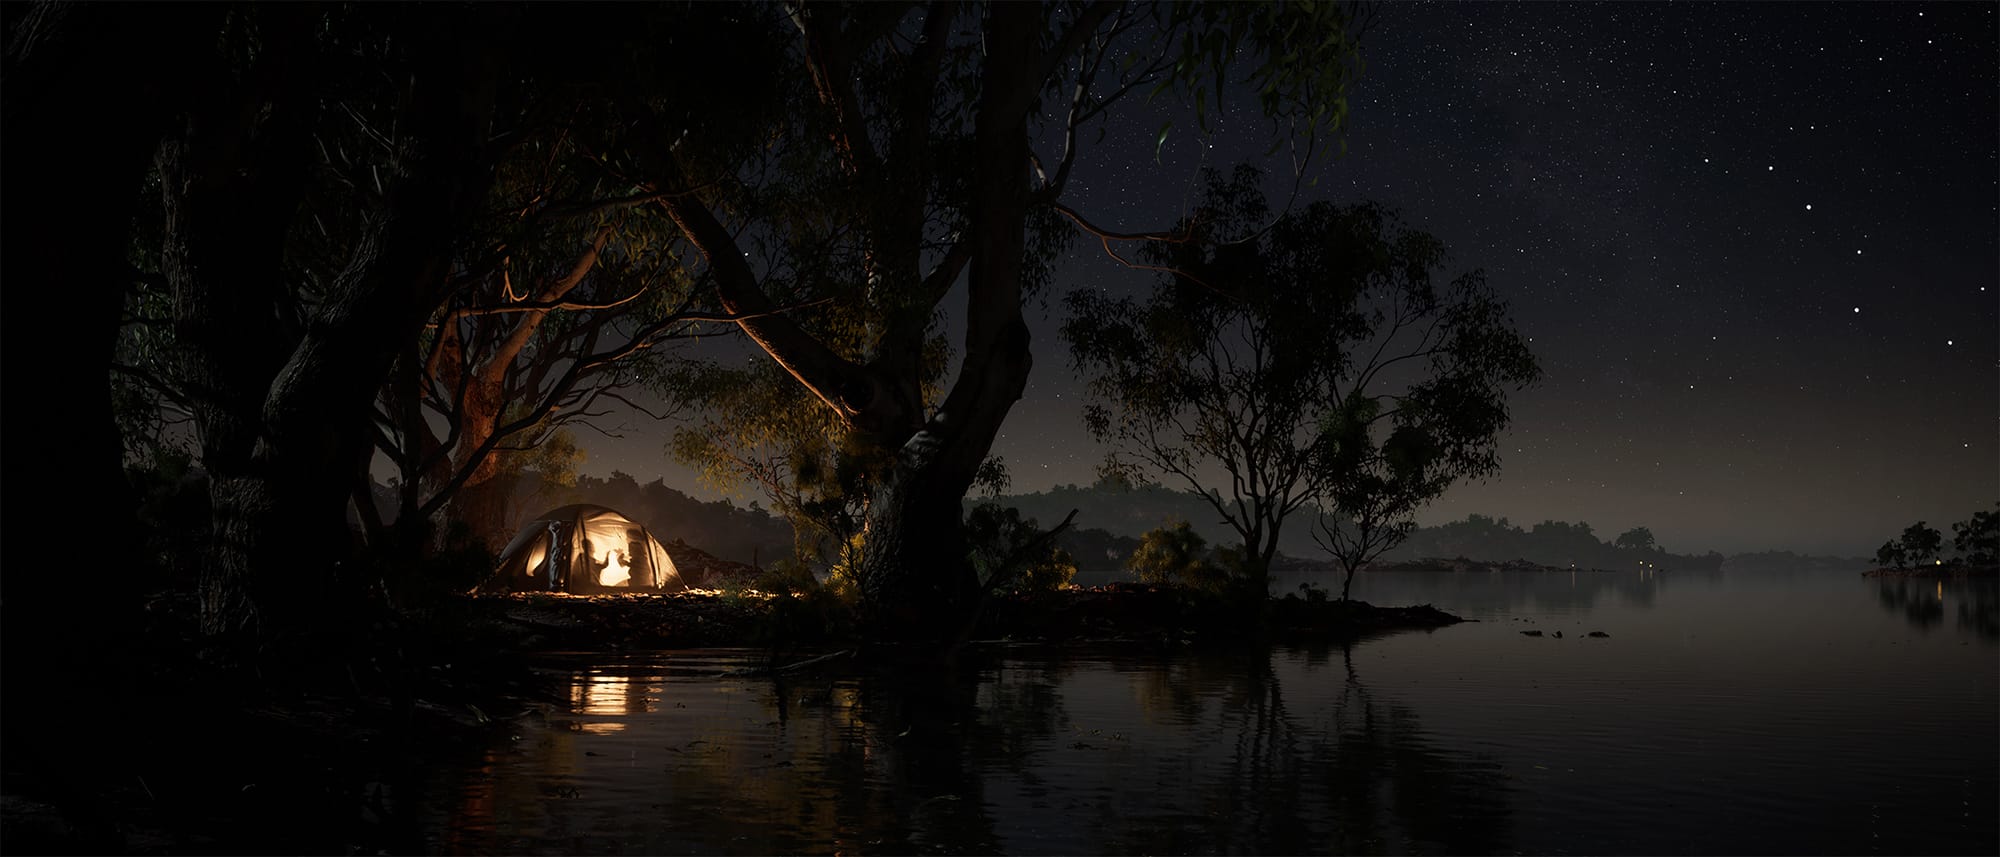
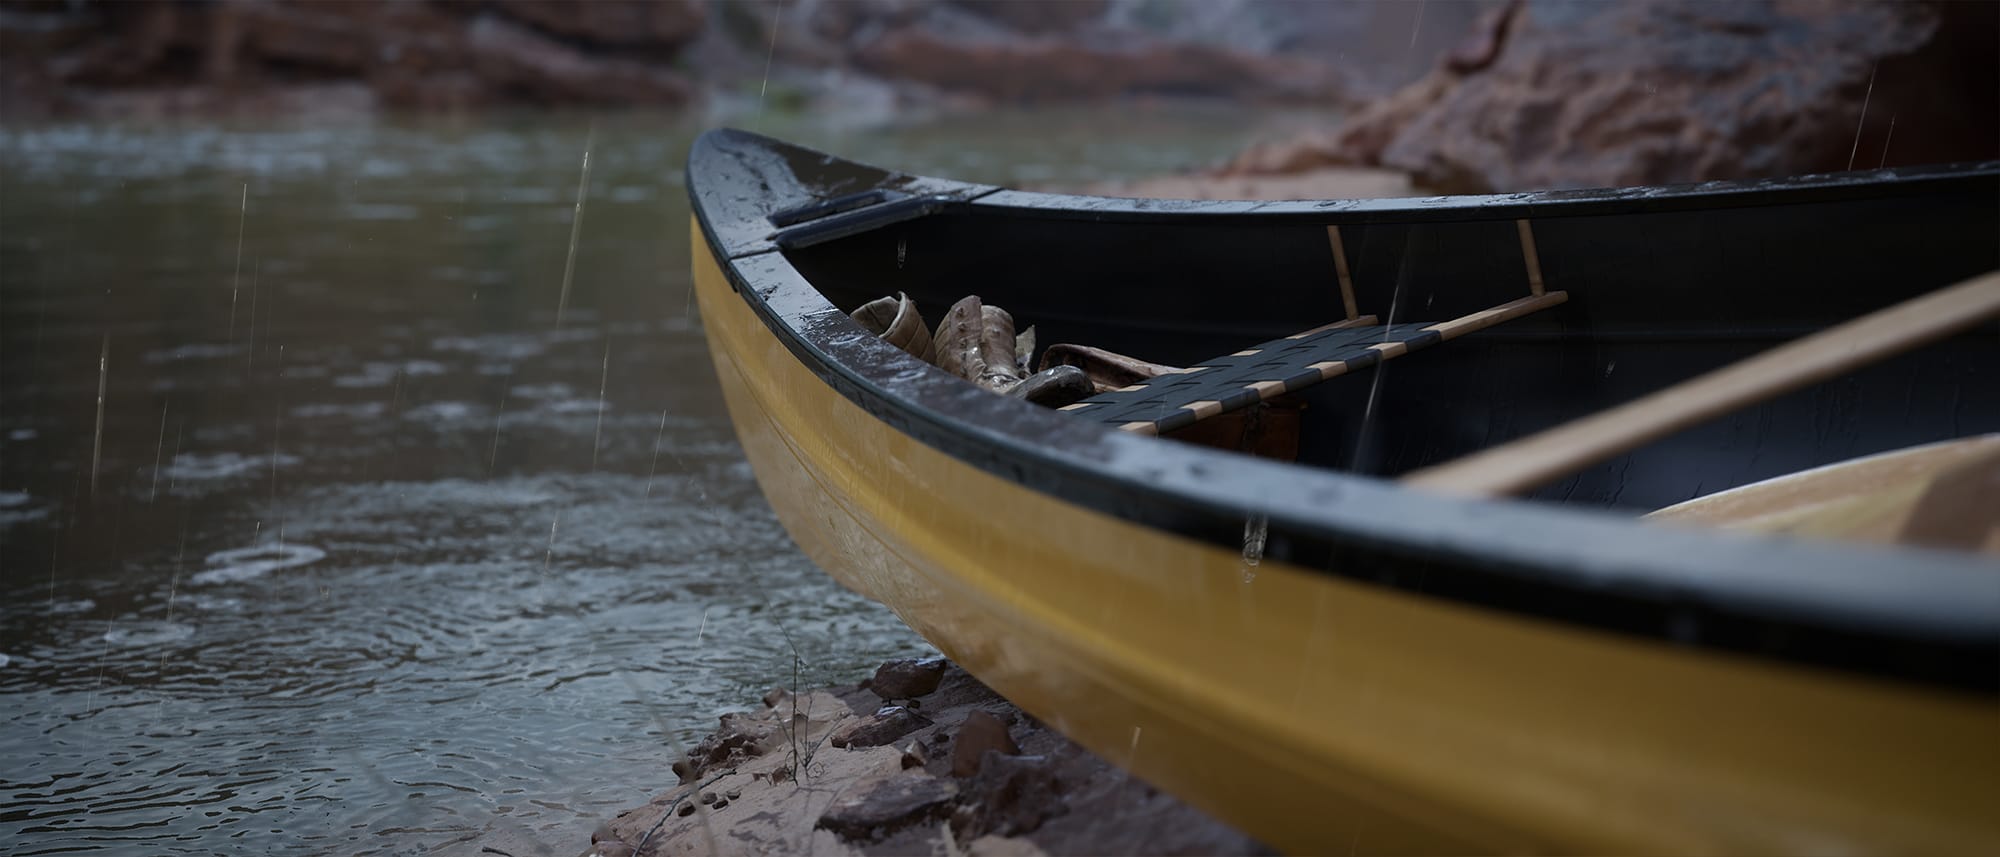
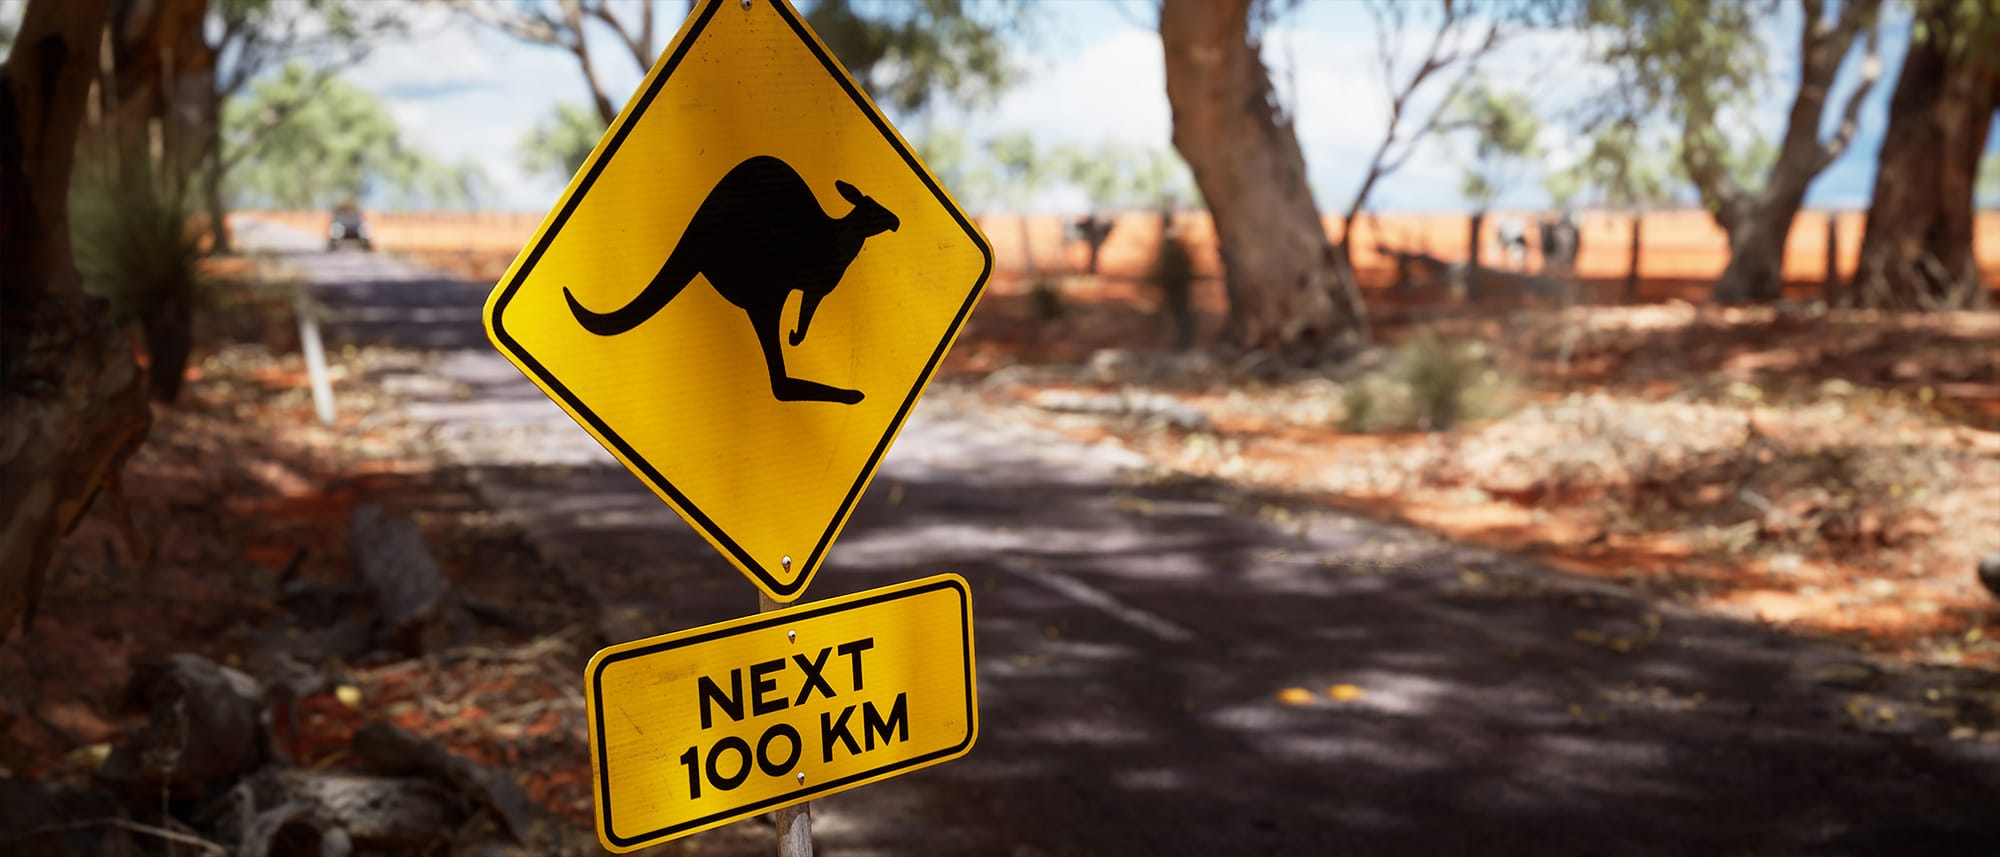
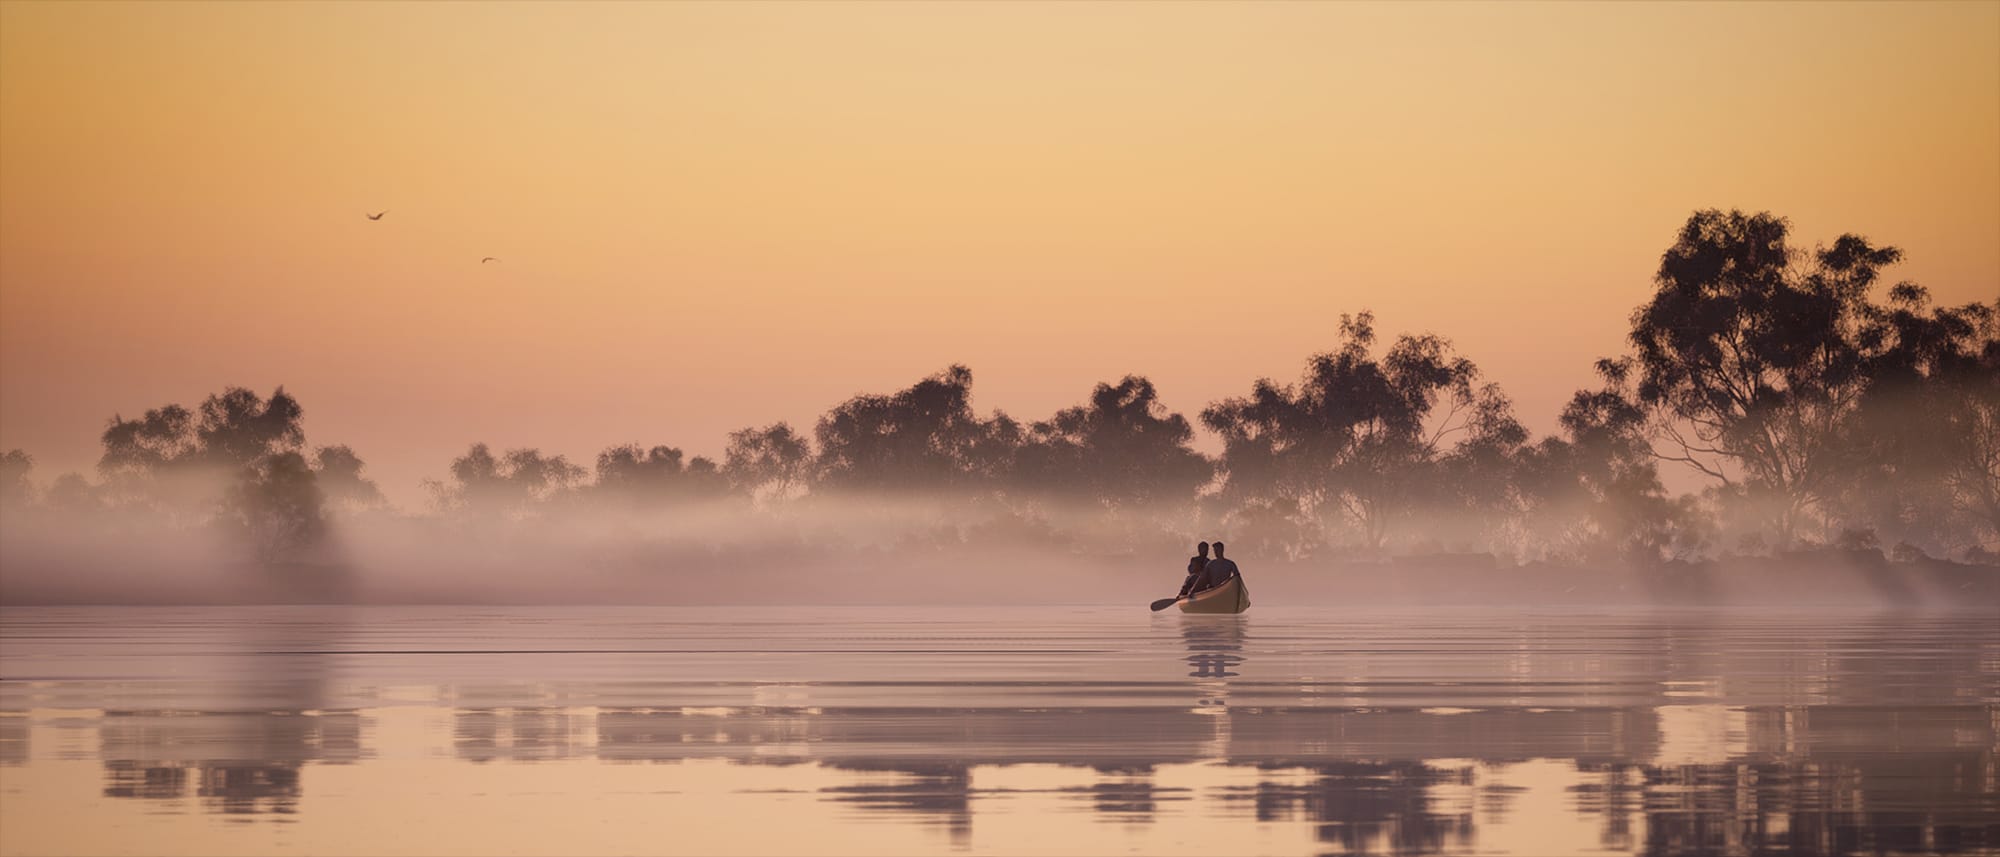
AH: I had originally intended to build a rather small Australian biome, without the narrative elements, but after having been on location and immersing myself in the biome I was to recreate, many ideas of how to tie it all together quickly arose, and I started to form a light narrative to create a flow through the content. The main narrative focus was the adventures of brothers on a day out in nature. Each shot started from a memory of my childhood, and I laid out intended shots with reference and my own location photos to find a sequence that could piece them together, with a thread being the journey of light. Starting from the hot, burning morning, to a sudden thunderstorm, the serene after rain sunset, and the pitch-black starry night. The intention was to capture the unique experience and nostalgic emotion from these great adventures.
FXGUIDE: Could you give me a rundown of the timeline, and how long you took at each of the major stages?
AH: This was a project I put together in my spare time, whenever the inspiration or time presented itself. So naturally, it was quite a scattered production over a few months, but I would estimate it would have taken roughly 5 weeks if working full-time. Most time was spent creating the content itself, but the real fun starts when composing the scenes. Once I had started on that phase, it picked up pace quite rapidly as I neared the finish line. Much of my time during this production was learning new tools, many of which I had never explored previously. Animation was a new area to me, working on the Kookaburra and other pieces, an enjoyable challenge. On the Unreal side, newly explored areas were less time consuming than expected, with the process to learn surprisingly smooth – importing animations, Sequencer, lighting. Unreal is a very well-rounded and user-friendly piece of software, with processes that are highly intuitive and well documented.

FXGUIDE: Which version of UE4 were you working in? – I believe you mastered in 4K? (3840×1646)
AH: This project was built on Unreal 4.24, and was built as real-time video game art, which has the need of being considerably more optimised, employing tricks and hacks to give the illusion of quality that would otherwise not be required in high-end offline rendering. There is no ray-tracing or other expensive features, only standard features you can find in games of today, with content supporting LODs (Level Of Detail), simplified shaders, and other standard optimising features. So while the final video is rendered for presentation at 30 frames per second at 4K, it is in fact running as you see it on my ageing GTX1080, at the same quality.

FXGUIDE: Was there much post-processing on the imagery?
AH: With the intention of being entirely video-game art, there is no post-composition or grading in the project. Unreal has the ability to do these kinds of passes in run-time, with the possibility to professionally grade and adjust a number of lighting and post-process features. For this project, I only increased the contrast slightly within Unreal, but otherwise, the image is intended to be as clean as possible, relying on the natural light within the scenes.

FXGUIDE: You mentioned that you were experimenting more with animation, was this with the car/animals, or were you also referring to the physics simulations of cloth, water, and rain when you mentioned that?
AH: Animation was an entirely new area for me on this project, something I’ve never explored in the past. There were two kinds of animation in the project – assets that are fully rigged, skinned, and animated in Maya, then imported into Unreal, and secondly basic animation of assets such as the vehicle or canoe that essentially move along a spline, which is done entirely in Unreal. There are a few examples where both of these approaches are combined, such as all the birds flying in the air. These are rigged and animated in Maya to simply flap their wings, imported into Unreal where they are keyframe animated along a spline in the air.
Elements such as the water and rain are effects created entirely in Unreal. The water surfaces are quite simplified shaders that are essentially 2 normal maps scrolling against each other to create the illusion of waves, although an entirely flat surface. The rain is built from a number of components with UE4’s effects tools. There are drops in the air, splashes on the ground, and a fine mist. All these pieces combined, though very cheap and basic as singular pieces, combine together to give the illusion of more complex solutions or quality.
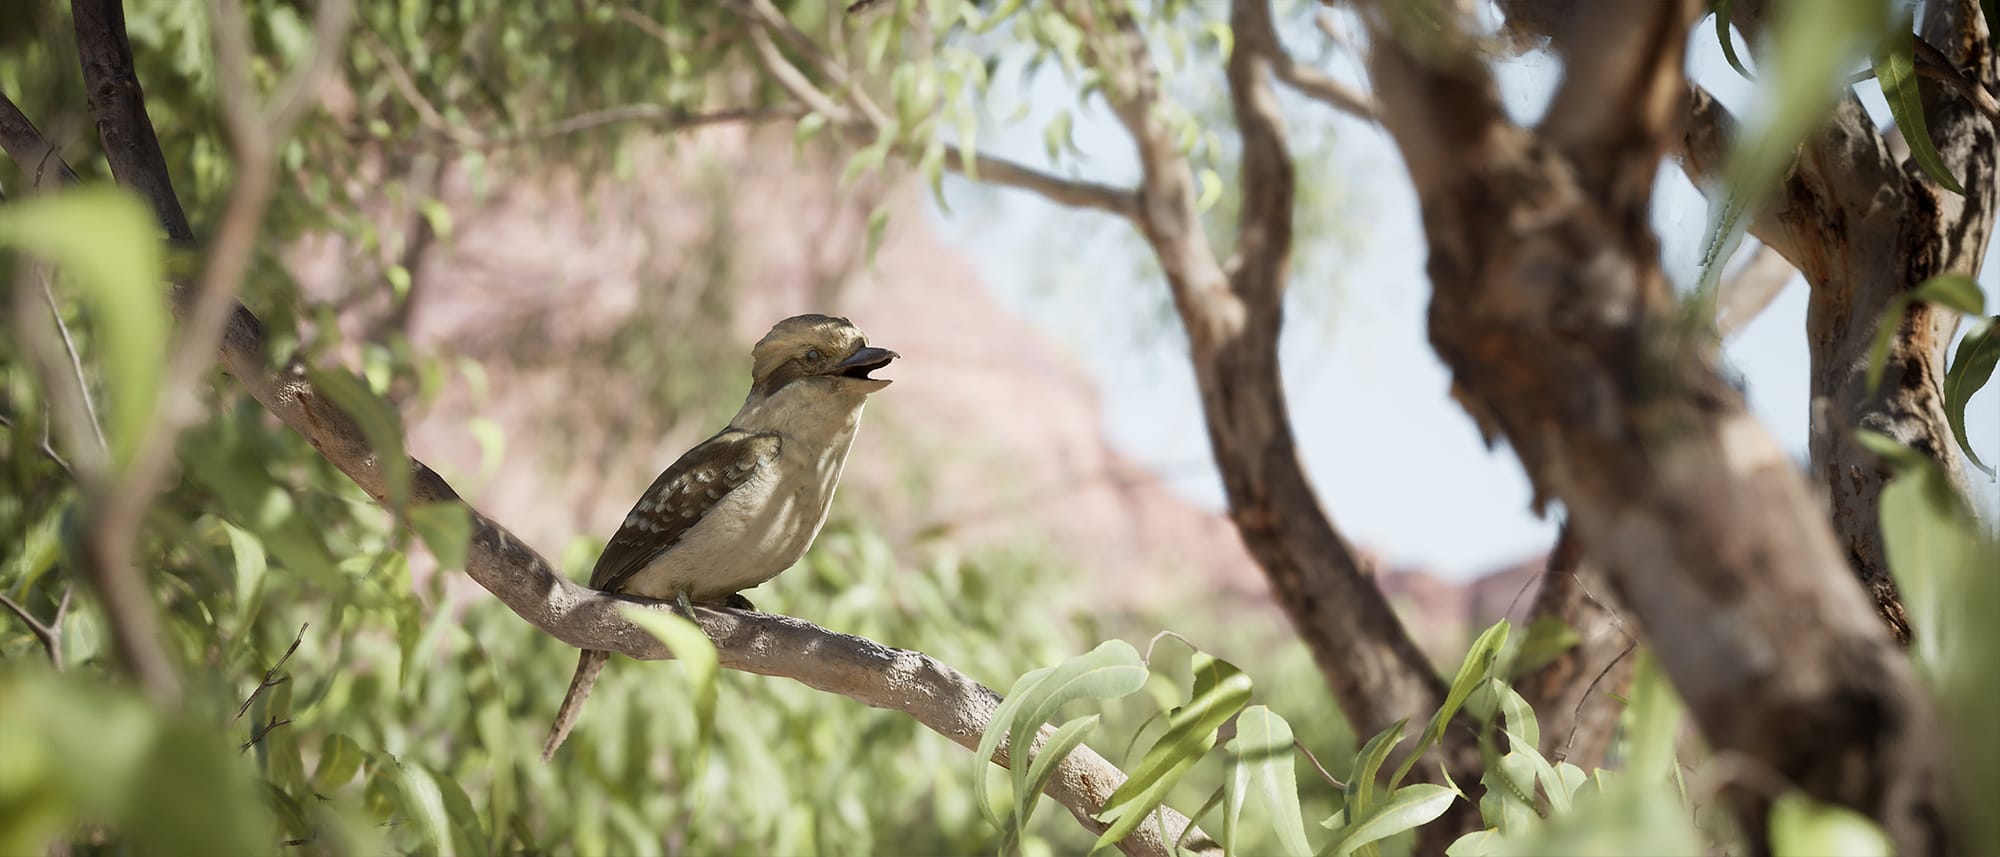
FXGUIDE: This project is so personal, can you point to a favorite shot?
AH: The closeup shot of the Kookaburra singing on the tree branch would have to be my favorite of the bunch. Not particularly because it’s the grandest or revealing shot, but because it’s the culmination of a number of new learnings – working with Sequencer in Unreal, rigging, skinning, and animating the Kookaburra in Maya, animation of other components in the scenes such as all the tree branches, lighting techniques, and most importantly timing animation with audio and music to make this shot a smooth and rewarding transition into the following larger vista shot. It wasn’t a shot I was sure I had the knowledge to complete when setting out, but I am glad I stuck with it!
FXGUIDE: Was the lighting primarily a skydome, how many lights were used generally? I would imagine quite a few area lights, but the lighting seems so natural.
AH: The lighting in all shots is surprisingly simplified. Due to this being real-time game art, I kept the lighting features to a minimum, avoiding expensive features or solutions. The goal with lighting was to keep it as natural and simple as possible, avoiding any stylized grading. Each shot is composed of standard Unreal features including Dynamic Lighting with a single Directional Light representing the sun, Distance Field Ambient Occlusion, SkyAtmosphere, SkyLight, a single Sphere Reflection Volume encompassing the full scene, and a PostProcessVolume simply to lock the exposure. For bounce lighting, there are 2 or 3 shots that use Screen Space Global Illumination, however, most shots ‘fake’ bounce lighting by enabling ‘Lower Hemisphere is a Solid Color’ in the SkyLight, and setting its ‘LowerHemisphere’ colour to a reddish tint that represents the bounce light from the red dirt seen in most shots. This cheap solution works great in this content, as there is generally always the need for a strong red bounce in the biome.
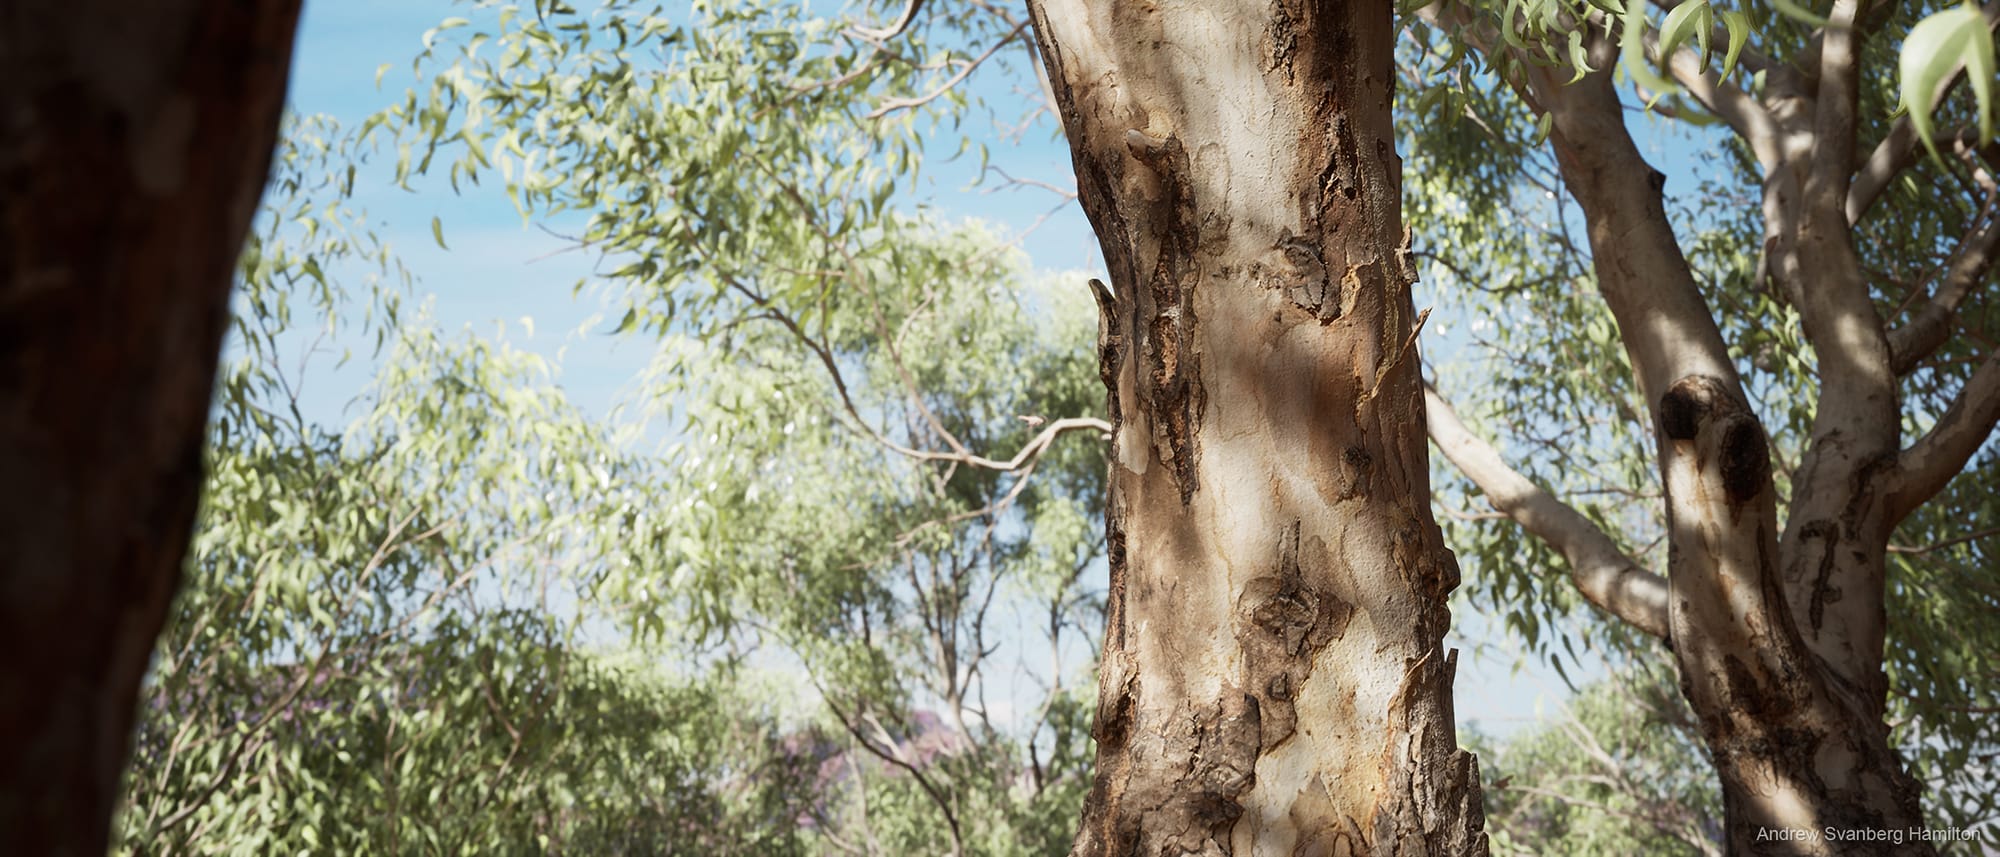
One particular Unreal lighting feature I’ve made extensive use of in this project is Contact Shadows. This is a screen-space feature that casts short, sharp shadows from geometry. One way to push this feature even further, greatly increasing the illusion of detail, is to set up asset shaders to support Contact Shadows on surfaces themselves, using a heightfield texture (baked from a high poly photogrammetry scan to low poly mesh) to represent the detail that would otherwise only be present from a very high detailed mesh. This essentially ‘casts’ Contact Shadows from the heightfield texture, not only the low-resolution game mesh geometry, giving the impression of a highly detailed asset. Combining these sharp Contact Shadows with the soft/low-resolution standard Cascade Shadows, you can start to create the illusion of a shadow penumbra effect, without the cost of expensive Ray Tracing.
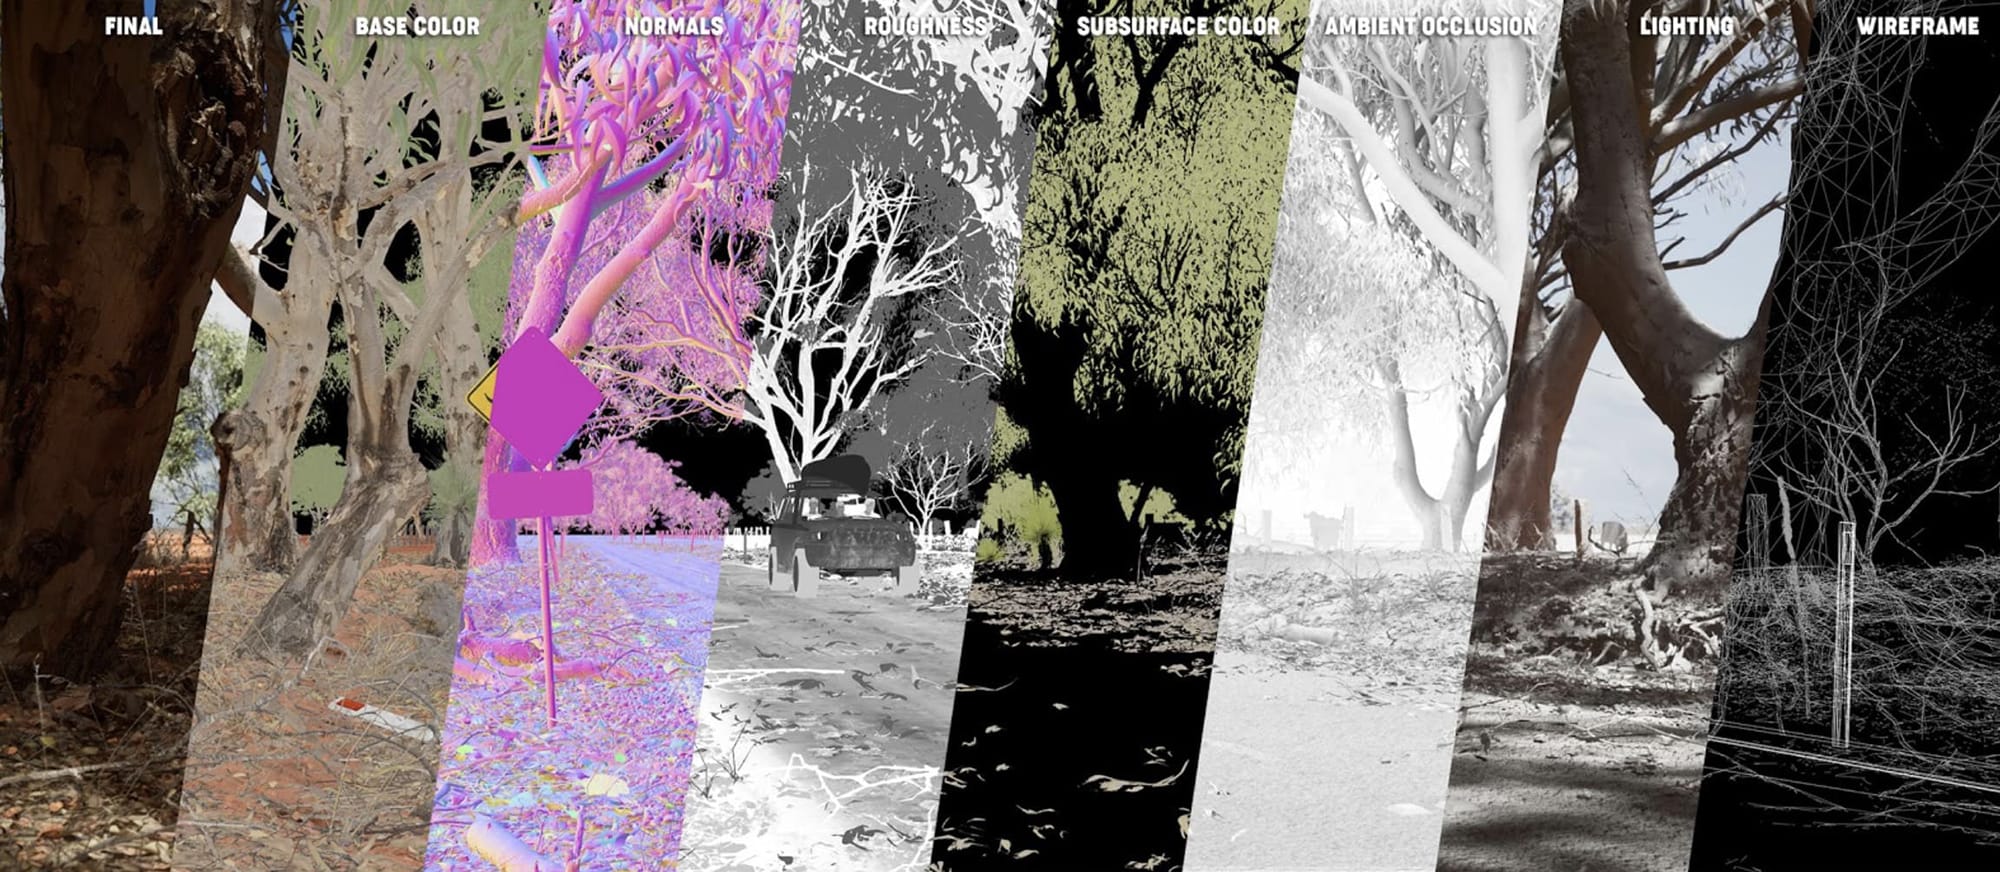
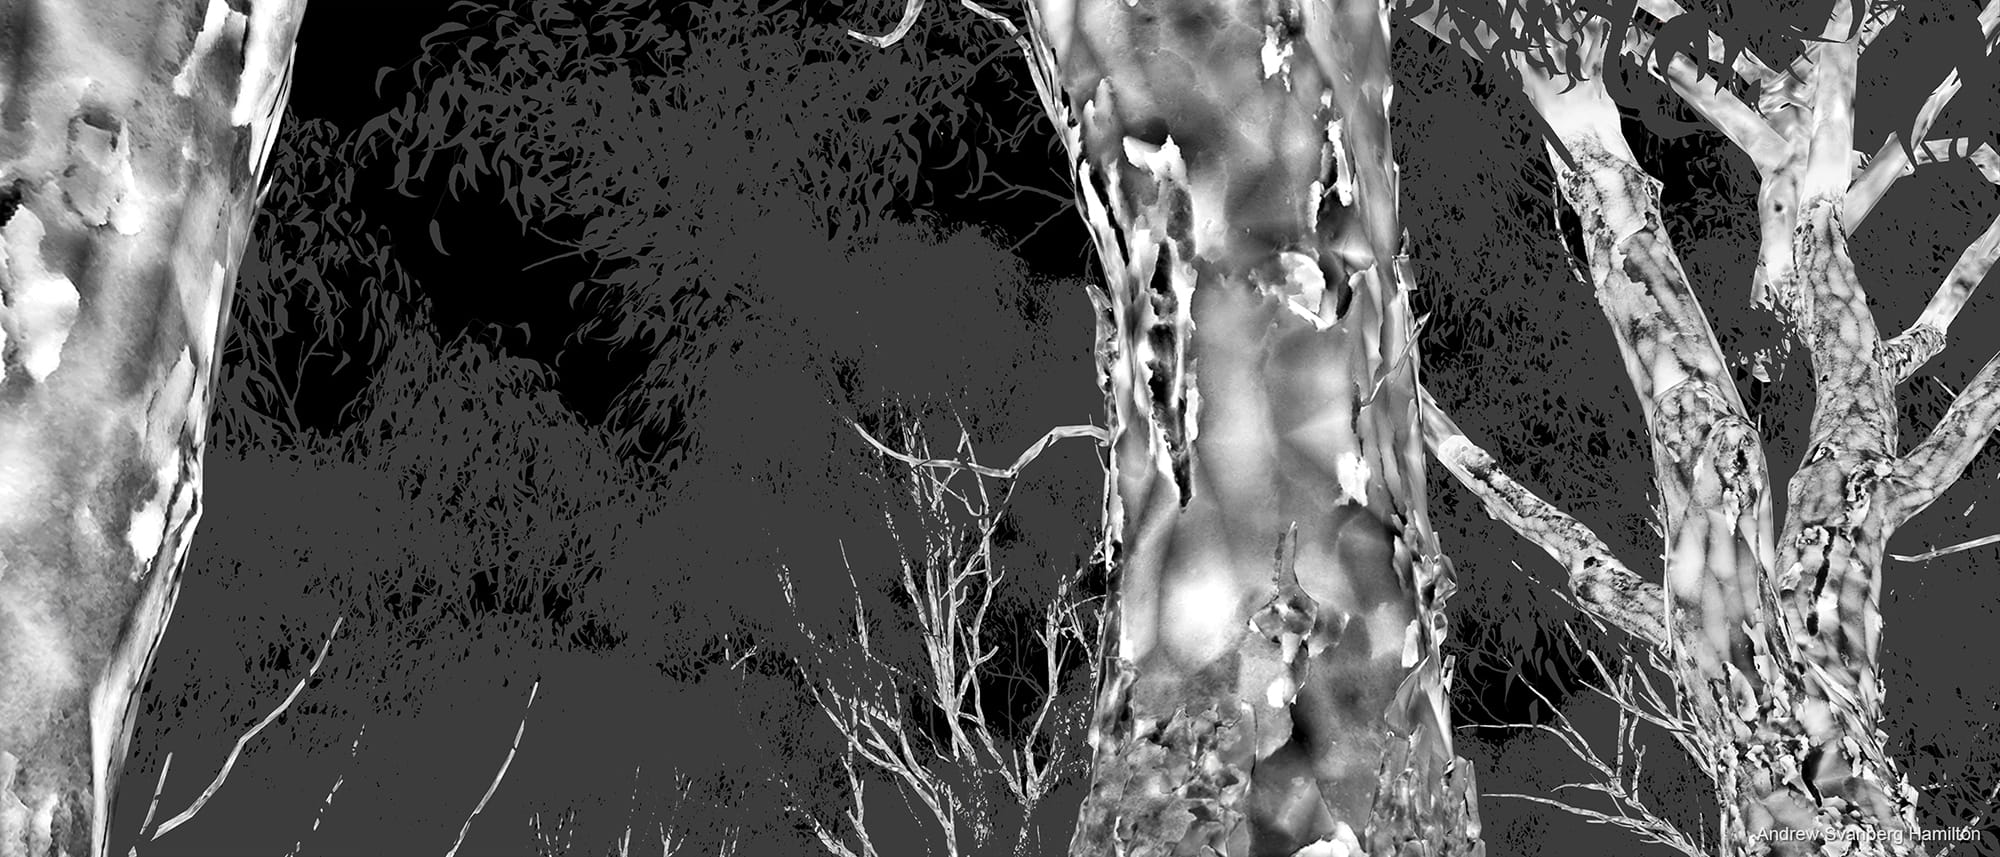
Below is a before and after of the result, notice the sharp detail shadowing from the tree bark, while still maintaining the soft dappled lighting across the tree:

Here is a wireframe of the tree to illustrate a fairly low density of triangles that was rendered – no tessellation or displacement is used on any of the content:
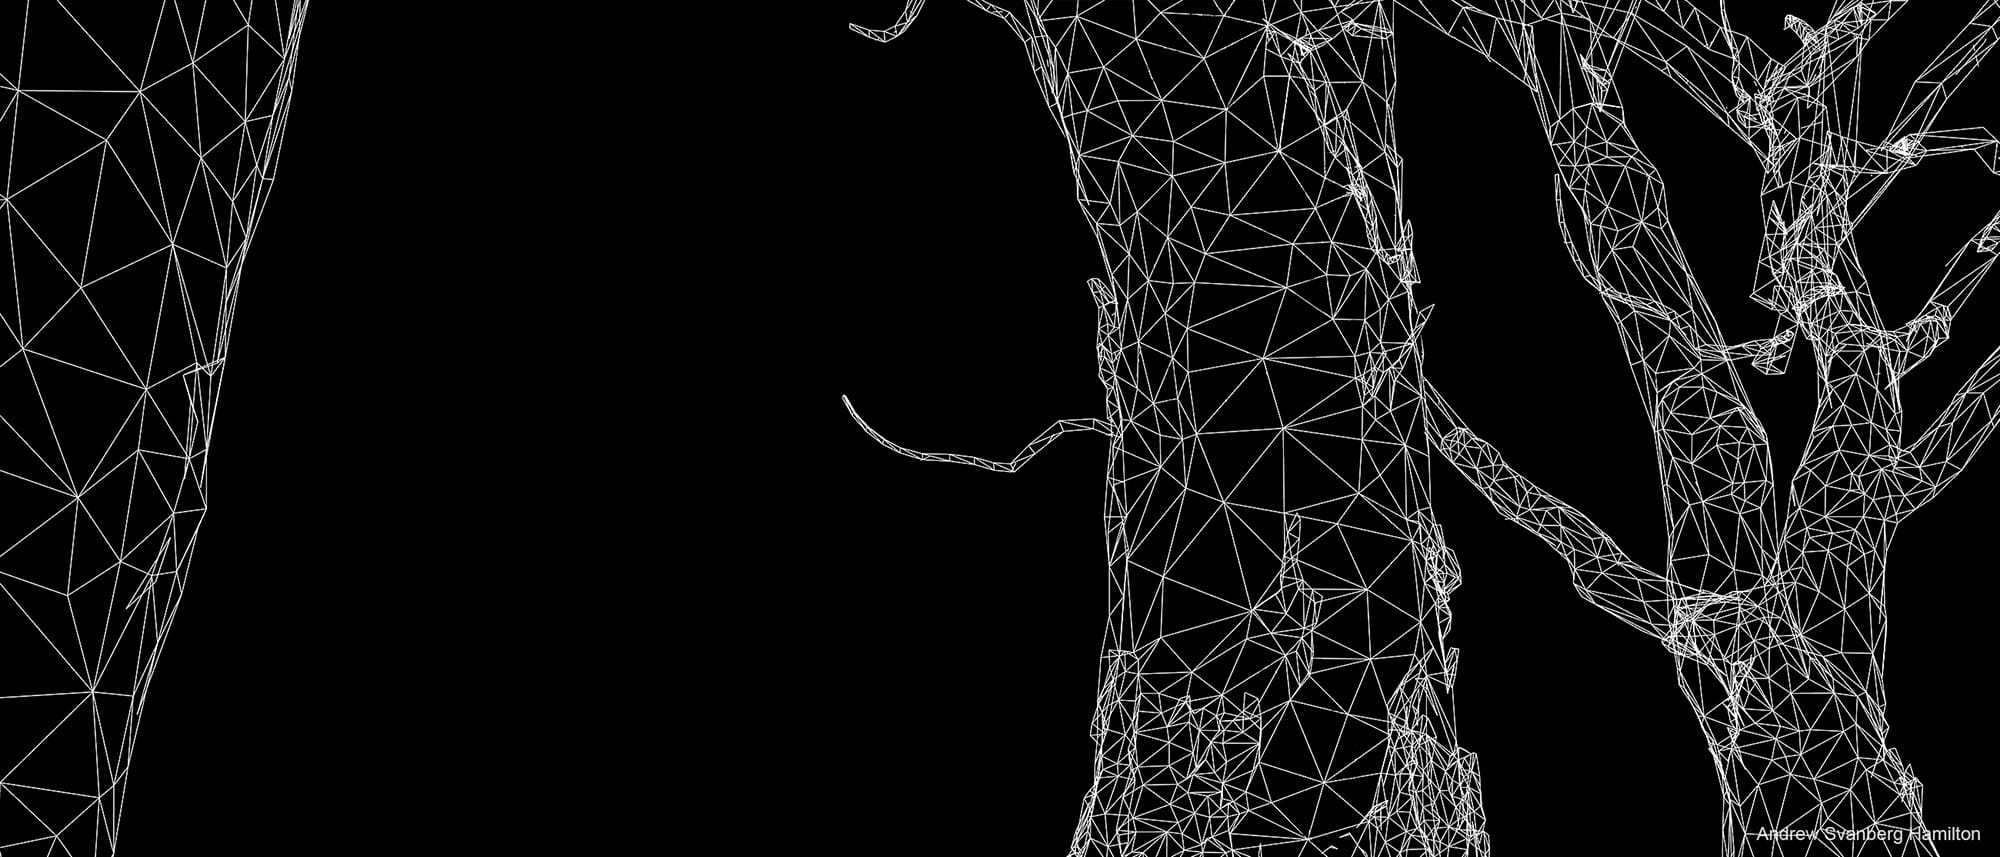
And the heightfield (baked from a high poly photogrammetry scan to a low poly tree mesh) that the Contact Shadows ‘cast’ from within the shader, creating the illusion of detail:
FXGUIDE: Finally Andrew, I just so enjoyed the cinematography – I know you’re primarily an Art Director but could you discuss the lensing choices and camera fluidity?
AH: I chose a custom 21:9 ultra-wide within Unreal to create a very cinematic feel. As I included many wide shots in the project I wanted to maximise those views with as wide lenses where possible. I wanted to create a very slow and soothing flow of cameras through each scene, leading from one to another without any abrupt transitions. I often jump from closeups with a low aperture to maximise depth of field, to a vista with a much higher aperture for clarity, and back to a closeup to create a rhythm. Bouncing between extreme closeups, and wide shots was often a challenge in reducing drastic cuts, but in combination with slow and smoother camera movements it turned out quite natural. This is all digital art, of course, however, I wanted to make sure it felt as human as possible, so I utilized Unreal Camera Shake to give that imperfect, wobbly feel to each shot, just enough to break away from any overly smooth spline-based camera movements.
Indie Series
Next on the Indie Series is Chalk Wars IV. If you have a major personal project that you’d like to discuss, please ping us via the contact us page.