Chris Godfrey is a very experienced Visual effects supervisor and, as with many professionals, he has found that “necessity is the mother of invention”. While doing work on the feature film The Great Gatsby he developed a technique on to gain the same effect as an additional four stops of depth of field when doing studio work.
The problem
On any major feature film a common problem can be shooting VFX exteriors elements such as the actors on a soundstage in front of green screen. Ideally one would shot the green screen outside with the correct matching sunlight direction but this is not always possible.
Lighting an actor with a very strong light on a soundstage can be very expensive for a DOP. Not only are specialist Softsun 100,000 watt lights expensive to use (productions have been know to light sound stage with two just to match exterior sun light), but they are bulky, heavy and very time consuming. But without major lights it is very hard to get the exposure level needed and thus the composited final shot can look fake, even with matching directionality and careful color grading.
While on the set of The Great Gatsby, former co-founder of Animal Logic and VFX supervisor Chris Godfrey worked out an elegant solution. He has proven in his films that it works and produces award winning shots, but it does seem like magic and has left even some seasoned DOPs scratching their heads and playing with their light meters.
The solution has virtually no additional cost, but relies on the much higher shooting resolution that modern cameras such as the Red Camera provide. While a Red camera can shoot up to 8K, VFX shots are still normally mastered at 2K. This is a brilliant use of that extra resolution. The technique works for films, television, commercials and documentary production. It is not a ‘VFX post process”, in the sense that it does not move the problem to post and add cost or time to your budget.
It all is possible because modern camera have HEAPS of resolution!
Camera facts
One: lens properties
Actual active capture area in mm.
16mm camera -10.26h v 7.49v
Epic – 27.64h x 14.58v – half crop is 13.82 h x 7.29 v
15 perf Imax camera – 70.739h x 51.63v
To understand the technique, there are three nuances of cameras and lens that we need to agree on. It is generally agreed that an image coming from using a 16mm lens on a 16mm camera is approximately a match to 35mm lens on a Red Epic camera. Or even vaguely match a 100mm lens on an Imax. In other words, as the camera film back increases so does the focal length of the lens for similar framing.
But importantly lens attributes are locked to the lens, independent of the camera back. So the depth of field (DOF) for each lens variation is NOT the same. The same blocking looks the same but the DOF is: 12 feet on 16mm, About 2 feet on a Red and only 4 inches on IMAX, assuming you swap lens and have matching framing. Extreme differences in DOF, but similar otherwise for framing.
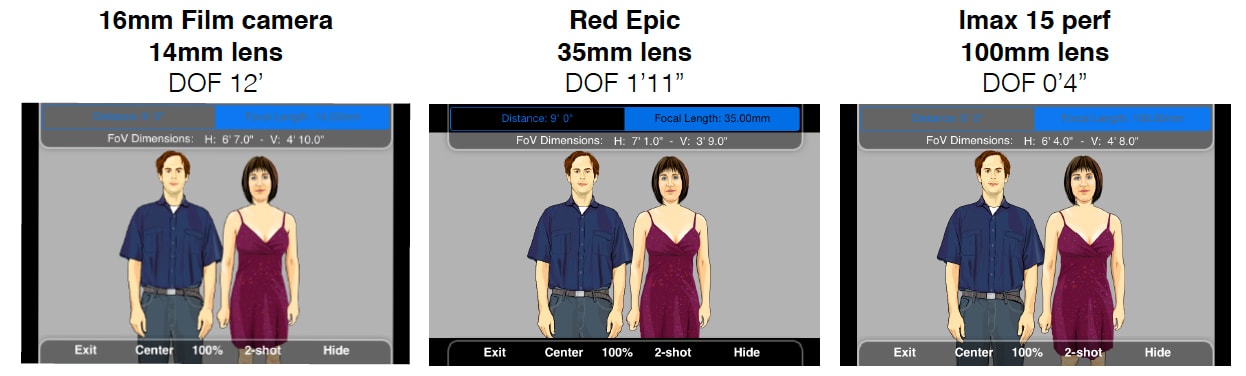
Alternatively, if we swap this around and use the same lens on all of the formats, then the framing changes but the DOF is almost the same.
Here are the exact figures from DOP software commonly used by Camera Assistants: pCAM. The numbers are not the same but they are much closer…

Just to repeat: this means the DOF produced by any lens does not alter with the film back size change. But different size lens have different DOF.
Two: lenses are lenses are lenses
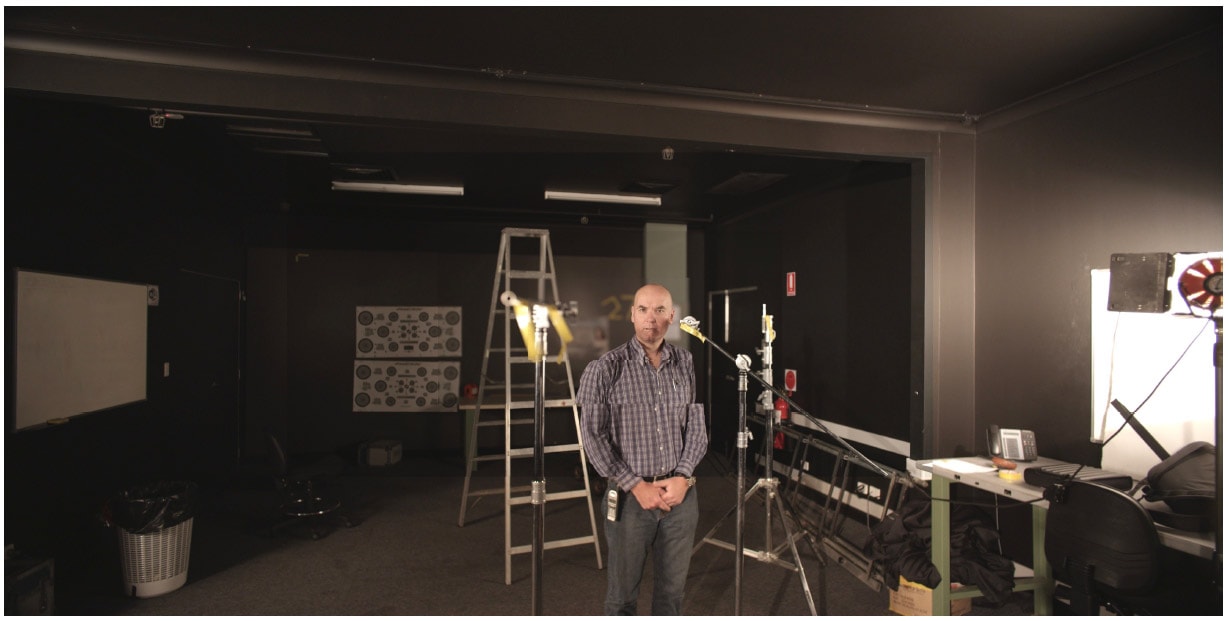
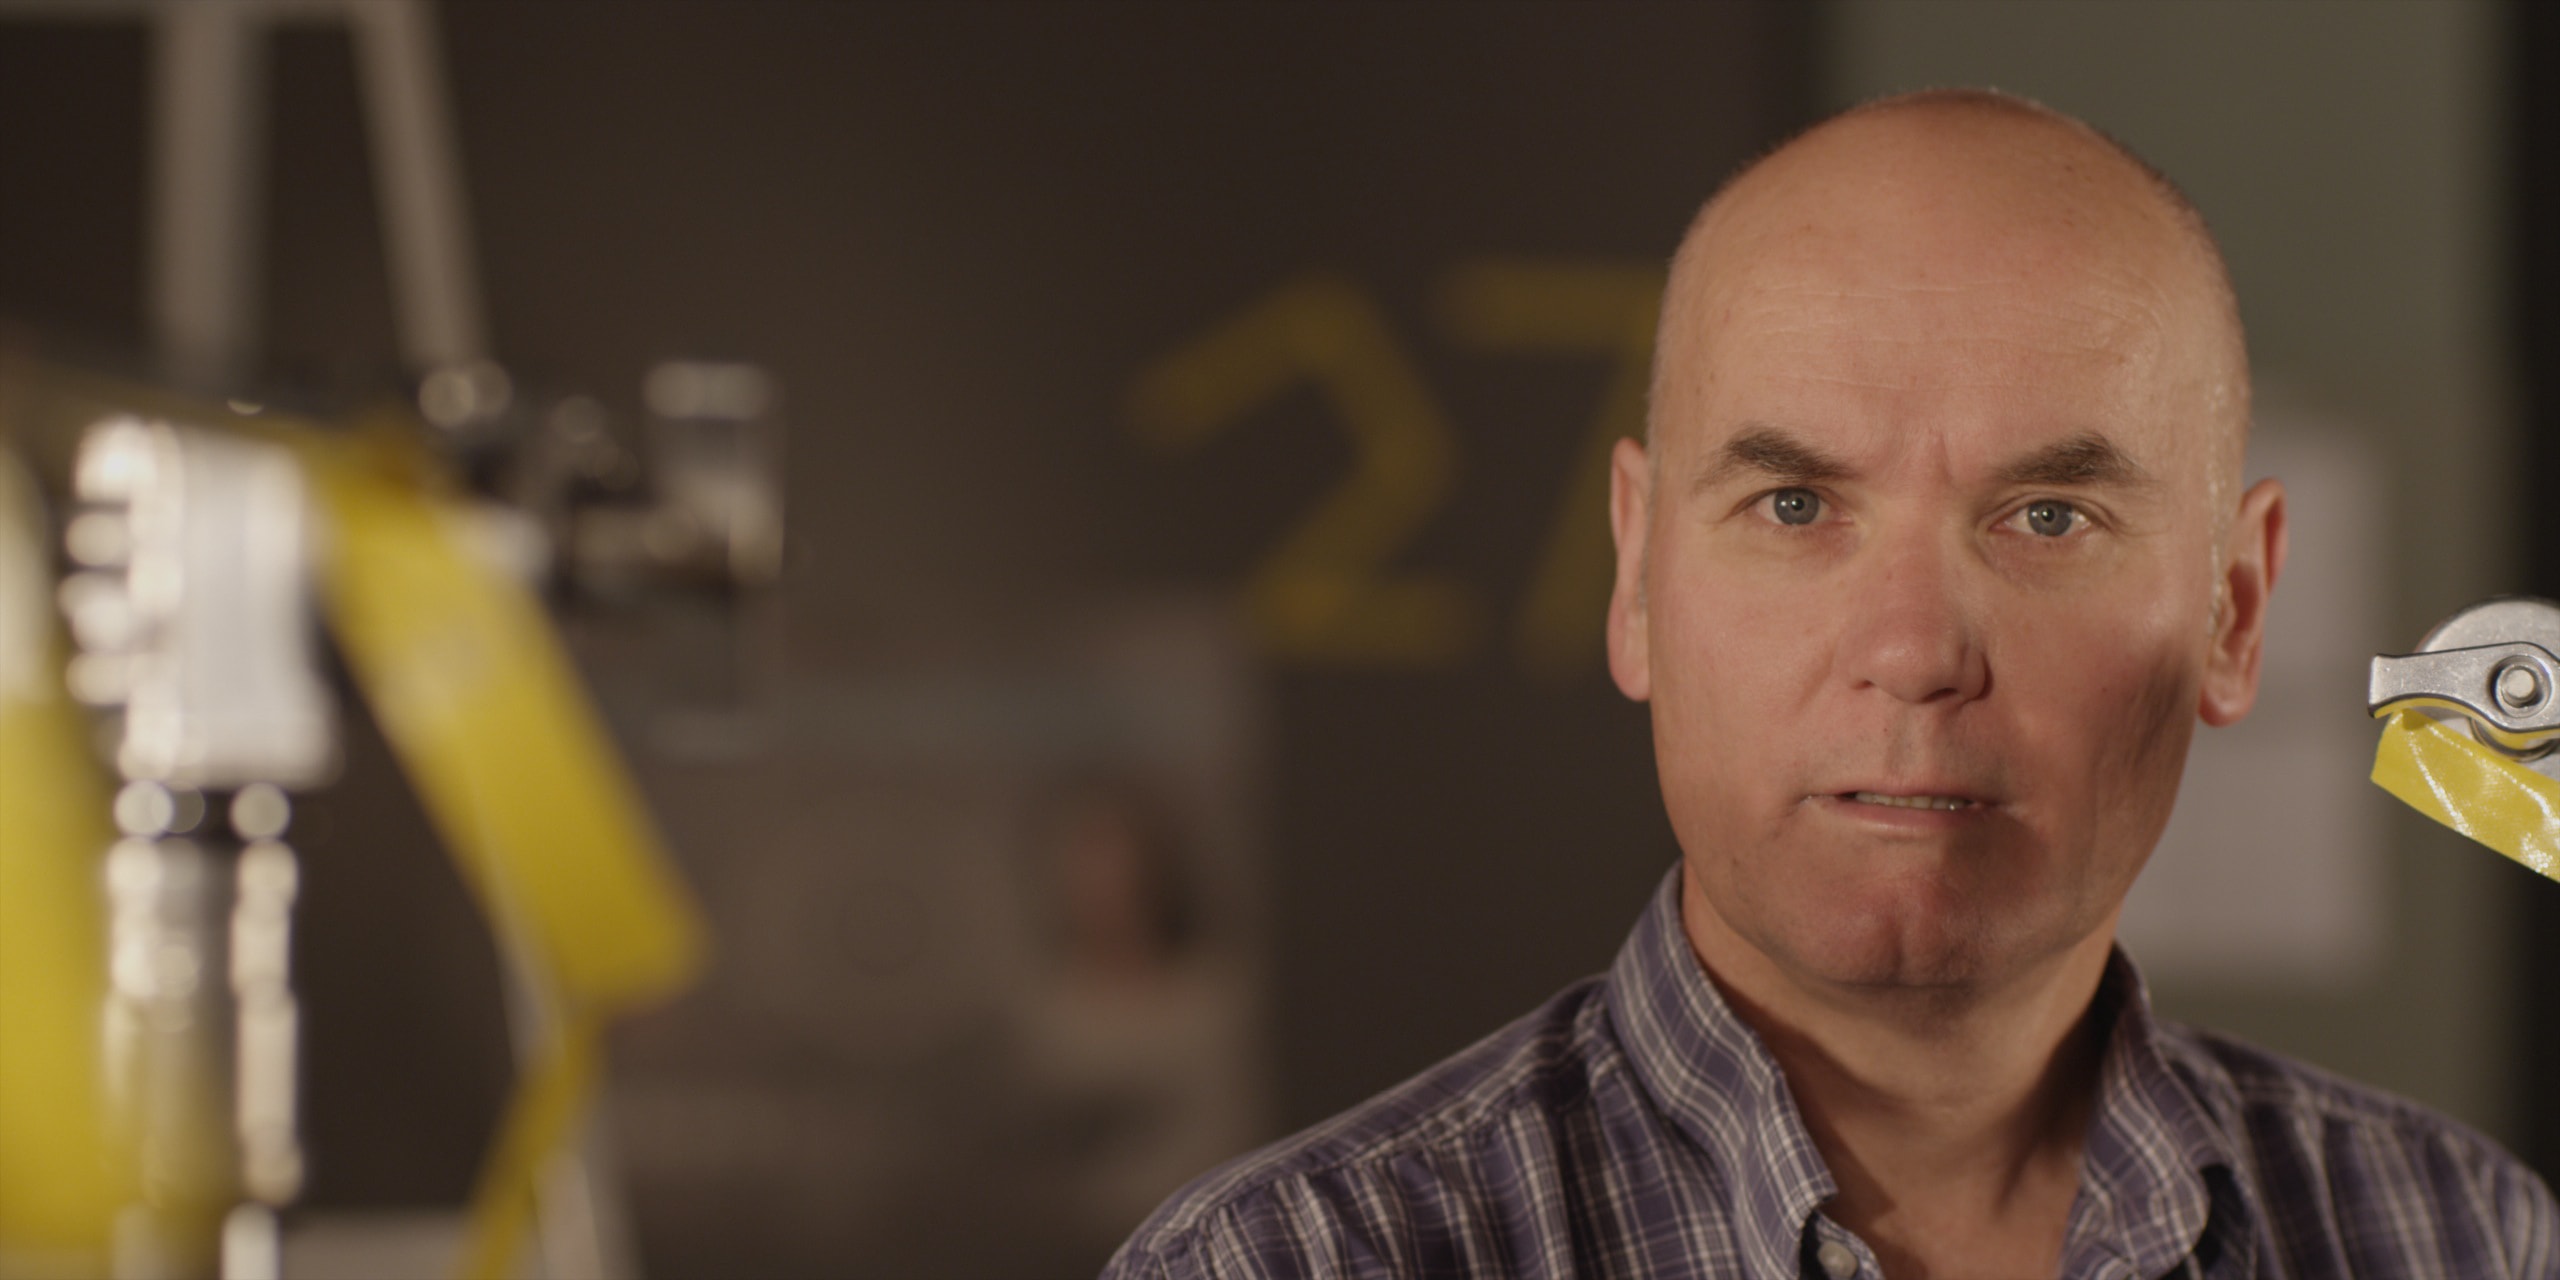
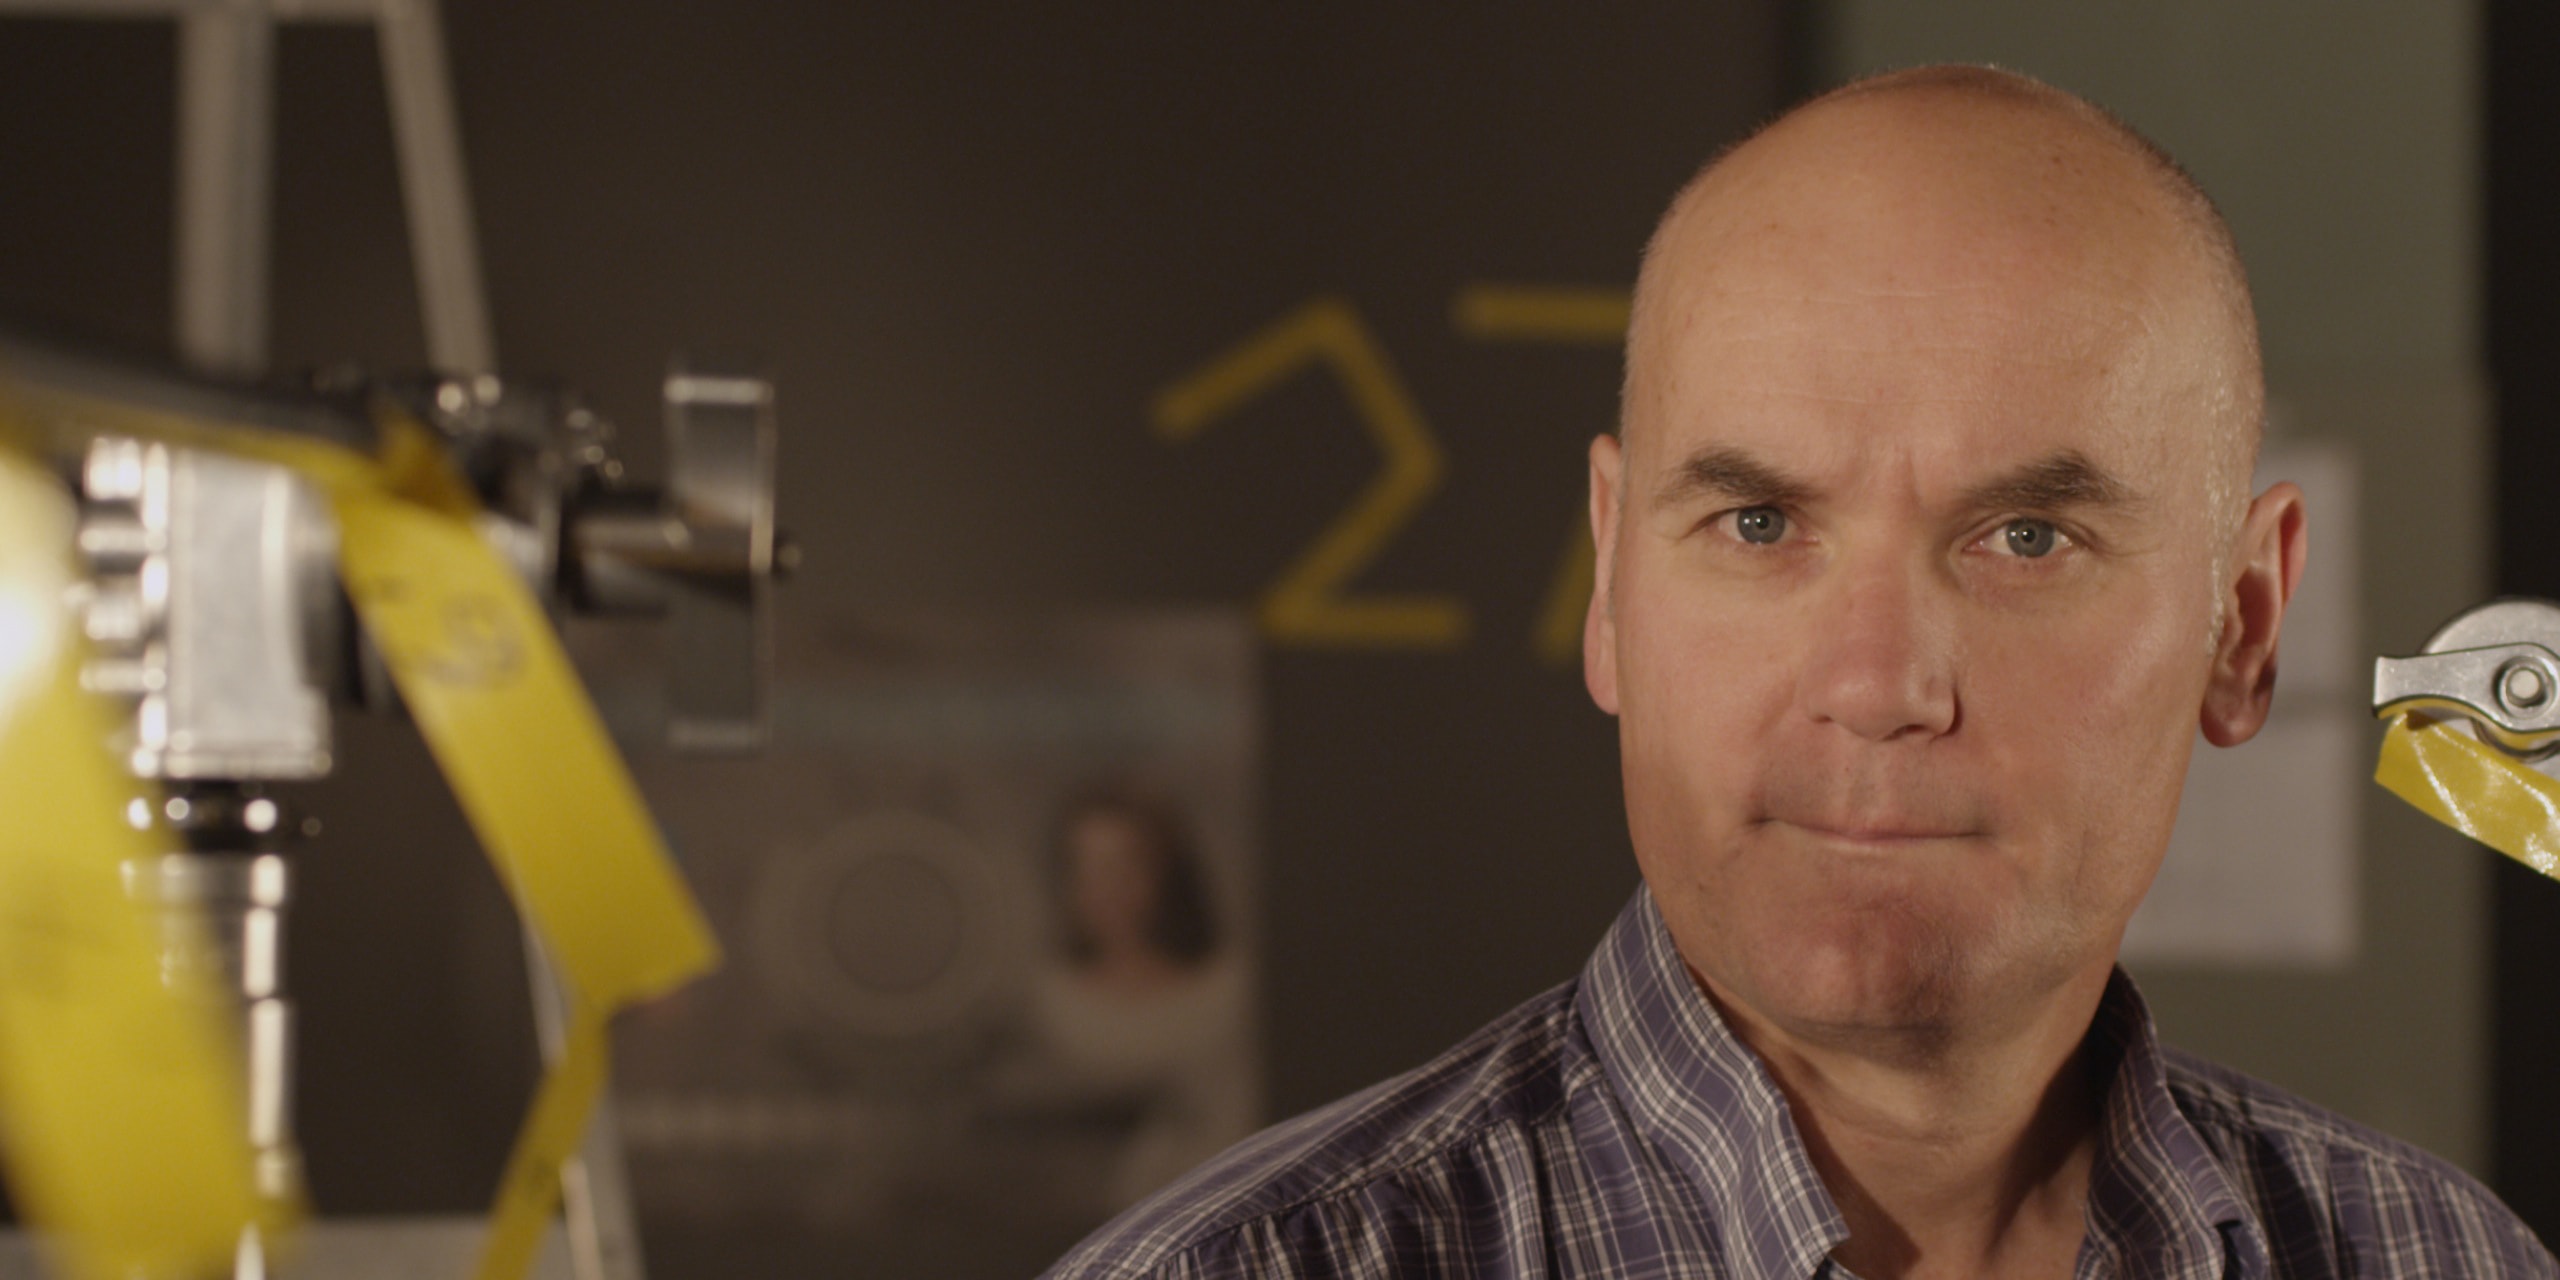
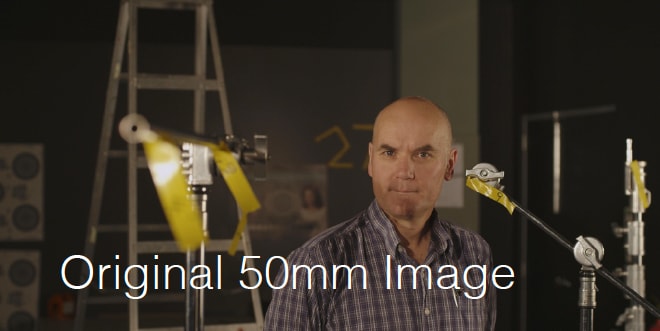
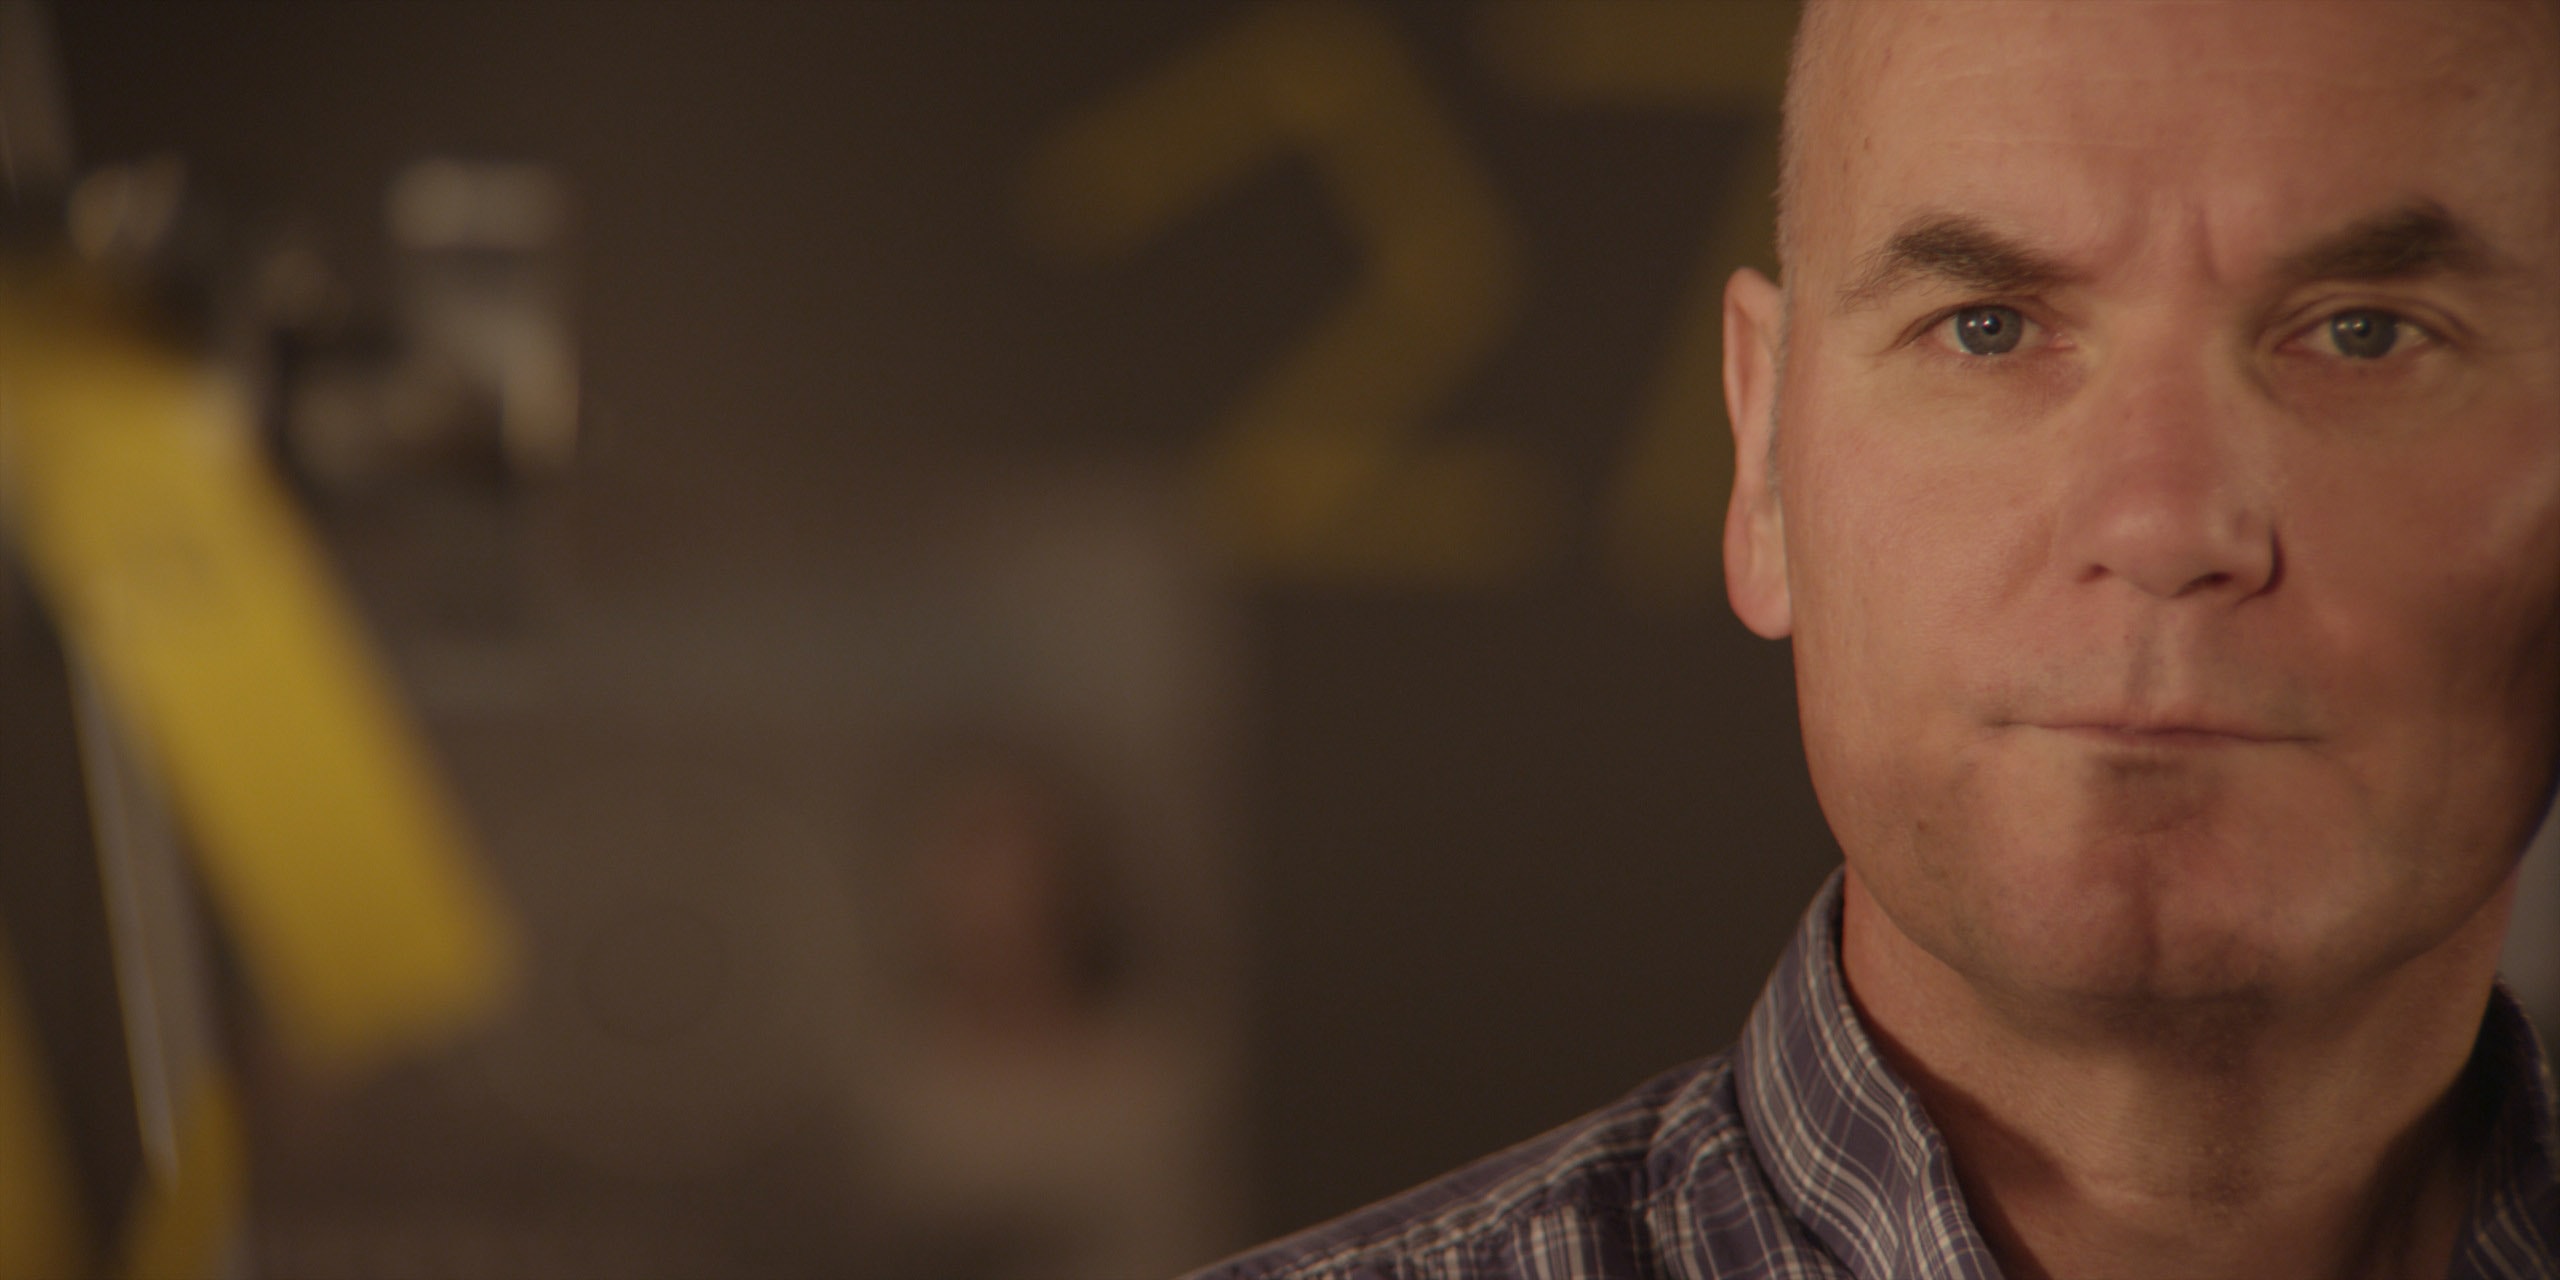
A lens is a lens is a lens. For example, when shooting from a locked camera position, a 50mm lens will sit happily inside a 27mm frame which in turn would sit inside a 14mm lens.
The difference on set is not normally the lens in terms of the viewport of the lens or what the lens sees, but rather how you frame up and use a 27mm vs a 50mm. This is a really hard concept for some people to believe. We think that the longer lens has different characteristics, this is because a longer lens blows up the small middle of what a wide lens sees, or we just about always move the camera when we swap in a different lens on set. But if resolution was not an issue and lens were perfect, then you could comp a 50mm immage into the middle of a 14mm image.
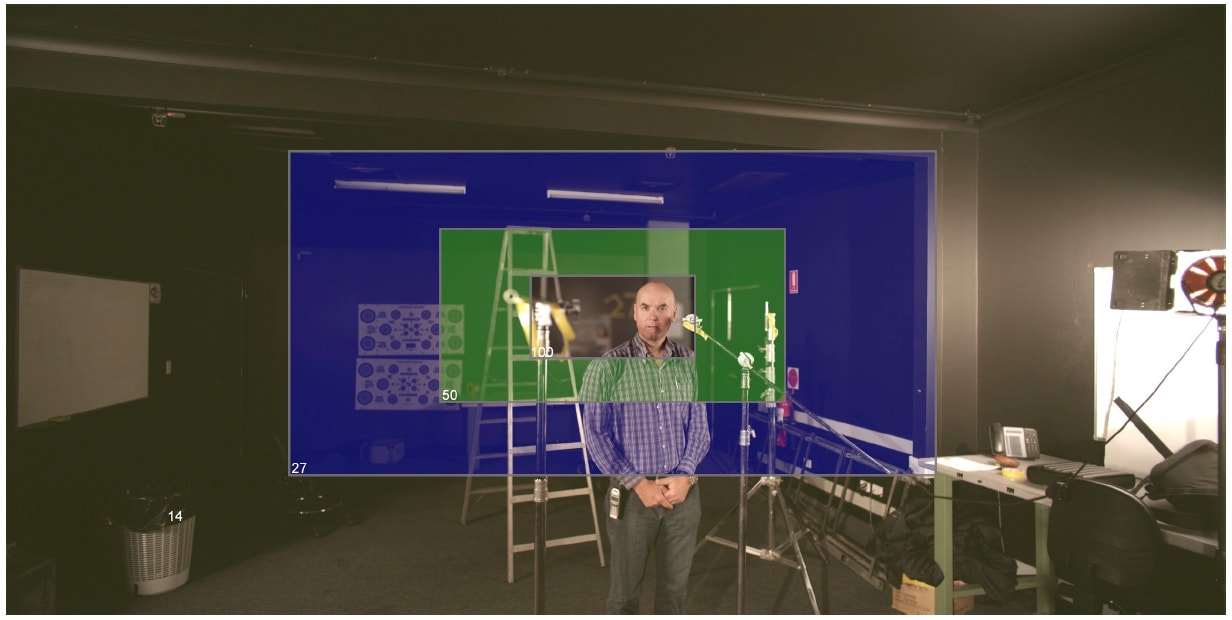
In real life there are obviously small colour variations, chromatic aberrations, different bokeh, lens barreling, etc. BUT each image from each lens still carries the original lens attributes which including depth of field.
Three: need to match DOF in effects work
Chris Godfrey shot the car scene outside early afternoon at an F-stop of F16. Then went onto stage to do matching blue screen plates but he could only light up to an F-stop of F4. He was 4 stops under the matching exterior elements. F4 to 5.6, 8,11,16. Since every stop is double the light level of the last stop, an extra 4 stops of light equates to 16 times the original studio light level.
On Gatsby in stage one, the mansion set was 50 metres by 30 metres by 12 metres high. The monthly rental of lighting cost around $300,000 which included rental of lamps, lighting boards and dimmers, generators. “And so if we could have hung the additional lights to get from F4 of F16, if we could get generators to power them, if the lighting rigs could hold the weight, if we could handle the additional heat on set – to add the extra 4 stops would change the lighting package from $300,000 to $4,800,000 a month. Totally unrealistic,” Godfrey explains.
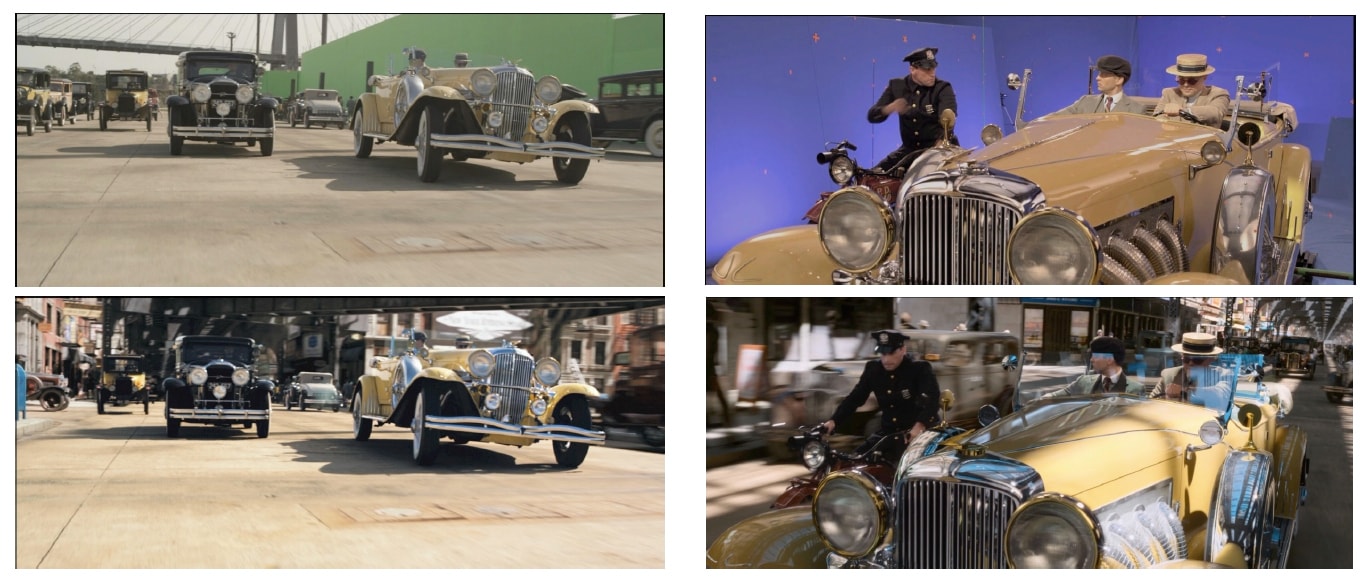
For VFX, the F-stop became an issue on The Great Gatsby because the Duesenberg car shot in the studio was soft at the front and rear of the car when filmed at F 4. “The focal split was not deep enough because of lighting and F-stop,” says Godfrey. “So we overlaid a CG version of the car around Leo and Toby. This shot is actually the reason I came up with this technique.”
The vfx composite would have looked very wrong with the car having a limited DOF but the background having vastly more DOF. This miss match of DOF is one of the most common problems in compositing and perhaps the greatest difficulty to fix, since the DOF is baked into the photography and so the only solution to get the car fully in focus would be an expensive digital car added on top – but without the in camera limited depth of field.
The solution
The solution is to work on the relationship of camera back, the lens selection and the F-stop.
For example: a lens 100mm shot at F 2.8 @ 400 ASA has a depth of field 2.7 inches. If you want more DOF you would have to add more light. In fact ,to get to 11 inches of DOF you would have to add 4 stops more light!
On the 100mm – if you could add 4 stops on set, then the exposure is at F 11 (same 400ASA) and now the depth of field is exactly 11.2 inches.
If you swap in a 50mm lens on the camera, at the same camera location, the image will naturally be wider… BUT that Lens 50mm cropped in to match – still at the original F 2.8 (400 ASA) on a 50mm lens has a depth of field 11.2”.
In other words, without having to push up the lighting levels – remaining at F2.8 – you are getting the improved DOF that you could only get on the 100mm by spending a fortune on more lighting !
This is not a unique trick with 50mm and 100mm lens…
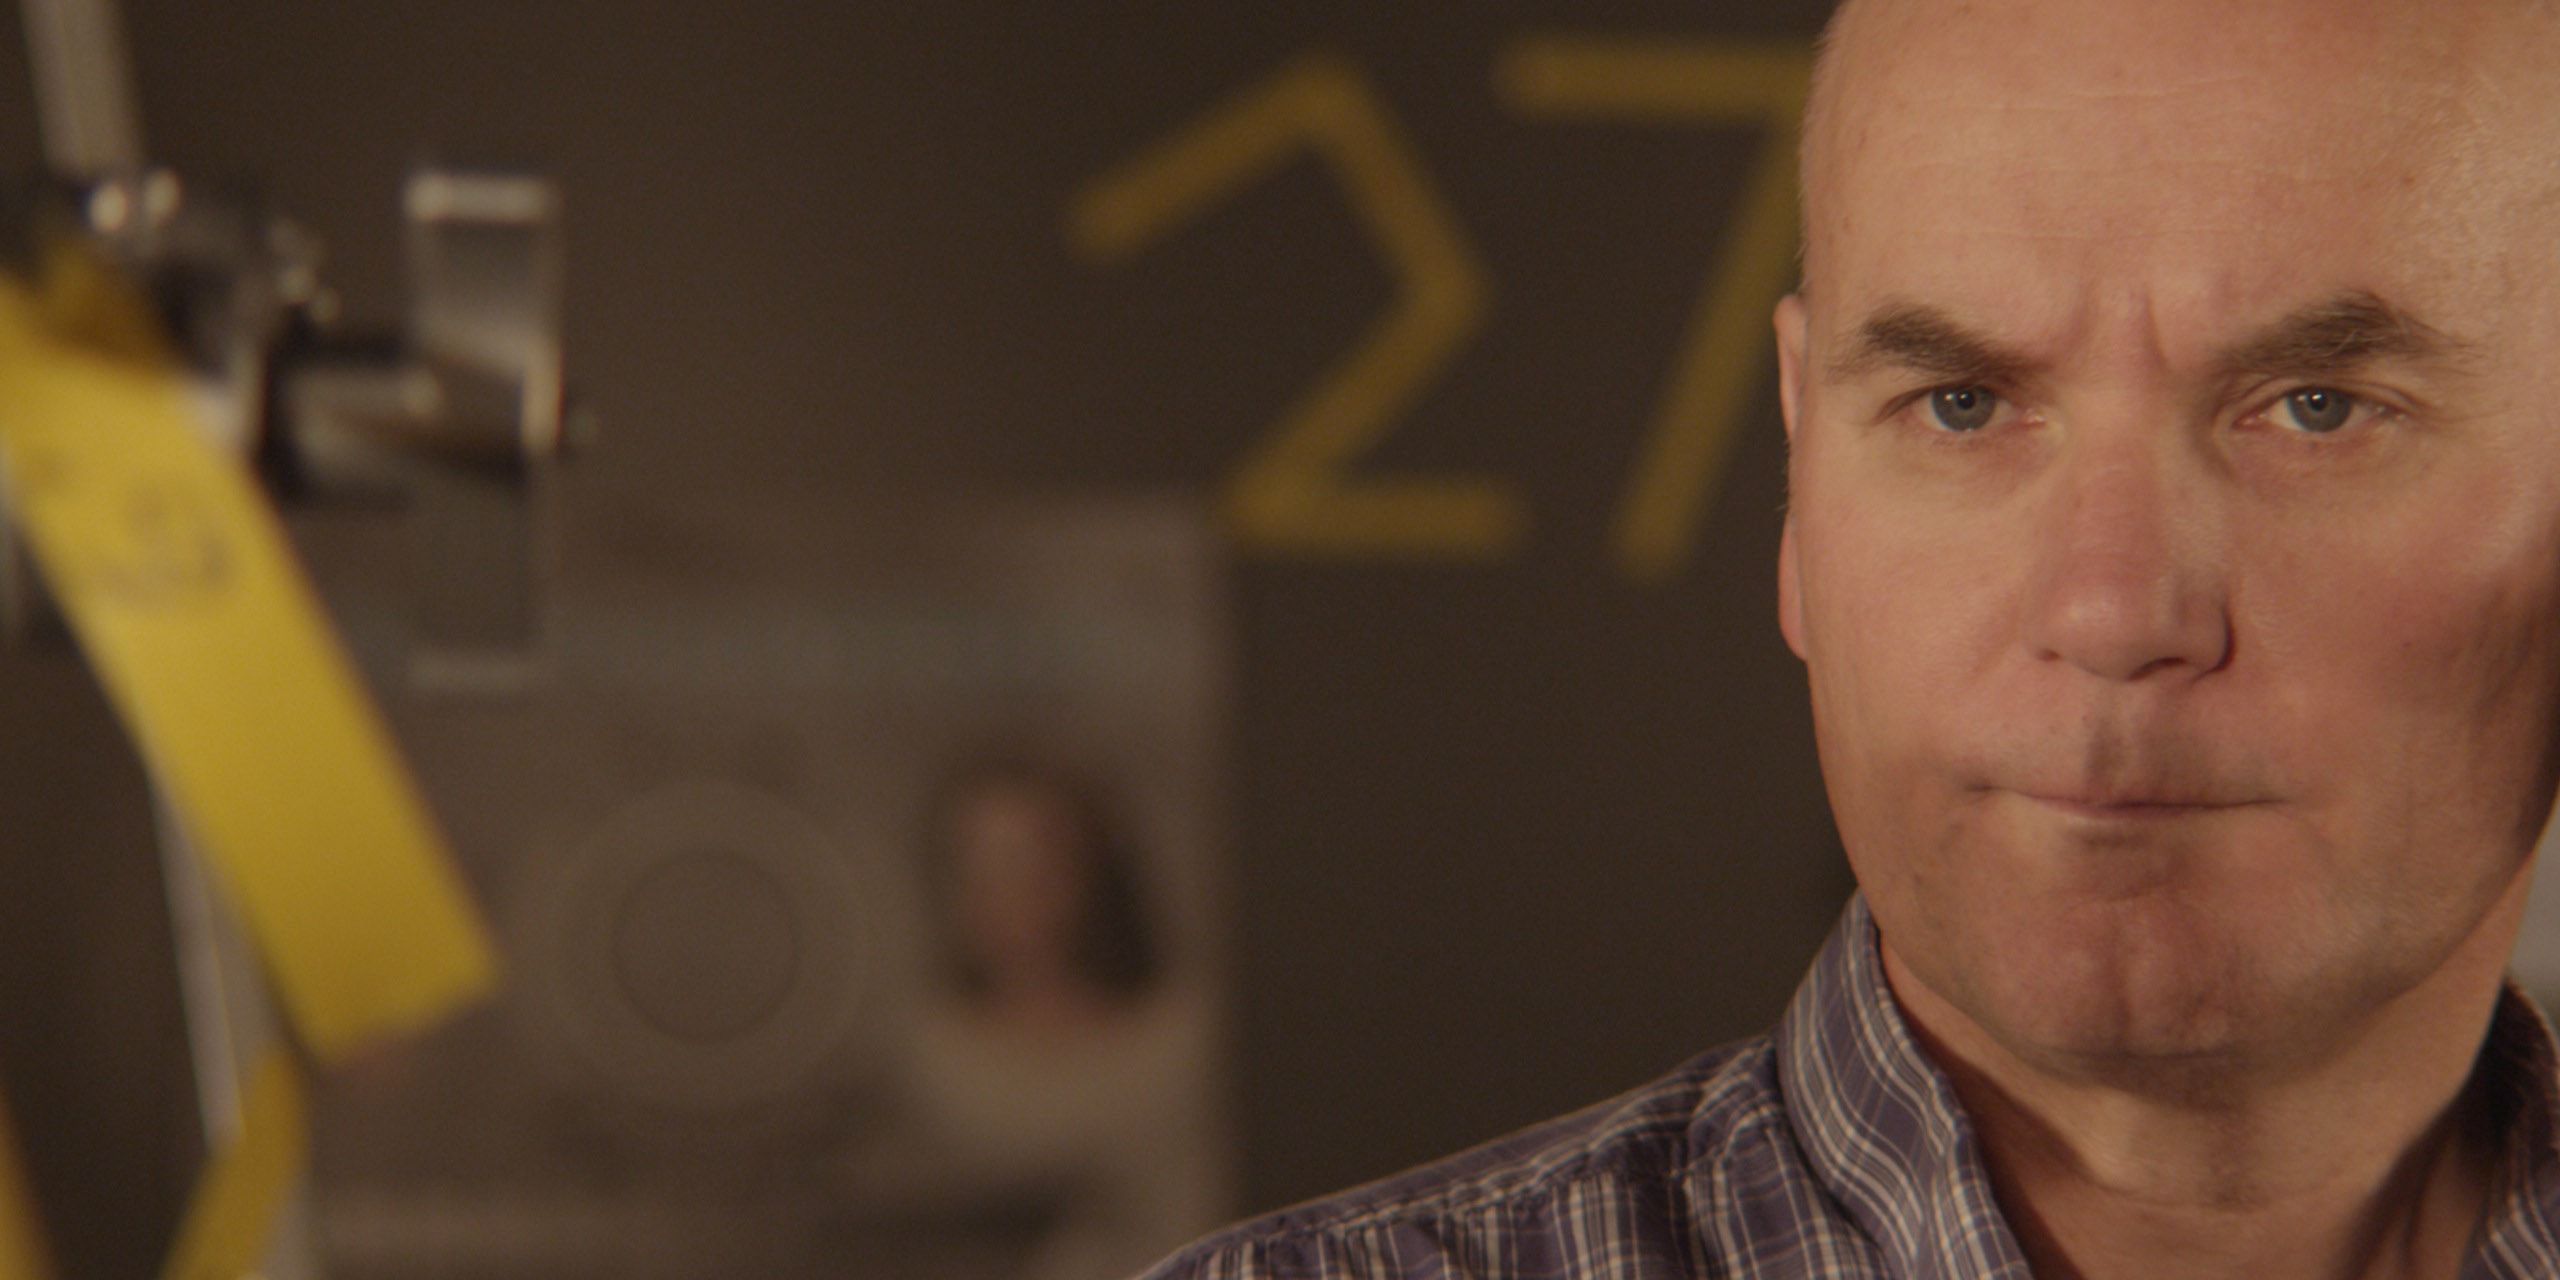
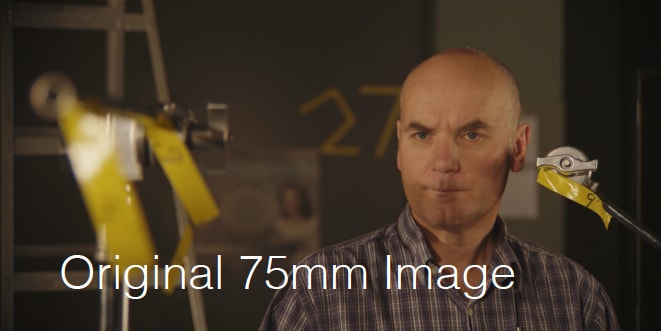
150mm and 75mm
Here is exactly the same thing calculated again but with a 150mm lens and a 75mm lens.
For example: a Lens 150mm shot at F 4 @ 800 ASA has a Depth of Field just 1.7 inches.
If one could add 4 stops of exposure, you would be filming at F16 (still at 800ASA) and the depth of field would increase to 6.8 inches. Not a lot, but a lot more than the pervious 1.7 inches.
If you swap in a 75mm lens on the camera, at the same camera location, the image will naturally be wider. BUT that 75mm lens image CROPPED to match the 150mmm — still at the original F 4 (800 ASA) — has a depth of field of 7 inches.(see below). This is very close to the 6.8 inches you got on the 150mm by adding 4 whole stops more light!
In other words, without having to push up the lighting levels – remaining at F4 – you are getting the improved DOF that you could only get on the 150mm by spending a fortune on more lighting. Just as was the case on the 50mm and 100mm example.
Conclusion
The technique works on all high resolution cameras and lens setups where you have control of the F-stop and interchangeable lens.
The technique is very simple and you can change to the extra 4 stops option at any time if you are already working at 5K raw. Additional depth of field can be implemented without changing lighting – just a wider lens (by a factor of one half).
Previewing of the crop can be reviewed straight from camera with internal window ‘shading’. A more advanced video split could easily be implemented for director and DOP. If you do crop to centre, it still allows for the wider version as well. As a result you have more flexibility in post.
Additionally for VFX it makes it easier to key with more visible tracking markers on the green/blue screen.
In reality, the technique can be pushed even further than doubling (2 to 1) as the 5K chip can be cropped down by a factor of 2.5 and is still only down to 2K. Or you could use an 8K sensor.
This technique helps resolve matching location work with studio work. It also address the problems with soft focus or rolling focus when the lens is long and open. Godfrey has also used it to compensate for loss of light levels due to reduced shutter angles, varispeed, filter pack loss. “It makes the idea of shooting a more focussed ‘sun’ on stage more feasible. It helps with shooting scale model and it works a sweeter aperture for the lens,” Godfrey adds.
The testing Chris Godfrey did was with a Panavision Primo lens package but technique will work with any lens package. He had a set of 10 14.5 17.5 21 27 35 40 50 65 75 100 150mm lenses. (Andrew Collier at Panavision Sydney kindly agreed to be the ‘model” for this test).
The technique does not fix key to fill ratios or the potential need for a distant key light (studio sun), but it solves a huge problem on set for VFX plate photography, especially when filming for exteriors and strong sun is needed.
If you require further information or additional detail [email protected]
Essentialy use a wider lens and crop in on the image digitally. well the picture quality would still drop depending on the lens. and depending on the camera stopping down and raising the iso might look better than zooming in on the image. I thought this article sort of over complicated something pretty simple?!
The picture quality will drop slightly regardless of the lens. BUT only ever so slightly. On films I have zoomed in 200%. Even 300 and 400% on Gatsby at Baz’s request.
If the native ISO on a red is say 800. To get 4 stops to compensate going from f2.8 to f11 you will need to jump the ISO up to 12,800. At this point the noise will compromise the quality of composites. Transparency, hair, detail, motion blur, items out of focus etc will all be compromised. And consistancy of noise to other shots around not using your solution will be horrible.
Ok thanks, will try if im in a situation where loads of DOF is needed.
Thanks for sharing this technique – it clearly worked well for you on Gatsby. A simple solution for a complex problem, particularly as the wider lenses tend to be the quickest.
For productions on a lower budget I think the glass could be more problematic for this technique. Are you choosing particular focal lengths to be sympathetic for the distortion – or is there some sort of de-lensing being done in post? Equally with anamorphics this surely would bring its own issues? The below GIF springs to mind!
https://uploads.disquscdn.com/images/59a8ece68397fb2e1777c7a76d663552d4c3482fb2d262a28ab220b0f011649c.gif
The technique was not used on Gatsby but as a result of technical frustrations I had on the film I came up with this technique because it cost me a lot of time and money to reestablish a CG Duesenberg around our actors and into the scene. The same technique could have also been used elsewhere in the film as well as the majority of scenes were studio based with the biggest set being the back of Gatsby’s mansion at 50m x 80m x 11m high.
As stated in the text above it is ‘how you frame up and use a 27mm vs a 50mm.
When you are on a 16mm lens and frame up an extreme close up of a face there is evident distortion both in terms of lens distortion (chromatic aberrations, barrelling etc) which could potentially be improved in post – but as well there is facial distortion. But the facial distortion is simply because you have come in too close. That is your creative decision not a technical one.
What I am offering up is the age old rough equivalent of cutting 16mm footage into a 35mm film after doing a traditional optical. A beautiful shot is a beautiful shot. And this technique has been used for decades. This is just an advance on the same concept to marry into todays technology but benefitting from the increased DOF.
Because you can use this simple technique and jump in and out of it at any time I would split a lens package creatively. Say I wanted to use Primo Prime Lenses and we were to shoot Red Epic 5K WS f2 at 3 metres – I would use a :
10mm as a 10mm – full gate no zoom – dof infinity
17.5mm as a 17.5mm – full gate no zoom – dof 2.49
27mm as a 27mm – full gate no zoom – dof .93
17.5mm as a 35mm – central zoom – dof 2.49 not .54
27mm as a 50mm – central zoom – dof .93 not .26
35mm as a 75mm – central zoom – dof .54 not .12
75mm as a 150mm – central zoom – dof .12 not .03
So the package could be a 10, 17.5, 27, 35, 50, 75 possibly add a 21 for fun but that gets you from 10mm to 150mm.
As for anamorphics there is no separate or different issue or technique. If anything for the anamorphics it would make pulling focus much easier with a much better DOF.
On Moulin Rouge there is a shot of the ‘Unconscience Argentinian’ shot through a window on a 400mm anamorphic lens. I asked Pat why the focus rolled from the actors nose to his eyes and back on this extreme closeup. Pat said that this was simply the actor breathing – we used a portion of the shot just as the actor breathed in and held his breath – just before speaking. So an anamorphic 400m at f4 and 6 metres is .03m dof in comparison to a .13m dof on a 200m with a digital zoom.
The technique also works perfectly for zooms and stills cameras.
*** ALSO please remember – because of the resolution of the camera back we are actually cropping into the centre of the frame – not zooming. So there is not digital degeneration. Or just simply record the centre patch.
The technique was not used on Gatsby but as a result of the frustrations I had on the film I came up with this technique because it cost me a lot of time and money to reestablish a CG Duesenberg around our actors and into the scene. The same technique could have also been used elsewhere in the film as well as the majority of scenes were studio based with the biggest set being the back of Gatsby’s mansion at 50m x 80m x 11m high.
As stated in the text above it is ‘how you frame up and use a 27mm vs a 50mm.
When you are on a 16mm lens and frame up an extreme close up of a face there is evident distortion both in terms of lens distortion (chromatic , barrelling etc) which could be improved in post – but as well there is facial distortion. But the facial distortion is simply because you have come in too close. That is simply a creative decision not a technical error.
What I am offering up is the age old rough equivalent of cutting 16mm footage into a 35mm film after doing a traditional optical. A beautiful shot is a beautiful shot. And this technique has been used for decades. This is an advance on this concept to marry into todays technology and take advantage of the increased DOF.
Because you can use this simple technique and jump in and out of it at any time I would split a lens package creatively. Say I wanted to use Primo Prime Lenses and as a reference we were to shoot Red Epic 5K WS f2 at 3 metres – I would use a :
10mm as a 10mm – full gate no zoom – dof infinity
17.5mm as a 17.5mm – full gate no zoom – dof 2.49
27mm as a 27mm – full gate no zoom – dof .93
17.5mm as a 35mm – central zoom – dof 2.49 not .54
27mm as a 50mm – central zoom – dof .93 not .26
35mm as a 75mm – central zoom – dof .54 not .12
75mm as a 150mm – central zoom – dof .12 not .03
So the package could be a 10, 17.5, 27, 35, 50, 75 possibly add a 21 for fun but that gets you from 10mm to 150mm.
As for anamorphics there is no issue. If anything for the anamorphics it would make pulling focus much easier with a better DOF..
On Moulin Rouge there is a shot of the ‘Unconscience Argentinian’ shot through a window on a 400mm anamorphic lens. I asked Pat why the focus rolled from the actors nose to his eyes and back on this extreme closeup. Pat said that this was simply the actor breathing – we used a portion of the shot just as the actor breathed in and held his breath just before speaking. So an anamorphic 400m at f4 and 6 metres is .03 dof in comparison to .13m on a 200m with a digital zoom.
The technique also works perfectly for zooms and stills cameras.
*** Also remember because of the resolution of the camera back we are actually cropping into the centre not zooming. So there is not digital degeneration. Or just simply record the centre patch.
Actually the perspective compression and decompression effect (demonstrated in the gif) is solely related to the distance between the camera and the subject, not the focal length of the lens.
in the case of this gif, the camera is moved between each shot to achieve the same framing.
the technique described in this article probably keeps a constant distance between the camera and subject and only relies on digitally cropping the image.
Of course the perspective effect is as a result of the distance to camera. The lens, whichever lens you use, just captures a different window from that physical relationship.
But the technique below has nothing to do with a constant distance between camera and subject. It is simply – if you require more DOF, go wider and choose a different sensor patch to record – or zoom / crop in afterwards to marry into the desired image. It is all about the desired image from the DP and whether you require more DOF within any chosen image and camera setup.
This technique is all about offering flexibility around a DP and directors vision. The vision is not build around a technique.
Because in the end – if the result looks like shit why would you go there.