SIGGRAPH 2012 started with some great sessions, and with what appears to be record numbers – certainly from just walking around and the sessions we have attended the conference is buzzing.
News from the show: highlights
• Mari 1.5 released, and at a tech preview during The Foundry’s Geekfest amazing work was shown by Scott Metzger using multiple spherical HDRs painting onto point cloud data, which is planned for an upcoming release.
• Alembic 1.1 has been released which includes Python API bindings, support for Lights, Materials, and Collections, as well as core performance improvements and bug fixes. Feature updates to the Maya plug-in will also be included. The code base for Alembic is available for download on the project’s Google Code site and more info at: http://www.alembic.io
• Shotgun releases not only Revolver (which Oscar winner Ben Grossmann said as a supervisor “changed his life”) but also Tank, their asset management system. See today’s fxguidetv for more.
• Side Effects Software releases orbolt.com – this is a smart 3D Asset Store, an asset marketplace that offers a whole new way to create animations and visual effects. Powered by Houdini, Orbolt assets are fully customizable and ready to animate and render. But unlike simple models, these come rigged with parameters (sliders, menus, etc.) for quick and specific adjustments. The level of customizability is virtually limitless and up to the artist to decide what can be controlled. Smart assets are not restricted to just geometry: there are also effects, tools, cameras, shaders, environments and much more. Artists are encouraged to sell assets, you can set your own prices and the store takes 30%.
• Massive 5 is being shown. After massive software being a bit quiet for the last few SIGGRAPHs, the company has a major new release (more in our next post).
• MAXON is pleased to announce a new Cinema 4D release 14 (R14).
And the actual trade show only opens today so much more is coming from the equipment companies.
SIGGRAPH ‘starts’ in rather an odd way, actually on Saturday but not at the convention centre.
Watch our latest fxguidetv episode from SIGGRAPH 2012.
DigiPro 2012
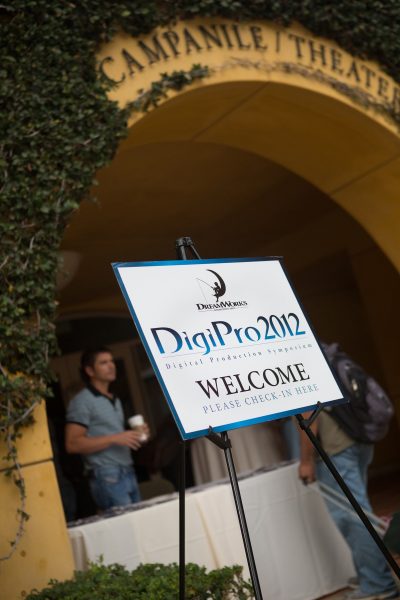
SIGGRAPH does not allow production focused research papers to be part of the main conference, which is ironic, given that it has both research papers and production talks. The DigiPro conference fills this gap. It is a mini-SIGGRAPH with high level research papers presented which focus on production issues from deep compositing OpenEXR2 volumetric compositing to fluid sim dust clouds, character rigging and much more. As this conference is not part of the main SIGGRAPH conference it is classified as a ‘co-located’ SIGGRAPH event, which is even more ironic as it is not located where the main SIGGRAPH is held but instead at Dreamworks Animation SKG the day before the main conference opened.
DigiPro aims for hard core production research and novel effects procedures or ‘tricks’ that are used in production. It is the bridge between the research community and hard wall of production delivery deadlines.
The event is small but packed with the best CTOs and researchers from the world’s top facilities. The lobby outside the lecture theatre was a buzz with a group that is at the very cutting edge of production.
The day started with Weta’s Joe Letteri who focused on digital production. In a detailed and insightful manner he worked through the evolution of digital production at Weta from Lord of the Rings and Gollum to King Kong, Apes and Tintin. Along the way he discussed Avatar, but not the two sequels – it was the elephant in the room as many people outside the session were discussing the implications of Weta’s work and how it might play out in the next Avatar films. The New York Times last week published that Cameron had bought a farm at Pounui Ridge, roughly 20 miles from the Wairarapa Valley wine town. In the same article, Cameron, “the filmmaker-adventurer, spent an estimated $16 million to buy 2,500 acres of farmland around Lake Pounui (pronounced po-NEW-ee)”. It went on, “The Avatar sequels, Mr. Cameron said, will almost certainly be shot in Mr. Jackson’s Wellington production studio, about 15 minutes by helicopter from Pounui. Visual effects will be completed at nearby Weta Digital, owned by Mr. Jackson and his partners, though motion-capture work on the Avatar sequels will still be done on a stage in California. Avatar 2 will not be ready until 2015 or later, at least a year past the 2014 date Fox executives once had in mind.” One other point that we heard discussed over lunch was that Cameron was quoted as building new facilities in New Zealand but in Auckland:
“I want to help in any way I can,” Mr. Cameron said, while also talking of emulating Mr. Jackson, perhaps by building new facilities farther north, in Auckland.
The next session was also from Weta and one of the most impressive of the day, it built on the work fxguide published about the Deep Image Compositing in Abraham Lincoln: Vampire Hunter. This talk we’ll cover with more news happening later today at the Deep Compositing Open EXR Bird of a Feather Session. Including great clips Weta has provided fxguide.com. But in short Weta has extended the deep compositing shown at Siggraph 2011 – in their work for Rise of Planet of the Apes. The new extensions decouple volumetric shadowing and allow for more Nuke driven relighting. The work is incredibly impressive and will have long term implications.
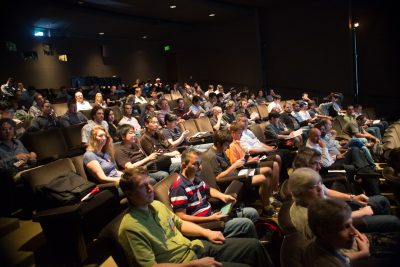
Other great sessions on the Saturday included Dreamworks’ new stereo tools. One of the great problems with a fully stereo animated production is setting all the stereo and doing that early enough that the layout and blocking can still be adjusted. If the stereo effects are handled too late in production then it is extremely expensive to re-block a shot. To solve this and allow artists nearly instant complex stereo – in the style set for the film and of the director – Dreamworks has been ingenious. The team set the stereo effects of roundness and use of the stereo budget (in and out of the screen) with the director on a bunch of test shots. This then forms the StereoLUT of the film. The software then analyses the nature of each new shot, and via this stereo lookup table determines how the director is most likely to stereoscopically direct the shot. It then applies that, but with two huge overriding controls which roughly speaking can be thought of as ‘how much stereo’ and ‘behind the screen or in front of the screen’. Let’s call these two parameters just A and B. The analysis stage looks only at the middle 70% of the screen (to avoid ground planes etc) and works out the closest object to camera and the the likely centre of attention for the viewer. It then cross references with how the director ‘normally’ sets the stereo on these shots of shots based on the stereo look up table.
When an animator has a shot roughly animated, they run the program and almost instantly they can see the shot in stereo, the way the director would most likely enjoy, but it also animated the A and B controls if the shot moves from one style to another. While around 70-80% of Dreamworks films have the stereo fixed for the shot (leaving aside cut to cut blends) for those 20-30% of shots that have animated stereo, it produces smooth stereo curves or controls on the A and B parameters. This means the artist can add additional artistic control if the shot needs it. Of course this can all be replaced or adjusted later but with this system from the get go the animators and the director are looking at sensible stereo from the earliest dailies. All in the ‘house’ style of the film. This is very much the same as filming in RAW and applying a viewing LUT so the director sees a sensible rough grade on set. The tools are only used in house but the various stereo clips played for the audience were singularly impressive and very professional, without any human adjustment.
Tech papers fast forward
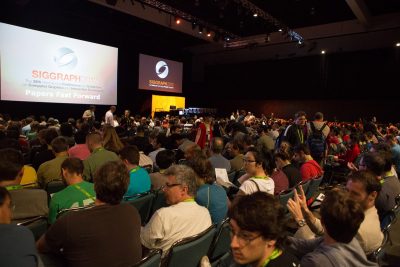
As usual the tech papers fast forward was packed on Sunday night as some 100 or so leading researchers presented their papers in rapid fire mode to a cheering crowd. This year there were some 449 submissions to the SIGGRAPH technical papers, 79% of which were rejected by the rigorous panel of 53 reviewers – the papers that did make it once again defining the state of the art of computer graphics.
While many papers are highly technical and will be later delivered and explained in depth, the papers fast forward program provides a much more comic and lighthearted overview of the conference. From weird animations to fake ads and Japanese poetry, the researchers tried in the few seconds they had to ‘sell’ their papers to the massive crowd. Really this has to be the geekiest and most loved event of all of SIGGRAPH. The presenters clearly love the massive interest in their work and the audience gets in one 2 hour session a world view of the hot topics and breakthrough moments from the videos and images shown. It is great to hear the crowd simultaneously take a quick breath when someone shows an inky liquid say pouring into a glass and forming a complex logo or the surface, in what otherwise appears like a photoreal random fluid sim. One can almost hear people thinking, “Man, how did they do that?’ And, “Boy, I could see us using that on a job…”
– Above: watch a preview video for the SIGGRAPH 2012 tech papers.
Talks/papers/sessions
Physics for animators
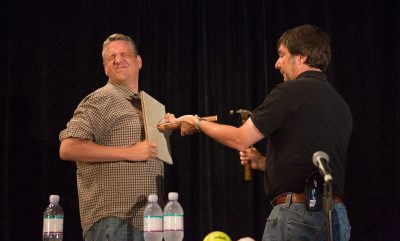
We had previously flagged one of the courses on Sunday as a good one not to miss. The course by Alejandro Garcia was centered around how an understanding of physics can help achieve believable animation. Garcia is a professor in the Department of Physics at San Jose State University and along with a good humored assistant who was bounded with steel spikes, weighed and made to run around the room in a wig, this course did not disappoint.
This author confesses that we assumed we would know a lot of the ‘facts’ in this course, but we were constantly surprised with great insights and examples aimed directly at animators that made the afternoon brilliant. For example, we all should know from high school that things fall with the same speed. Ever since one of the Apollo missions dropped a feather and a hammer on the moon, we have had proof enough…you would think… but Garcia explained how we visually know size from movement even without any reference in shot or knowing the actual size of the falling sphere.
On paper, a baseball and a bowling ball will fall at the same rate, but in reality you can pick the difference immediately. A baseball lifted one ball height off the deck will fall in 3 frames. A bowling ball lifted one ball height will take 6 frames. Garcia explained with suitable props, ball drops and videos. The reason is the bowling ball is lifted much higher – as a bowling ball is bigger – so while they both drop one ball height we KNOW they are different sizes. So if we see a sphere take 14 frames to fall one diameter in height, we as humans, know it is either slow mo or a giant ball. He then extended this to ropes and swings. This was something he had done for Dreamworks while consulting on various animated films at the studio such as Madagascar 3.
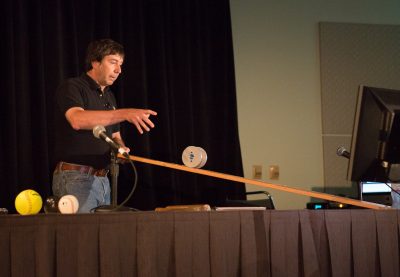 Apart from the props and great insights, Garcia’s energy and respect for helping animators, not dictating to them, made for a cracker of a session. You may not have paid attention at school to the Law of Inertia or force, but no one fell asleep as Garcia dropped canon balls, rolled things down planks and had his offsider dance on a pair of scales!
You can also listen to our podcast with Garcia here.
Roger Deakins
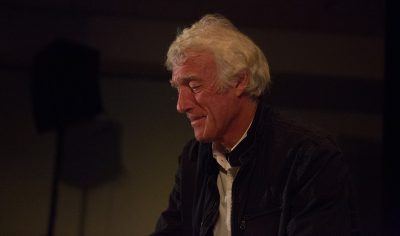
A late edition to the program, but a packed session nonetheless was Roger Deakins. This DOP has just finished the new Bond film Skyfall but is also consulting on four fully animated feature films. His credits include the unlikely bed fellows of: How To Train Your Dragon, No Country For Old Men, Rango, Sid and Nancy, Skyfall, True Grit, Wall-e, Assassination of Jessie James and many more (and he showed clips from all these).
Known for his work with the Coen Brothers in films such as Barton Fink and O Brother, Where Art Thou?, amongst others, Deakins is also the world’s leading DOP who works with animation houses such as Pixar and Dreamworks.
This role as consulting DOP has lead to major improvements in digital cinematography. His first film was Wall-e and the improvements in lensing, camera movement and staging were immediately clear when the film was released. Deakins actually commented how ironic it was that digital layout and animation were trying to add lens breathing, depth of field or chromatic effects, lens flares – “I spent so long trying to get away from that.”
Deakins comes over as the most relaxed, approachable and yet hardest working DOP in the business. For example he was filming the major feature film western True Grit and while on location, getting digital high speed feeds from ILM with scenes from Rango, which he would often then grab a frame from and send back Photoshop notes after work finished for the day. While on Skyfall, he was also consulting on Dragon 2 for Dreamworks, and two other films!
Deakins recalled going to Pixar and discovering that most of the team had never been on set or even seen a film camera in person. He immediately arranged to get a camera and together they shot practical footage and discussed everything from camera mounts to staging.
For How to Train Your Dragon, at Dreamworks, he convinced the team to play several key scenes in extremely low light, “as we are here to tell stories and not show sets.” The studio had immediate “blow back” as you could not see the great sets they had spent man years modeling, but Deakins won the day and the film was that much more impactful for the decision. He then pointed to another scene where he moved to have nearly all the background in very heavy mist. “I did it for a couple of reasons – it isolates the characters and heightens the drama of the scene…plus it was really economical, if you don’t have to render half the background it renders faster,” he said only half jokingly.
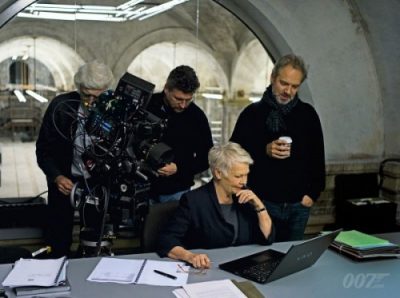
Not that Deakins intellectualizes the process and pretends to have all the answers. He showed one clip from No Country For Old Men, in which the two leads end up walking to a car and finishing a scene in near complete darkness, just visible, as complete silhouettes. Deakins explained his ‘creative choices’ as: ” I hate lighting cars. It was going to rain in two hours and I was worried about overtime (turnaround) on the crew, so I thought let’s film it without lights, I figured we’d just seen them talking so we knew what was going on, but when I discussed it with the director he said, ‘Sure, but you have to go tell Tommy,'” Deakins jokingly recalled referring to Tommy Lee Jones who was playing Ed Tom Bell. “Tommy was great, he was fine with it!”
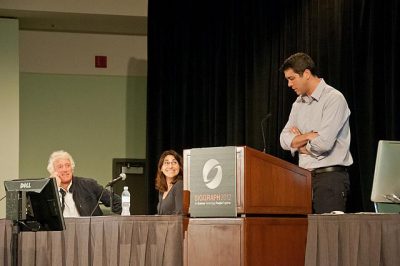
Deakins is not a fan of 48 frames, at least not for everything, he is a tad concerned that everything is getting too sharp and too crisp and it is taking people out of the film experience. “48 fps – I’m worried about it getting too sharp, look at Citizen Kane – it’s so grainy. I have done tests and it does not draw me in. I want it sketchy. 48 frames per second – don’t use it just cause it is ‘great’, ask yourself ‘does it suit the story?'” Deakins is a big fan of the Alexa, however, he enjoys shooting with it and freely admits digital has taken over from film. “There is so much dynamic range in the Alexa, it is pretty hard to blow things out right now.”
Hugo panel
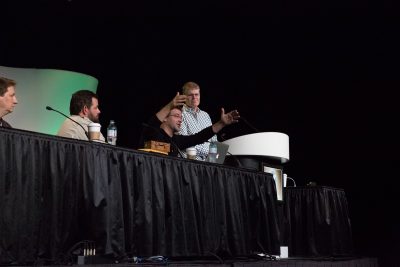
A huge highlight for me personally was being asked to host the Hugo panel on the Monday morning. There was a huge turn out there not to see me but the Oscar winning work of the four panelists who spoke, but it was an honor just to introduce them. The panel featured Ben Grossmann, (Vfx sup, Pixomondo), Alex Henning, (Digital Effects Supervisor, Pixomondo Los Angeles), Adam Watkins, (Computer Graphics Supervisor, Pixomondo Los Angeles) and founder and principal of New Deal Studios Matthew Gratzner (Director/Producer, 2nd Unit Miniatures).
History of matte painting
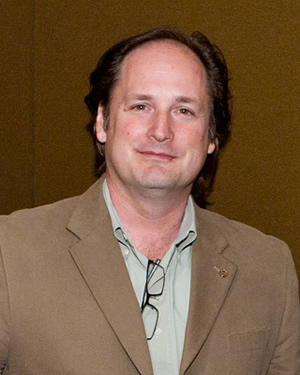
Craig Barron is a vfx supervisor who specializes in seamless matte painting effects. He is also a filmmaker, entrepreneur, and film historian who is co-founder and head of the visual effects company, Matte World Digital. Barron is a member of the Academy Board of Governors, representing the visual effects branch. At this talk on Sunday (The Invisible Art – The History of Matte Painting) Barron walked through from traditional photo chemical process through to digital work of film’s such as Hugo, covering both the history and the craft of matte paintings.
Barron discussed many classic matte and glass paintings from the view early days of matte painting such as
A Wonderful Life (1946), The Wizard of Oz (1939), The Hunchback of Notre Dame (1939), Ben-Hur (1959), Planet of the Apes (1968),Star Wars (1977), Raiders of the Lost Ark (1981), and then moving forward with digital films such as Casino (1995), Cast Away (2000) Star Trek: First Contact (1996), Gladiator (2000).
Barron started by discussing the process of glass matte paintings and how the artist literally painted the image onto a sheet of glass while looking at the real environment through it. Once this was complete the camera would then film the scene looking through the glass pane and into the real environment behind.
Barron then went on to talk about the opening shot to Citizen Kane (1941), how lots of the places in classic movies didn’t exist but were created only in paintings. Another example is the revealing shot of Skull Island in King King (1933). The sea was filmed at Santa Monica while the rest of the environment was added later as a matte painting. Yet another example was Gone with the Wind (1939), which needed to look like America’s old south. The final example was The Wizard of Oz (1939) and specifically the famous shot of the emerald city. This was created in two passes, the main matte painting of the yellow brick road leading up to the city and a second pass of the twinkling lights on the city towers.
Barron moved on to talk about George Méliès and how he made a glass studio so he had enough light coming in while filming to give him the exposure levels he required, as seen in the film Hugo, a film Matte World Digital recently worked on. One of the things George introduced to the art of matte painting was to paint more realistically, so objects in the painting where shown as though they had actually been built as part of a movie set.
Craig then talked about Norman Dawn visiting George Méliès studio and from there went on to create his own matte paintings not based on fantasy like George was doing (bringing Jules Verne stores to life), but creating more realistic looking shots. Interestingly, Dawn spent some time on the project ‘California Missions’ in 1907 driving up and down the California cost photographing old church buildings. When a building was partly damaged Dawn used matte painting techniques to reconstruct the mission parts to restore the building back to its original state.
Around this time the idea of matte painting for motion pictures began to being a standard. One system which was used a lot at this time was to remove lights from the movie set. Due to the type of film stock being used many lights needed to be placed on set and the matte paintings where basically used to rebuild to background behind the lights in order to hid them. The start of painting C-stands out and fixing it in post!
Barron discussed the problems of painting on glass and how a crew would literally have to stop work and wait for the painter to do his work before moving on to film that scene. Back then it was key for matte painters to anticipate the time of day, weather, etc that the shot would be taking place so his painting lined up with the real environment lighting wise.
The talk then moved to the work of Albert Whitlock who was based at Universal Studios. Whitlock won the Academy Award for the disaster film Earthquake (1974) for which he painted over 70 matte paintings. He used a new system of matte painting which involved painting a black ‘holdout matte’ on the glass instead of the matte painting, the shot was photographed and then later the matte painting was created and an inverse matte added where the live action had be photographed. These two images were then optically composited together. This system was obviously vastly better than the traditional glass setup as the film crew didn’t have to wait on set of the painting to be finished, and the artist was not under so much pressure to finish the painting in a very short amount of time. From here Barron discussed the role of the optical printer and how its creation changed the way matte painting effects where done, referencing the films of Alfred Hitchcock and specifically – The Paradine Case (1947) and The Birds (1963).
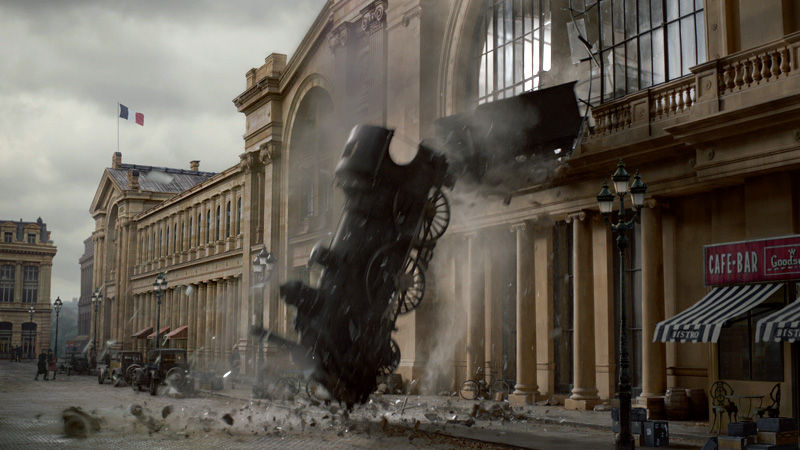
From here Craig highlighted some of the great matte painters including:
– Walter Percy Day who worked on the such films as the Thief of Baghdad (1940) – which was the first move to use the bluescreen process
– The MGM Matte Painting Department who worked on The Wizard of Oz (1939)
– Peter Ellenshaw who worked on Mary Poppins (1964) and the classic Rome shot from Spartacus (1960)
– Albert Whitlock and his work on The Hindenburg (1975) and The Birds (1963)
– Matthew Yuricich (who sadly recently died in May 2012) work’s on Forbidden Planet (1956). This movie used a hybrid technique where the matte painting was incorporated into a miniature set and photographed as one unit, the live action elements where then added later again via the optical printer.
– Harrison Ellenshaw (the son of Peter Ellenshaw) who worked on the original Star Wars (1977) movie and specifically the famous shot of Ben Kenobi turning off the tractor beam.
Barron then moved to ILM, and talked about the principles of the traditional Industrial Light & Magic matte painting department and how they used models as reference to there paintings. One example he gave was from Raiders of the Lost Ark (1981) and the famous closing sequence of the ark being wheeled into the huge warehouse full of crates. The matte department built a small mockup of the warehouse out of boxes on a table so they could study the way the lighting worked between the models.
Die Hard 2: Die Harder (1990) marked the end of the ‘classic’ era. In a wide shot of Dulles International Airport the matte department at ILM painted the scene using traditional techniques but this marked the first film to use digital compositing techniques to bring all the pieces together using software running on SGI computers.
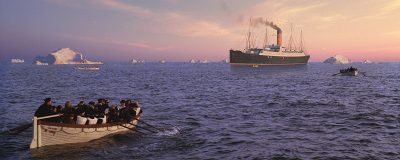
Barron discussed Global Illumination techniques, Radiosity and Ray Tracing and how they can be used to create more realistic digital lighting in 3D. The first movie to use Radiosity as part of the rendering process was Martin Scorsese’s crime drama Casino (1995). On Phantom Menace, Paul Huston at ILM also developed the technique of adding matte paintings onto 3D geometry who along with Jonathan Harb produced 70% of the backgrounds for the pod race scene. Barron also mentioned the work done by Matte World Digital on David Fincher’s movie Zodiac (2007). Various matte paintings where completed for the show but the two particularly discussed were the opening sequence which is a helicopter shot across San Francisco bay (in which the artist created a complete digital matte painting including birds flags, water and glints of moving cars), and a shot looking down at a taxi cab moving though the city at night. The show required a helicopter to fly too low for city laws so the shot was created again as an entirely digital environment. Also this new digital era made it possible to create shots that would have been impossible before such as the timelapse sequences again in the movie Zodiac.
Barron spoke about digital cameras and the how they made it easy to film additional elements which could be used to add more detail into the matte paintings. From here Barron briefly talked about how traditional art can help influence the work of the matte painter. He specifically referenced The Isle of Death painted by Boklin in 1883.
Finally Barron talked about his work on Hugo (2011) and how Matte World Digital was brought in towards the end of production to help out on the matte paintings in the film. These shots included Hugo follows a Papa Georges through the streets of Paris, Hugo’s uncle Claude body being discovered drowned in the Seine, a number of shots looking out over Paris including the long open sequence and a flashback of George Méliès glass studio. For the latter shot of Méliès studio a real set had been built in London but the UK weather did not match that of Paris so a digital version of the studio was created and lit based on the background matte painting. The CG glass was then composited over the real on set glass add the required reflections of the matte painting which as composited around the set.
In a final Q and A session Craig emphasized the importance of Adobe Photoshop to today’s matte painters and said it was being used much more for photo manipulation and not pure digital paintwork. He also noted how Global Illumination and Radiosity was not used so much nowadays and it was extremely time consuming to render the lighting effects. To finish with, Craig Barron emphasized talent over knowing software and the need to get out into the real world and see what’s happening with lighting, textures and general reality.
Stereoscopic visual effects: DD
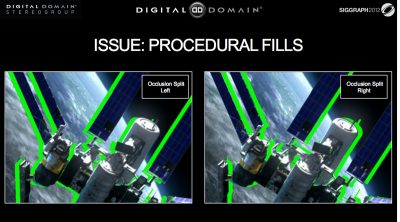
The session (State-of-the-Art Stereoscopic Visual Effects: Stereoscopy and Conversion are “More than Meets the Eye) started with an attempt at humor, talking about Digital Domain in the news. Digital Domain Stereo Group (DDSG) Director of Production and Operations Jon Karafin said he wanted to start with this to keep the Q&A open at the end and then showed slides that aimed to make light of recent news items (student labor, patent enforcement) while reading prepared statements from the PR department. For a technical talk, it was… unusual.
The talk was fast paced and Karafin said in rehearsing he had already “cut 200 slides for time – so we were only getting the good stuff.” Some highlights:
• He explained how a program like Ocula calculates disparity maps and how you make your own.
(Interleave left and right eye and run Optical Flow like Real Smart Motion Blur, then use only the forward motion for left eye and reverse for left eye.)
• Explained how sometimes it is better to take material shot with one camera and create two new views as opposed to the more traditional approach of using that camera as one eye and creating the other eye.
• Proposed and explained mathematically that conversion can replicate exactly material shot in stereo.
• Showed examples using real world materials of how various quality levels of conversion looked. From simple displacement and the inherent stretching problems with that to full reconstruction addressing smoke and focus issues. Seeing these examples back to back was an extremely rare opportunity and showed not only that high quality conversions can be done but also that there is more than one approach that may be used.
ICT: technical papers
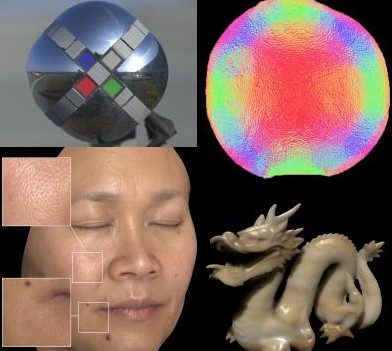
We will publish more on the technical papers, but one session on the first day of technical papers that was perhaps small but highly informative was the Material: The Gathering session. This session was both technically very interesting and also demonstrated the key role USC’s ICT plays in the area of surface properties, scanning and reproduction of human skin. All five papers in this area were either written by or co-authored by ICT team members.
Avengers panel
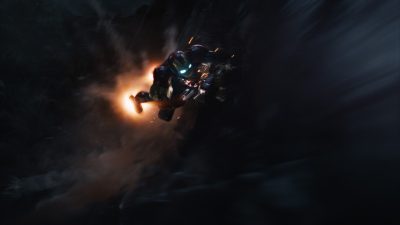
One of the most popular session on Monday was the Avengers session. We have covered the film extensively, but this session which was partly a repeat of FMX, was completely packed with making of clips, reference material and even blooper reels from this blockbuster film. The panel was made up of two speakers from each of ILM and Weta. Some highlights included the last section on the actual character animation of the fight between Thor and Iron Man in the forest. This large and complex sequence has many technical aspects, but it was seeing the developments and subtle work in animated the characters, from analyzing hundreds of comics to see how Iron Man’s hips and shoulders align in most poses, or – how he flies posed very symmetrically but fights posed exactly the opposite, right through to the use of motion capture and physics sims to inform the animators and allow them to better understand what might happen – even if the motion capture is never directly used. It was brilliant.
fxguide / fxphd meet up
On Sunday night was the fxguide and fxphd meet up. This great annual meet up was at the Yardhouse near the convention centre and it was so great to see so many fxphd and fxguide folks there.
Foundry GeekFest
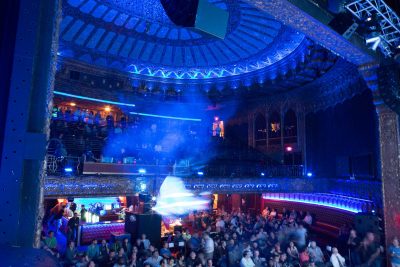
Monday night was The Foundry’s GeekFest. This year the presentations were covering the three big areas, Mari, Katana and finally Nuke. While some Foundry staff presented key technology previews, it was also a great chance to see both the unbelievable Foundry demo reel projected on a massive screen in high res (with just about every major feature film from the summer represented) and also to hear first hand user stories of using the software in production.
Highlights included an amazing demo of a yet to be released version of Mari by Scott Metzger, who phoned the Foundry to say that he was working on a major feature doing massive point clouds and a huge number of very high quality HDRs and while, “Mari can’t paint those with spherical mapping/projection right now, you can work out something can’t you?’ The Foundry did and the results were nothing short of jaw dropping. If you approach Mari as just a texture painting tool, then you need to see this demo, some of which will be on the Foundry booth over the next few days (but is not being publicly posted until the film is released).
The shot was basically a very cluttered bedroom loft set being fully 3D rebuilt and textured from a point cloud scan and multiple HDRs. Even with the VAST amounts of data involved Scott was able to fly around the screen, blend various HDRs, adjust exposure and zoom in from a wide shot of the room to a close up of a comic book cover, all on detailed 3D with seamless Ptex textures. Quite how the Foundry is able to manage the disc i/o point cloud and render caches and HDR openEXRs with such speed was hard to guess, but manage them Mari did. This program clearly shows its Weta roots in dealing with production level assets and interactive speed. The film Beautiful Creatures was not discussed but will be out next year, no details on when this custom build will find its way into the standard Mari but one would expect it is planned for the next release given how well Scott’s special cut of Mari was performing.
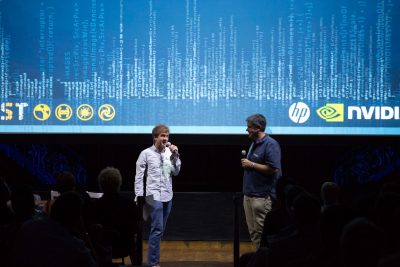
Unfortunately the event ran long, and without the bar being open until after the event, it was hard after a long day at the show to sit through hours of talks and not pine for some more brutal editing of the program’s length, especially as many of the speakers will also be presenting on the show floor. That being said, the recent additions and support for things such as Deep Imaging Compositing (openEXR 2) lead to spectacular results on screen from Nuke users around the world, and it is hard to fault The Foundry’s road map as a company that in terms of artist tools “just gets it”.
